The MGA With An Attitude
Parking Brake Cable EQUALIZER FUNCTION - BT-103A
On 5/6/2010, Francis Yerbury wrote:
"I am completely mystified by my braking problems; I have at least 3/16 on all shoes. I cannot get any purchase on the parking brake. All parts are free and greased. Should the cable outer that goes thru a bracket on the back axle, be RIGIDLY trapped in the bracket, or loosely contained ; the bracket seems to have both options in its design, i.e. a wider part for loose (floating) and a longer narrower part (for tight and trapped), and I can see that the cable outer part is supposed to move to operate the right side of the mechanism at the end of the system, at the so called equalizer bracket".
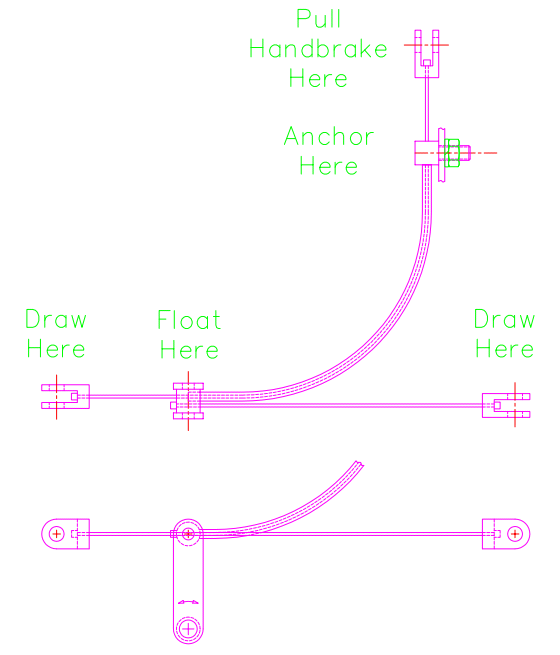
The cable outer jacket is anchored solid on the frame at front end. Hand lever pulls on the inner cable.
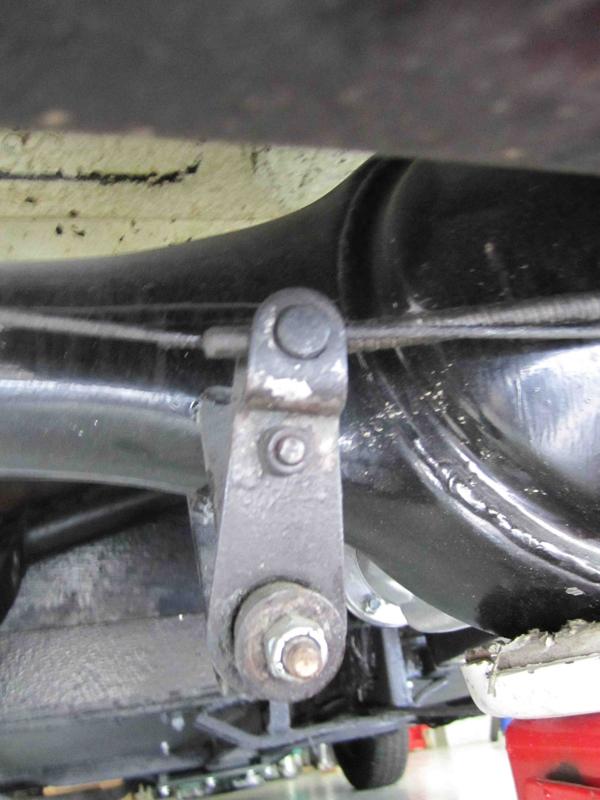
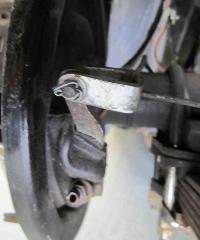
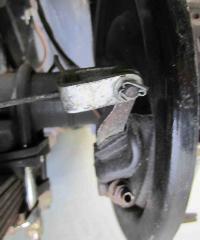
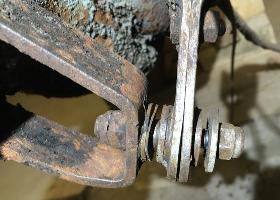
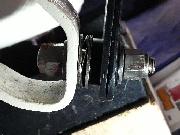
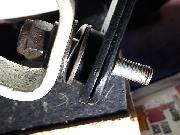
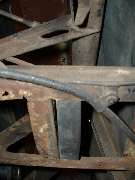
On the rear axle there is an equalizer arm carrying a trunnion that is free to move (swing) left and right. Cable jacket abuts against one side (in a counterbore) with the cable core passing through to attach to left side brake lever. Another small cable core goes through the trunnion the other direction and attaches to the right side brake lever.
When you pull the hand lever you are pulling on the inner cable. This puts the outer jacket into axial compression. When the inner cable is pulling on the left brake lever the outer jacket is pushing on the trunnion in the equalizer lever. The trunnion in turn pulls on the second cable to pull the right side brake lever.
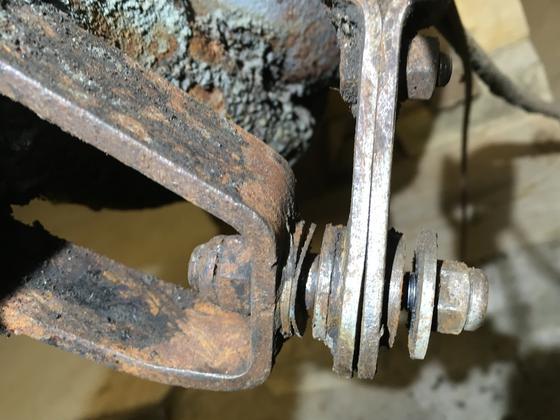
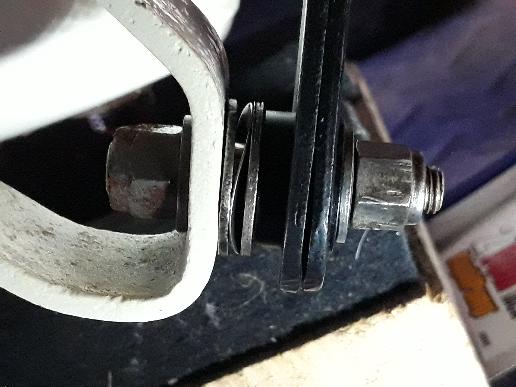
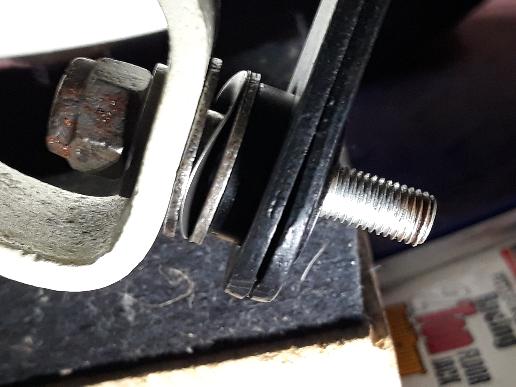
For assembly, press the bronze bushing into the hub of the arm, flush both sides (remove old
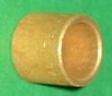 bush first if this is a replacement). Test fit the shoulder stud into the bush to assure it will move freely. Put the two halves of the arm together with the cable trunnion in between, and secure it with the 1/4" bolt, lockwasher and hex nut. The welded bracket on the axle will have a female thread (which may or may not be required). Screw the double threaded stud fully into the bracket (until it hits the shoulder). Then screw the 3/8" lock nut onto it to jam the stud tightly in the bracket so it will not move. Slip a large bore flat washer over the stud, followed by the thin wave washer, and another flat washer. Then install the arm followed by the small bore flat washer and 5/16" lock nut. When fully tightened, the anti-rattle washer should be mostly compressed (nearly flat), but the arm should swing freely with finger force.
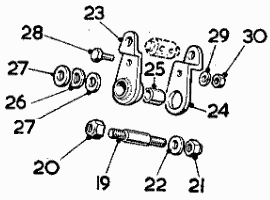
McMaster-Car sells a SS 7/16" ID spring (wave) washer that works nicely. Slightly larger OD than original. -- Part No 9714K32 -- It may want slightly larger flat washers.
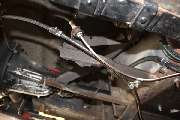
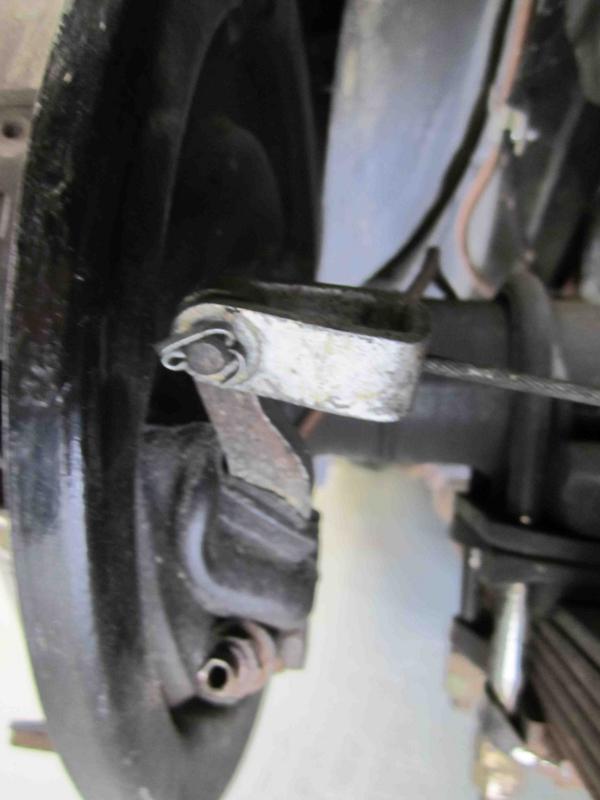
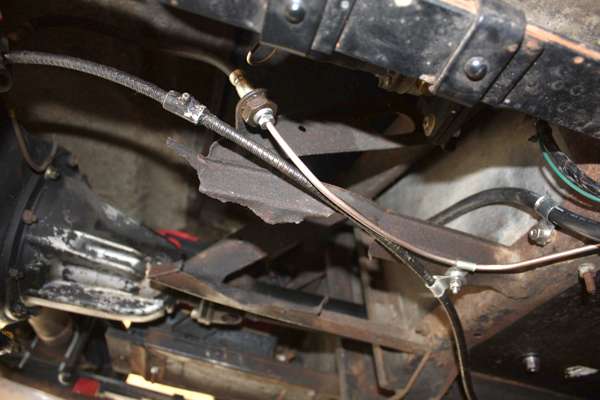
The brake hydraulic pipe and parking brake cable pass along and under the right side of the right hand battery carrier tray. There should be a P-clip for the brake pipe on the underside of the battery tray, followed by a tube spacer, then a P-clip for the parking brake cable followed by a lockwasher and hex nut. The bolt for the P-clip here should be a pan head screw (#10-32-UNF x 1) with the head on top under the battery. It is very common for these fasteners to be missing. Dimensions of the spacer tube are 7/32" I'D x 3/8" O.D. x 1/4" length.
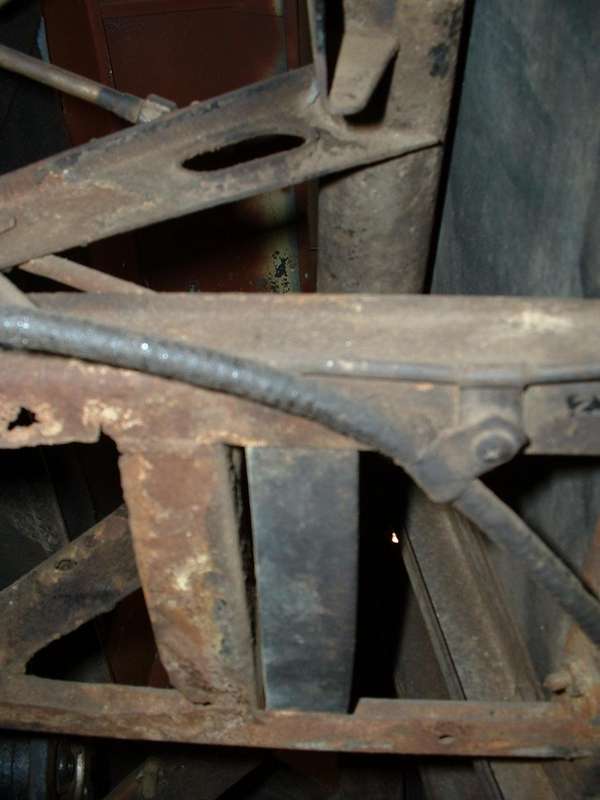
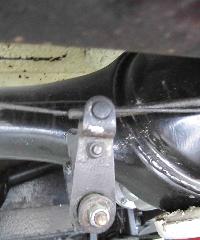
Where the hand brake cable passes under the rear axle housing there is a special bracket and an elongated P-clip holding the cable. This bracket is attached to the same mounting point as the brake line 3-way fitting.
|