The MGA With An Attitude
DOOR And WINDOW Reassembly, MGA Coupe #2 - CP-110B
Photos and notes compliments of David Adams in the UK.
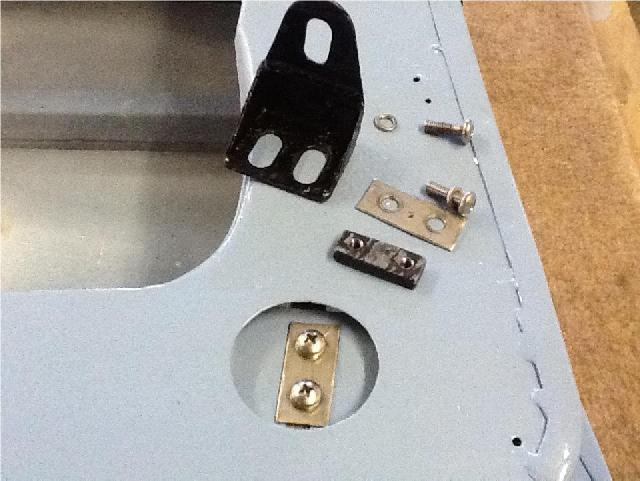
These notes are written from the point of view of a rebuild of a very corroded UK car. There was nothing but rust in the bottom of the doors and no information in the SPL, so this is my improvised solution. For the purists, recent correspondence in Autoshrine has concluded that all the fixings that secure the bottoms of the window channels are screws into cage nuts. Thus the black bracket in the second picture below gets 2 # 10-32 and 1 # 1/4 UNF cage nuts. However, I prefer the tapping plate route as this gives more flexibility in adjusting the alignment of the window frame into the top of the door recess.
Preparations
Drill out the holes in the bottom of the window channel and put in a 1/4" bolt screwed into a nut trapped in the channel. Use a penny washer and spring washer.
Make two tapping plates for the two screws that connect the bottom of the channel to the slotted holes in the bottom of the door, 10-32 holes on 19mm centers.
Make tapping plates for the hinge screws that connect the hinges to the door. You will be glad you did because it is almost impossible to reach the hinge nuts from inside the door when the window channels are in place.
Make 2 rectangular washers 17 x 30mm drilled 5mm to bear against the underside of the slots in the aluminum skin where the quarter light fits to top of the door.


Assembly
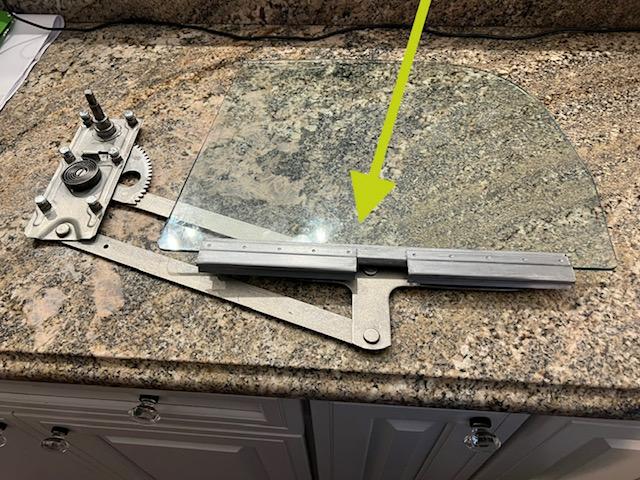
 Fit the glass into its channel. The channel is 363 long ex Spridget, AHA7042, cut down. Glass is 470 wide. If the glass is equal-spaced in the channel, the wheels tend to fall out of the groove at rear at lowest window position. Space 48mm from rear, 59mm from front. Wheel track faces the outside of the door.
Fit the hinges to the door.
Fit the external door handle and key lock if appropriate.
Fit internal lock and link and test lock functions.
Slide the pyramid up the rear window channel.
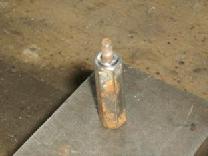
Put 4-48 or 6BA x 5mm screw into location at pyramid and rear channel. If the thread is stripped tap out to 6-40 or 4BA. These threads are interchangeable in this application.
Put the U-nut into its recess in pyramid.
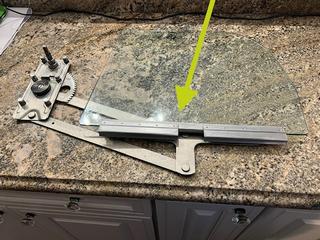
Grease the pantograph groove and put the glass into its channels.
Insert the window channels and quarter light assembly.
Grease the pantograph wheels and put the pantograph into the door, wedge the parallel bars 48mm apart.
Raise front of the quarter light assembly about 25mm.
Slide pantograph wheels into the channel from rear.
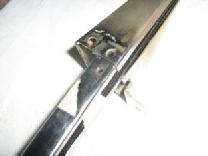
Lift the winder into place, be careful that the wheels do not drop out of the channel at the rear. Insert 6 screws to winder mechanism and remove the wedge.
Place the rectangular washers onto the quarter light screws and then box nuts with spring washers. It is easier to reach these screws if you put your arm into the bulge at the top of the door from the rear (window lowered). There is room to work in there with a short 7/16 open ended spanner.
Test window open/close.
Insert self tapping screws into top of door at pyramid and front channel bracket.
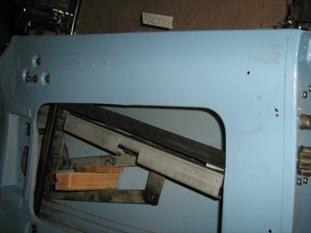
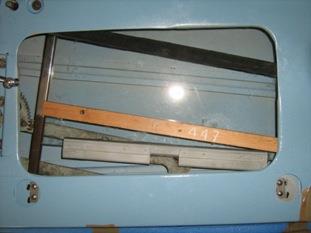
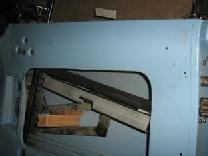
Fit the brackets joining the bottom of the window channels to the bottom of the door. Check window raise lower, adjust bottom brackets as necessary.
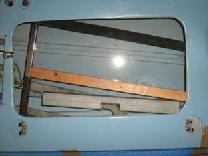
Space between insides of channels should be about 447mm, see picture below.
Stick glass stop buffer at bottom of door, 2 pieces AHH6432, one on top of the other.
Fit the glass into its channel. The channel is 363 long ex Spridget, AHA7042, cut down. Glass is 470 wide. If the glass is equal-spaced in the channel, the wheels tend to fall out of the groove at rear at lowest window position. Space 48mm from rear, 59mm from front. Wheel track faces the outside of the door.
Fit the hinges to the door.
Fit the external door handle and key lock if appropriate.
Fit internal lock and link and test lock functions.
Slide the pyramid up the rear window channel.
Put 4-48 or 6BA x 5mm screw into location at pyramid and rear channel. If the thread is stripped tap out to 6-40 or 4BA. These threads are interchangeable in this application.
Put the U-nut into its recess in pyramid.
Grease the pantograph groove and put the glass into its channels.
Insert the window channels and quarter light assembly.
Grease the pantograph wheels and put the pantograph into the door, wedge the parallel bars 48mm apart.
Raise front of the quarter light assembly about 25mm.
Slide pantograph wheels into the channel from rear.
Lift the winder into place, be careful that the wheels do not drop out of the channel at the rear. Insert 6 screws to winder mechanism and remove the wedge.
Place the rectangular washers onto the quarter light screws and then box nuts with spring washers. It is easier to reach these screws if you put your arm into the bulge at the top of the door from the rear (window lowered). There is room to work in there with a short 7/16 open ended spanner.
Test window open/close.
Insert self tapping screws into top of door at pyramid and front channel bracket.
Fit the brackets joining the bottom of the window channels to the bottom of the door. Check window raise lower, adjust bottom brackets as necessary.
Space between insides of channels should be about 447mm, see picture below.
Stick glass stop buffer at bottom of door, 2 pieces AHH6432, one on top of the other.
|
|