The MGA With An Attitude
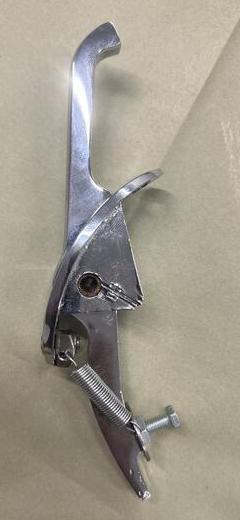
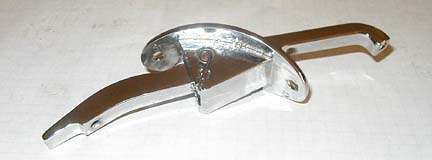
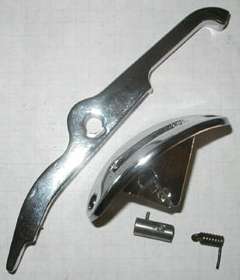
DOOR HANDLES, OUTER, MGA Coupe - CP-114
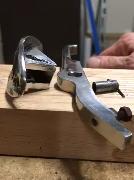
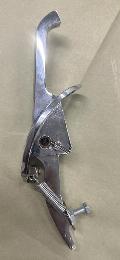
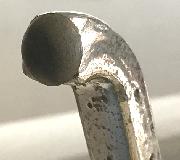
Photos compliments of G T Foster, New York, USA -- (Notes below).
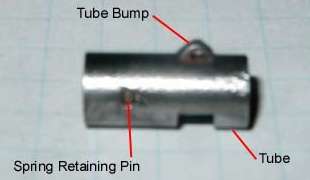
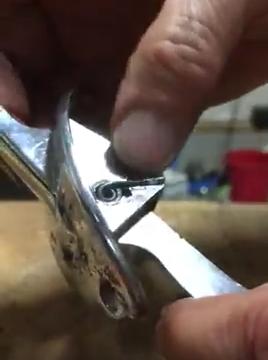
When assembled the pin fits flush on both sides of the tube, and a small raised tab on the side of the tube engages the handle to provide torsion.
On 15 January 2007 at 18:14:04 UK time, Mike in northern California wrote:
"What is the trick to removing the spring from the outside door handle so I can separate the two halves?"
On 15 January 2007 at 20:57:26 UK time, Gerry T Foster, New York, USA wrote:
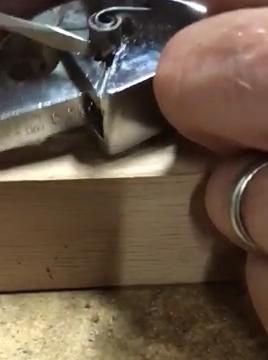
"The long arm of the spring fits into a groove on the door handle body. This arm is swaged in place in this groove. You need to (carefully) pry it out of the groove. The pivot tube and spring can then be removed which allows the handle and body to be separated. The spring is held in place in the pivot tube by a small pin. Press this pin out to remove the spring."
At 12:24 PM 1/21/2007 -0800, Gerald Foster wrote the following notes:
The nomenclature used was arbitrarily chosen. The MGA service parts manual does not show the names of these parts. These instructions assume you have a fully dismantled door handle assembly.
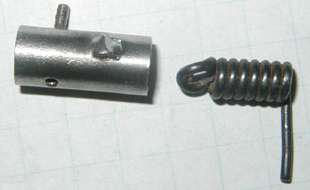
1. Insert the spring into the spring tube.
2. Orient the spring in the spring tube so that the spring arm and the tube bump point the same direction.
3. Insert the spring retaining pin into its hole in the spring tube.
4. Make sure the spring retaining pin passes through the loop in the spring.
5. Press the spring retaining pin home so that it is flush to both sides of the spring tube.
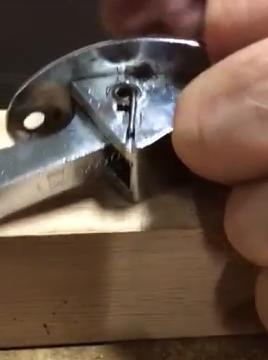
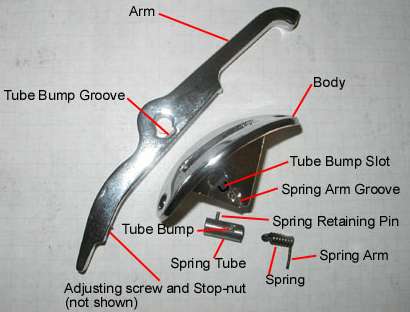
6. Insert the arm (handle) into the body and align.
7. With the spring arm groove facing you, align the arm and body to allow the spring tube to be inserted into the large hole in the body.
8. Orient the spring tube so that the tube bump can pass through the tube bump slot in the body.
9. Align the spring arm with the spring arm groove.
10. Press the spring arm into the spring arm groove and swage if necessary.
Note1: Disassembly is opposite of assembly.
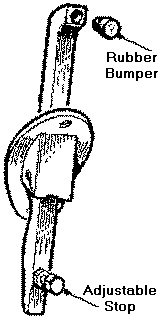
Note2: The adjusting screw and stop nut are not shown. These are clearly depicted in the MGA service parts manual, plate RE. These are adjusted as needed after the handle assembly is installed.
Note3: When assembled, the tube bump resides in the tube bump groove. When the arm is pulled, torsion on the spring is created by the arm contacting the tube bump and resisted by the spring arm (retained in the spring arm slot).
Comment:
My experience is that the door handles work just fine even when the spring arm is broken, as sometimes happens. As far as I can determine the purpose of the spring is twofold:
1. It helps hold the spring tube, which serves as the pivot between the arm and the body, in position.
2. When the adjusting screw is set, the spring provides some pre-load to keep the arm from rattling.
On 3/1/2010, Peter Tilbury in Surrey BC, Canada, wrote:
On instruction #2 (above), I found that the orientation stated, i.e. spring arm in line with the bump, resulted in a sloppy handle. I then set the spring so that the spring arm was 90 degrees pointing to the right when the bump in the tube was facing you. (This is how
 I found the original unbroken spring when I removed it). When the tube was refitted to the handle, the spring arm pointed along the body, and had to be pulled about 60 degrees with pliers to fit into the groove, i.e., it had a pretension.
Now the handle is tight in the body, and when you pull it back you are increasing the tension on the spring. The spring now has a return spring function, not just a rattle prevention function. Some say the handle works OK with the spring broken, but I disagree. It may open the door OK, but will probably rattle.
The handle should have a small rubber bumper fitted to the upper inside end. There is a hole in the handle for the rubber bumper to fit into. I glued mine in with contact adhesive. This bumper then touches the chrome trim piece on the window frame, another anti rattle feature on this handle.
On Dec 15, 2017, im Cheatham in Amelia, Virginia, USA wrote:
"I have a pair of Coupe doors that Im in the process of taking apart to save the parts that might be re-usable. They both have the exterior door handles so I took one of them off to make a short video on reassembly. Hope this helps".
https://www.youtube.com/watch?v=Qq2xmJGSmDM


Addendum February 1, 2022:
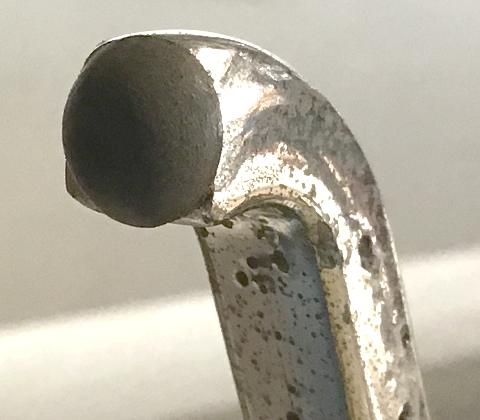
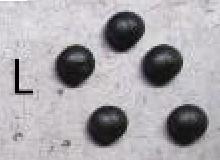
Here's a tip from David Adams near Gatwick, England, UK -- "The type "L" plug from the Moss Motors firewall grommet kit is perfect as the impact cushion for the Coupe exterior door handle".
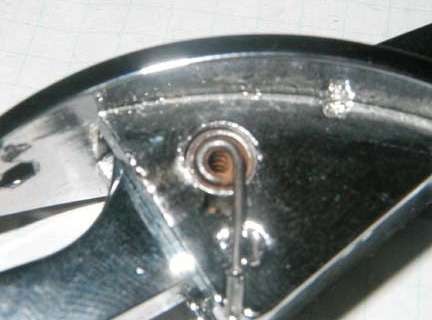
On September 5, 20222, Daniel Ross in Park City, UT, USA wrote: "My solution to a broken door handle spring. Works well". - (Photo at right).
|