The MGA With An Attitude
TEMPERATURE SENSOR LINE - DT-101A
Installation & Routing
At 06:23 AM 1/25/06, Barrie Graham wrote:
>"Where do I run the sending tube for the temp gauge after it leaves the block?" Does it go straight over to the inner fender and follow closely to the wiring harness or does it follow the motor to the firewall, hook left then through the bulkhead? If this is the case, where is it clipped?
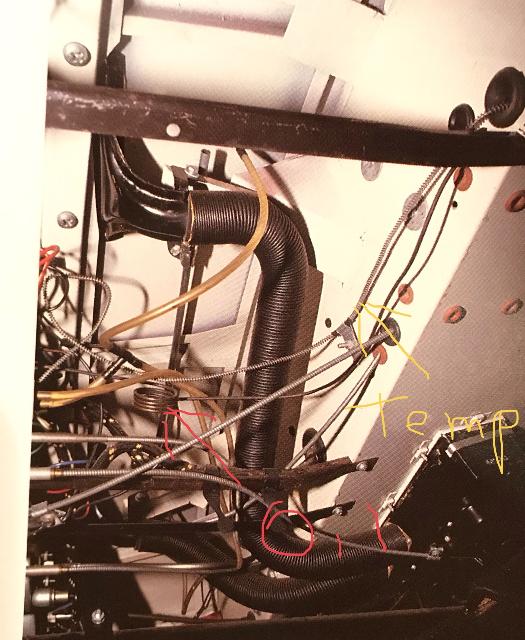
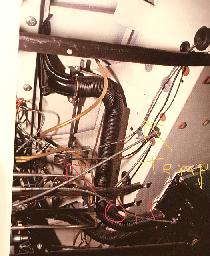
Original issue ran along the side of the engine near the head gasket joint, with a clip on the bottom bolt for the heater valve. In the jump to the heater shelf it made a 360 degree loop to provide flexibility to accommodate engine motion, and attached to the heater shelf with another clip. From there it ran under the blower end of the heater box and through the handiest hole in the bulkhead (being sure to use a good rubber grommet to avoid chafing), and was secured to the rear side of the bulkhead with another P-clip. Behind the dash it did another 360 loop (or several loops to use up any extra length) before the termination at the gauge.
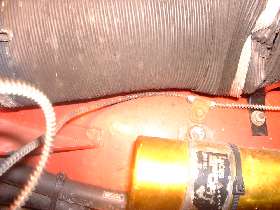
There was also considerable extra length to the sensor tube. On early 1500's there were additional coils above the heater shelf to store up the extra length. On later cars the additional coiling was done behind the dash, which makes the engine bay neater in appearance. I do not recall the production date for that change, but it is tradition to use the later configuration as the design is technically superseded. Photo below shows the two P-clips, top one holding the spiral wrapped temperature sensor tube, bottom one holding the oil pressure signal pipe.
Notice in photo on left, the temperature sensor pipe with coiled cover wire is coiled around very close to electrical terminals an back of dash. Recommend you position such pipe coils farther forward near the firewall to avoid shorting out electrical circuits.
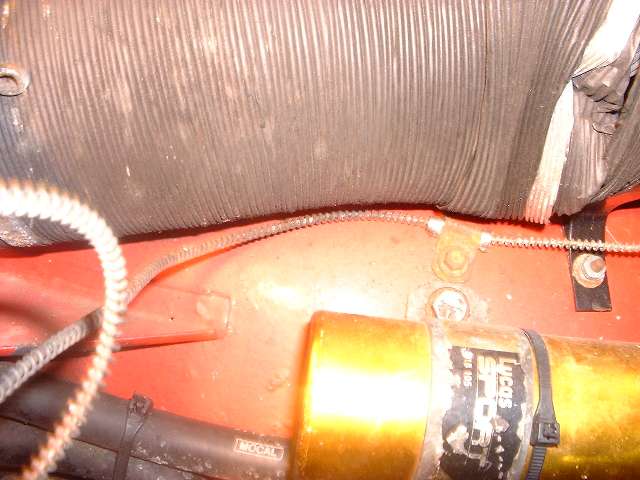
Since I drive a lot and do a fair amount of service on the engine, I take a different route with the tube. As long as it's not for concours show I prefer to run it along the inner fender. To do that you run it straight out from the sensor position above the generator and make a 360 degree vertical loop (about 2" diameter loop) about half way between engine and fender. This flex loop will see axial motion of the tube rather than lateral motion, but it still works well. I also tie wrap the tube to the upper radiator hose for strain relief and to keep it away from the generator (or alternator in my case). The tube then needs to be attached securely to the inner fender with another P-clip, preferably before it travels very far back. It is good to put a thin rubber liner or some tape between the tube and clip at this point to prevent chafing and possible cracking of the tube.

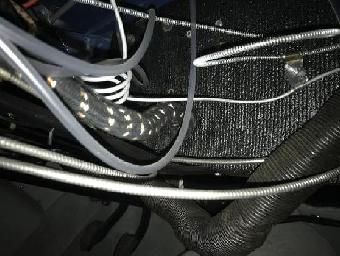
From there you can run it roughly along the top arch of the inner fender, maybe follow the wiring harness. If you have the heater installed you can mostly hide the tube behind the 4" air duct for protection. You should install one or more support clips on the inner fender before it gets to the heater shelf (but that's not particularly important if it is tucked in behind the air duct). The tube will transfer to the heater shelf at the most convenient point near the inner fender, and should have another clip on the heater shelf. From there it can go through the bulkhead at the nearest convenient hole with a suitable rubber grommet, and attach to rear side of bulkhead with another P-clip. There will still be some excess length which needs to be coiled up behind the dash before ending at the gauge.
In practice what you really do is start at the back by running the line through the dash, then through the bulkhead, and then along your path of personal choice. Install the sensor bulb in the head, then work back the other way to position the line and make the coils where convenient, and attach the clips. Final part is to make the loops behind the dash to use up the extra length as you do final installation of the gauge in the dash.
The line is quite flexible, so you can easily wind it around your fingers to make the loops. Just don't put any sharp kinks in it, and no bends very close to any of the attachment clips. If you break the line it's about a $100 repair bill. The better job you do of routing it for least strain and best protection, the longer it will last without fracturing in use. I seem to need to repair or replace mine every 100,000 miles or so. They should otherwise last almost forever on a low mileage car if not abused. There are many 50 year old units still working as new.
In spite of sometimes forgetting the clip behind the firewall I have never known a tube to break there. Most common break point is between engine and body due to flexing without a loop, or missing P-clips. With routing along the inner fender, when need to R&R the cylinder head or whole engine, I cut the tie wrap on the radiator hose, disconnect sensor from head, and tuck the sensor out of harm's way back against the fender below the 4" air duct. Haven't had a broken tube since following this scheme.
|