The MGA With An Attitude
FOG LIGHTS INSTALLATION - ET-205
At 02:58 PM 9/21/04 -0700, Mark L. Lambert wrote
>"You gave me some useful advice a couple of months ago about installing fog lamps, and a couple of weeks ago when I finally had some free time, I completed the installation. Following is a brief summary."
1) Two Lucas SFT-576 fog lamps on chrome mounting brackets bolted to the bumper behind the overriders.
2) A Lucas 4-terminal relay mounted on the radiator shelf, passengers side, near the harness connections to the headlamps. This meant removing the grille for access, but resulted in a clean look. If I ever have problems with the relay, access will be painful, but not impossible.
3) Brown 28-strand wire from the starter terminal to an inline fuse, and brown/white 28-strand wire from there to the relay power terminal. The wire is cable-tied to the harness that runs behind the large diameter fresh air intake hose, routed through the same radiator wall grommet that the harness uses, and is completely hidden.
4) Red/yellow 28-strand wire from the relay's load terminal to a double bullet connector.
5) Existing harness's red/yellow 14-strand wire connected to the relay switch terminal.
6) A 14-strand black ground wire from the relay ground terminal to a local fender bolt.
7) A 28-strand black ground wire from the same fender bolt to a double bullet connector.
8) A 33" braided harness containing a red/yellow and a black wire to run power and ground over to the driver's side lamp. The red/yellow wire is connected to the double bullet connector in (4). The black wire is connected to the double bullet connector in (7). Harness followed the headlamp harness routing over to the driver's side.
9) On the passenger's side, 14-strand red/yellow wire and black wire in a PVC sleeve (matches headlamp pigtail wiring sleeve) from the fog lamp, down the back of the bumper overrider, through a 3/8" hole in the valance (protected with a grommet), and up through the hole for the headlamp wiring entrance into the engine bay. Red/yellow wire connected to the double bullet connector in (4), black wire to the double bullet connector in (7). This mimics the headlamp wiring and follows my rather sketchy factory install instructions.
10) Same thing on the driver's side, but the wires are connected to the harness wires in (8), each with a single bullet connector.
The result looks very clean, the lights are nice and bright, no worries about wires melting if I get a short, and after 20 years I finally have fog lamps on the car.
--------------
At 11:06 AM 9/23/04 -0700, Mark L. Lambert wrote:
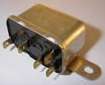
>"The relay is a 6RA, sealed, with four plug-in (spade) connectors." The load terminal is actually a double connector so you could in theory plug both fog lamp wires directly in. I chose not to do that, and covered the extra connector with shrink-tube.
The relay has a riveted mount with two screw holes. The relay is screwed to the shelf, but space is tight. Any maintenance would require the usual double-jointed arms, or removal of the grille.
See Accessories for more information on fog lamps.
Addendum, 6/13/2007: Circuit with additional relay for Dual Fog Lamps.
|