The MGA With An Attitude
WIPERS TWO SPEED With Relays -- ET-219
MGA Two Speed Wiper Motor Conversion - by Barney Gaylord
 Since I haven't installed this yet, I don't have pictures. The short of the mechanical installation is to modify or fabricate a bracket if necessary to mount the late model MGB two speed wiper motor in place of the MGA wiper motor. The late model MGB motor gives a longer stroke for the drive cable. The late model MGB wheelboxes have a larger diameter wheel to accommodate this, but apparently they cannot be used on the MGA due to a short spindle which will not reach through the angled mounting bezels on the MGA. Another solution is to install a "105 degree" crank gear in the late model MGB wiper gearbox. This part may be available from Brown and Gammons.
Then you need a special electrical circuit, with a few choices of approach. The original MGA single speed circuit has only one wire in the harness between the motor and switch, black with a white stripe, which is switched to ground to make it run. If you have read the previous article you know about the 12-terminal 4-pole 3-throw toggle switch which emulates the circuitry of the MGB steering column mounted multi-function switch. That requires 4 wires to the switch, none being grounded. There is also a 3-position toggle switch used for the wipers in the 1968-1972 MGB and Midget (European cars, not North America?) which does the same thing and is more easily procured. This article should make the circuitry simpler to understand, and maybe also simpler to install.
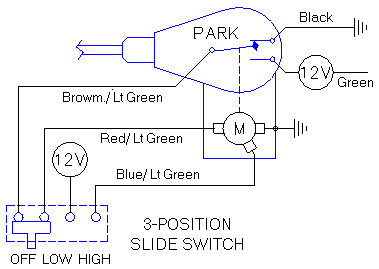

The diagram on the right shows a 4-terminal 3-position slide switch, which does exactly the same electrical function as either the MGB switch or the multi-pole toggle switch. In the "off" position it connects the low speed motor winding to the parking switch in the gearbox. When the motor runs to the park position the internal switch will disconnect power and ground the motor winding to activate dynamic braking. The switch center position connects power for low speed, and the third position connects power for high speed. This one is simple to understand.
The diagram below shows a connection method using a standard MGA 3-position lighting switch in place of the original 2-position wiper switch. To make this work I would attach two miniature relays to the wiper motor. By making the relays part of the motor, it becomes a direct interchange for the original MGA unit, with only one additional wire required from the motor to the switch to operate the second speed. All of the 12 volt power connections will be wired together at the motor. The additional wire to the switch will be switched to ground like the original wire, so this wire should also be black with a stripe (different color stripe than the first one). I would like to suggest soldering all wire connections on the relays to minimize the number of terminal connections for best reliability. Otherwise you can use relay sockets.
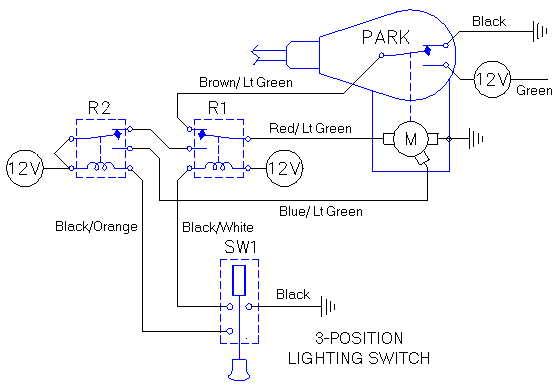
In the off position both relays are at rest (de-energized) as shown, with relay R1 making the connection between the low speed motor winding and the parking switch. This enables the motor to run to the park position, and then switch itself into dynamic braking. The center position of the pull switch (first pull) will trigger relay R1 to disconnect the dynamic brake circuit and connect power to the low speed winding, making the motor run continuously in low speed. Final position of the pull switch (second pull) maintains the first connection (to defeat dynamic braking) while also triggering relay R2. This switches power from the low speed winding to the high speed winding, making the motor run continuously in high speed.
The purpose for using the relays is to allow use of a standard lighting switch for original appearance on the dash, and to minimize the number of new wires required in the harness (just one additional wire).
Addendum, December 2, 2023:
The purpose of the original article above was only to show how an MGA Lighting switch can be substituted in place of the original MGA Wiper switch for original appearance on the dash, and only one new wire added to the harness to trigger the second speed of a 2-speed wiper motor. The rest of the switching logic is done with two SPDT relays.
I was for decades willing to settle for one slow speed as original, as long as the wipers actually worked. I drive the car a lot, and in recent years the original MGA wiper motor has failed a few times. Now 17 years later (being thoroughly disgusted with the repeating chore of R&R of the wiper motor for service) I finally bit the bullet and vowed to move the wiper motor to the other side of the car aft of the firewall.
While I was going to be relocating the motor, and figuring out how to mount it, I might as well switch it to a later style 2-speed permanent magnet motor for better performance. So I grabbed a 5-wire wiper motor from a late model MGB, taking also the motor mounting bracket, wheel boxes and drive casings, and the motor connector with 18-inches of the 5-wire harness (for the correct wire colors).
Remove the original MGA wiper motor. You know the drill, removing the master cylinder, the rubber pedal and the pedal pivot bolt to drop the pedals on the floor. Disconnect a few wires, and the difficult to reach drive casing flare nut and a few bracket bolts, Remove the wiper arms to allow the spindles to rotate, then pull out the wiper motor and drive cable. Also remove the drive casing that passes through the firewall, and the rubber grommet (which will be replaced later with a hole plug). Being a hard nosed and knowing what I'm doing, also pull up the 3-wire wiper motor branch of the harness and cut it off flush with the side of the main harness, to be re-used later behind the dash.


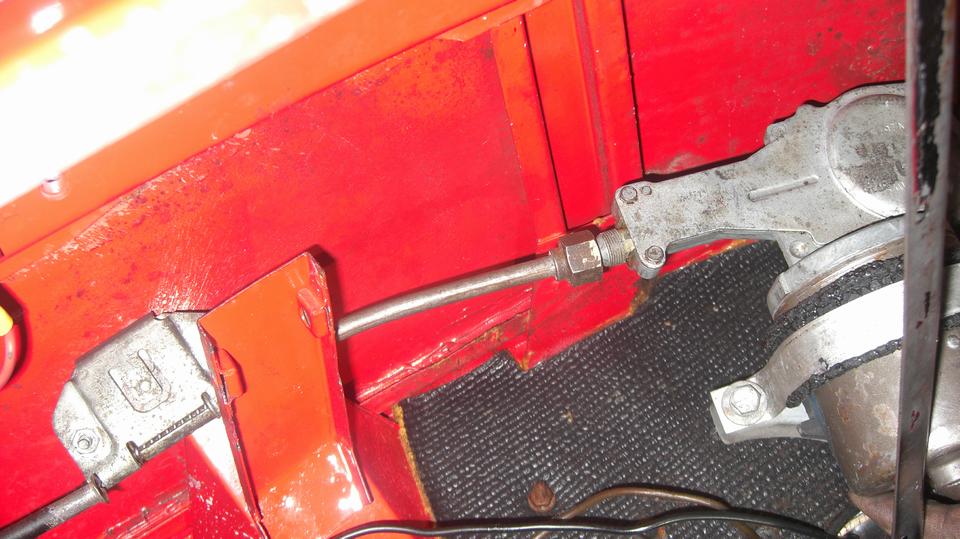
Bite the bullet and remove the steering wheel. Get under the dash and remove the accessory Navigator's desk and brackets (remember that gadget), and the demister hoses and metal ducts. Contemplating the fact that the MGB system has longer throw of the drive cable, that would induce too much over travel of the wiper arms. Also not wanting to change the crank wheel in the gearbox to shorten the cable throw. Remove the original MGA wheelboxes and drive casings to give the MGB parts a fair shake.
Where some people have reported the MGB wheelboxes cannot fit in the MGA, I beg to differ. MGB spindles sit at a slightly different angle, with a longer bottom spacer and shorter outer chrome bezel. Installing the original MGA bottom spacer and MGA chrome bezel with the MGB wheelbox, it fits together nicely with the spindles positioned exactly as original. And the MGB wheelboxes do fit (barely) above the welded demister brackets. That was a great revelation, meaning we do not need to modify the MGB wiper motor or gearbox.


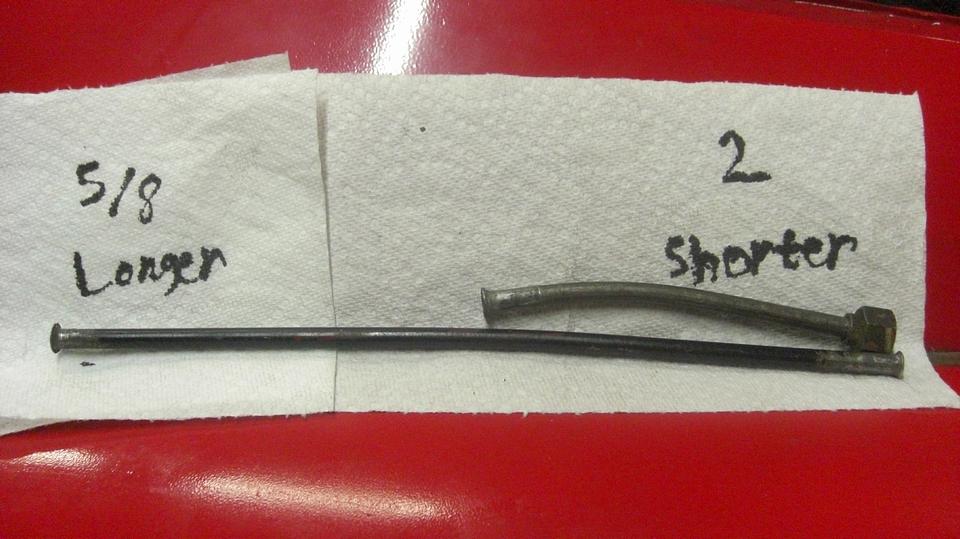
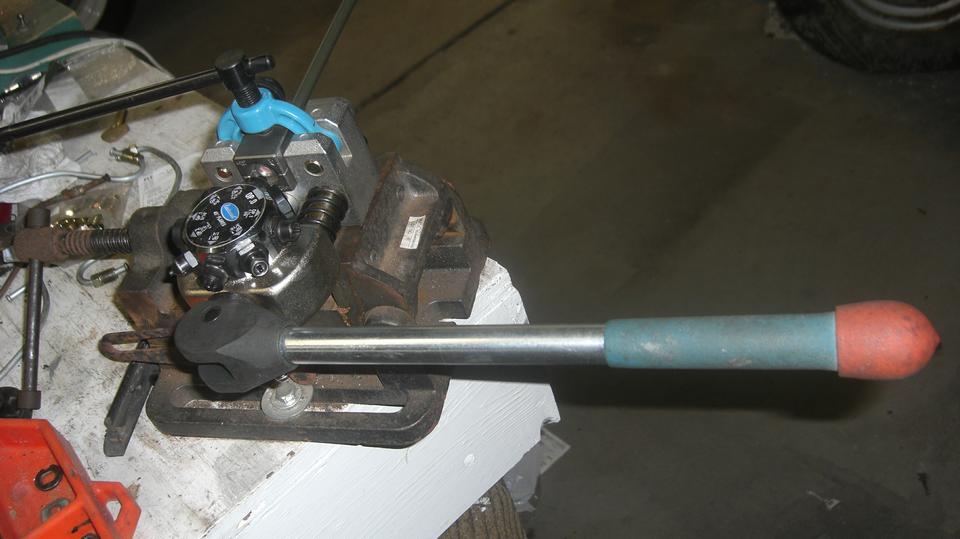
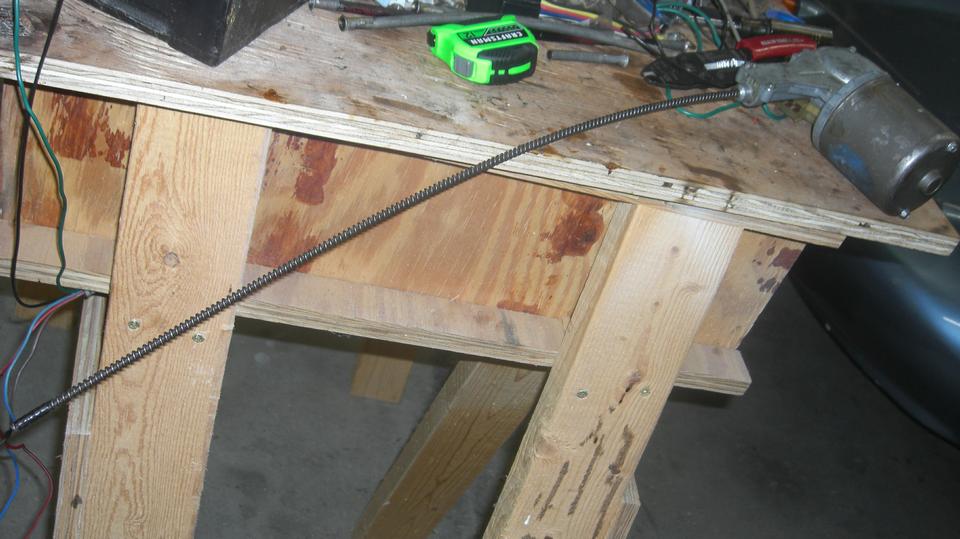
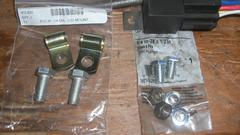
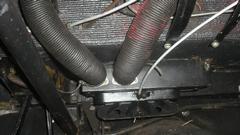
I had to make a new center casing a bit longer. I also shortened the MGB primary casing a few inches, installed the original short straight tail casing (MGA or MGB) on other side of the car.


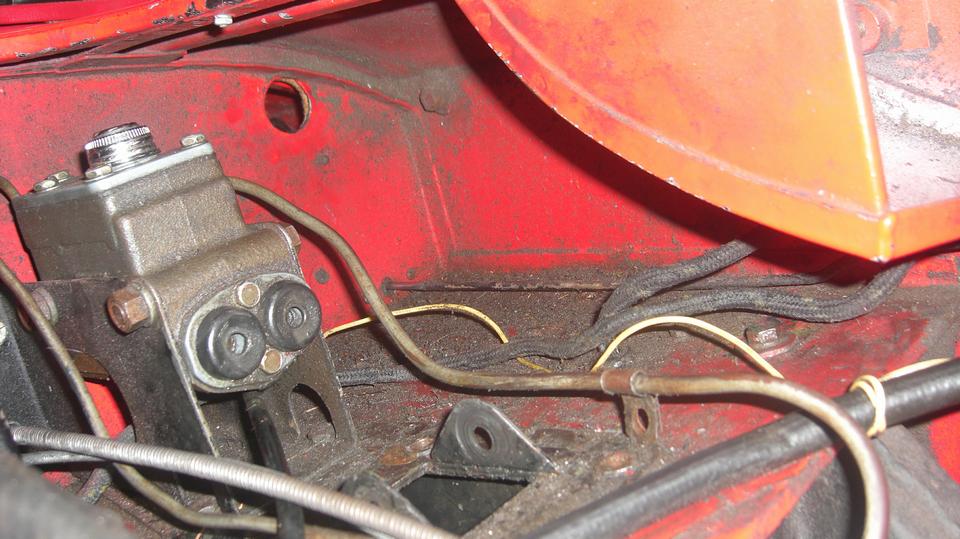
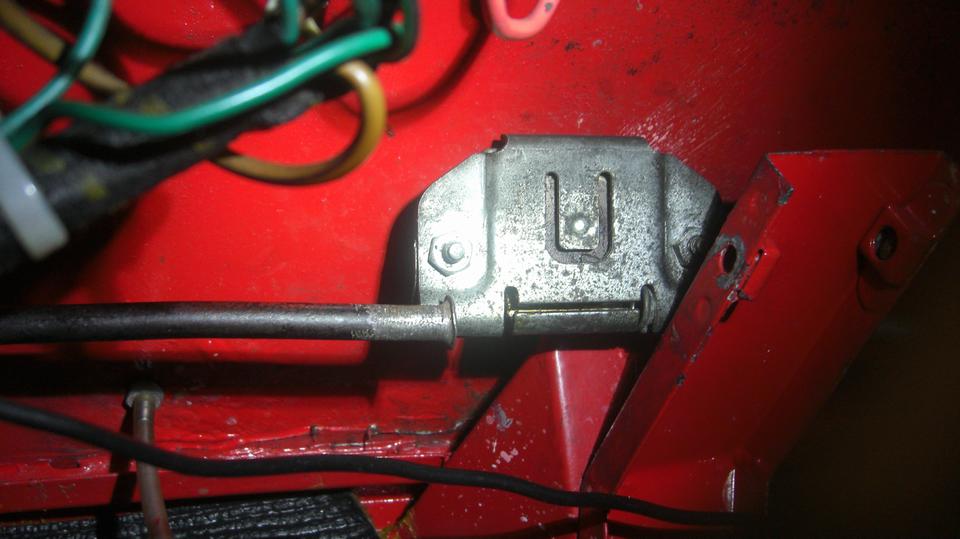
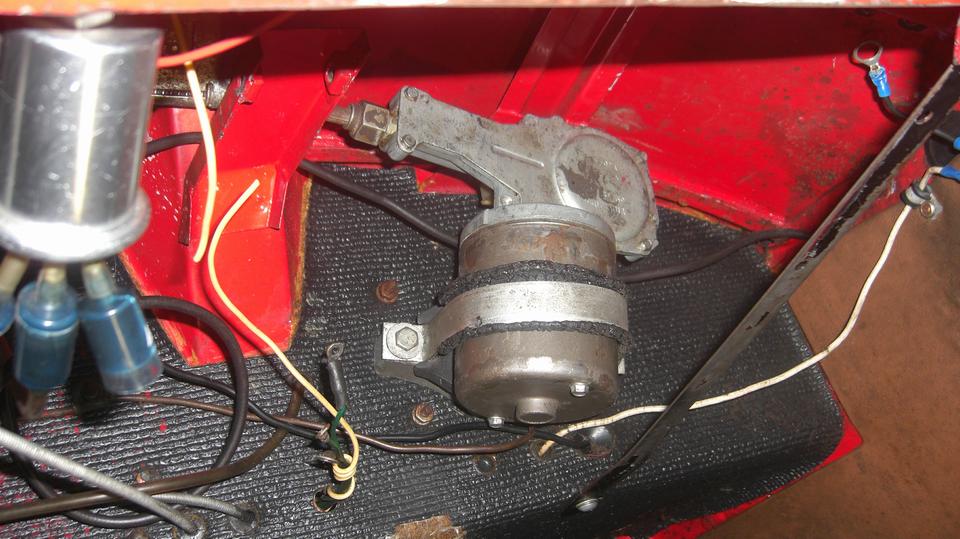
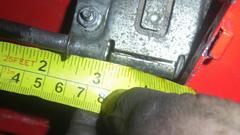
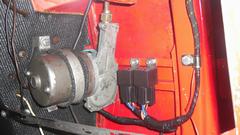
Grab the MGB wiper motor, shove the drive cable up the pipe, position the motor where it looks like it should fit. Low and behold, the late MGB motor mount bracket will work just by drilling two holes in the firewall for the bolts. No special brackets will be required. But do be careful where you drill. For LHD MGA the control box is on the forward side of the firewall. Notice the two smaller screws above and below the motor bracket bolt. That would be the control box location. I run an alternator, no more control box, but if your car still has one, then you might install the MGB wiper motor at least 2 inches farther to the right (more like photo on the left).


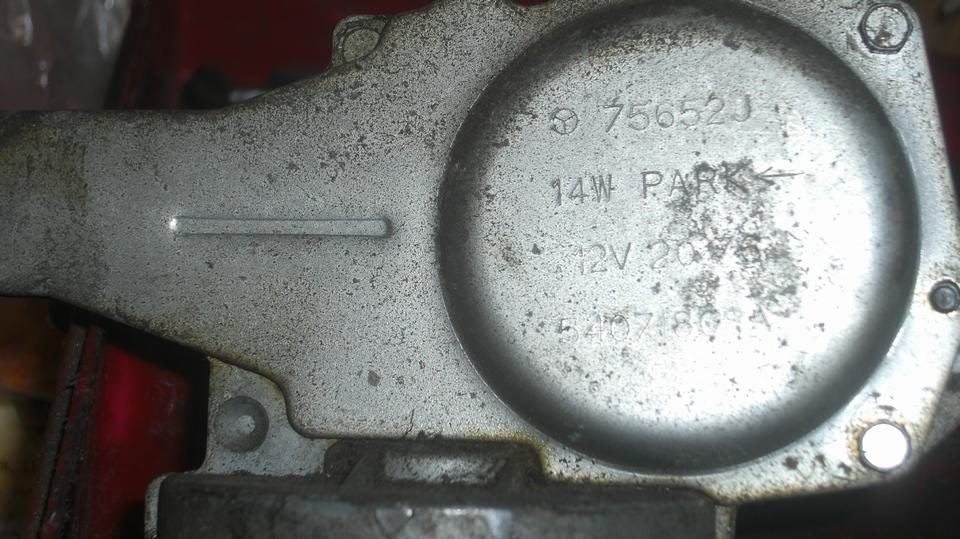
We had two of these MGB permanent magnet wiper motors, intending to install one and keep one as a spare. They both tested good, work fine. The 75652J motor parks with the cable extended. The 75697A motor parks with the cable withdrawn. This setup needs to park with the cable withdrawn. The 75652J also runs a bit faster, might be preferred,but the park switch is buried inside, not easy access to change it, so we set that one aside and installed the slightly slower one (which is still plenty fast).


I spent the next hour scratching my head while deciding where to locate the relays and new harness. That notion must have changed five times during evolution of these ideas. In the end it came to be quite simple.
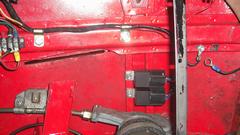
Plug in the MGB motor harness and run it around behind the motor to be neat. Drill two holes in the flange of the under-cowl brace to mount the new relays very near the motor.
Using the original MGA wiper motor harness, connect Green wire to the back of the petrol gauge for wiper system power (switched and fused as original). The Black ground wire is not needed in this part of the harness, if the motor can be grounded locally. So pull out the Black wire and replace it with a different color wire for the second relay trigger. Replace original MGA Wiper switch with an MGA Lighting switch. Connect the original Black ground wire to the switch, and also the two signal wires in the newly modified (original) harness section.

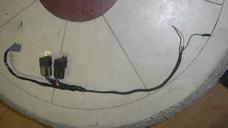
I spent half an hour massaging the wires for switch, motor, and relay sockets into position
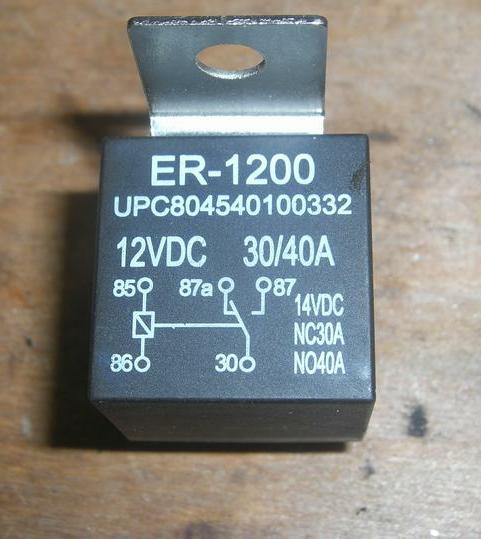
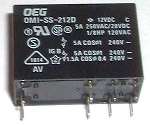
to form a new harness between switch and motor with the two relay sockets in between, including location for two P-clips to support the new harness. A few pieces of tape hold the new harness in correct configuration while it gets pulled out for trimming, soldering, shrink tube insulation,and tape over wrap. The finished cable in the center picture looks simple. It took a while to figure out and fabricate, but it looks neat in the car. For the record, the relays used were DIN style ER-1200.

Plug in the motor connector, and two relay connectors. Connect a few wires at the switch and petrol gauge, install two P-clips and the ground wire, and it's testing time.

 It runs like a champ. Good torque, nice full wiper motion with good overlap in the center, little or no backlash at ends of stroke, and not running past the edge of the glass. About one cycle per second on low speed, at least half again faster on high speed. As designed, it parks instantly in very repeatable manner. I'm stoked! Great way to end a modification job). Reinstall the demister ducts, steering wheel and Navigator's Desk. Still needing to plug a few holes left from the original wiper motor.


|