>.... Ive read some on the list about hardened seats. Is that anything for me to worry about?
Not to worry about, but when the head comes off for needed work, it is the right time to think about it. If you plan on putting a lot more miles on this car, hard seats are a good thing. I have a head with hard seats that has done 100,000 miles of somewhat harsher than average service, including much trailer towing and considerable autocrossing. It has gone through three sets of valves, including most of one set of Stellite exhaust valves, but the hard seats still look like the day they were installed, and the same head is now going onto the next engine.
Hard seats are under $10 each, plus another $10 each or so for the machining and installation, so all new hard seats will cost you around $150 installed (or maybe more depending on who you deal with). Let the shop doing the machine work procure the valve seat inserts for you. They likely get them cheaper than you can, and no hassle about wrong parts, material or quality issues. And if your head has substantial wear on the original seats, it's possible that some of the seats will be needing inserts anyway. Take this up with the machinist when you present the head for inspection. If the existing seats are okay, and you expect easy or average service and less than 50,000 miles in the foreseeable future, then you may not want to spend the money on seat inserts.
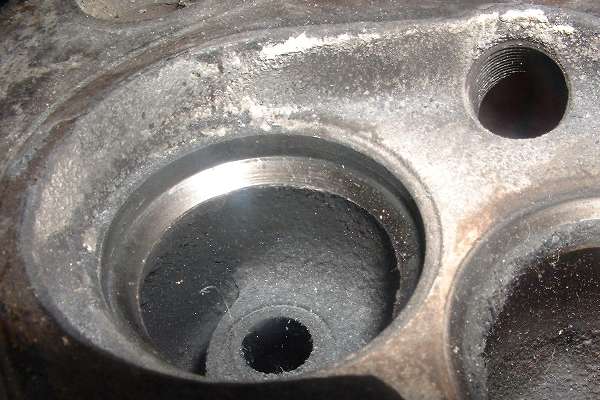
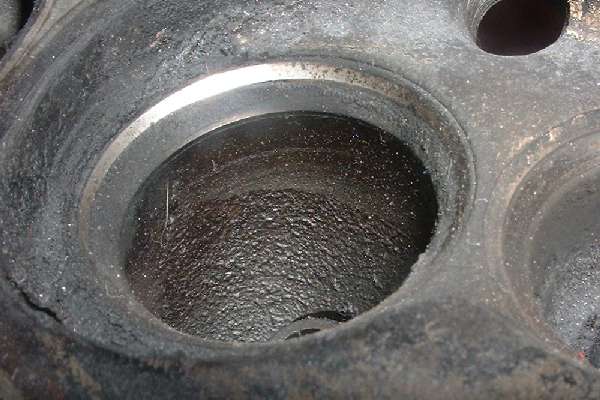
I've had a couple of heads done up with valve seat inserts. Actually they were both early MGB 18 heads with valve sizes similar to the MGA 16 head from the MGA 1622 engine. I've also seen MGA 15 heads (MGA 1500 & 1600) with the valves increased to MGB valve sizes. The water jacket is not along side of the valve seats, but is under the seats, and is deep enough so that installing valve seat inserts is not a problem. If you're going with larger valves and seat inserts, just be sure the inserts are not so large as to run into each other.
After the new seats are installed it is necessary to clean up the transition within the ID of the seat between the seat and the casting. If the new seat protrudes into the port area, it needs to be cut back to match the wall of the port. If the ID of the new seat is larger than the port in the head, the port should be enlarged a bit to match the ID of the insert.
If you're thinking about valves more than one size larger than stock, I'm in the gray zone, couldn't say for sure. I have heard that there is quite a lot of material available for cleaning up and enlarging the ports without running into the water jacket, but if you're doing big time porting you should ask someone with more experience.
>Is lapping the valves OK, or is grinding them pretty much necessary?
When the valves are far enough gone to cause bad running, lapping is seldom the solution. At the very least the valves will likely need to be re-faced (ground on the working surfaces), and you should prepare yourself and your budget for the possibility that some valves would need to be replaced.
Also, depending on your driving and service conditions and expected life miles, Stellite exhaust valves may be a desirable option. For normal driving and service conditions, standard valves can be expected to last a good long time. For heavy driving and/or hard running conditions, Stellite exhaust valves can be expected to last about twice as long as the standard parts. Four standard exhaust valves will cost about $30 (if needed). Four Stellite exhaust valves will cost about $75.
If your head still has the original iron valve guides, they will also most likely be badly worn and in need of replacement. A set of bronze guides will cost about $25 more than the iron guides, and the installation is about the same labor cost, but the bronze guides are another of those likely once in a lifetime fixes. Again the decision rests on budget constraints and your expected service requirements. Talk to the machinist about this when you take the head to the shop, and let them procure the parts (if they have a source). Bronze guides need a bit more working clearance for the valve stems to avoid sticky valves, but you want to be tactful when discussing this with the machinist and not let it sound like you're telling him how to do his job. Best to ask for his opinion to get the discussion started.
And if you decide to use bronze guides, those things are self-lubricating and don't need much oil, so you might consider installing "real" valve seals to reduce oil consumption a bit. This can also reduce carbon deposits on the intake valves. With early engines you need to remove the valve deflector to make room for the new seals. On engines with double valve springs you may get a charge of a couple dollars per guide to reduce the diameter of the top of the guide to fit a seal with a smaller OD. Again, let the shop procure the parts, seals are cheap, maybe $20 for the set. If you do this, be sure to get the shop to document the work done in the interest of future service, and get a part number for the seal that was used so you can get replacement parts in the future.
>Since winter (read that 3" of snow) is already here I would like to get it back on the road quickly so maybe an interim solution (lapping) would work instead of a full rebuild. Sound reasonable?
Ah, one of my favorite subjects, Grapes of Wrath repairs. And the answer is, probably not. However, suppose you're on a really tight budget and just want to get the valves to seat and seal so you can drive it a while longer before the hit for the real valve work. J.C.Whitney sells a "Valve And Seat Facer" for $9.99US. It's a small hand held jig with a free wheeling grind stone. You spin the valve with an electric drill to grind the working surface against the free wheeling stone. It actually works quite well (surprise) as long as the valve head is round and concentric, and there's enough metal left to clean it up without producing a sharp edge on the valve head. You can also do a multi-angle grinding job on the valves with this tool. Once the valve edge is clean, you put a couple bits of sticky backed sand paper on the edge of the valve, drop it into the head, and spin it again to clean up the mating valve seat. This also works, as long as the seat is not too badly burned and recessed into the head.
How long this repair lasts is greatly dependent on the condition of the valve guides, among other things. The finished valve to seat contact area should be about 1 mm wide. If the contact patch is too narrow, the valve may over heat and burn prematurely because of insufficient heat transfer from the valve head to the seat. If the contact patch is too wide, the mating surfaces can accumulate carbon deposits because of insufficient contact pressure, and these deposits can contribute to leakage of hot combustion gasses and erosion of the valve and seat.
For such a Grapes of Wrath valve job, the work is only warranted by the person doing the work, you. Having said that, I have performed this procedure on several engines (not all my own), and in each case have gotten at least a few more years of continued service (YMMV). But if the valve guides are quite sloppy, don't expect too much additional life, and you will still likely have excess oil consumption and smoke.
Good luck and happy tinkering,
Barney Gaylord
|