The MGA With An Attitude
ROLL BAR Installation For MGA - FR-302
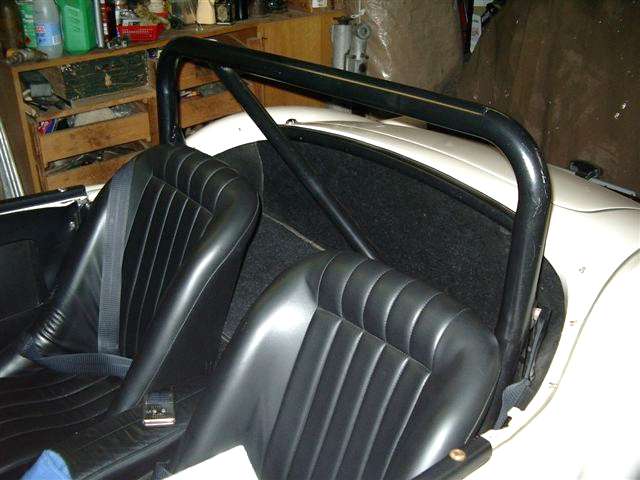
These photos and notes come from Barry Gannon in Melbourne, Australia. Notice first that this installation began with removal of part of the steel body tonneau behind the seats. Also this installation will not meet requirement of most current race sanctioning groups because it is not tall enough.

This car was involved in a horrific accident and written off by the insurers as a total wreck. So, after I bought it from the PO, 38 years ago, I set about restoring it with a license to severely modify - or not. As I worked to restore the body I decided to remove the tonneau panel and provide a parcel space behind the two front seats. I simply cut the panel with a hacksaw and tin snips, turned a return-edge into the cockpit with a hammer and dolly and finished it off to be painted. This later facilitated the fitting of the roll bar. As you can see from the photos I followed the line of the long tonneau and the hood mounting studs.
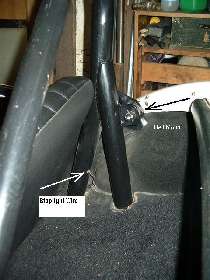

Some years later, when a 40ft. container nearly crashed off a truck onto me in the car, I decided a roll bar was the best safety option. I had the bar rolled from heavy steam pipe, cut and shaped the straight angle struts so they could be welded to the bar upright sections and welded flat bars to the bottom ends. I fabricated angle cleats, made from stock angle bar, and welded these to the chassis (in the fashion of the Mk-II seatbelt mountings). The two are bolted together with high tensile bolts so the complete roll bar can be removed if necessary. The cross bar is fully welded both ends. The top mounting for lap sash belts are attached to lugs welded to the roll bar (see photo).
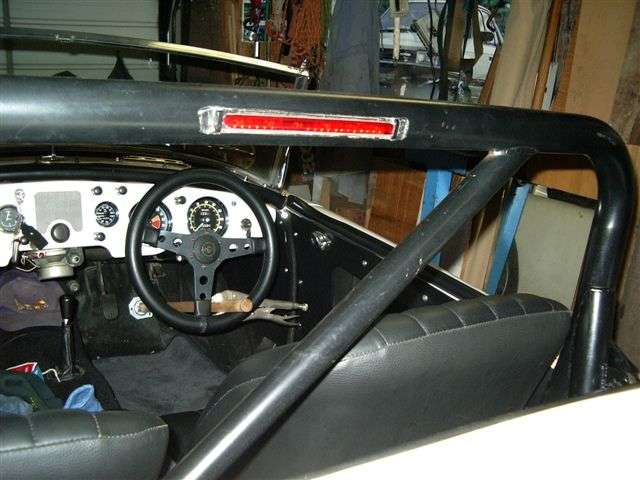
I fitted an LED stoplight by cutting a slot into the bar, glued the light in place with silicone, pushed a wire up through the pipe via a small hole drilled into the pipe at its bottom edge, and connected into the rear stoplight circuit. This high level light is better seen by following vehicles and therefore safer.
The soft hood fits over the roll bar so the roll bar most probably will not comply with competition height safety rules
 but I figure it is safer than nothing! In order to get the maximum height, I fitted the fiberglass hood in place, pushed the roll bar up until it just lightly touched, then cut and welded. It is a tight fit under each of the two hoods.
I have modified the hood mounting to allow the soft hood to be fitted quickly and with minimum fuss. It cannot be carried in the car in the folded position as this space is now taken by the roll bar. I store the soft hood in my garage and fit it as necessary. This requires a degree of planning as, if you think it may rain, then you fit the hood before leaving on a trip, or get wet. I usually find it is the latter! The mounting brackets are from MGB and screwed to the body, the MGA hood frame brackets have been detached from the body and simply cut with a hacksaw so they slide easily into the bracket (see photo). The hood is a quick and easy fit.
|