The MGA With An Attitude
AH-HAAII! - An MGB Transmission Mount for the MGA by Bill Stewart As originally appeared in Texas Chapter News - October 2002 (with addendum). Reproduced here with permission of Bill Stewart and TCN. My car is a '58 MGA coupe in the process of a ground-up restoration (I have drug this car around with me for over 20 years). Wanting an air conditioner and overdrive, I decided to go with an MGB 1800cc engine to overcome the added load and improve the ride at highway speeds. Mounting the MGB transmission on the MGA frame, however, became a real challenge. The MGB 1800cc engine mounts are identical to the MGA and that installation was effortless; the transmission mount for the MGA and MGB are not the same and this was not a trivial installation. For this reason, many installers of MGB engines use the front half of a MGB transmission and the back half of an MGA transmission so they can then use the stock MGA transmission mount. Unfortunately, no overdrive is available for this combination, so it was not pursued.
Searching for an MGB transmission mount took me to the MGA 1800 interest group as listed in the back of MGA! magazine. Steve Chaffee of that group sent me a drawing of a mount which utilized the 'ears' cut from a MGB cross member. The 'ears' were then welded to a flat plate which is bolted to the MGA cross member. Steve also mentioned that there was an 'engineered' solution also but that one I have not seen. Having a potential solution in hand, I proceeded to search for yet another solution that I felt would be how it would have done by the masters at Abingdon-on-Thames.
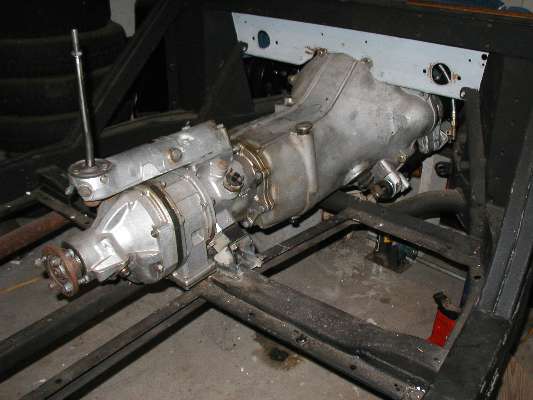
After putting the engine in its mount, I kept the transmission blocked up over the frame. I would return from time to time to this void between the transmission and the frame while continuing to work on other parts of the frame and suspension restoration. Months came and went and no happy solution came to mind. I tried to think of something new. I reconsidered the 'ears' on a plate. I wondered what the engineered solution was. I worried. I wondered. I worried!
Then, Ah-haa! What if I took the MGB member and cut it away until it fit on top of and into the MGA frame? I had a vision of the MGB cross member melting and sinking until it held the transmission 1/2" above the MGA frame. With that in mind, I bolted the transmission to the MGB cross member as it lay across the MGA frame. Taking measurements, eyeball and otherwise, I began to cut with a reciprocating saw and fine tooth blade with the cross member mounted in my shop vise. The first cuts were to the ends, A-A and B-B as shown in Figure 1. The next cut was to the base of the rear 'ears', C-C in Figure 1. A rip cut of the base, D-D was then made as shown in Figure 1, 1/4 inch behind the three holes in the base.
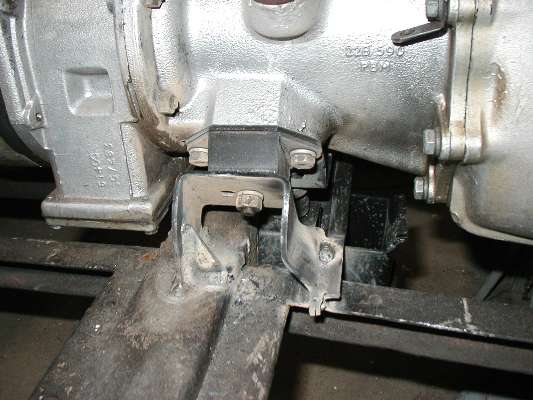
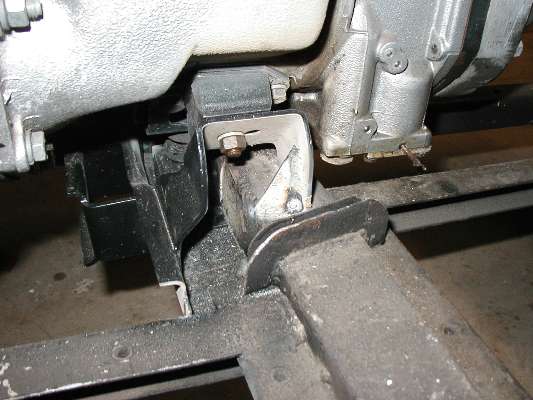
Two notches were made on the ends as shown in Figure 2. The lower bracket for the transmission mount pin was cut 1/2 inch from the rear as shown in Figure 1. The lower rubber bushing was trimmed 1/8 inch on the bottom lip to fit next to the square cross member. The mount was then welded in place to insure a fit without having to remount the transmission.
My concern for making a mistake was realized when I mounted the new A/B the first time. When the transmission was swung down on the frame, it also moved forward leaving a 1/4 inch gap at the A square cross member. Also, the left end needed to be longer to reach the floorboard frame. With these corrections made, the second mount fit nicely. Yes, I cut a second cross member. |