The MGA With An Attitude
|
| MGAguru.com |
|
MGAguru.com |
MGA Battery Cover CARPET and FASTENERS -- INT-101C
At 09:59 AM 10/10/04 -0600, John Keller wrote:
>"When I carpeted the battery panel, I cut about a ¾ inch slit into the carpet about and inch from each side of where the fastener will be under the carpet. I covered that part of the carpet and panel with masking tape before I applied the adhesive. After the new panel was installed I peeled back the carpet, removed the tape and applied ¾ inch square Velcro fasteners to the carpet and panel with contact cement. If you get your nose down to the carpet there is no sign what so ever the carpet has been cut. When you want to remove the battery cover, just peel back that little strip." -- John
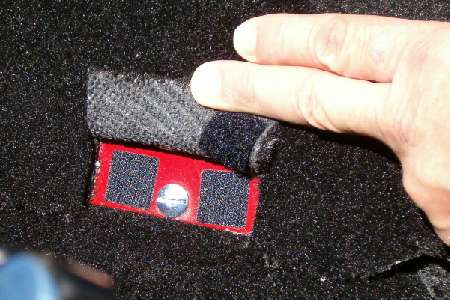
Carpet tab before last Velcro piece is applied.
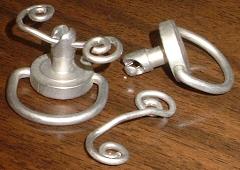
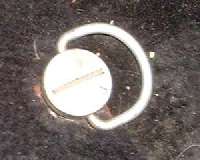 Okay, he's just making pretty. I'm not nearly so particular about appearances. In my world form follows function, and I just want to be able to get the battery cover off and back on in the shortest time possible, and preferably without tools. So I have replaced the original slotted dome top fastener with a bail handle Dzus fastener. This is getting to be a popular modification these days, especially for the MGB which has 5 panel fasteners. It is really nice to get a firm grip on the fastener and feel the way into the wire hook in a couple of seconds. In the MGA roadster nobody ever sees it anyway, as the side curtain stowage pouch hides that area whether the top is up or down. -- Barney
Addendum, May 2006:
Okay, people have been asking where they came from. I do some business with S.W. Anderson in Downers Grove, Illinois. www.swaco.com (moved to Bolingbrook, IL July 2022). There are a few of these around the country. This is an industrial fastener supplier, and they may require some minimum order or establishment of a business account. Occasionally you may be able to get a few pieces as samples.
The manufacturer is "DFCI Solutions Inc" http://www.dfcis.com.
For dimensions see www.dfcis.com/st-1200
Addendum, January 2010: More dimensions:
www.dfcis.com/st-1200/d5s.html
www.dfcis.com/engineering/C122J-R5RevC.pdf
For more detail about panel fitment and mating parts,
see the Southco/Dzus larger (7-MB) pdf file here:
www.southco.com/static/Literature/D4.en.pdf
The size 5 stud info starts on page 11.
DFCI is same company as founded in 1938.
DZUS is a registered trademark of Southco Fastener company.
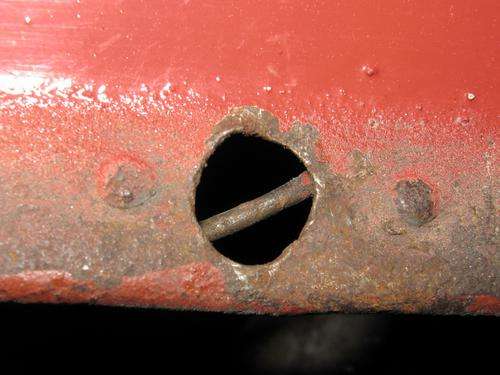
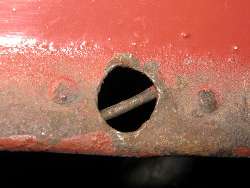
This stud is 5/16" dia on the cam end with a 1/4" dia undercut on the shank. The panel hole will be 5/16" dia, so it will be slip fit for installation. The undercut allows 1/16" diametrical float once installed.
I have one piece in my possession, retained as a spare ever since I installed the things in late 1986. The head design is slightly smaller since then. Mine has grip length of .450 and undercut length of .225. If the stud is too short you're screwed. If it is a bit too long you can install a thin flat washer under the head. In my case the fastener head rests on top of glued on carpeting, and the panel rests on top of more glued on carpeting, so if you install this in a bare panel it may be better with less stud length.
Addendum, January 2010:
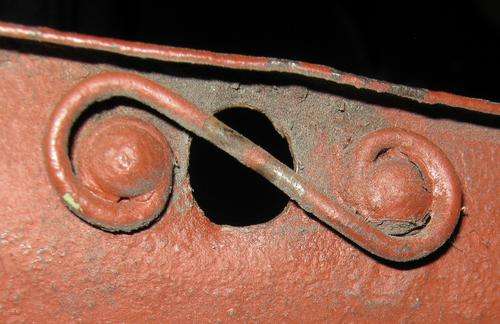
The spring wire piece is secured with round head rivets, head on the bottom and peened over on top. Photos compliments of André M. Kunz in Frauenfeld, Switzerland.

Addendum, June 2016:
Southco has completed the acquisition of DFCI Solutions, Inc. As of 27-Feb-2015, customer orders and communications will be processed by Southco, Inc.
See the Southco web site: www.southco.com - Look for D4-style, size-5.
I use bail handle, steel, zinc plate, 0.45-in grip length, part number D4-BJR5-45
You may want a shorter stud if you do not have two layers of carpet.
I used to have the Dzus catalog containing all installation information (see links above, middle of page). There are various ways to install these parts. The common method uses a thin metal washer with a conical bevel in the center (called "grommet"). Insert the fastener in the panel, slip the "grommet" over the stud, and use a tubular punch to press the grommet flat so it will constrict on the stud for permanent attachment (floating stud). There are also nylon grommets that can be pressed onto the stud with a tubular punch (or even with your fingers). These stretch a bit during installation and then contract to hold the stud in place.
Another method is to make the hole in the panel same size as the stud. Insert the stud, then use a tubular punch to smash the panel thinner in the immediate area around the stud to constrict on the stud for permanent attachment (floating stud).
Removing the stud requires a bit of force. Just punch the stud out of the panel, which may deform the panel slightly around the hole, then hammer the panel flat.
|