The MGA With An Attitude
RECOVERING THE DOOR TOP TRIM RAILS -- INT-104
The prerequisite here is a review of the page on replacing door panels ("liner assembly"), as the door panel must be removed to R & R the door trim rail ("trim roll"). These trim parts were originally listed as assemblies. For the purpose of restoration it is now common to find the bare trim rail parts (not pockets or panels) and the fabric covering materials being supplied separately. This relieves the supplier from having to carry a lot of separate part numbers in inventory, some of which may be slow movers. It also makes the materials cheaper and the labor more intensive, as the person refurbishing the parts now has to strip and recover the original trim rails (assuming the old ones are still serviceable).
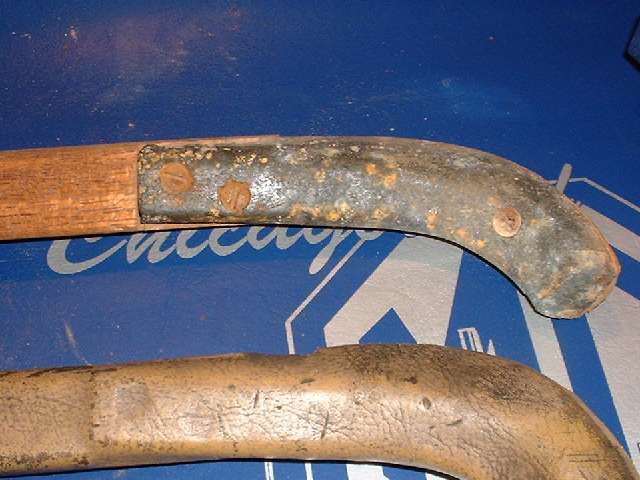
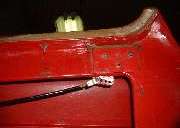
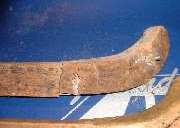
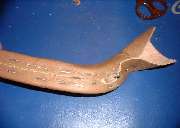
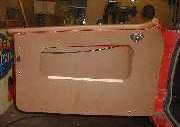
The frazzled door rail covering that started it all.
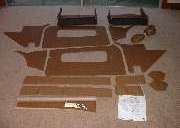 Reviewing the panel and trim kit in the picture at left, the two longer rectangular parts (a step up from the bottom of the picture) are leather strips for covering the door rails. The two shorter rectangular parts to the right are leather strips for covering the rear corner rails. These are the only leather parts in this kit, as all other fabric covering parts are vinyl over cloth. It was common practice to use leather covering on the heavy wear surfaces, and less expensive vinyl on other surfaces. As such, the side rails are leather covered, while the front and rear rails are vinyl covered. As a side note, the seats and arm rest get similar treatment with leather only on the top and front surfaces. The roll of material at the bottom of the picture is the vinyl over cloth material used to cover the front and rear cockpit rails.
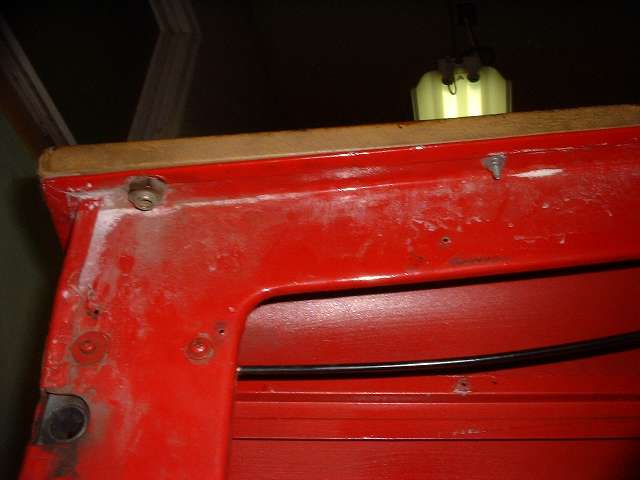
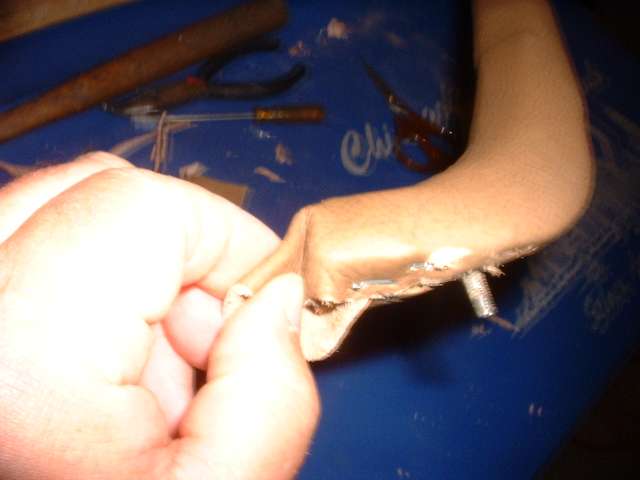
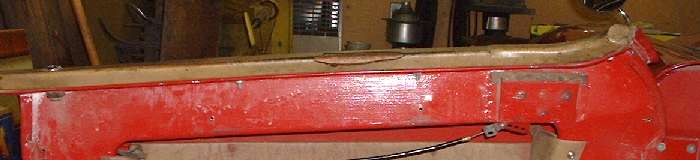
  Here we have pictures of the fasteners securing the door top rail. At the rear there is a large hex nut and flat washer holding the post socket for the side curtain mount. Farther forward there are three small studs which should have flat washer, lock washer, and hex nut on each. Remove these and the rail comes off.
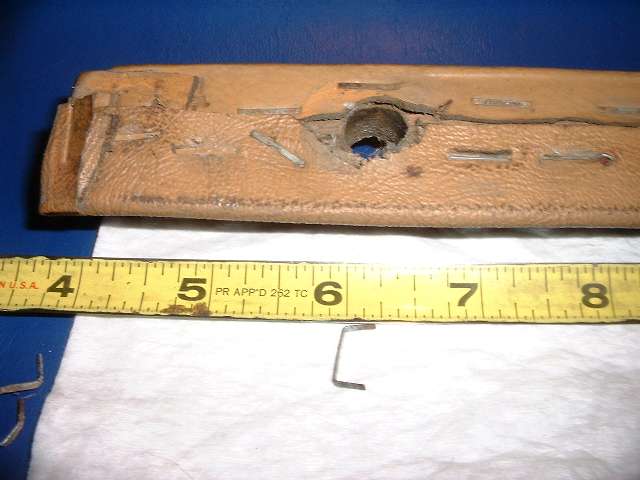
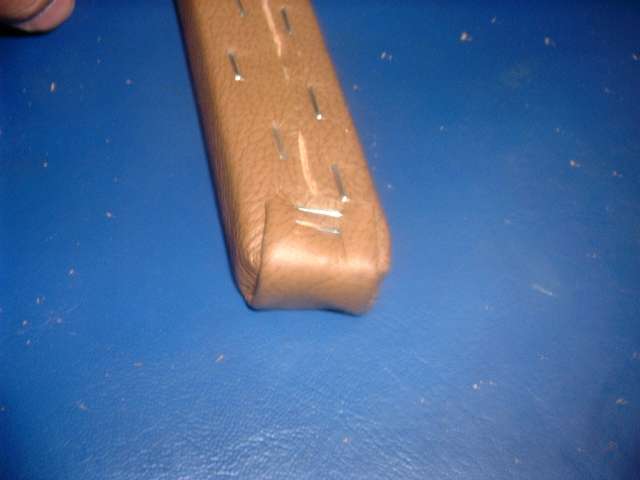
  Now a few words about tacks and staples. While it may be possible to attach the trim rail covering with glue or small carpet tacks, life can be much easier if you can use a staple gun, and easiest still if it can be a powered staple gun (commonly electric powered). Tacks or staples should be short, no more than 1/4 inch long. 3/16 inch staples would do nicely, but they may be harder to find than 1/4 inch staples. The first chore here will be to remove all of the old fasteners to remove the covering down to the bare rail. For tacks, maybe use a small side cutter pliers. For staples, a small screwdriver and long nose pliers work. You might also consider wearing soft gloves or having some blister cream handy, especially if you do all the rails in one sitting.

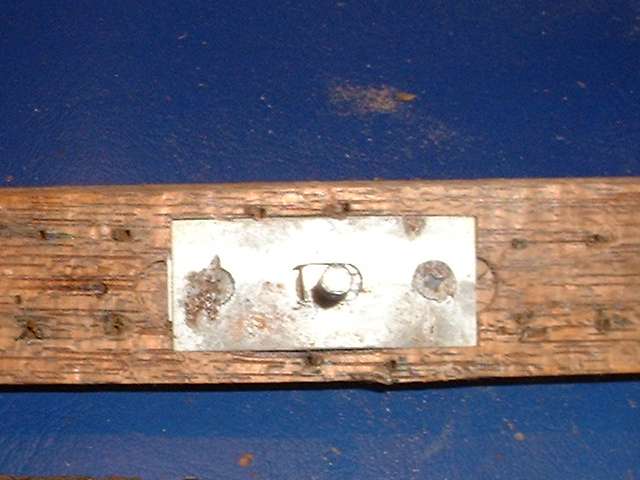
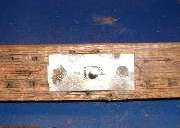 With the rail laid bare you will find a couple of metal plates secured with flat head wood screws and holding floating square head studs in a metal cage. If the studs are broken or stripped or badly rusted, you might need to raise another blister or two, but keep telling yourself these are only wood screws, and small ones at that. After many years of static installation the studs may no longer float, but if they are otherwise in good condition they should go back in the same position on the door anyway, so don't worry about it. Find installation detail for these floating studs on next page.
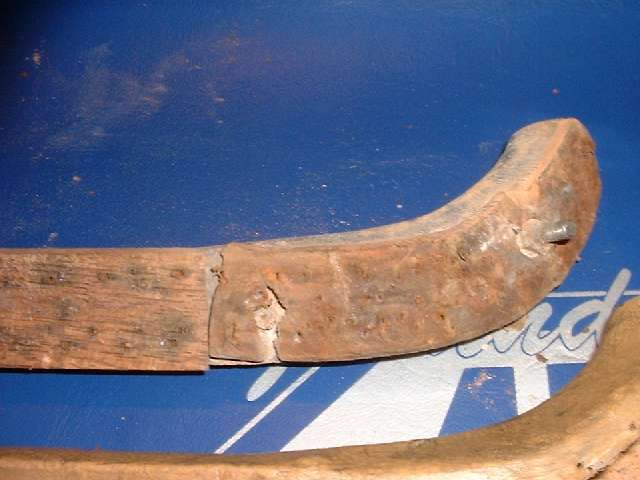
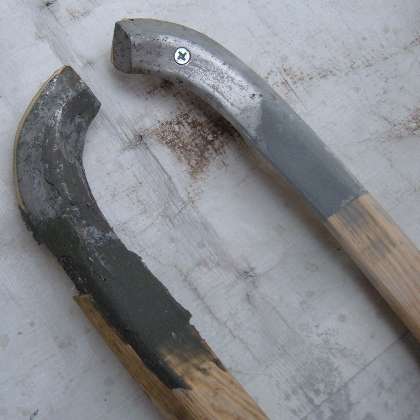
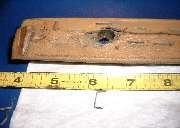
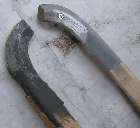
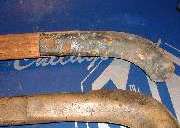 Early copies of the door trim rails were one piece wood from end to end. After roughly one year of production these were superseded by a shorter wood rail with the curved part at the front being cast aluminum. The wood and aluminum parts are connected with a lap joint and a pair of wood screws. The forward bottom stud is a long flat head screw with a nut underneath the rail (see next picture below). If you have to change this stud, keep the nut fairly thin so it doesn't lift the rail above the door on final installation.
Notice in the picture above that the replacement wood rail (circa 1986) was not exactly the same thickness as the original aluminum corner piece. Also the flat head screws are recessed slightly below the surface. As the leather covering settles over time the steps and depressions become quite visible in the covering. While some of this may be perfectly original, it is likely to cost points in a concours show. There is a solution for this problem.
At 07:40 PM 11/11/05, Brian McCullough wrote:
"The plastic filler Bondo works fine for door trim filling as long as you clean the surfaces. With power tools (and since you will not see it again for 20 years or so) you can have both pieces filled, sanded, and the mess cleaned up within 1 1/2 hours".
To provide a soft under surface for the fabric fasteners, there is a thin strip of leather secured to the metal rail with small flat head machine screws. After many decades the steel screws are most likely a solid part of the aluminum rail, never to removed because of galvanic corrosion. If you feel the need to replace the leather tack strip you would likely have to grind the screws down flush with the bottom of the rail, and then drill and tap another location for new screws. This car was restored once before (by myself) reusing these metal parts and the leather liner strip. Now 45 years after original issue, the leather bits look pretty bad, but they are still supple enough (barely) to hold a third generation of staples, so I'm not fiddling around trying to replace them, yet (maybe for the next restoration).
At 01:59 AM 11/9/04 -0700, Anders Rydström in Sweden wrote:
"I put the part of the leather that covers the "twisted" end in a water bath for 24 hours before putting it on, and it flexed much easier."
And it survived? In daily usage the leather doesn't like being wet, as it fluffs off small particles from the surface and loses the dye color. Does it suffer any damage during installation when wet? Any change of surface texture or color?
At 02:21 PM 11/11/04 +0000, Anders Rydström wrote:
"It definitely survived. No change in color of leather or the water bath (cold water). You can see a change in structure. It can be a result of water bath or the fact that it has been stretched. When I do the second door I will put he entire piece in water, then I'll know."
At 10:06 AM 12/17/04 +0000, Anders Rydström wrote:
"I have now done the other side and this time put the entire piece of leather in water bath for 6 hours. The result was even better."
It's always nice to find an easier way to do things. Cold water bath for the leather for six hours makes it soft and stretchable, easy to install, and has no deleterious effect on the color or texture of the leather. Leaving it in the water for 24 hours appears to be overkill and may cause some small change in appearance of the surface. Of course be sure the water is clean. Keep your hands clean while handling the wet material. And it may be a good to allow a day or so for drying time after assembly before installation it on the car.
At 07:09 PM 4/30/05 -0400, Fred Stankovich wrote:
"I saw your advice for "wetting" the leather before fitting it on the curved rails. I was having a devil of a time getting one of the rear corner rails to look good. I just wet the leather on the rough side only in the area that I needed to stretch. I put it under the faucet 2 times and left it about an hour. It then was real easy to fit on the corner rail. It looked so good I went back and removed the staples from the door rails and just wet the curved sections. Great results."
 Wrapping and attaching the leather cover starts off easy, but gets a little tougher later. Before installing the first staple you need to hold the fabric roughly over the rail to see approximately how it needs to be aligned to cover the whole length, including the front contour, without having to stretch the fabric to much latterly away from the center line of the rail. Then I like to start in the middle of the rail and work toward the ends. The straight tail end is easy, while the contoured part in front is more difficult. I start by attaching the fabric at one side (generally the side adjacent to the inside of the curve) with staples off center, then trim the fabric back to the center of the rail. Then I wrap the fabric all the way around the rail and staple the opposing edge, also off center, followed by trimming the fabric again back to the center line. This way it ends up with only a single layer of fabric underneath after the initial wrap, and less stapling on top of other staples. You also need to be conscious of not driving staples or tacks into the metal plates, and not putting staples or tacks too close to the edge of the wood where they might split out the side and pierce through the leather on the side of the rail.
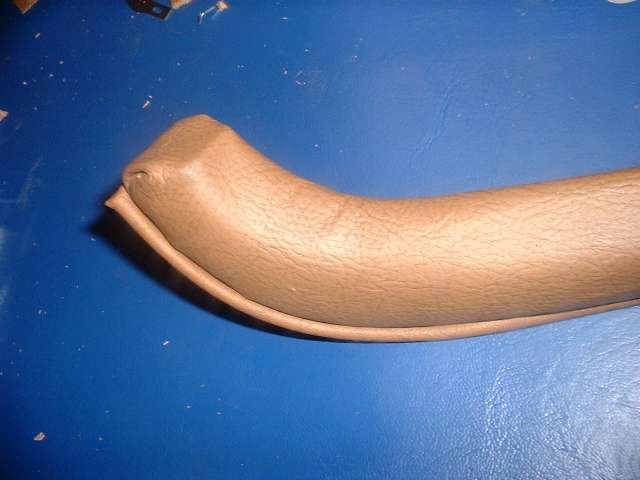
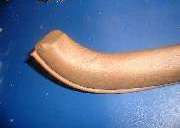
 Now fair warning, the tough part of this project is stretching the leather fabric to conform to the contour at the front of the rail so it can finish with no wrinkles (wishful thinking). It can be done if you have enough time and energy and patience. Your finger and wrist muscles will get a good workout doing this, and you may get a few muscle cramps in the process. You might enjoy a little TV viewing, and take a sweat break to the icebox to refill your favorite brew a time or two. Do try to keep your hands clean to be nice to the leather. You might also plan on doing the leather covering on only a single rail in any one evening or during any half day shift.
From the quote notes above, it will be easier to cover the contours without wrinkles if you soak the leather in water first. It may be sufficient to place the material face down on a clean surface and soak the back side for about two hours. This may require only an hour or so of diligent pulling and stretching, but you might spread the muscle cramps over a longer period and do something else during the rest breaks. Do not rush the job. The leather will continue to stretch a little at a time until it may stretch quite a lot. But trying to manhandle it and stretch it a lot all at once may rip apart the leather fabric or your fingers, whichever gives first. For assistance of tools, a good side gripper pliers might help, but be very careful not to tear the fabric with sharp edges of the tool, and don't grip the fabric anywhere that may be visible on the top side of the rail after installation. This materials kit came with plenty of extra vinyl, but no extra leather, and you really don't want to have to start over.
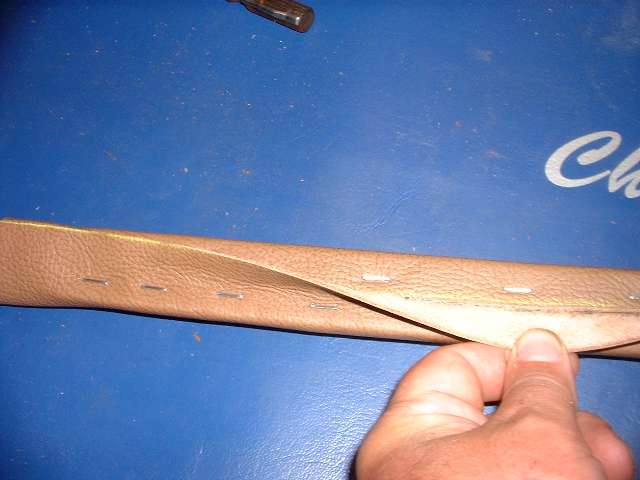
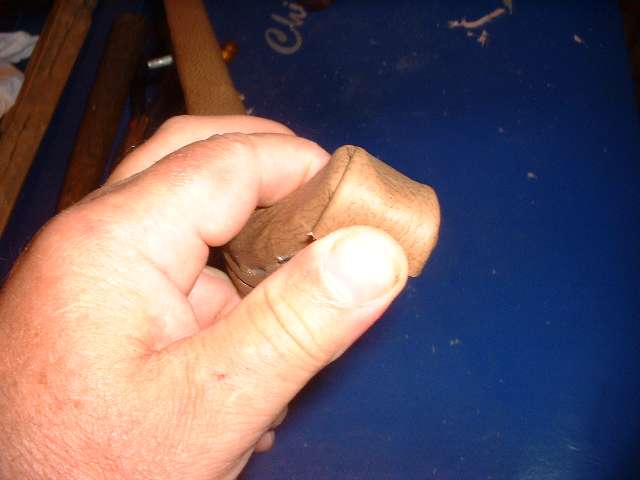
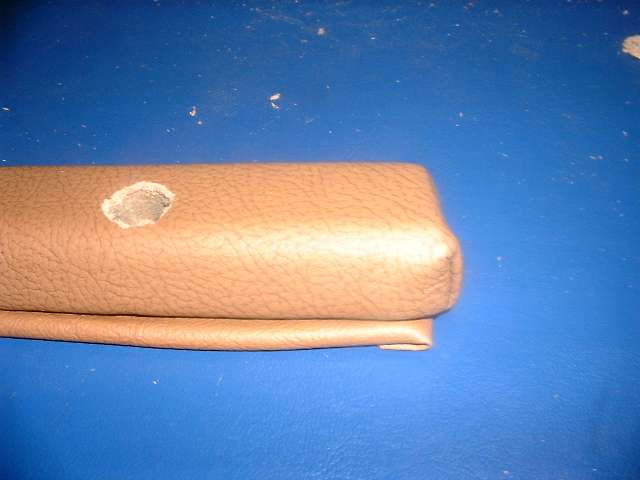
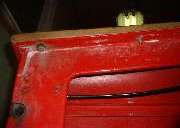
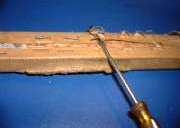
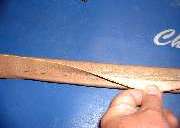
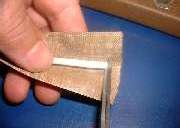
 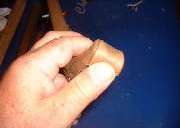 Covering and closing fabric at the ends of the rail is a little like gift wrapping. Fold the bottom edge in first, then the sides, and then fold the top down last, continuing the final wrap around to the bottom where it can be secured with a single staple. Again, don't be in too great a rush, and you can figure this out as you go. With a little judicious trimming around the bottom corners, you may be able to stretch the leather enough there to avoid the first fold back and the extra layers of fabric that would go with it. Make the final end flap a little narrower than the rail so you don't have overhanging leather edges. You can use a small screwdriver to help tuck in the little folds at the sides so they become more flush. When it's about finished it should look like the picture where I have my thumb right where you want to put the last staple, but don't staple it just yet.
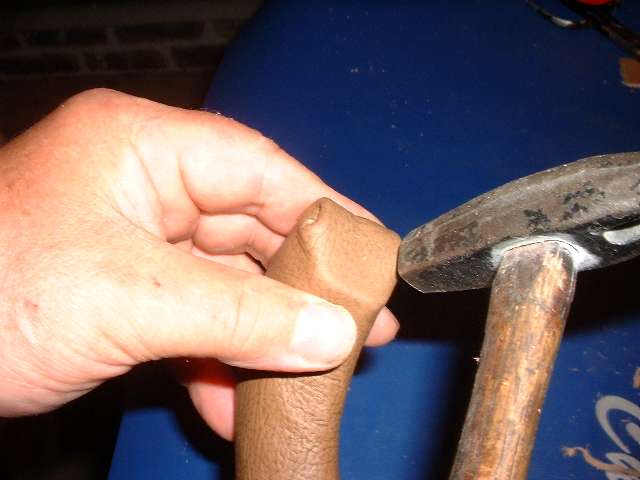
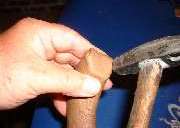 A little gentle tapping with a light hammer can do wonders for smoothing down the folds and edges of the leather. You can tap on the side to push the pucker in a little. You can tap on the end to flatten the folds. Tap gently on the flat faces to avoid burnishing the surface, and avoid hammering at an angle on the corners to avoid mashing holes through the fabric. When you're satisfied with the appearance, push the last tab snugly around the bottom, install the final staple or two, and trim away any excess material.
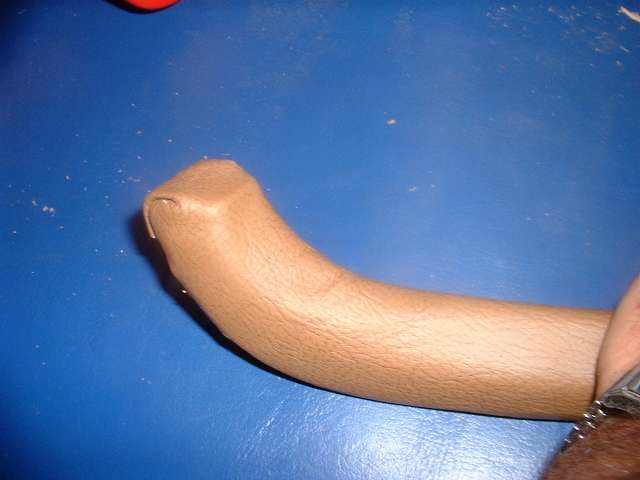
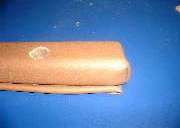
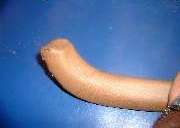 Yes, I know I left one little wrinkle in the top, but call it character. I suspect that most MGA left the factory with more wrinkles and puckers than this. It might be fun convincing a concours judge that any car without a few wrinkles in this area should have points deducted. Lots of luck with that argument, as most concours events award extra points for being nicer than original. While the fabric wrap is still fresh, you can smooth out these little puckers considerably by rolling a hard rubber ball over the area with firm hand pressure (kid's game Jacks ball or a small Super Ball).
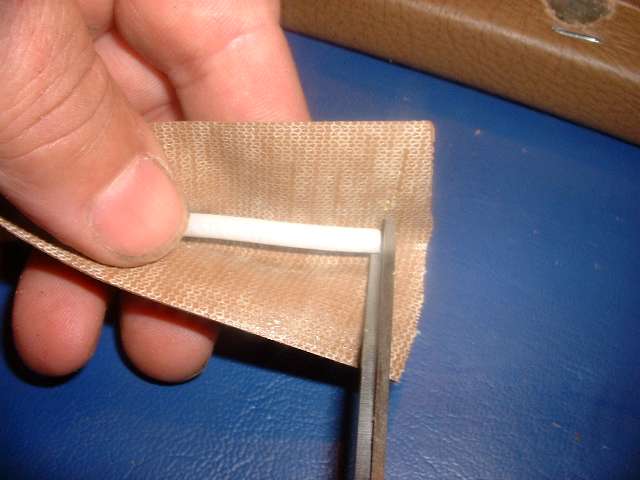
  Okay, with both ends wrapped the rest of the job is much easier. Use a razor knife to trim the fabric out of the hole top and bottom where the socket fitting will be installed. Then the piping piece needs to be installed along the outside edge of the rail. Start by trimming the core piece of the piping back at least 1/4 inch inside from the end of the jacket material, then fold the material over to form a closed end.
  The piping should be positioned firmly against the outside corner of the rail, flush on the bottom side. When you lay the rail down on a flat surface, the piping should be snug against the side, and should not be holding the rail up with any gap underneath. Do not attempt to run the piping around the ends of the rail, as it would only interfere with allowing the adjacent rails to snuggle up end to end with minimal gap in final assembly. It will look best if you terminate the piping about 1/8 inch short of the end of the rail so it doesn't leave an exposed corner that might rub off to look bad later. The piping belongs on the outward exposed side of the rail only, not on the inside. Starting at one end, staple the piping to the bottom of the rail. For termination at the other end, cut the material a little long, then trim back the core piece to about 1/8 inch short of the end of the rail. Finally fold the last end over and tack it in place, trimming off any excess.
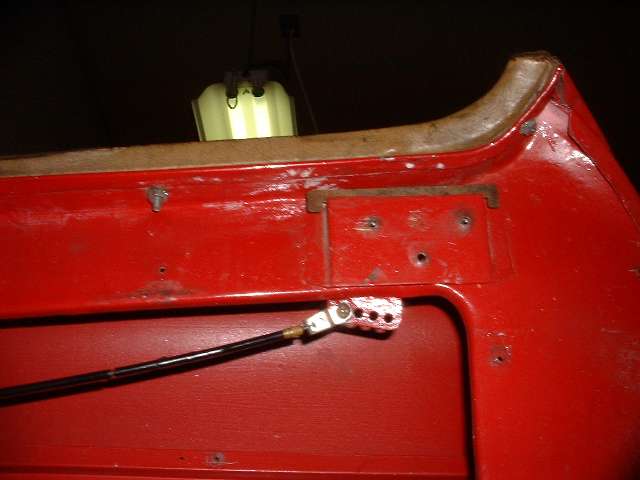
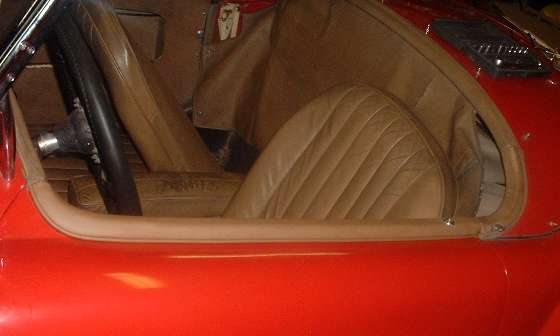
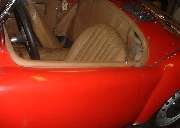  Here you have the final reward with the part installed on the car. The rails should be aligned such that when the door closes the ends of the rails approach as near as is practical without actually touching. The mounting holes in the body panels are a bit oversize, and you may recall those floating studs under the wood rails. So you have some freedom to move the rails around a bit on the body before tightening the nuts underneath. Even the post socket at the back of the door rail should have some clearance in the hole in the door panel, which is why it needs the flat washer underneath. You might even use an over-sized flat washer here, and maybe trim the sides to make a double-D washer to fit the space allowed.
Do not try to hide the painted top edge of the door shell on the inside. Aside from that being a futile effort, this is a character line for the MGA Roadster. You may also have your choice to paint the door panel stiffener bar to match the color of the panel, or to match the color of the body as another character accent line. This goes well if it matches the color of the piping on black seats, which would originally have matched the body color of the car. This applies to black seats only, as other colors of seats had the piping color matching the rest of the seat fabric.
Addendum, March 2015:
On 3/4/2015, Steve Miller !- wrote:
"I spent many hours fitting my wood and aluminum rails to my doors. I noted that the chrome plated brass 'socket bolts' that hold the rear of the rails were coming up a bit short. But, without the full covering and piping installed, my length assessment was a bit off. My new wood rails were built a bit large in both width and height. I adjusted the dimensions to fit the door, then to fit the aluminum front rail. It also required a bit of planing and thinning to get the rails to sit properly on the doors. But, as I try to do the final assembly, I find the sockets short. At this point, after some work, I have a few threads engagement on the lower nuts. This meant some compromises and no lower washer at all.
"I would recommend that when working these parts initially, if there is any concern over the height of the wood and the length of the sockets, that the builder use a spade bit in a vise and drill press, to form a well for the head of the socket after covering. This would be minor, but could be as deep as 1/8 in. to help provide more thread length below, and should be a bit larger in diameter than the socket head. The covering would then just get pulled into the new counter bore, and not be visible. Otherwise, the overall rail should be planed down to gain this dimension. I am quite certain at this point that the originals (which I did not get with my car) are somewhat thinner in both dimensions than the repros. Just one more thing to be aware of as assembling the rails".
|