The MGA With An Attitude
DOOR SEALS - FurFlex, correct -- INT-108B
Step #1: Go to the Clarke Spares & Restorations web site and read the instructions for installing this door seal. The page below is supplementary to the Clarke Spares instructions.
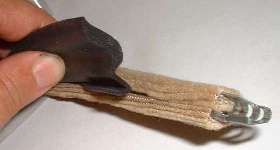
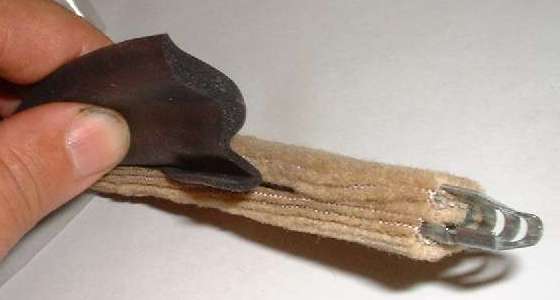
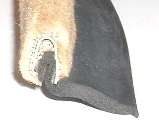
 Click for larger pictures. The picture above left shows the FurFlex door seal assembly as received from Clarke Spares. The picture on right shows the fuzzy cover material unwrapped to expose the flexible steel spine. Note that the spine is asymmetrical having a short flange formed inward on one side. The soft rubber seal piece is also asymmetrical having a curved back and fold on the insert edge. The edge of the rubber fold will be tucked inside the flange of the spine. If you receive these parts disassembled (from some source other than Clarke Spares) you can press the folded edge of the seal into the fur covered shell using the blunted edge of a wide putty knife, being careful not to tear the foam rubber.
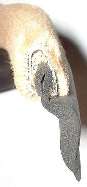
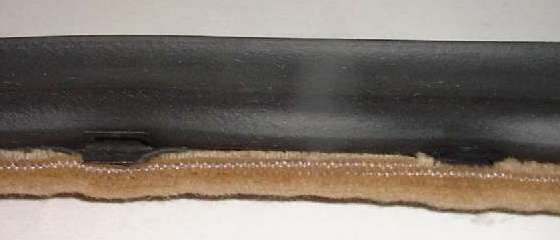
 Here we have two end views of the seal as assembled. The first view shows the rubber seal in its relaxed state. The second view shows the seal deflected by 90 degrees. When installed it can and will assume these shapes and anything in between depending on the configuration of the car body at the point of installation.

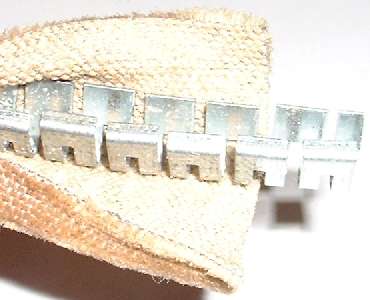
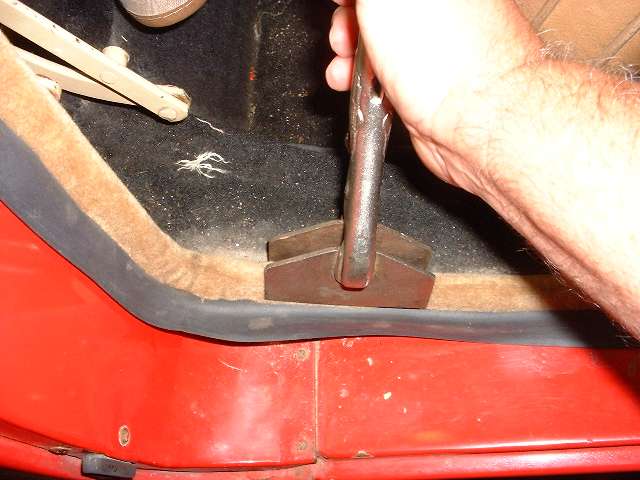
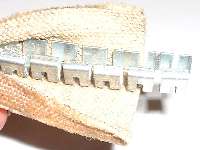
 At left we have pictures of the steel clips which are to be installed inside of the assembly. These parts are a symmetrical flared "U" shape with the small triangular points formed inward to grip the steel body flange. If you receive your parts with these pieces loose, you can install the clips by pressing them into position with the edge of a putty knife after the rubber seal is in place.
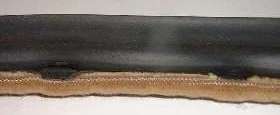 One edge of the clip will snap in under the flange on the spine. The picture at right shows two clips installed. The clip on the left is not quite all the way in and has the edges showing. The clip on the right is all the way in place and has the edges completely hidden after snapping in under the flange of the spine. Starting at the seal end which will be at top of the latch post, put the first clip two inches from the end of the seal. Then install 20 more clips at three inch intervals. This arrangement will have the clips positioned to either side of the two bottom sharp bends, not in the corners.
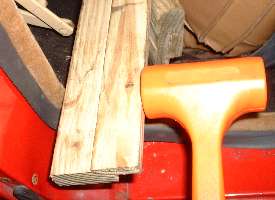
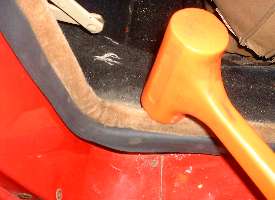
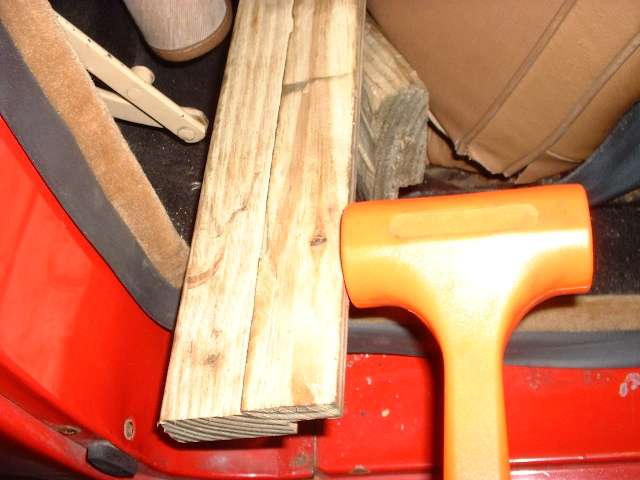
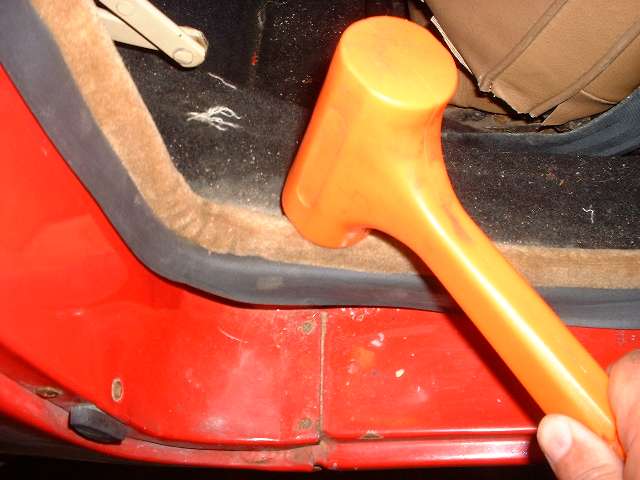
The Clarke instructions say you can push the seal onto the body flanges with your hands, and that you shouldn't hammer on it. The vertical runs where there are only two layers of sheet metal (0.096" plus paint) go on easily with a gentle push. However, where there are three layers of metal in the flange at the bottom (0.144" plus paint) I found a bit of a nudge with a light plastic faced dead blow hammer was the proper finesse. Where I wanted the seal to make a nice tight turn at the sharp corners I used a wood block in the corner with a few gentle thumps.
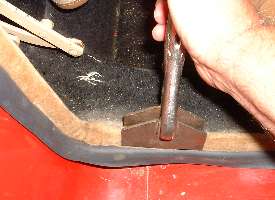 If you apply any more than minimal force with the hammer it may flatten the curvature of the back of the metal spine in the seal causing it to spread wider at the sides. The sides of the furry shell would also spread some where I made the abrupt bend in the sharp corners. Where the shell opens up it looks fat and a little strange in local areas. If you hit it hard enough in the wrong place the retaining clips might spread open and lose their grip on the steel body flange. I found an expedient solution to the issues of shell spreading by pinching it back in to normal width using a wide jaw flat face clamp. This gave a nice uniform width with parallel sides on the fuzzy shell.
 Running my fingers over the fur afterward fluffed it up to bring back the original uniform fuzzy appearance.
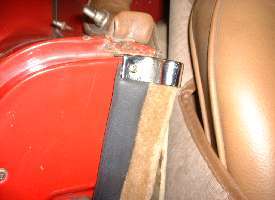
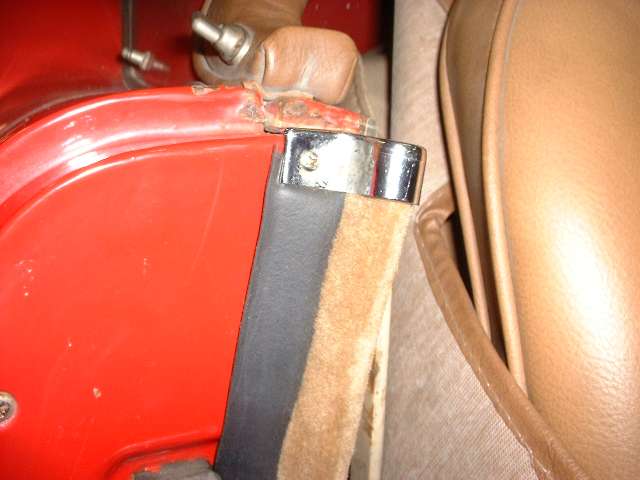
Once installed this makes a very neat trim. The picture above shows the rear end cap installed. If you are particular about appearances you can use a razor knife to trim the exposed corner of foam rubber at the end cap. Since the protrusion is minimal here, you might be able to push the edge of the seal back underneath the end cap while tightening the screw. Picture at right shows the front end cap installed. Here I found it reasonable to trim back the edge of the rubber lip with a razor knife at a slight angle so it will not protrude past the body corner. This may be a matter of personal taste. (Yes that is a good shot of the fused DC power jack and the navigator's desk).
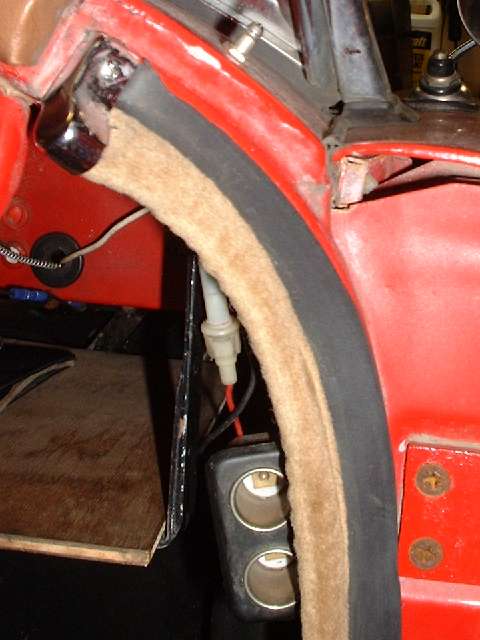
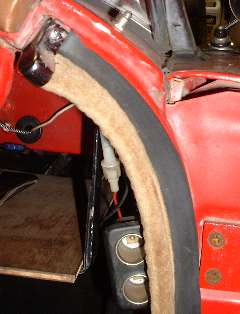
Picture above left shows how the rubber flange will stand outward from the vertical body plate where it makes the rear turn when first installed. This is no problem at all. The run up the vertical post has the rubber at right angles to the body flange. The run just ahead of the turn wants the rubber to lie flat in the same vertical plane as the body flange to lie against the inside surface of the door trim panel. A little farther forward it transitions back to lie again at right angles to the mounting flange along the bottom of the door. When the door is closed the rubber will take a set in the correct desired position. Picture above right shows the condition of the seal after the door has been closed against it for one day.
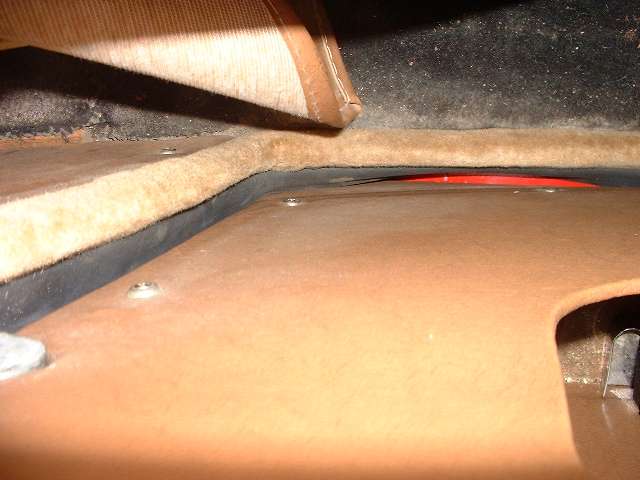
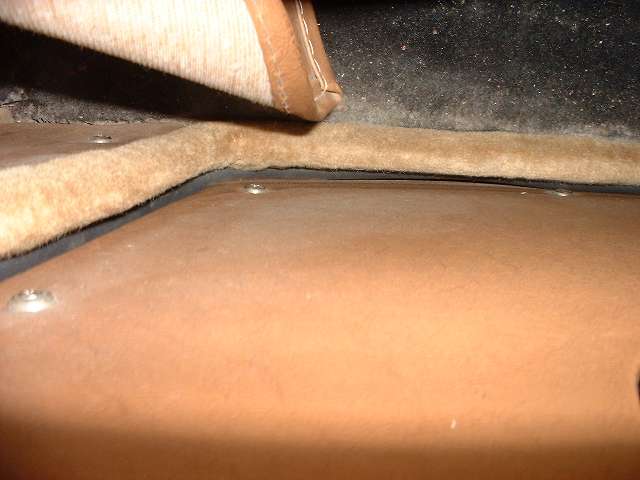
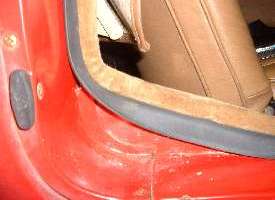
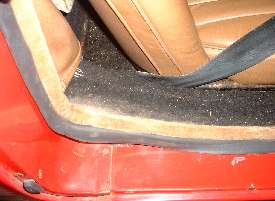
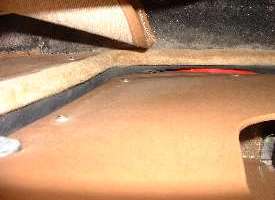
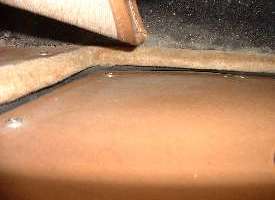
Now here is the real pay-off for this effort. Pictures below show an inside view of the door looking down at the seal at the bottom rear of the inner panel. The picture at left is with the door on the first position of the safety latch, not completely closed. The picture at right is with the door fully closed and latched.
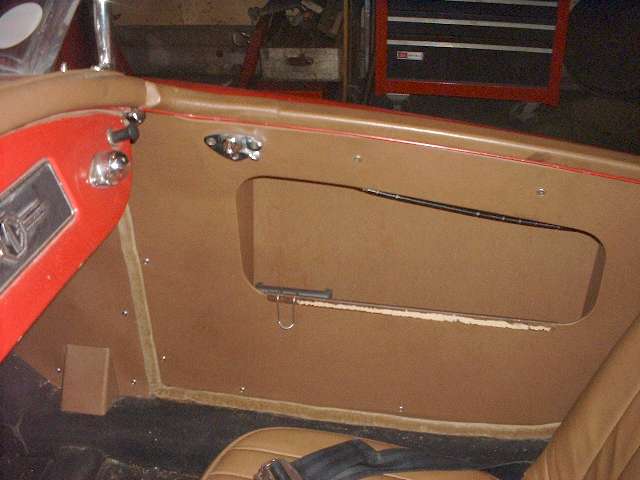
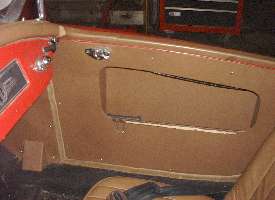 This last picture is a view of the final installation from inside. I am happy to
report that it closes easily, and that I can lean against the back edge of the door to make it latch without slamming it at all. The rubber seal makes good contact all the way around with no gap anywhere. Since I can now close and latch the door with a mild pull with one hand I have hopes that there may be no more popping of the latch on rough roads. This is looking pretty spiffy, so now I need to paint the panel reinforcement bar again.
This last picture is a view of the final installation from inside. I am happy to
report that it closes easily, and that I can lean against the back edge of the door to make it latch without slamming it at all. The rubber seal makes good contact all the way around with no gap anywhere. Since I can now close and latch the door with a mild pull with one hand I have hopes that there may be no more popping of the latch on rough roads. This is looking pretty spiffy, so now I need to paint the panel reinforcement bar again.
Addendum October 13, 2018:
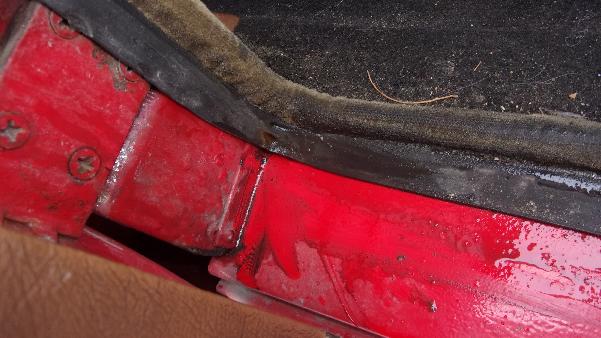
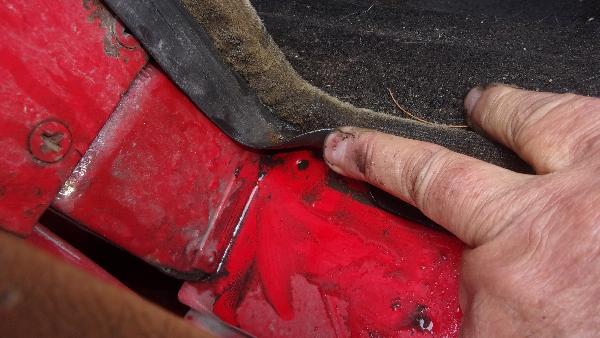
Someone asked about the purpose of a hole in the top front of the rocker panels near the inboard flange. By coincidence it happened to be a rainy day when it was appropriate to take these pictures.
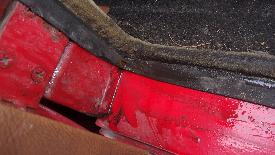
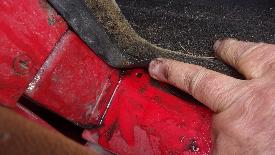
If you use the correct original type door seal, this hole is mostly covered by the rubber wing on the seal, so you don't see the hole in final assembly. The hole is there to drain water that may be trapped behind the seal, running down from the top. The drain hole lines up with a matching (slightly larger hole in the inner body sill box panel, so the water can drain out the bottom of the body sill.
|