The MGA With An Attitude
MG ENGINE PAINTING - PT-101
When the question arose, "What kind of paint do you like to use for your engine components?", it soon led an extended discussion of paint type and colors and techniques for cleaning and painting the engine. The meat of the matter is reproduced here for your consideration.
And the answer is, acrylic enamel, the same stuff you might paint the body with. For the engine you don't need the (expensive) hardener component for the paint because it will heat cure when the engine runs. The catalyzing hardener may give it a more glossy appearance (if that's what you have in mind). I also don't bother to prime the engine components, but you have to get it all especially clean before painting if you want the paint to stay on. Enamel sticks quite well to the rough cast iron engine block, and moderately well to the smooth sheet metal covers. If you're especially concerned about long term appearance of the paint you might consider using an epoxy based metal primer, especially on the detachable sheet metal parts.
When repainting an old engine you want to remove any loose paint and flaking rust with scrapers or abrasive means. Freshly rebuilt engines are usually hot tanked in the engine shop to remove all paint and rust. I start by washing it all down with gasoline (think safety) to remove any oil, and then wash it down with lacquer thinner to remove the remaining gunk and grit. The lacquer thinner dries quickly and completely, leaving nothing behind but a pristinely clean and dry surface. Then you want to paint it immediately before it starts to rust.
For an engine that has been previously painted, where it is in fairly good condition and is to be painted over, the important thing is to get it all clean as possible before repainting. Painting over dirt or oil is guaranteed to allow the new paint to eventually peel or chip off. Start by cleaning the engine with a good degreaser. Given enough time, mineral spirits will generally soak out and dissolve old dried on grease and oil. Gasoline is a lot quicker if you don't mind working with the stuff in the open air, but plenty of ventilation and rubber gloves are advised, and of course stay away from any sources of ignition while you're doing it. Old engine dirt can be stubborn stuff, so I like to use a tooth brush to scrub in all the little nooks and crannies. Take your time here, as most of the quality of an engine paint job is all a matter of how clean you can get it before the paint is applied. Again I like to finish it off with a quick rinse in lacquer thinner to remove all traces of any oil or cleaners. The lacquer thinner will evaporate leaving the surface absolutely clean and dry, and you want to paint it immediately before it starts to go rusty on any spots of bare metal.
Engine dark red is Ditzler DQE 50782Y, but don't bet on your local auto paint supply store being able to find the mixing formula for this code. I wasn't that lucky, but I do have my own way. The first time around I bought a can (one only) of engine paint from Moss for the color reference. For a fresh engine you may need at least three spray cans of paint. Darned expensive that way, especially if you plan on repainting the engine more than once. I usually end up painting it every two or three years when it's out of the car for some other reason. I painted some of the loose parts with the spray can first, then took one of the painted parts to my local auto paint supply store. I had them color match the paint and mix up a pint of acrylic enamel, which with some reducer is enough to paint the engine several times over, and it cost about as much as two aerosol cans (but getting more expensive with time). As I have been doing this for many years I have had that pint can refilled a couple of times, but I don't like larger quantities that might sit on the shelf for more than about five years before use.
It's easiest to paint the engine when it's on the engine stand. (A cheap engine stand is about $40). Remove any parts you don't want painted the same color, like starter, generator, engine mounts, distributor, thermostat cover and tach drive. Remove any parts that you can't paint behind and paint those separately, like the steel engine mount brackets, the crankshaft pulley, water pump pulley, and the draft tube on the front tappet cover. Either tape over or remove the valve cover ID plates, and (maybe) also the engine number plate. Tape over or plug anything that should not be painted, like the gasket surfaces for the manifolds on the cylinder head, the thermostat mounting location, tachometer drive mounting surface, distributor mount, and any threaded holes. Paint the engine as an assembly including the rear plate (if it's attached), timing cover, head and valve cover, tappet covers, and oil pan.
The engine was originally painted in assembly with engine mount brackets, engine rear plate, front plate, timing cover, crankshaft pulley, water pump and pulley, oil filter canister and the oil pipe from block to filter mount, oil pan (sump), tappet covers, valve cover with all of the mounting hardware in place, thermostat cover and intake manifold. Do not paint the front face of the engine rear plate where it mates up with a gasket to the back of the engine block. This is of no concern if it is painted in assembly with the engine block, but if painted separately the rear plate should be masked off in the area of the gasket. Also do not paint the rear plate where the starter motor mounts, because the starter needs a good electrical ground to work properly. For this I put masking tape over the whole area in the vicinity of the starter mount, put the starter motor in place against the plate, trim around the starter motor with a razor knife, and peel off any tape that is outside the area of the starter motor. When the painting is finished and the tape is removed this leaves a nice bare spot exactly the same shape as the face of the starter motor. The same technique can work for the gasket area on the back plate when being painted separately from the engine.
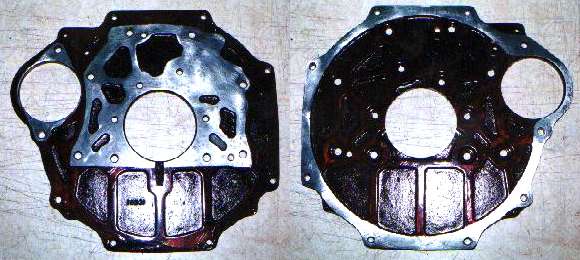
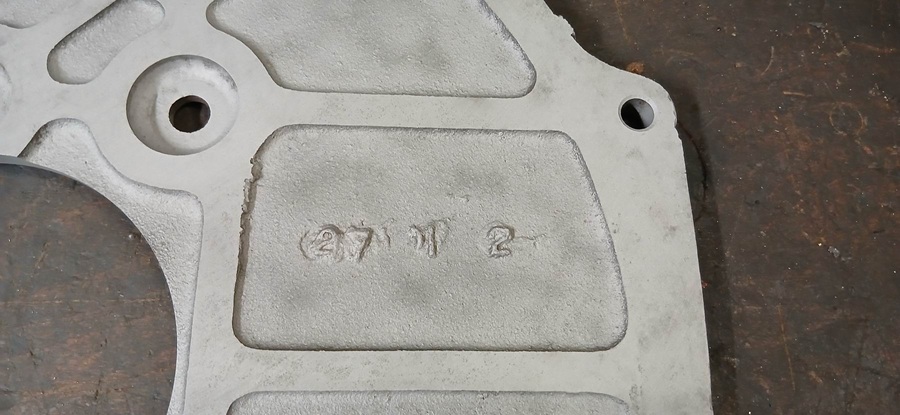
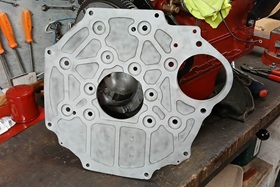
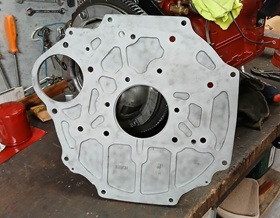
Okay, so sometimes a labor of love becomes a work of art. Not that anyone would ever see much of this when it's installed, but it was cute at the time. This is an engine rear plate for an MGA 1600 with the high starter position and the counterbored holes for the mounting bolts. These parts were normally flame cut from a flat plate, and were flat faced on both sides except for the counterbored holes for the bolt heads. This part was found with (not assembled) a 1960 Elva Courier which used the MGA 1600 power train and suspension parts. Notice the indentations in the face of the plate for lightening (both sides), indicating that this part was cast to shape rather than flame cut from plate stock. This saves considerable material (and machining) in manufacture and makes for a slightly lighter part. I do not know when the production changeover occurred, if this is a late production MGA part, a MGB 3-main bearing engine part, or something that was made special for the Elva to reduce weight.
Addendum July 17, 2025:
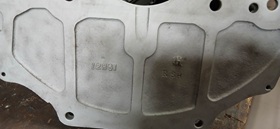
Franck Boulen wrote (with the following pictures):
I just got one from a 1622 engine. I have an MGA 1600, and the cast iron backplate is exactly the same as the sheet metal one, except for two small holes at the top near the starter".

Other loose parts such as engine mount brackets, belt pulleys, generator brackets can be painted separately if you're particular about getting into all the partly hidden surfaces. The factory was not originally so particular and just painted the whole engine as an assembly, including having all the brackets and pulleys attached.
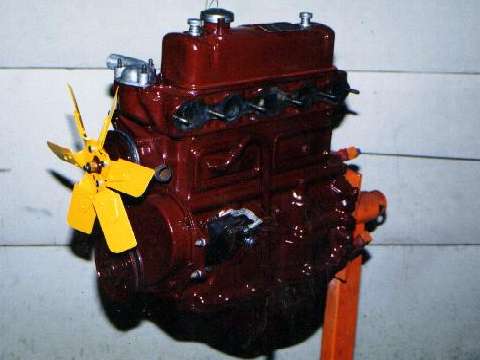
The engine picture above is nice, but otherwise I'm not really that picky about a show car detailing job. I just like to drive the thing, so form follows function. I paint the engine to keep it from going rusty, leave the iron exhaust manifold as cast, and leave any aluminum parts as cast (cleaned but not polished).
Additional sources for MG dark red engine paint:
Ditzler - "Reno Red" - DQE 50782Y
Dulux Enamel - "Reno Red" - DAY
Duplicolor - "Dark Canyon Red" (very close)
Eastwood Powder Coating: MG Maroon
Krylon - "Maroon" (close)
Moss Motors - "Moss Dark Red Engine Paint" - 220-540
POR 15 - "MG Maroon"
RM - E3123M
Note: MG TD & TF is a darker red, more brown tint.
|