The MGA With An Attitude
Body Sill Replacement - RT-613
First Spot Welding
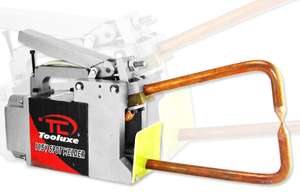
After a long delay when the first shipment was lost, my new spot welder finally arrived. I spent an hour aligning the welding tips, making a few welds on scrap sheet metal, breaking the welds with a BIG hammer and chisel, then making and breaking a few more welds. When I was happy with the weld strength and consistent quality, I moved on to welding the inner sill panels, making three pieces into one for each side.
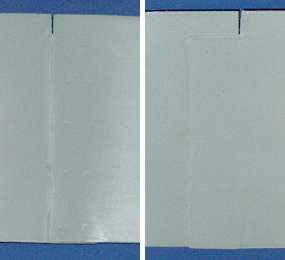
Before spot welding the inner sill panels, I cleaned the panels with lacquer thinner, dried completely, and sprayed zinc-rich weld-through primer on the mating surfaces in the weld zone. After 15 minutes minimum drying time, I lined the panels up on the car body again, clamped securely in place. I made a few spot welds where there was available access near the bottom edge, then carefully removed the panel assembly with inter-panel clamps still attached, and finished spot welding off the car. End result is perfect fit front and back, now being all one piece.
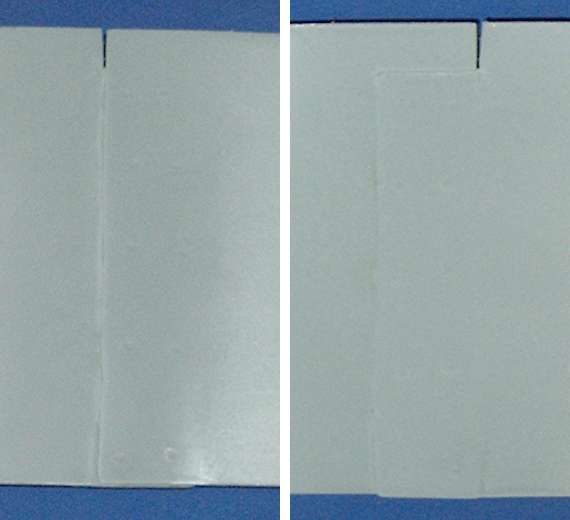
 After spot welding I decided to remove all small burrs from the welds with the mini air sander to assure against paint break-through that might promote future corrosion. Spot welds can start to oxidize instantly after spot welding when the surface metal is still bright hot, even before the welding tips are separated from the work piece. So after deburring I sprayed a thin coat of the zinc-rich primer over the weld zone on both sides of the part. This is almost a trick picture with camouflage (at left). It left shows both sides of the same panel joint after deburring and painting. If you have keen eyes you may make out ten spot welds in two rows of five. Aside from the spots and paint, the assembled panel still looks much the same as before welding (a few pages back).
Caution: It is possible to cause some warp in the panels when placing a number of welds in a small area. The weld spot will be bright hot and soft at the instant of highest welding heat. If the weight of the welder is supported by the panel, or the weight of the panel is supported by the welder, the soft weld spot can be pushed slightly out of plane from the force. Several welds made in the same area with the force in the same direction can result in a slightly bowed panel. In my case this was easily fixed by placing the part across a bridge of two boards with a gap between, and tapping gently with a heavy hammer. Having seen this problem once, I was more careful the second time to support the weight of the panel during welding, in which case warpage was virtually nil. (25 Jan 08)
|