The MGA With An Attitude
Body Sill Replacement - RT-624
Rocker Panel Installation, A Touch of Red then Gray
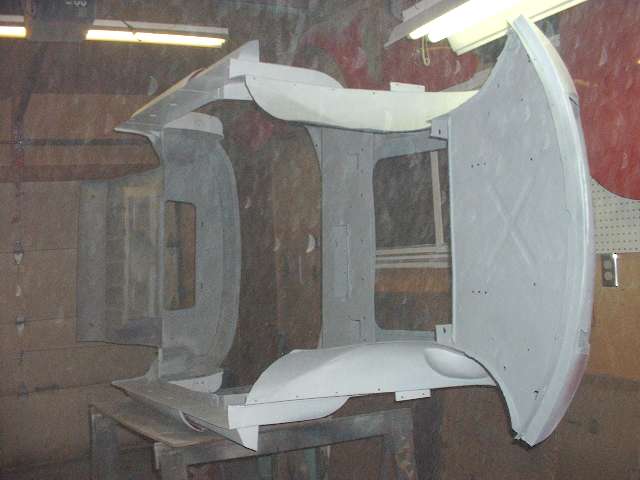
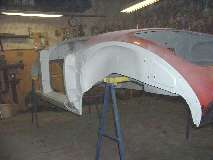
Early morning the underside of the boot floor, heater shelf, and front air pan were given the second coat of Chassis Saver, last of the black on the main body. While that was curing I took a break to attend a club tech session getting a new engine installed and running in an MGB. Then late afternoon the body was turned right side up on the saw horses for the next step.
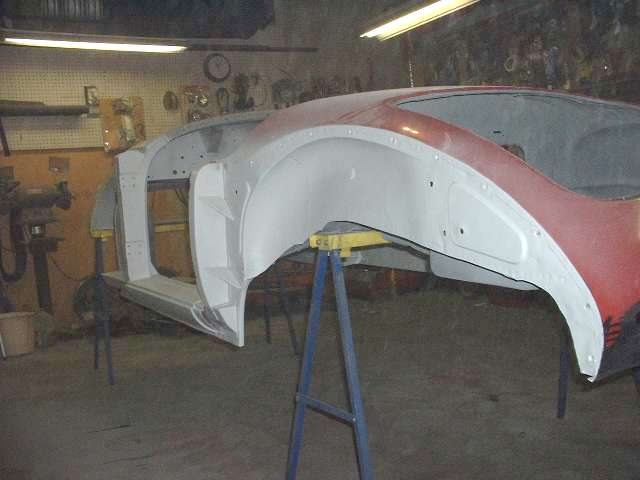
 There were a couple of tricks to fitting the new rocker panels. Click on picture at right for larger view. Notice the flanges do not lie in a common plane as they should for attachment to the mating flat surface. This has an easy fix. Clamp the flange in a vice and push on the body of the panel until the opposing flange is in the same plane. Ditto for the other flange. The next issue was the mouth of the part (distance between flanges) was a little too wide open. Solution there is to push the flanges together hard with two hands to reduce the height of the part to match the height of the body sill. That's it, maybe five minutes for each part to make them fit flat for welding.
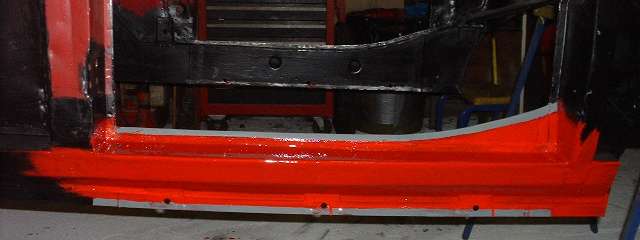
Note that the top bend of the rocker panel fits above and possibly touching the flange of the box panel in the body sill. In my case I clamped the rocker panel gently in place, then tapped the top edge down until the bend hit the top flange on the box panel, then welded it in place. This may call for a little trimming of the top flange of the rocker panel, especially at the back along the curved top edge. For the bottom flange, just push it up flush with bottom of the sill, clamp it and weld it in place.
The MGA body has some substantial positional tolerance for parts in the welded assembly, so the door posts are likely to vary a bit in spacing. If the rocker panel is a bit too long to fit between the posts, use a flat faced body hammer to hammer on the flange bend directly in line with the top surface of the panel to modify the bend and shorten the distance between flanges. If the panel is a bit too short to fit between the posts, you can use a flat faced punch and hammer the flange as close as possible to the bend to extend the length slightly. Once the panel is welded in place and the end flanges are pop riveted, you can use the flat face punch to gently seat the end flanges against the posts for best appearance.
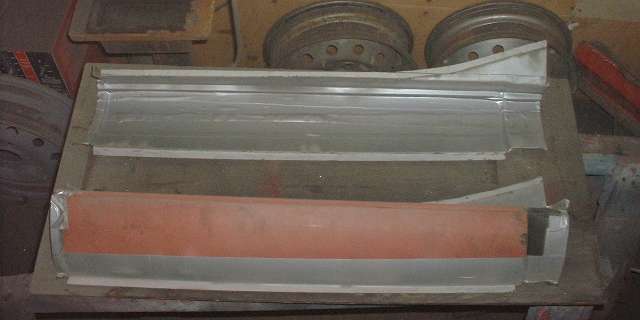
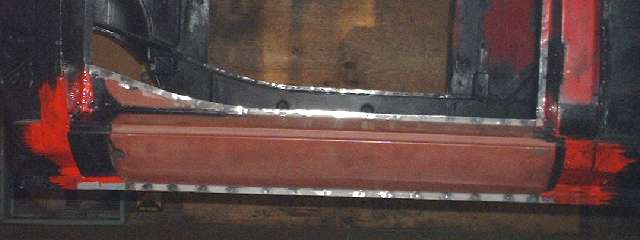
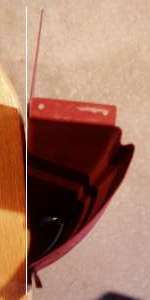
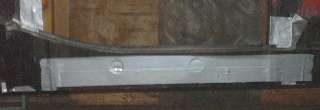
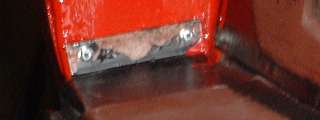
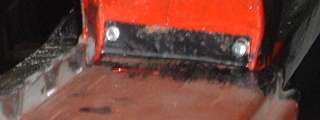
Inside of the new rocker panels was given two coats of Chassis Saver (a couple days earlier), similar to 30 years ago, as well as the outside at the end flanges where the fenders overlap. That last bit is a lesson from the School of Hard Knocks, as the 30 year old rocker panels had started to rust through at the rear where the rear fender dogleg would trap dirt and moisture next to the rocker panel. The entire painted inside surface and part of the outside was covered (masked) with Duck Tape, leaving 1/2-inch of the top and bottom flanges exposed inside and outside. The flanges were then sand blasted both sides to remove the paint down to bare metal (photo below left).
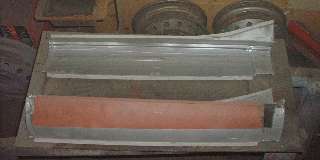

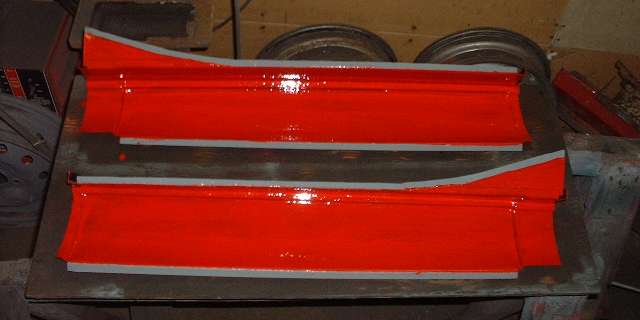
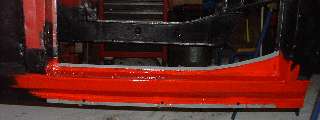
Before the tape was removed, the inboard side of the flanges were sprayed with the zinc-rich primer (2 light coats) in preparation for spot welding. Then the masking tape was removed, and inside of the panel was brush painted with finish coat red, being careful not to paint over the Zinc coated weld zone. This is partly due to my sense of humor showing through, with a slight ulterior motive. End result is picture above right.
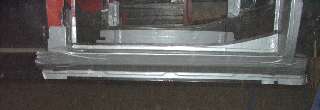
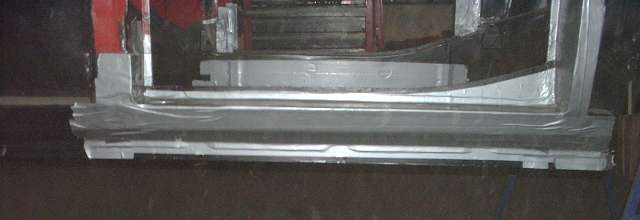
Next came similar preparation for the body sills. Area around the top and bottom flanges at the door opening was masked with Duck Tape, leaving about 1/2-inch of the black painted metal exposed inside and outside (photos above). The exposed flanges were sandblasted to remove the paint to bare metal, and the outboard side of the flanges were sprayed with the zinc paint in preparation for spot welding. Then the tape was removed, and the outboard side of the sills were brush painted finish coat red, being careful not to cover the zinc paint in the weld zones (photos below). This was not as much extra effort as you might think, since the masking and sand blasting was being done for spot welding anyway. It didn't take very long to brush paint the surfaces that would ultimately be hidden inside the rocker panels. Having fiddled with the sand blaster to remove the paint for this little job, I'm pretty sure it could have been done easier with the mini disc sander. (22 Mar 08)
Next day, before installing the rocker panels, the body was up on edge to swab Chassis Saver paint inside the A-posts again. I must have gotten enough in there this time, because when the body was set flat the black paint was dipping out the bottom of the A-posts for a couple of hours. Better too much than not enough.

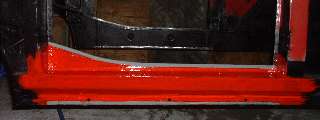
The rocker panels were then clamped in position and spot welded in place along the top and bottom flanges, and the spot welds were quickly deburred with the mini air sander. Using guide holes already in the new rocker panels, 1/8-inch holes were drilled in the posts, and pop rivets were installed, two front and two back on each side, as original. These photos were taken just moments before I applied a coat of Chassis Saver paint to the new weld joints and all bare metal.
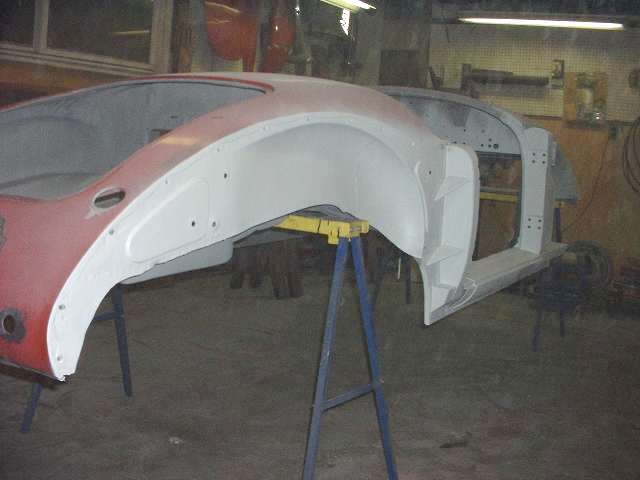
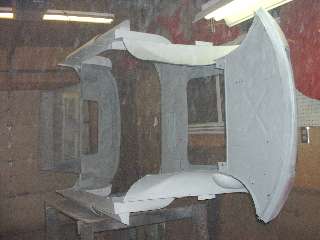
In the photos above a sharp eye may notice a slight twist in the top surface of the rocker panels. They seem to have 8 degree side slope at front and 12 degree side slope at back. This is a function of the parts being narrower at the back while maintaining constant height on the top and bottom flanges and also constant height of the stepped shoulder that mates with the bottom edge of the door.
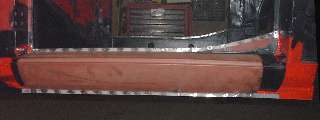
I don't do this very often, but I now have a personal endorsement to make. These rocker panels are absolutely wonderful for form and fit, including correct height of the shoulder at front and back. It seems someone paid for tooling to have these produced about 30 years ago, because other replacement rocker panels available at the time were all bad fit in one form or another. It may have been a year or two too late for me, as I bought my ill fitting ones in late 1977, or I didn't know these existed at the time. These parts came from Sports and Classics, Inc.
web site: www.sportsnclassics.com - - eBay store: http://stores.ebay.com/Sports-and-Classics-Inc
e-mail: sportsnclassics@aol.com -- Phone: 203-348-2226
As to that "ulterior motive" for painting the rocker panels red inside, maybe just a touch of superstition or personal preference. These were the only body surfaces left black with the prior restoration when the red paint was applied after the rocker panels were installed. Not this time. I will leave it for the next generation, and whomever might be the next person to disassemble or repair this body, to figure out how it was welded together AND painted inside. Chuckle. (23 Mar 08)
And the next day it was gray all under. Look, Ma. No more black!


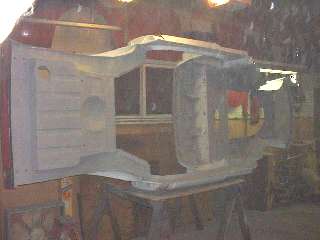
It wasn't absolutely essential to spray the underbody primer at this time, but it feels like a personal triumph and milestone, and it will stifle the urge to slap another brush full of Chassis Saver black on it. Nothing left to do under there now but to shoot it red (when the time comes). You may figure about now this is a golden opportunity to change the body color? .... Nah, not this time. (24 Mar 08)
|