The MGA With An Attitude
Body Sill Replacement - RT-625
Doglegs, Shutface, Other Repairs and Alignment
With the inner body tub repairs finished it was time to reassemble the outer panels and do a few minor repairs there. I was going to replace the outer skin on the left side door, but a friend gave me a replacement door in good condition, so I could skip that step. When assembling the MGA body, get the doors to work first, then fit the fenders around the doors. But before I could align the doors I had to remodel the pesky doglegs on the rear fenders.
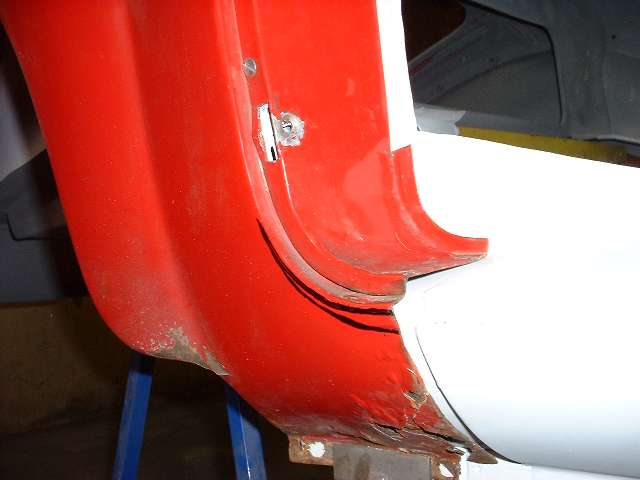
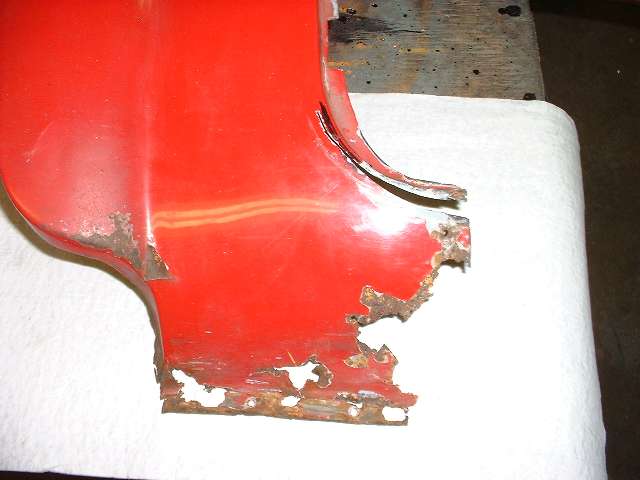
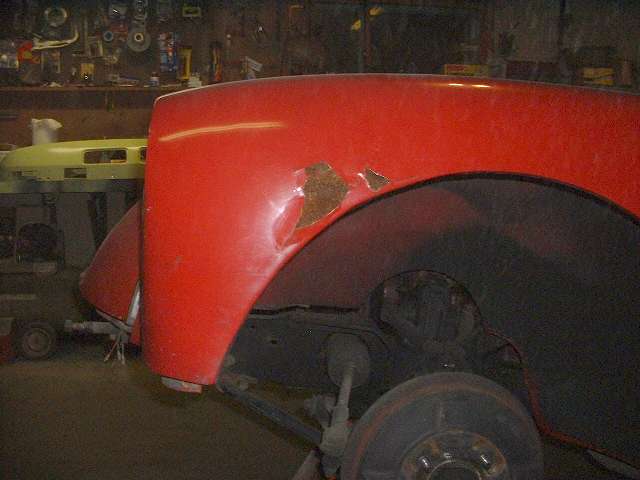
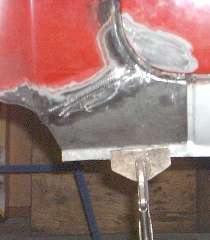
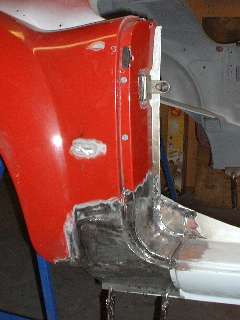
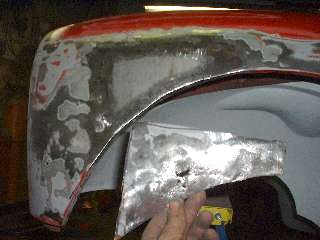
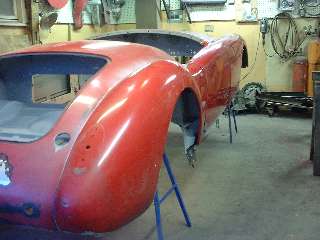
Notice in the first photo a couple of crescent shape black lines. This is the area where I added a bit of metal 30 years ago when the new rocker panels (at that time) were too tall. Now that I have replacement rocker panels that are the correct shape, I have to cut out that little section to make the old (modified) fenders mate up to the new sills. The second picture shows the crescent cuts easily made with the body saw (air powered mini Sawzall), and also some rust needing attention.
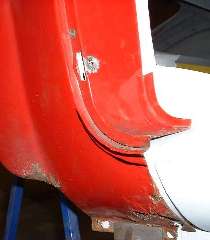
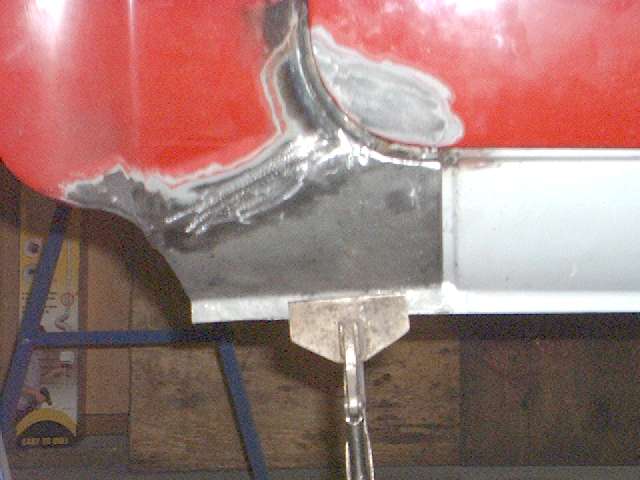
Third picture above shows the completed repair with butt welds ground smooth. The repair piece was made from flat stock, starting with a rectangle a bit larger than the finished patch. The first step was to bend a 90 degree flange on the front end, then continue to hammer it down flat to form a double layer reinforcement fold 1/2 inch wide at the front edge. I then set an old generator body on top of the vice and proceeded to form the nearly cylindrical curve using a flat face body hammer, sneaking up on the radius a little at a time until it matched the original panel. The trick here is to hold a dolly (for mass) on top of the panel at one edge to prevent it from bouncing up when you hit the panel with the hammer on the opposite side of the forming cylinder.
The bottom flange was done next by hammering it over an angle iron on the edge of the work bench. The angle on top (about 30 degrees from horizontal) was then cut in roughly the position where I would cut the fender, leaving a little excess material. The short curves at top front and bottom rear were drawn in to match the original parts, and those short flanges were hammer formed free hand over the corner of the vice jaws. The rusty piece was then cut out of the fender, and the mating edges of old and new parts were ground to match in correct position. The parts were then clamped in place for welding on the outside. Then the fender was removed for grinding and touching up the weld on the inside.
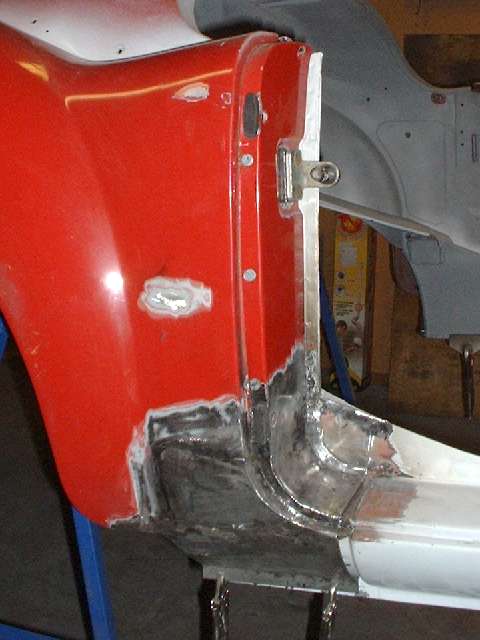
Chalk up one time consuming mistake here. While I was touching up the welds I discovered some old metal a little higher up that was abnormally thin. This was a bit of a surprise, as it seemed solid and polished out clean on both sides, but it was very difficult to weld without blowing holes through it. I finally decided to replace the metal a few inches farther up, so more cut and weld to install another patch without having to re-make the lower piece. End result is shown below left. The left side dogleg needed similar lowering of the top curve, but only the front 1-1/2 inches needed to be replaced due to rust.
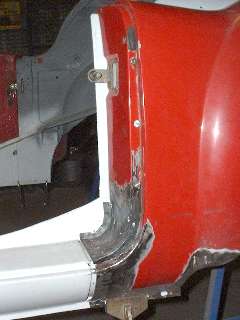
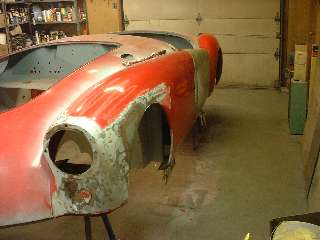
The next operation shown above was to reform the shut face panels (again) to match the new (original) shape of the dogleg and rocker panel. This was done by holding the panel in a vice while heating the panel until red in the area needing to be reformed, then tapping it into the new shape while still hot and soft. A couple of trips back and forth between the vice, torch, and car body got the shape right. Cleanup was done with the 2 inch disc sander.
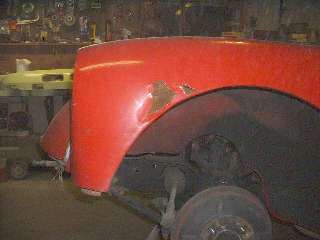
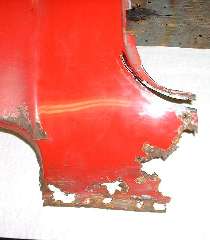
You might remember the picture above left from disassembly time (back on page 3). This called for some exploratory sanding to remove paint and filler to expose the surrounding metal. Photo at right shows the repaired panel and the piece that was cut out and replaced. A lot of the dimples were a result of at least two separate repairs in the 60's and 70's. The rust hole was a result of a bad repair (by someone else) with the last repaint ten years ago when it was bondoed over without welding up a crack. Other minor repairs included welding up a couple of cracks in bottom flanges of the rear fenders aft of the rear splash panels.
While aligning the doors I seem to have innovated another slick trick. I assembled the hinges securely with all screws but with no shims, leaving the door slightly farther forward than the desired final position. I tied/taped a thin steel wire to a piece of drill rod, suspended the drill rod between the hinge plates near the hinge pin, then pushed the door shut slowly, a little at a time, for the desired result. The drill rod holds the hinge slightly open while the force on the door pushes the hinge plates together. This bends the hinge plates a bit resulting in more space between the hinge plates, giving a result similar to adding a shim(s) to the hinge, but without needing a shim. It worked like a charm, but before anyone asks, I was prepared to buy a new hinge if I happened to break one.
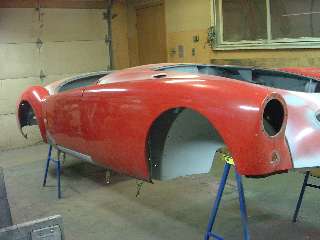
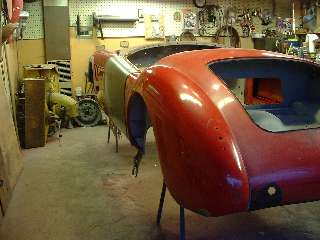
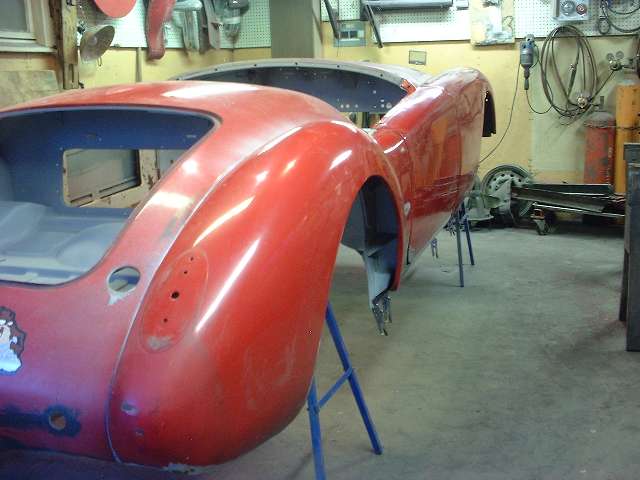
So there are the outer body panels all repaired and aligned. The body top cowlings have not been damaged or touched for repair, so the bonnet and deck lid will bolt up same as before. My next intended operation will be to strip off most of the "too many" layers old paint on the outside body surfaces. No chemicals or sand blasting, this time I will try a belt sander to see how it goes for speed and convenience, being very careful of course with the aluminum skins on the moveable outer panels. (3 Apr 08)
|