The MGA With An Attitude
MGA Guru Is GOING MOBILE - (January 1 - January 15, 2020)
Wednesday January 1, 2020:
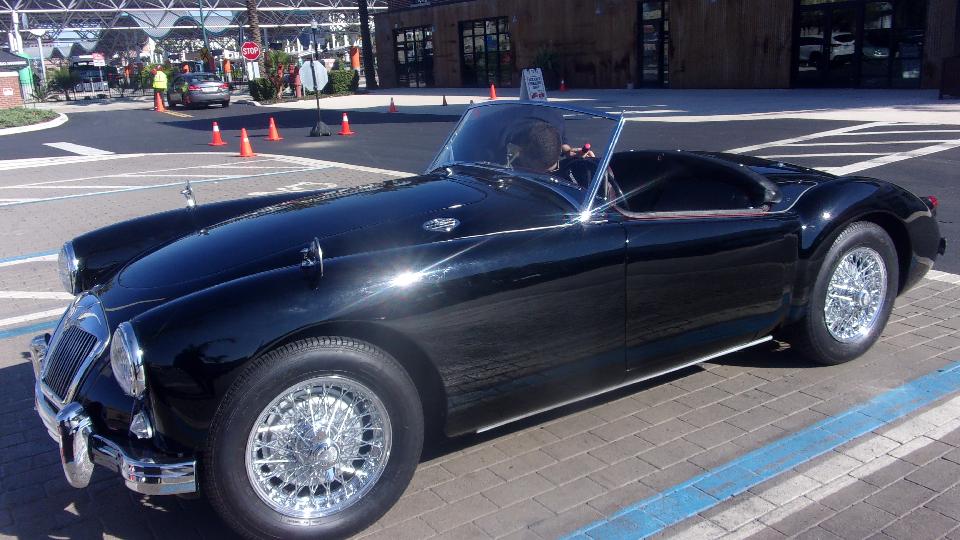
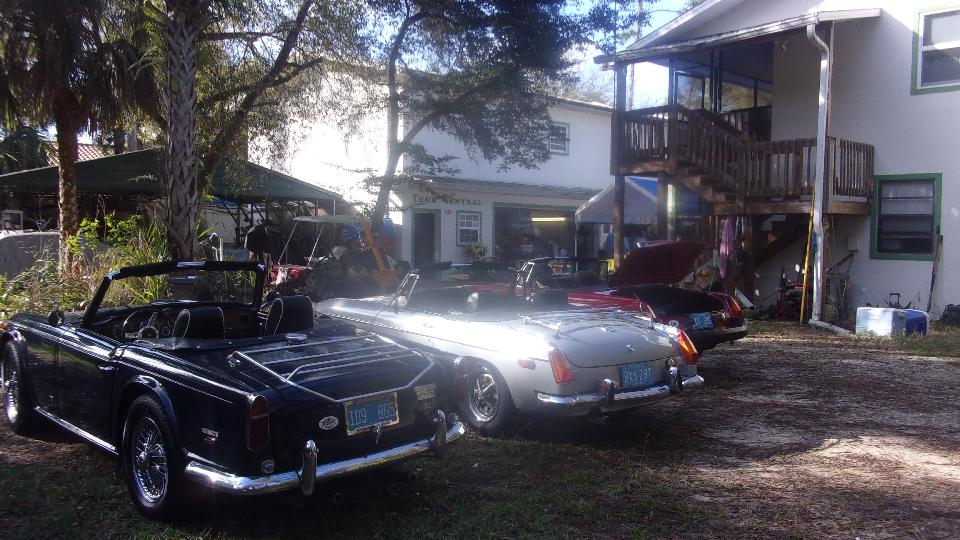
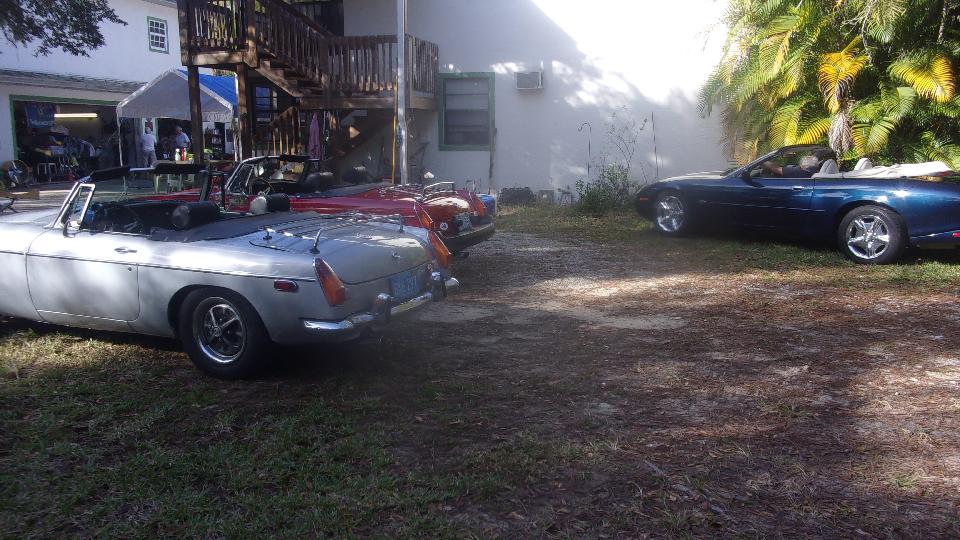
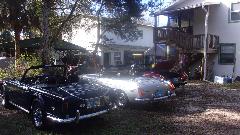
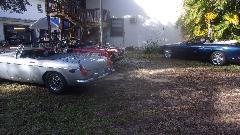
 Happy New Year, and hello to Joel Theard in Orlando, Florida. Yes we have been bopping in and out of here since three weeks earlier. Joel has been a bit discouraged about the way his "new" and "restored" MGA was not running well, and had scheduled a service appointment
 with Ceres Motorsports in Oviedo, FL for next week. The car was so bad he thought he may have to have it towed to the shop, so I figured we should at least drop by once more to for another tinkering session to get it running well enough to at least drive it to the shop.
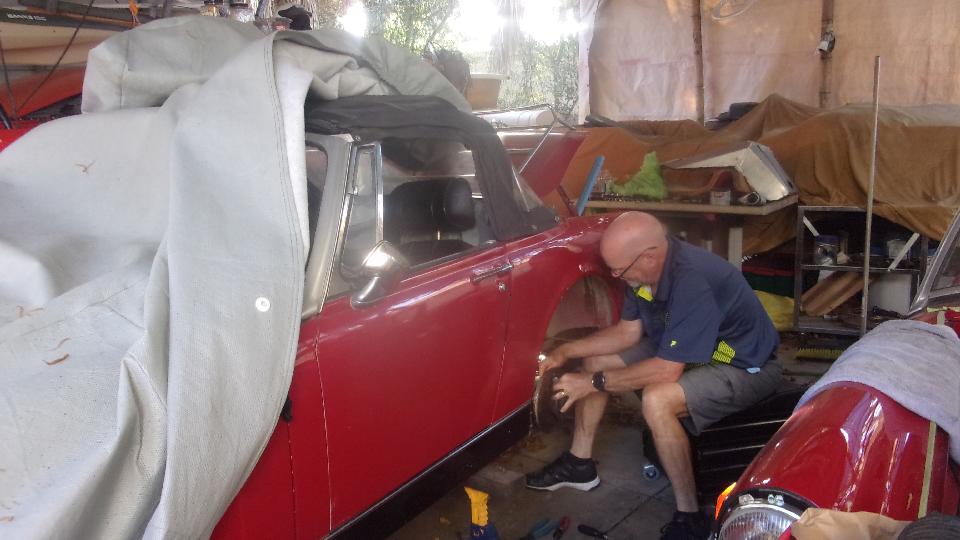
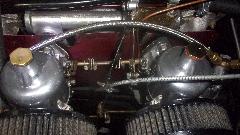
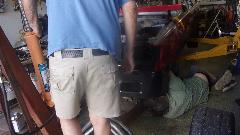
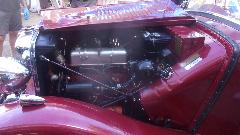
 With a little poke at the carburetors, and reset the sticking choke (again), it was running well enough for a test drive, so off we went. It was rather sluggish at low speed and running a bit warmer engine temperature than I thought was reasonable. I took an educated guess that maybe ignition timing was a bit late, so advanced the timing a few degrees. It did run better for a little while, but still sluggish at low end, so back to the garage for better investigation.
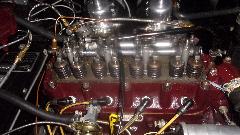
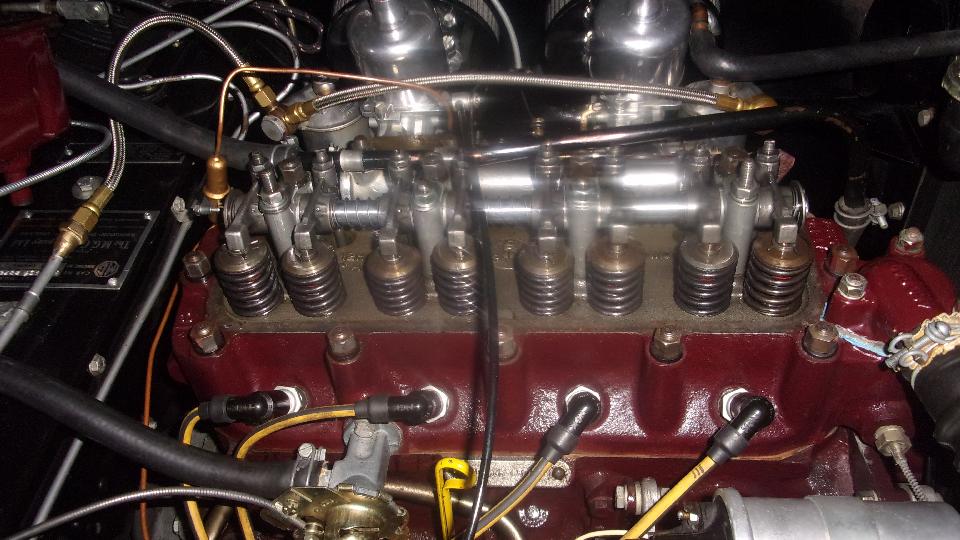
 I had a passing thought that cam timing might be a tooth off at the timing chain, which is easy enough to check. Remove valve cover, use 4th gear and push the car to turn the engine. Rotate to what should be Top Dead Center with intake and exhaust valves on #4 cylinder both open a little, exhaust closing and intake opening, stop with both valves at same height, and then check the timing mark position. Mark was lined up with the pointer at TDC, so the timing chain and sprockets were aligned okay, not the problem we were looking for. I had a passing thought that cam timing might be a tooth off at the timing chain, which is easy enough to check. Remove valve cover, use 4th gear and push the car to turn the engine. Rotate to what should be Top Dead Center with intake and exhaust valves on #4 cylinder both open a little, exhaust closing and intake opening, stop with both valves at same height, and then check the timing mark position. Mark was lined up with the pointer at TDC, so the timing chain and sprockets were aligned okay, not the problem we were looking for.
While looking at the valve gear I was casually checking full lift (or depression) of the valves. While most
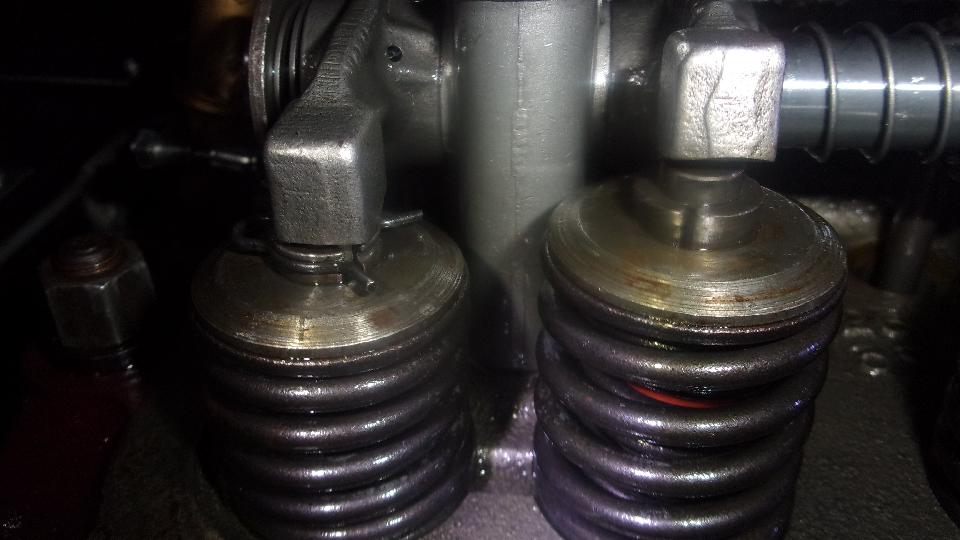
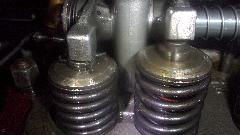 valves seemed to moving close to the desired 0.350" travel, the #1 and #4 exhaust valves came up a little short, like maybe around 0.250" depression. That would imply worn cam lobes. I also noticed the exhaust valves have "type A" valve retainer parts, while the intake valves have "type B" retainer parts, so the head has been modified sometime in a past life. Also a couple of the exhaust valves seem to have the tips of the valve stems ground down, possibly to increase valve lash (clearance), which implies a nasty case of valve seat recession.
Consider that low oil pressure when hot, and a disturbing loud tapping noise may imply at least one loose connecting rod bearing. Now I suppose this "rebuilt" engine may have a lot of miles on it since it was rebuilt. When it gets to the pro shop next week the first step may be an hour of diagnostics to determine it it may need some serious internal engine work. My current best guess is it may need to have the crankshaft reground with new bearings, install a new cam and tappets, install hardened steel valve seats, and maybe some new valves. Not what he wanted to hear about his new car, but better to know than not know, and best to get it fixed as soon as possible.
Thursday January 2, 2020:
Having at least a half day to kill allowed time to post up a new tech page for installing a Speedy-Sleeve on the differential input flange. Intended appointment didn't materialize, so we headed SW in the evening, landing in Fort Myers, FL by 10-pm. Along the way the dipper switch failed, this time working on low beam but going dark with selection of high beam. I've lost count by now, but I think we have been failing about one a year on average.
Friday January 3, 2020:

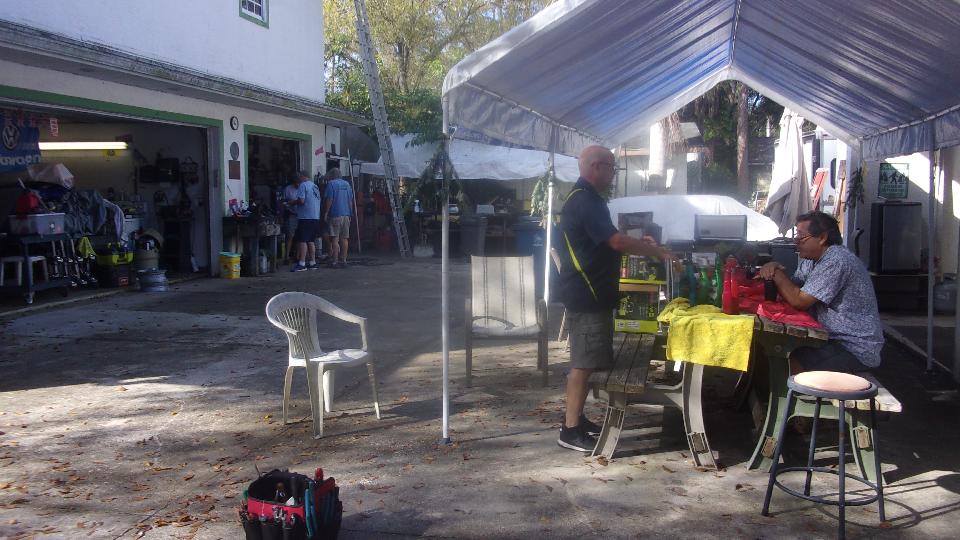
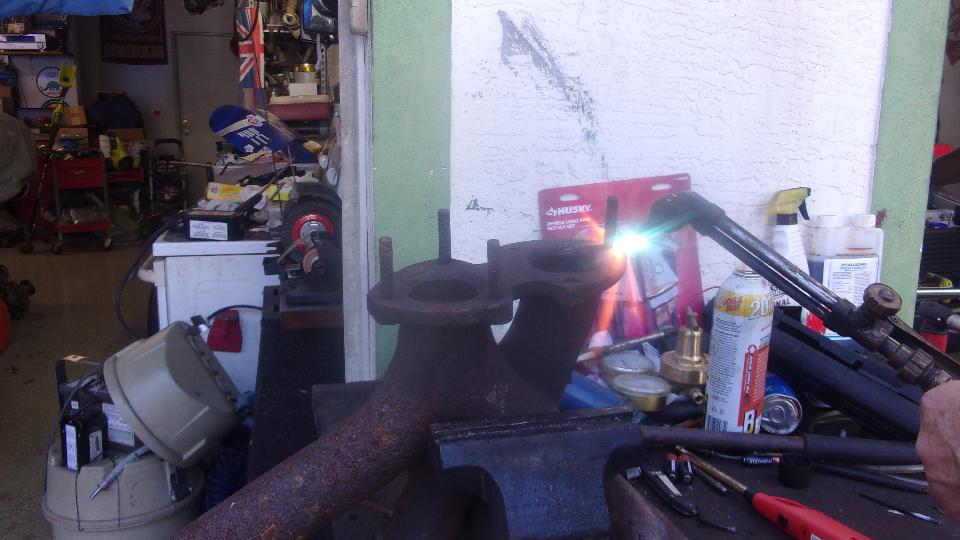
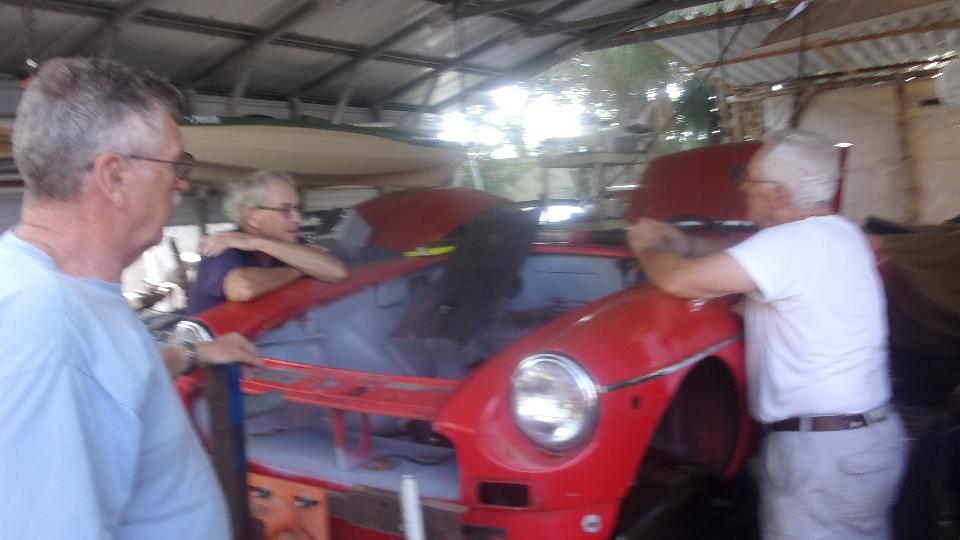
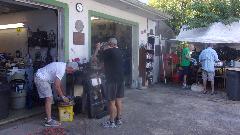
 A little farther south, back at Tech Central in Bonita Springs again to see who may be here tinkering and if we might be able to lend a hand. Early on two guys working on removing studs from MGB exhaust manifolds (3 or 4 manifolds). Jerry was still working on the VW Scirocco race car, didn't have the new headers installed yet, but this time they were working on re-installing the gearbox, and a little problem with the front transmission mount. Couple guys chatting about realigning a door latch striker plate on a TR6.

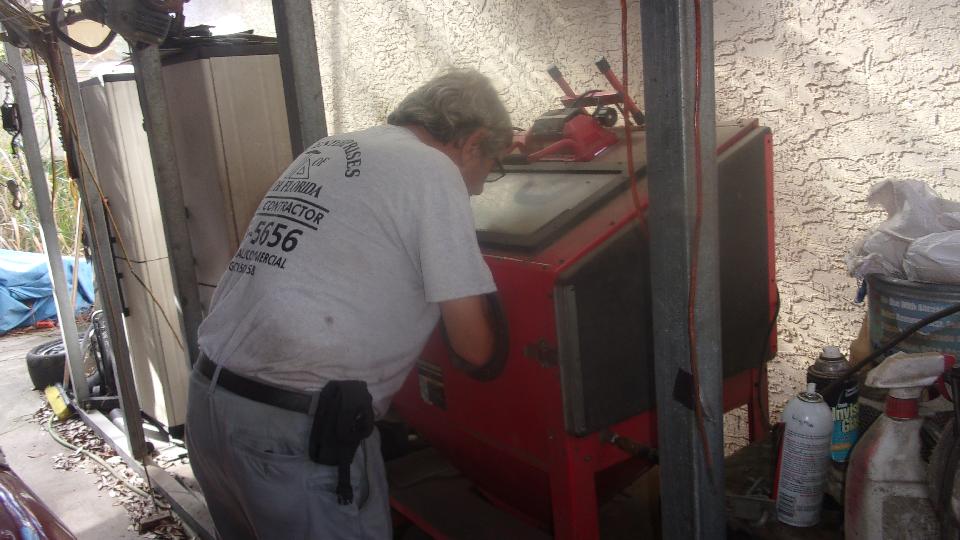
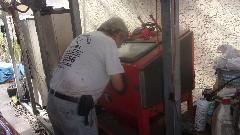
Couple guys still working on rear brakes of the MG Midget (job left over from the week before). More work on the wannabe MGB race car, so far in process for two years. And someone intent on sand blasting four wire wheels, a job that might end up taking four weeks at a half day per wheel (this blaster not very fast).


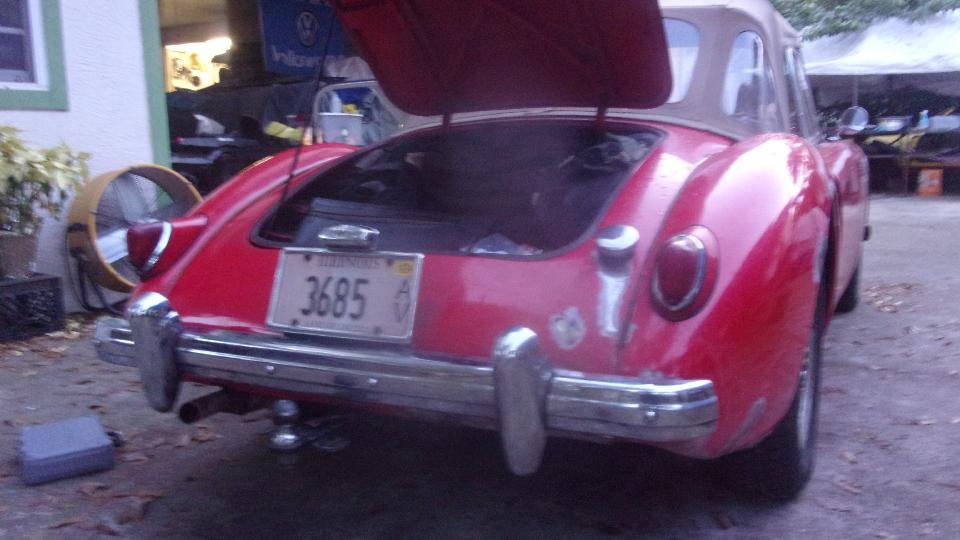
One last detail, the renewal sticker for my MGA license plate had arrived, so the car is officially legal again. Also met a new friend, a fellow from Germany here visiting a friend, his first time visiting the shop. He had a lot of questions about the MGA, and notes about how few of them would be found in Germany. With a little luck he may be back next week.
Saturday January 4, 2020:
Had in mind to do a little fender crack repair, but the weather turned to rain, so the priority melted (again), and it didn't happen. Some tech discussion about core plugs, what's good and how to install them.
Sunday January 5, 2020:
A little tech discussion on leaf springs. Otherwise, hey did anyone notice it was Sunday (nothing happening).
Monday January 6, 2020:
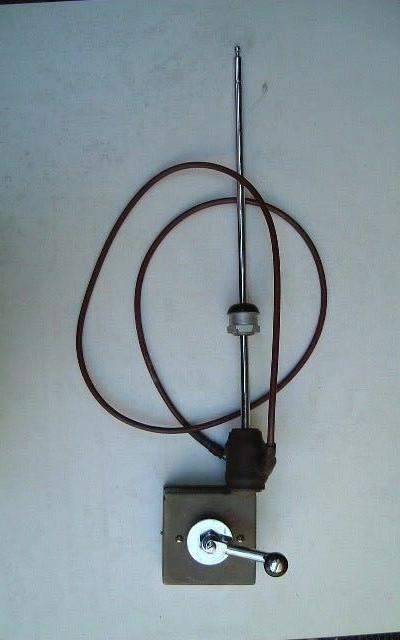
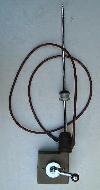
Posted up a new tech page on a rare factory optional Wind-Up Aerial for MGA. Cool gadget.
Fair amount of time spend in email discussion with a concerned Chicago club member about any news about the club web site "turn over", before the first Monday staff meeting. As usual, nothing visible happening for five months so far, and no idea what may or may never happen, not holding my breath while waiting.
Tuesday January 7, 2020:
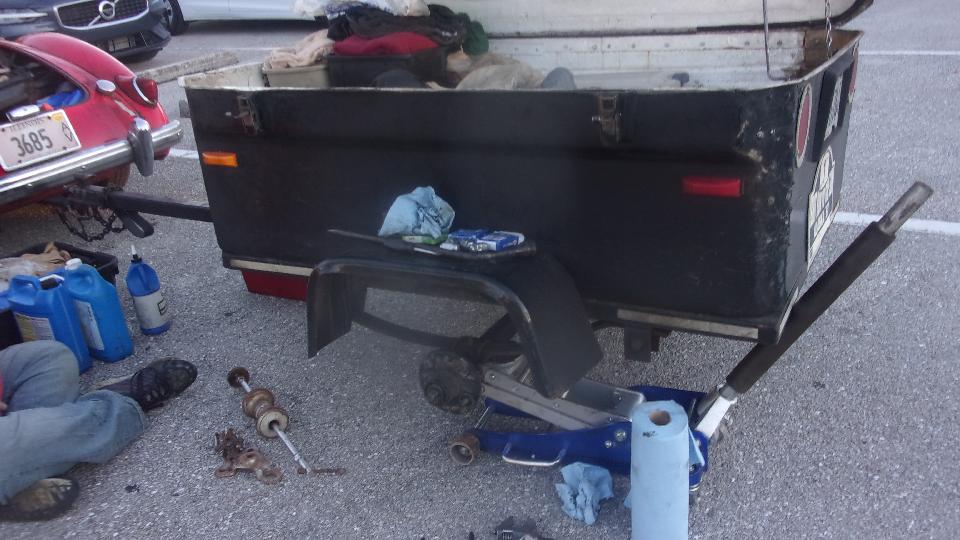
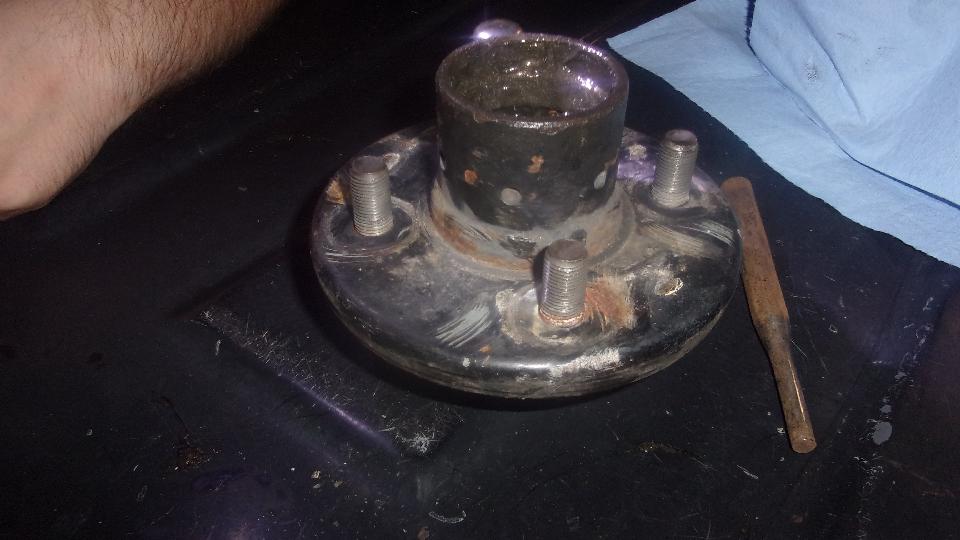
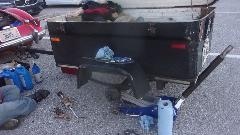
Not what I was planning for the day, but the trailer left side wheel bearings decided not to wait for Friday, and this was the day for replacement. Another parking lot job (better than on the shoulder of the road). Not supposed to be a big deal, been there done that plenty of times in the past 30 years. Slide hammer made short work of yanking the hub off the axle. Not much left of the rollers, largest pieces being about 1/4 inch long and not particularly round. The inboard inner race was firmly stuck on the axle, and the puller wasn't long enough to reach that far, so had to get creative. There was just enough space to insert the 12-inch adjustable wrench jaws inboard of the bearing race. Then convert the puller to two arms which would grip the wrench jaws. Yanking like crazy finally pulled the bearing race off (good to have the right tool in hand when needed). Paper towels to clean out the old grease and lots of debris. Then a few minutes of hammer and punch to drive the old bearing races out of the hub. Easier to install the new outer races using large wrench socket for a driver and a three pound hammer.

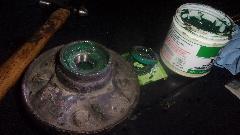
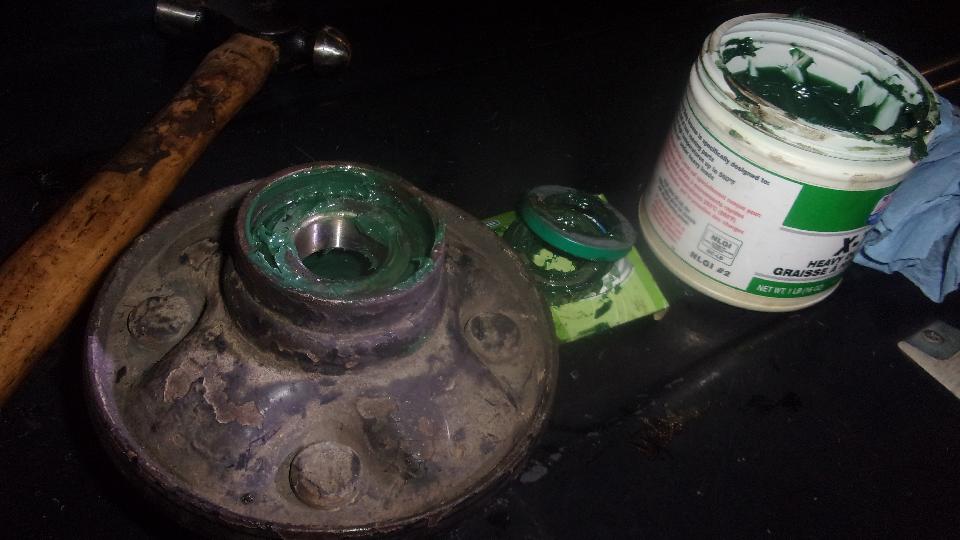
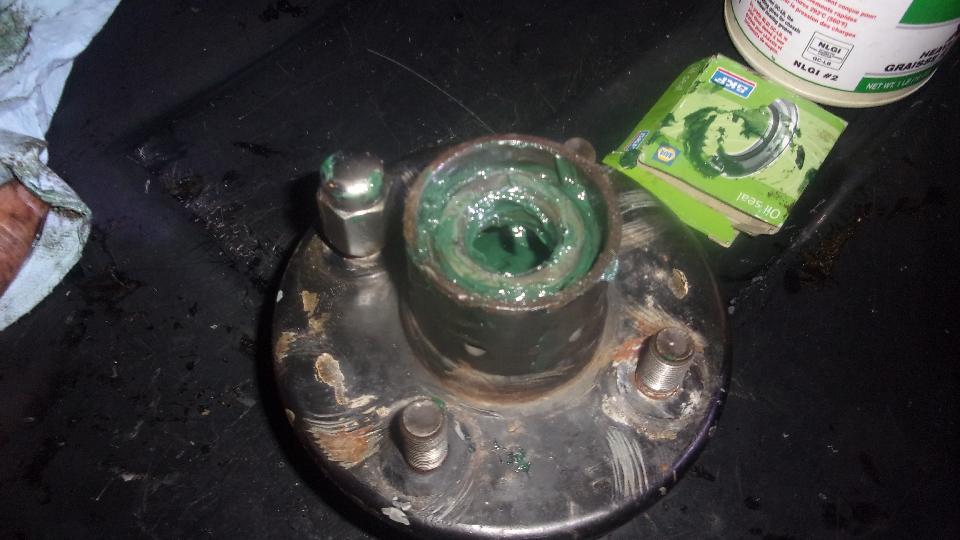
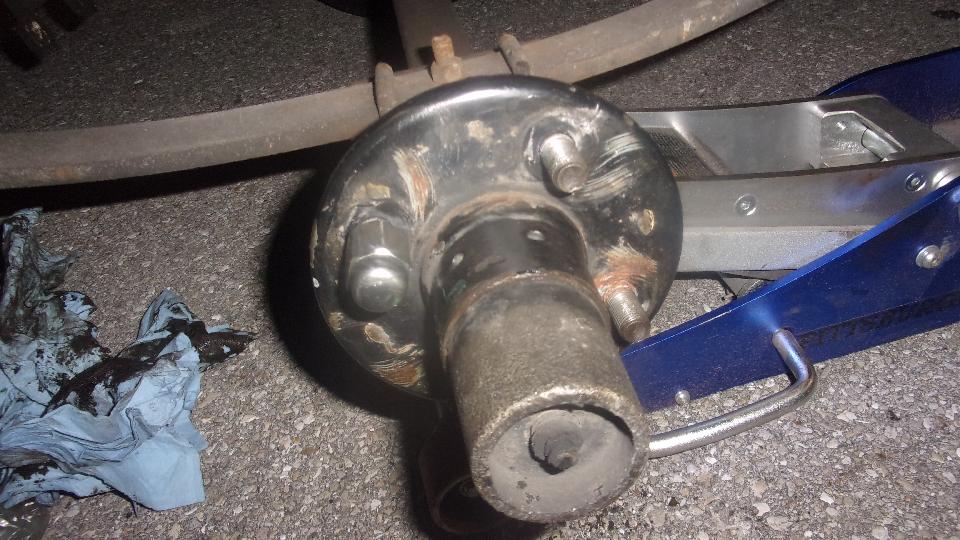
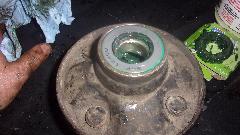
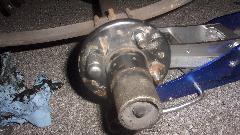
The rest was easy, after removing some dirt (or rust) and one small burr from the axle with a file. so the inboard bearing would slip on with a light tap I(and remove easily). Reload hub and pack the new bearings with grease, insert inboard bearing then inboard seal then outboard bearing. Slip the assembly back onto the axle, install large flat washer and castellated nut. Tighten nut, turn hub, loosen, tighten, turn a few more times to assure the bearings were seated. Loosen just enough to turn freely but not wiggle on the bearings, install the split pin and bearing cap. This one is a steel Bearing Buddy that has been surviving more than 20 years (lost the other one in Alaska in 2017). For good measure, remove grease cap to re-adjust bearing clearance on the right side as well. All back together, jack and tools stowed away, cleaned up, good to go again.

Wednesday January 8, 2020:
Day of rest, sort of. Spent some time ordering tools from Amazon, a new set-back timing light, a modern electronic battery tester, Dremel tool kit, cooling system pressure tester, and another set of wheel bearings for the trailer (thinking a long time ahead I hope). Some of the tools are replacement for things that were pinched out of the trailer last February (silly to wait this long).
Thursday January 9, 2020:
Nothing unusual today, mostly contemplating tomorrow.
Friday January 10, 2020:
Back to Tech Central in Bonita Springs to see if anyone may need help. Mostly the same cars, same people, and same Midget brake job spanning a few weeks by now.
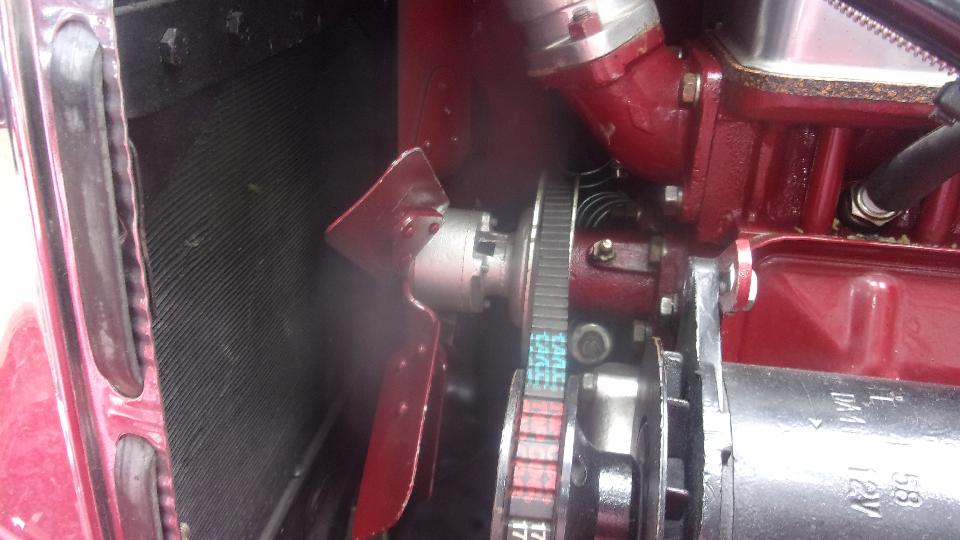
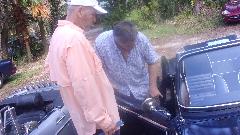
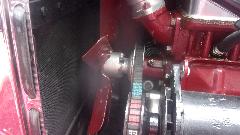
But there was an MG TD with a fairly recent restoration, not running well. First off, tell him to turn the fan around so it can run cooler in Florida weather, but that has nothing to do with the way it runs.
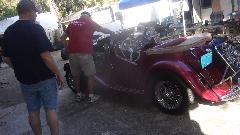
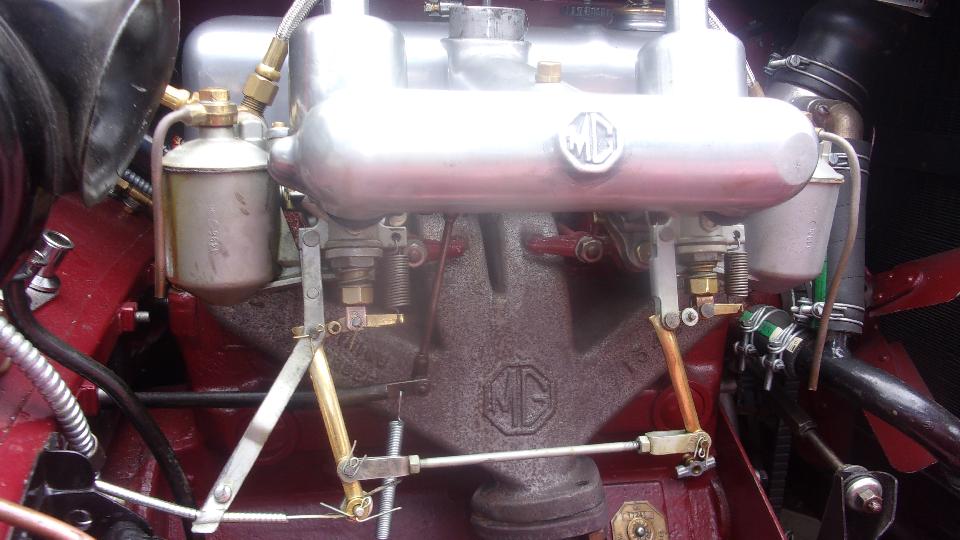
Just getting into the tune-up when we notice the carburetors dripping fuel from the bottom of the jets, and the rear
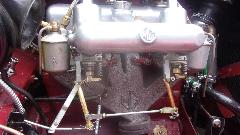 one nearly gushing. Dug some seal parts out of the trailer first to be sure I had the stuff before disassembling anything. Removed a couple of clevis pins to get a choke arm out of the way,then proceeded to R&R the rear jet bearing assembly to replace the jet seals and lower packing washer. It made a nice tech session. That done, and simply tightening the packing nut on the front carb. Stopped all the leaks, after which we could proceed with the tune-up. All went well, and the car was soon on its way home with a sweeter disposition.
Saturday January 11, 2020:
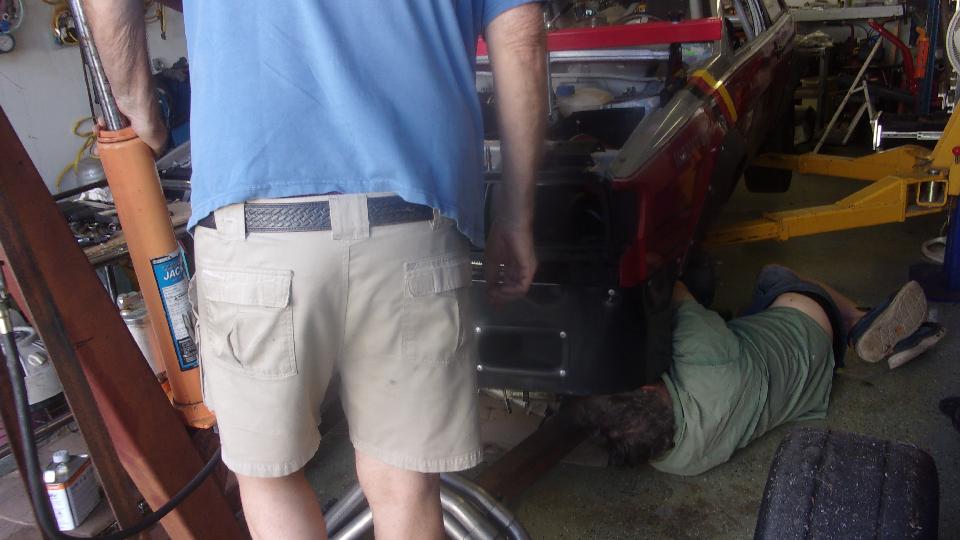
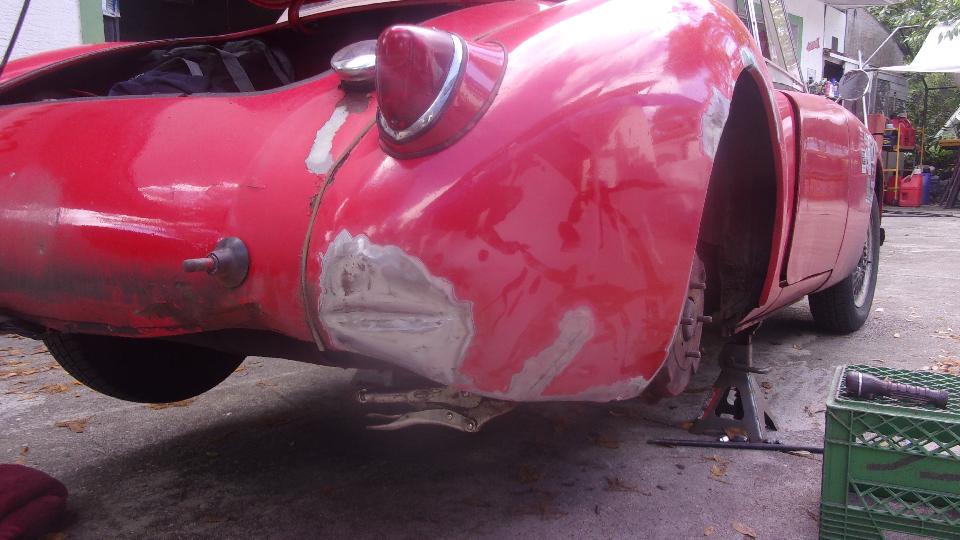
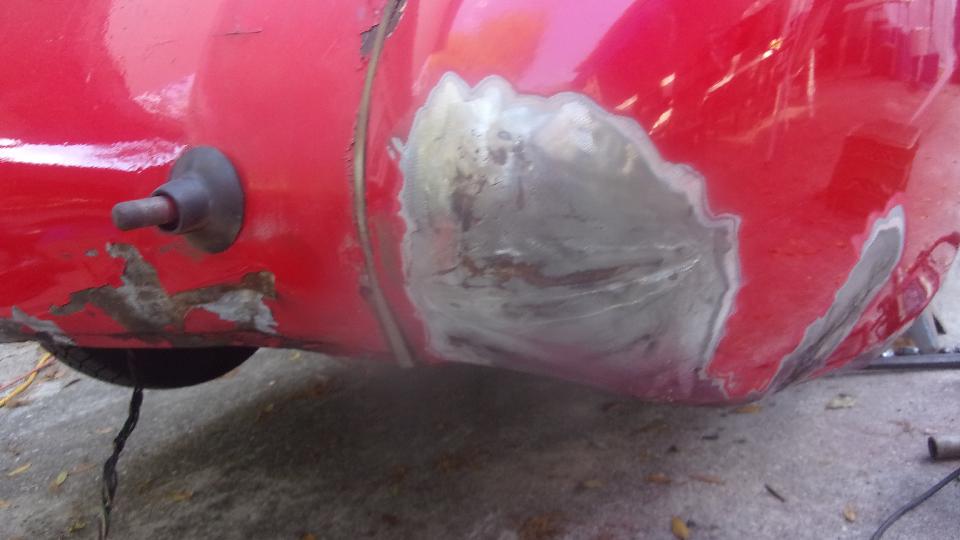
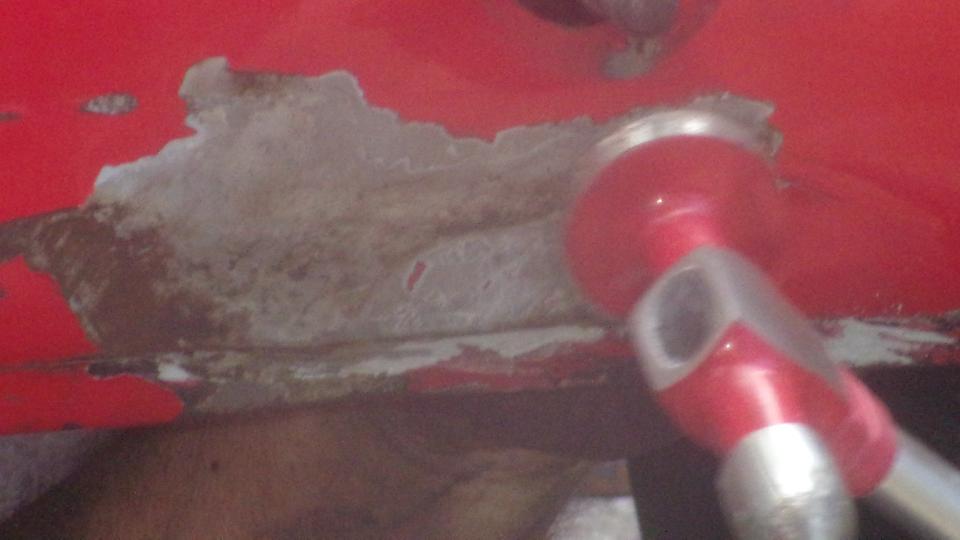
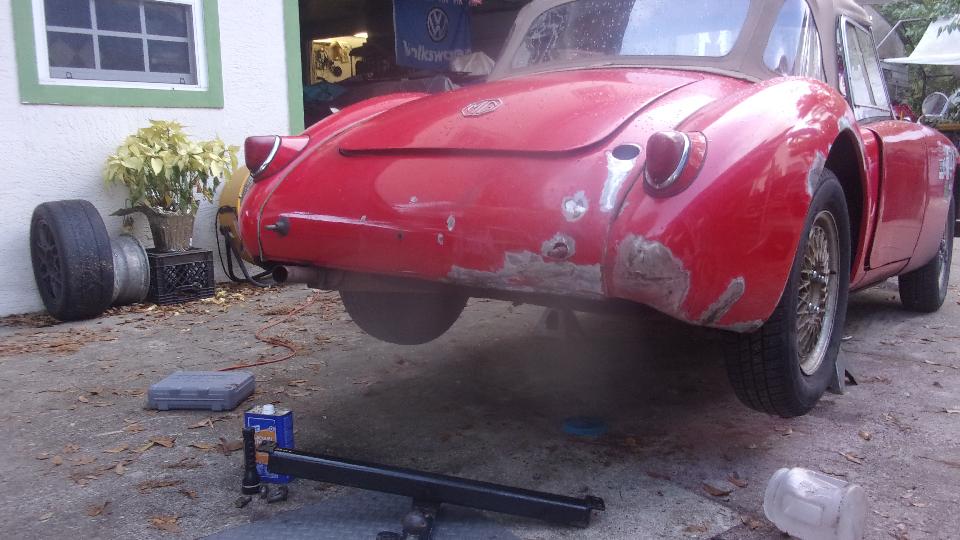
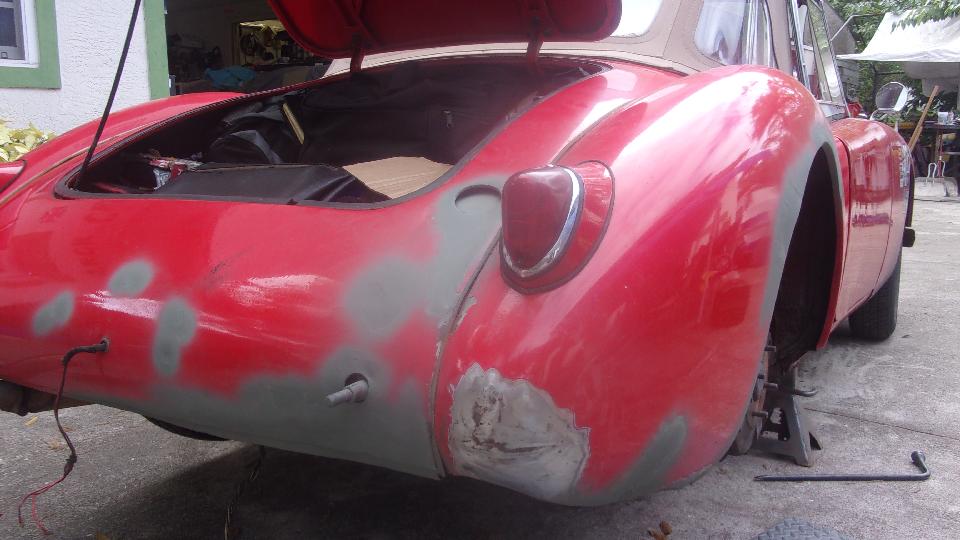
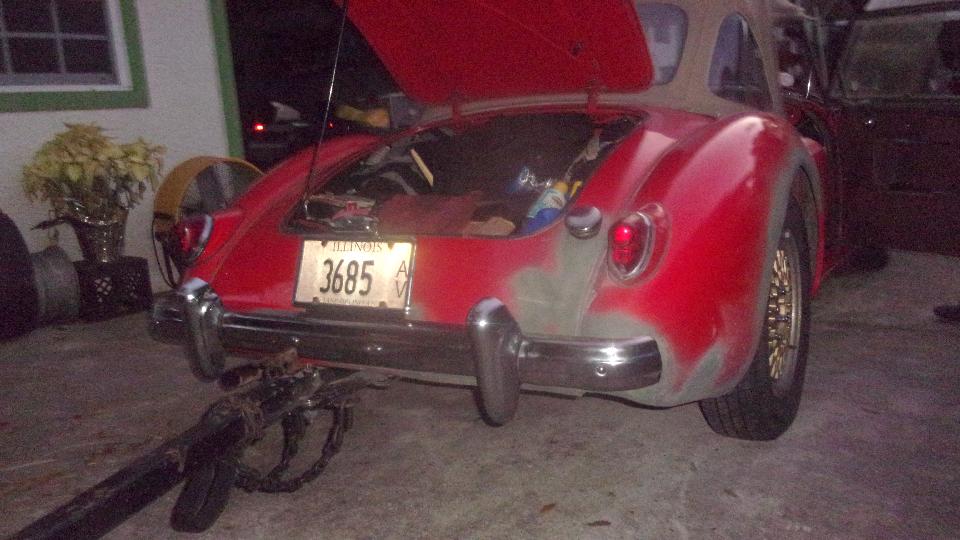
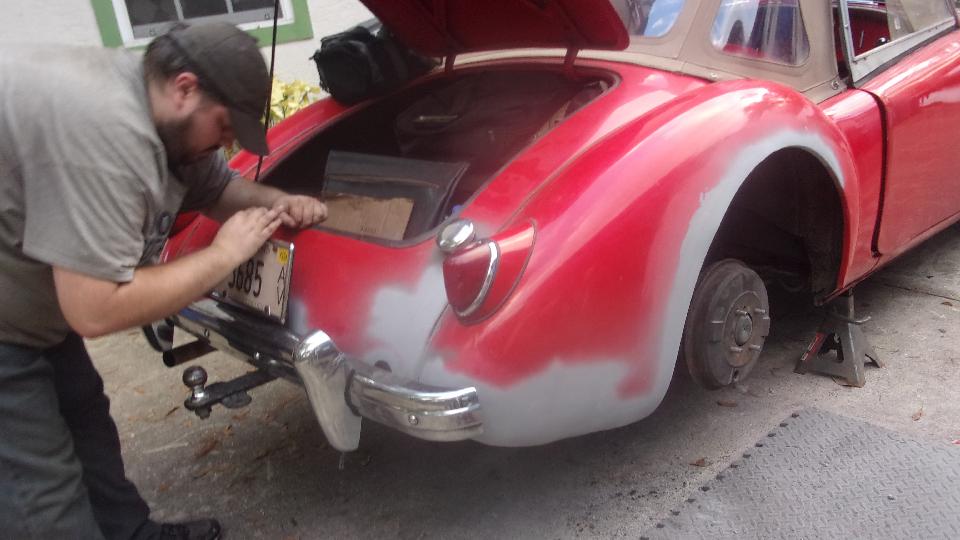
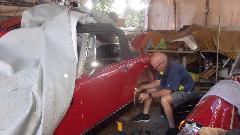
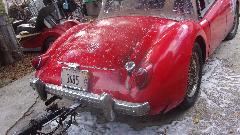
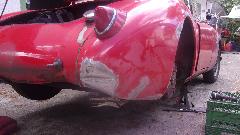
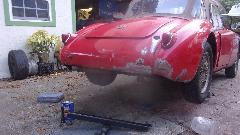
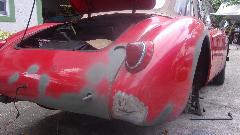
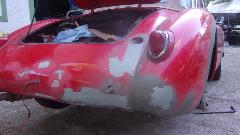
Nobody else at Tech Central today, so we will begin to take advantage of Jerry Wilcox's hospitality while we get heavy into some body work that is two years overdue. This is the result of the moose encounter in Alaska in July 2017 when we avoided hitting three moose in the road while the trailer jackknifed and mangled the rear bumper and right rear body panels. We had previously straightened the badly twisted bumper (some) and replaced the mangled overrider with a decent used one from a friend. Start with the "annual weather it needs it or not car wash" (because it needed it). Then removing the rear bumper and splash panel, and grinding away paint around the offending dents and cracks. The Vice-Grip is holding the panel alignment for the largest crack to be repaired.
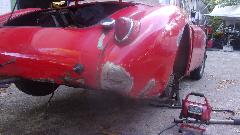
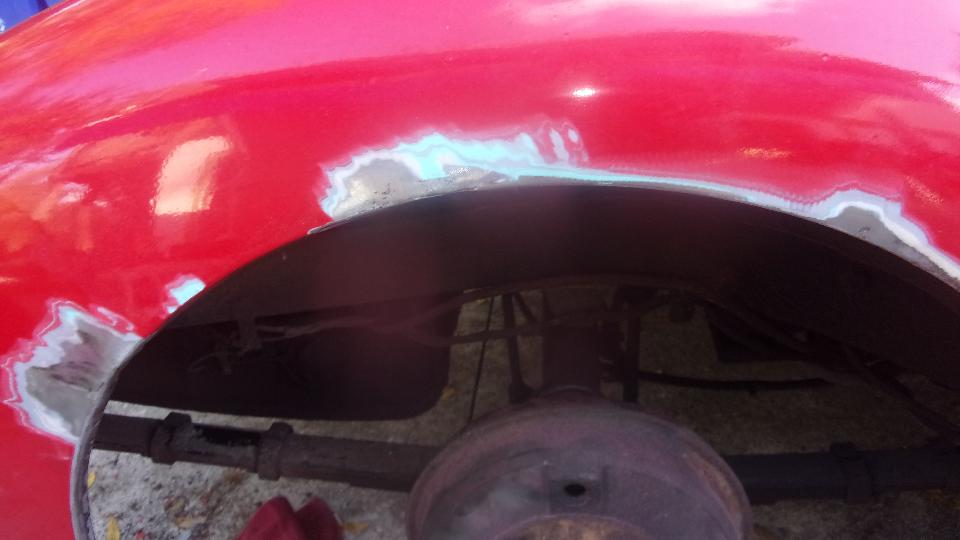
Lots of fiddling time later I had the major crack welded up and ground smooth, and the sharp crease banged out of the tail end of the wing. This left some small cracks visible from the inside, to be attended to later. Also pushed back the lower end of the bolting flange to remove the kink that was hiding just behind that tail light harness.


Running out of daylight, so time to put the toys away for the day. Wheel on, rear bumper re-installed (two bolts and two wires), off the stands, pack everything away and clean up. This is part of the challenge of doing a larger job one day at a time while keeping the car driveable.
Sunday January 12, 2020:
Traditional 10-am start at Tech Central. Pleasant surprise this morning when an Amazon delivery showed up on a Sunday morning. I think they may be onto something here. Stuff I ordered Wednesday wasn't shipped until Friday, but here it is two days later anyway. Received the five items I ordered, dropping four of them directly into the trailer. Got to open the new Dremel grinder and put it to use same day.
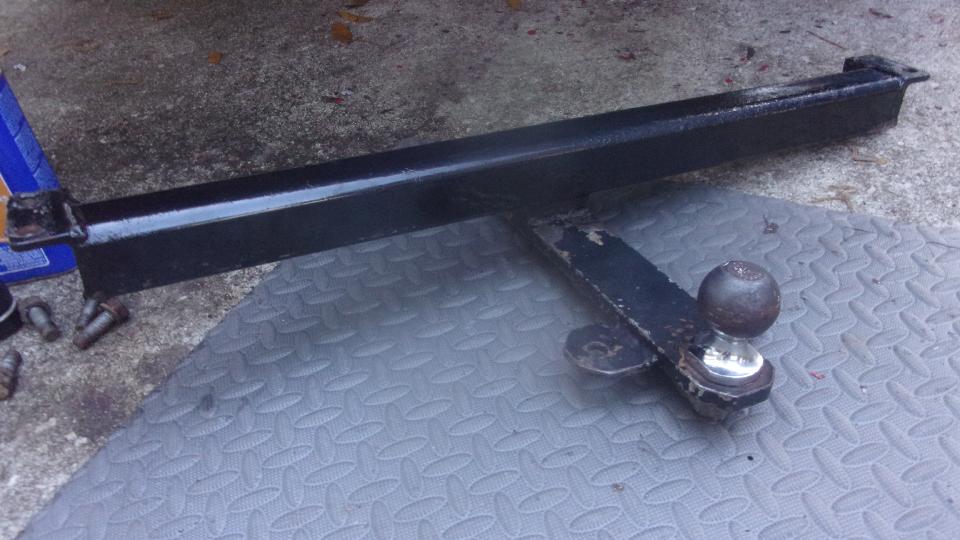
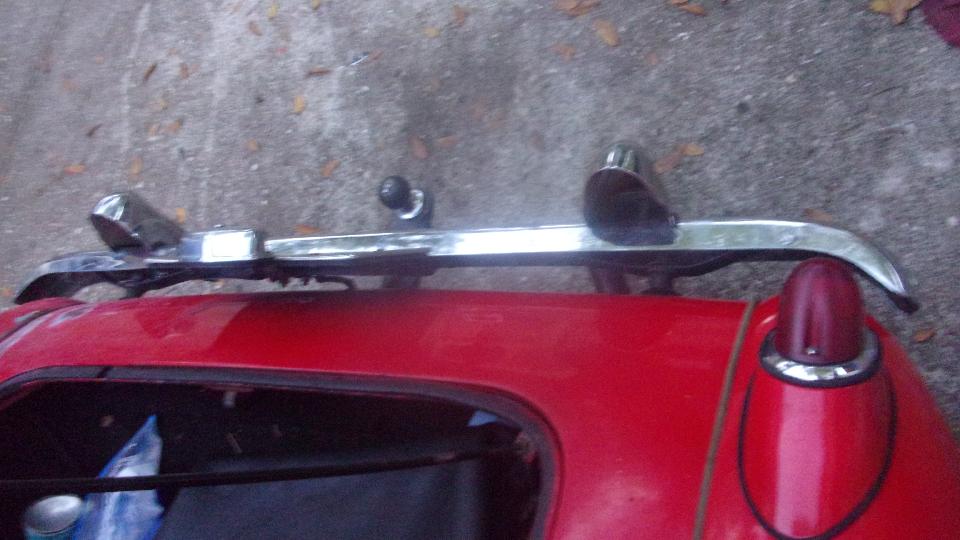
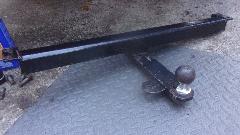
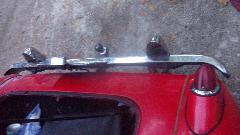
After significant difficulty re-fitting the rear bumper the night before, we were determined to fix that problem first. So get the bumper off and and disassemble it, then spent about an hour systematically re-forming the spring irons to get the facebar spaced out about 1-1/2 inches from the body. I would have made it a little more, but that was as far as the spring bars would go before mounting holes got too close together for the slots to align with holes in the facebar. More photos of the bumper below with late day re-installation. We also removed (and cleaned) the trailer hitch (just four bolts) to have access to the space in front of the rear valance panel, which was the target of today's body work. Photos from day before show how mangled the valence panel was.
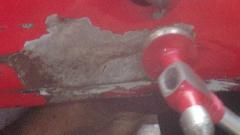
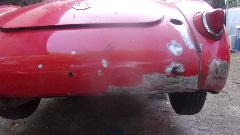
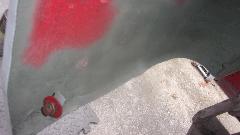
Then I ended up lying on my back under the rear valance panel for about four hours. Push and straighten, hammer and dolly, and repeat. There were three kinks with stretched metal (and two cracks) in the bottom flange. Solution there was to make a thin slit with abrasive wheel, then hammer the flange edges into a common plane, followed but gentle MIG welding and grinding smooth. Amazing how much stiffer that bottom edge gets once the cracks have been closed.
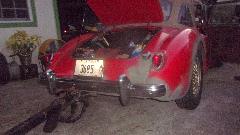
I had a desire to brush paint a primer sealer on the inside of the valance panel, and also apply JB Weld to inside and outside of the rear dome on the wing to seal some cracks. We may have gotten a bit ahead of schedule here, as we had not yet procured the materials for those operations. Also running out of daylight again, so reinstall the trailer hitch (4 bolts) and the bumper (2 bolts and two wires), clean up and pack the tools away. Short work days, but second day in a row that we feel better for having made good progress. Bumper alignment is very nice after the painstaking realignment of the bumper support irons.

Monday January 13, 2020:
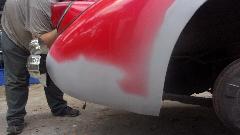
Got up early enough for breakfast, but made a side trip to Walmart to pick up primer paint, body filler and other related supplies. Then back to Tech Central to continue body work on the MG. Mid day temperatures in the 80's, and limited time working outside by daylight, so there is some limit to what can be done in a day. Having the car back on the road at end of each day requires some planning, and some duplicate work to disassemble and reassemble some things each day. The primary goal for today was to R&R the rear bumper and trailer hitch (again) to finish cleaning and priming and painting the hidden side of the rear valance panel. That would mean we won't need to remove the trailer hitch again.
I lucked out on the red paint (so far) in that the paint we had been carrying in the trailer for more than two years had apparently partially survived. A small plastic bottle of brush touch-up paint was half flat, dried out, no good. One aerosol can was empty, likely result of being frozen (more than once), had lost its contents to the inside of its cardboard packing box. A second aerosol can had survived and was in serviceable condition.
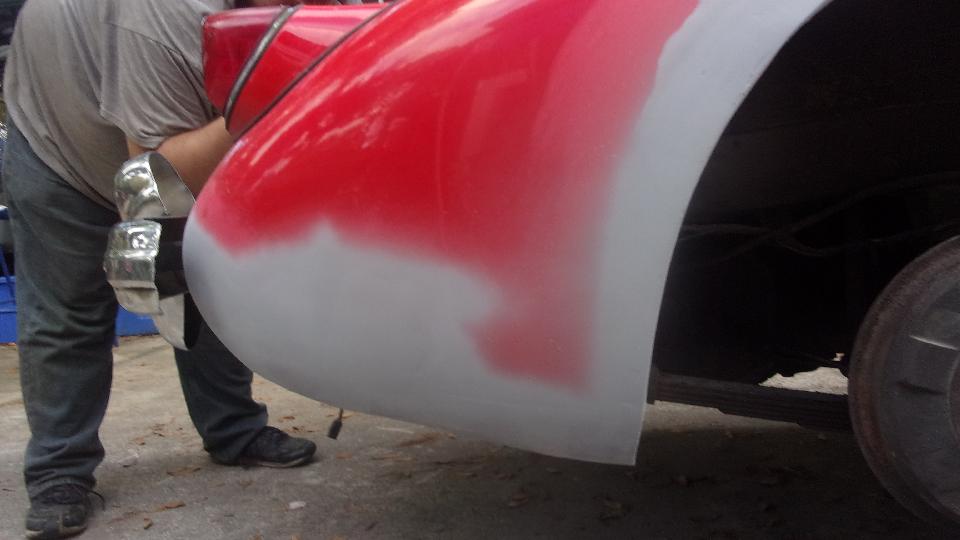
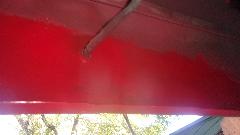
 Today's mission accomplished, and a bit more than the minimum. Cleaned and painted (primer plus finished
red) inside the rear valance. Some panel finishing, filler and sanding multiple times plus a touch of primer, sanding and more primer outside. Also did a bit of filler and sanding and preliminary primer on the tail of the right wing, as well as sealing a few cracks and priming inside. The valance panel will require more external work before finish painting, but it was good progress for the day. As light was fading the hitch and bumper were reinstalled, everything cleaned up and packed away, and rolling again.
Today's mission accomplished, and a bit more than the minimum. Cleaned and painted (primer plus finished
red) inside the rear valance. Some panel finishing, filler and sanding multiple times plus a touch of primer, sanding and more primer outside. Also did a bit of filler and sanding and preliminary primer on the tail of the right wing, as well as sealing a few cracks and priming inside. The valance panel will require more external work before finish painting, but it was good progress for the day. As light was fading the hitch and bumper were reinstalled, everything cleaned up and packed away, and rolling again.
Tuesday January 14, 2020:
Back to work shortly after 10-am. Bumper off, bunch of body work, and bumper back on before dark. The primary objective today was to weld a bracket back onto the rear wing where bottom end of the splash guard will attach. It is a pesky little part where a 14-gauge bracket was originally attached to the flange of the 18-gauge fender by spot welding. It is a weak point that commonly cracks out of the thin fender flange, especially if the wing might be exposed to some physical trauma. Having had to re-weld these bits before, this one was about to be modified. I cut a 3-inch long piece of 1/8-inch x 1/2-inch steel strap, ground one outer edge to a bit of curve to match the curvature of the wing, and welded the new strap in between the flange and the bracket. Pretty sure it will not break out again.

That little welding job was driving me nuts for a couple hours due to very thin edge of the flange that had been broken and rusted (and repaired a couple of times in a past life). Lots of welding, grinding, welding, grinding. If I had known the difficulty beforehand, I could just as easily have cut and welded in a new piece of sheet metal. By early afternoon the structural welding and grinding was done. That was followed by a few passes of metal laden filler, sanding, filling, sanding, etc. I was working on finish of the rear valance at the same time. By the time daylight was failing it was looking pretty good, inside and outside sprayed in primer. It may need a little more flattening work.
After cleanup and pack up, hitching up the trailer revealed a broken wire connector just inside the rear valance (no tail lights on the trailer). Not long to install a new butt splice, and we were on the road again.
Late night putting together a 40-item order to Moss Motors for a few needed bits, but more to replenish inventory in the magic trailer (some of which has been pending on low priority since April).
Wednesday January 15, 2020:
Computer time with breakfast, fussing with posting the 40-item order through the Moss Motors web site. As much as I try to use this function for larger orders, I don't think it will ever be as easy as a phone call.
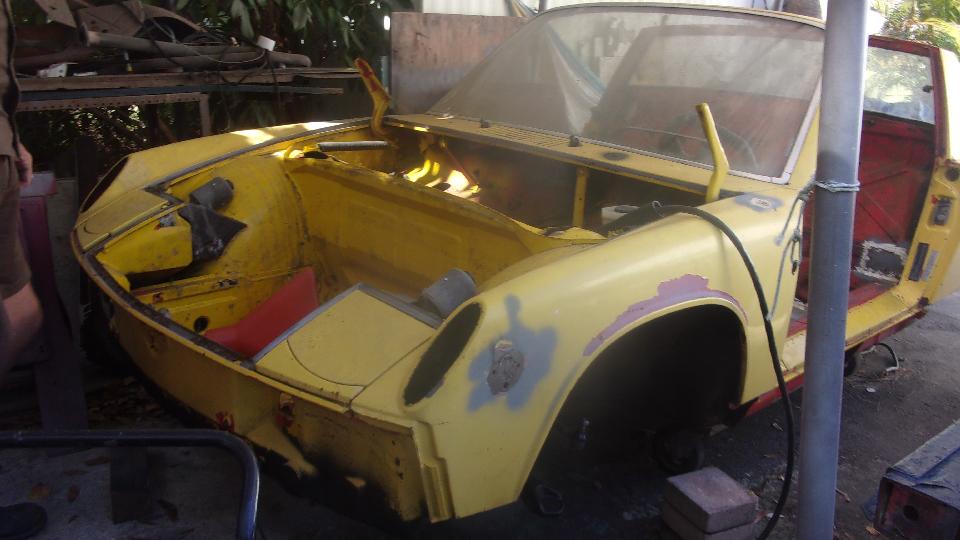
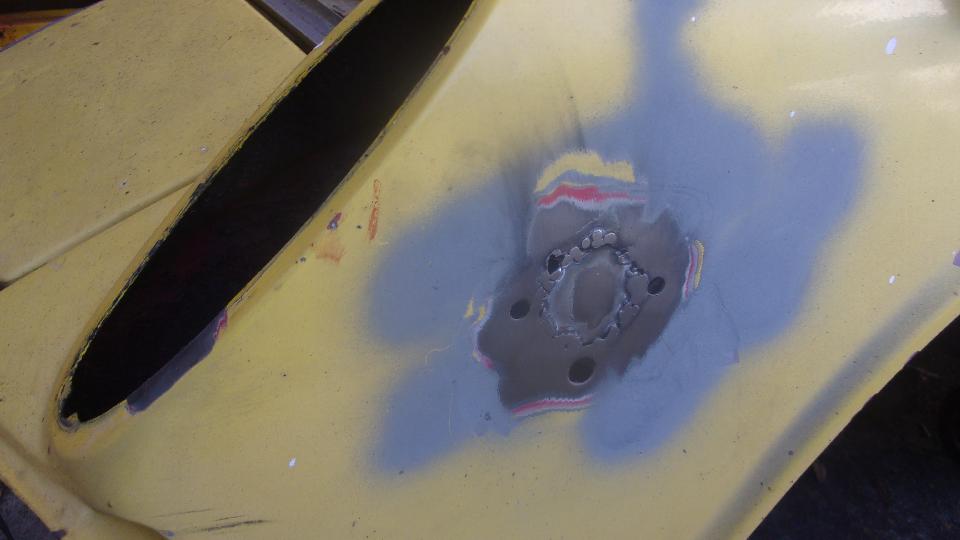
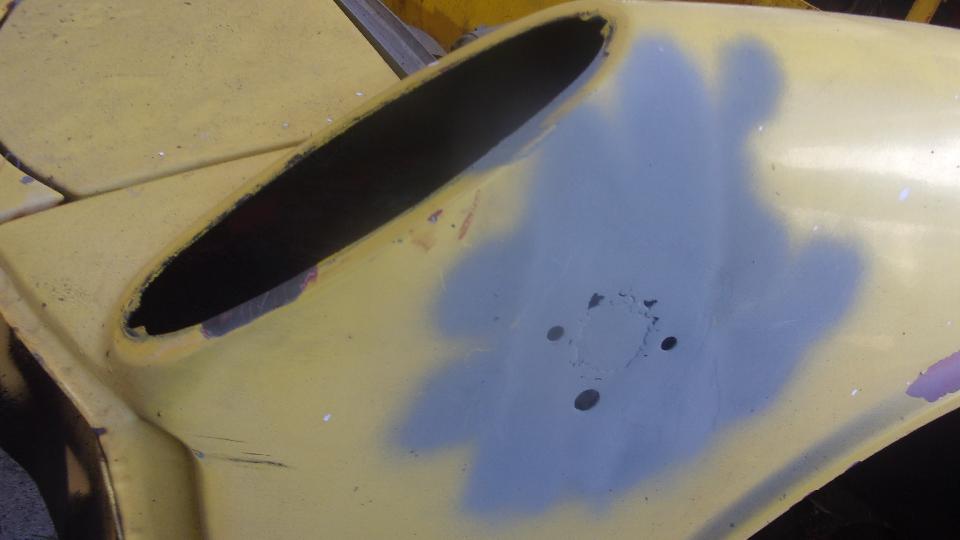
A bit of work by others today at Tech Central Racing. Guys were in process of deleting holes left from side marker lamps on a Porsche 914 that is destined to be a race car.
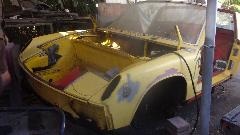


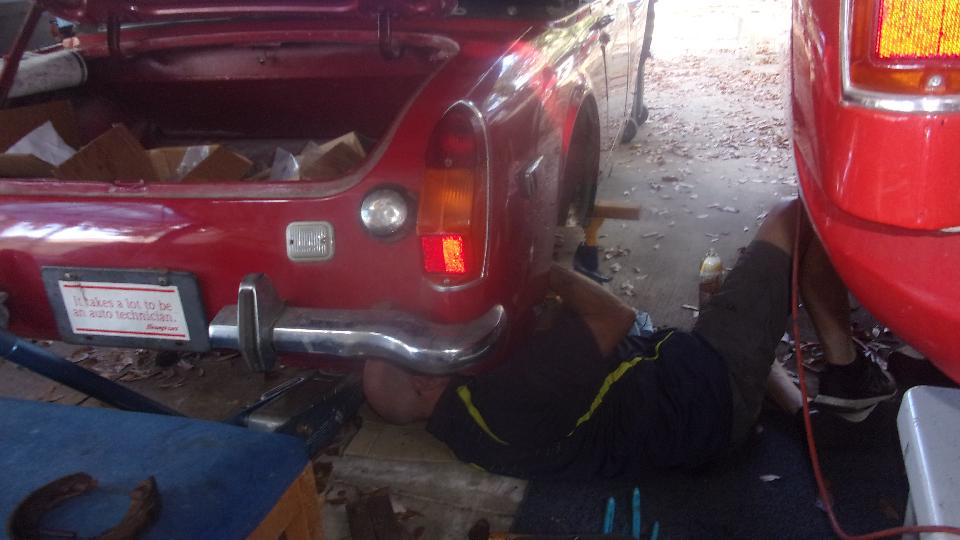
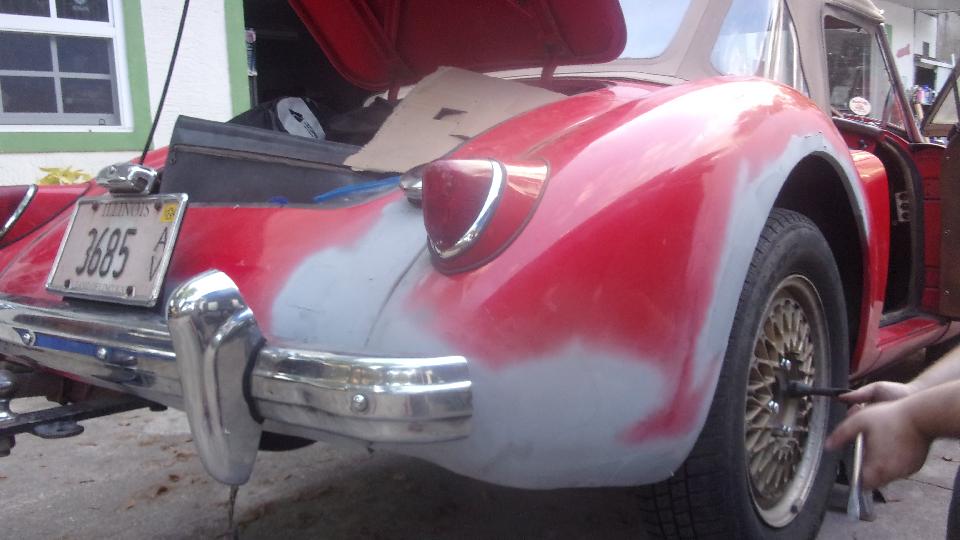
A slightly different approach to my MGA today, removing only the 2-bolt bumper and the 2-bolt center hitch bar from the trailer hitch for clear access to the rear valance. We also removed the RR tail light and plinth, and several bolts securing the RR wing to body, beginning at rear. This allowed use of a long threaded 5/16 stud and a few (larger) hex nuts as spacers to separate 2/3 of the length of the rear wing away from the main body (without removing rag top frame and rear kick panel and more bolts to remove the whole fender). That allowed sanding and finishing work in the wing joint area near the light plinth (after the piping was removed). Also loosen one hose clamp to remove the fuel filler pipe (again), easy peasy. I recon I was busy and neglected to get the picture, but may have a chance to do it again tomorrow. It was an interesting sight while it was in process.
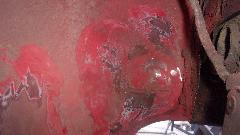
The more tricky bit was welding up a few more cracks in the thin wing sheet metal, one along the flange
 bend line (at top of wheel arch), and a couple more in the inboard edge of the flange. Amazing how much stiffer the wing gets once you delete the cracks in the wheel arch flange. This was followed by some power sanding of the body and wing in and along the piping joint to remove some rust and paint blistering (a result of some prior "shortcut" work by some friends). A few more hours of fill and sand flat around the piping joint near the tail light, wheel arch, body immediately below the fuel filler, and lower part of the rear valance. At day's end it doesn't look much different than the day before, but the beauty is in the quality of the underpinnings (hoping I won't have to do it again for a while).
Catching up photos and notes in the evening, I was also checking an email order confirmation from the on-line from Moss Motors. It didn't show my Customer Loyalty Discount, so I called Moss to inquire. Apparently the discount will be noted in another email at time of shipment, hopefully later tonight. Looks like another deficiency in the Moss on-line ordering system.
|