The MGA With An Attitude
MGA Guru Is GOING MOBILE - (January 1 - January 15, 2023)
Sunday, January 1, 2023:
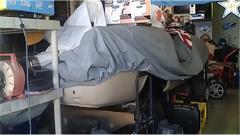
Time for tying up a few loose ends. Just ordered a new Attwood Turbo 3000 Bilge Blower to replace the one that burned out several months ago. I cut the legs off, wrap it in sticky foam rubber weather strip, and shove it into the 4-inch air duct in front of the carburetors. One wire to a grounding screw nearby, the other wire to a small toggle switch under the dash on far left. In July 2012 it was a $19 part with temporary installation for testing, but it seems to stand the test of time. It works well for cooling the carburetors to prevent boiling of the 10% alcohol fuel when creeping or idling on a hot day. Not so much a problem since installing the original style cell core radiator last Summer, but I do miss it occasionally. Like when stopping for fuel fill-up, and it wants to stumble on restart. Still only $28 delivered, and very easy to install, so I'm buying another one.

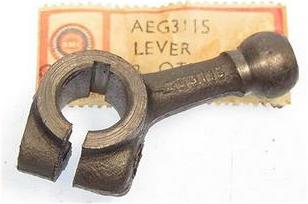
 Also time to get serious about finding a replacement for the shift lever I broke last September. This is for front end of the control shaft in the rear shift housing. I borrowed a complete remote shift assembly from a friend at the time, and I dearly need to get the broken one fixed to give it back to him before he completes his restoration project. This part is NLA, but I have some feelers out to find one anyway, most likely a used one will do just fine. Also time to get serious about finding a replacement for the shift lever I broke last September. This is for front end of the control shaft in the rear shift housing. I borrowed a complete remote shift assembly from a friend at the time, and I dearly need to get the broken one fixed to give it back to him before he completes his restoration project. This part is NLA, but I have some feelers out to find one anyway, most likely a used one will do just fine.
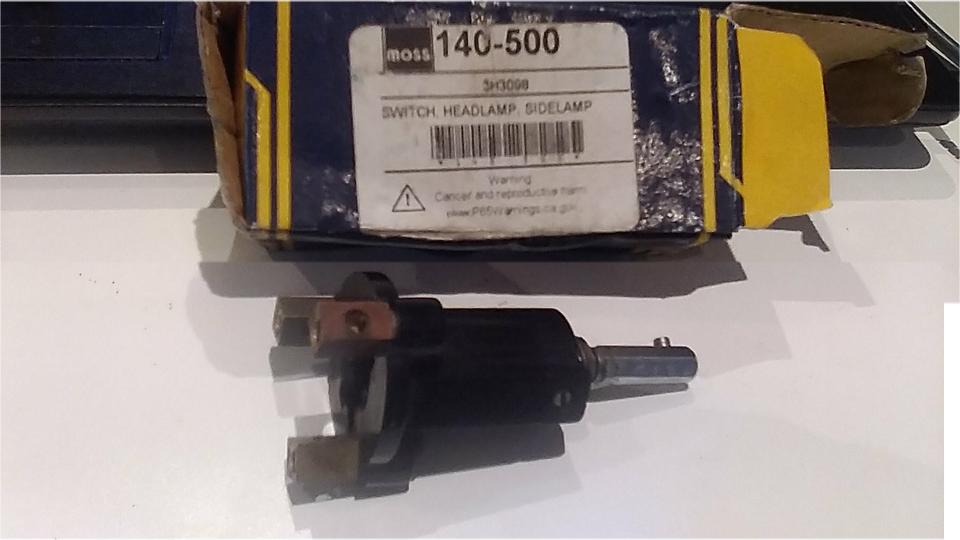
Sometimes I have enough time to do some tech work, especially if it is pressing and urgent. Another Moss Motors Classic Gold MGA lighting switch bit the dirt today. They must be very proud of their merchandise to keep putting the same fancy label on the same classic junk for 15 years now. I have been buying these two at a time to have spares, since they have proven to be so unreliable. The last failure shorted to ground and nearly burned up the wiring harness. This one just gradually lost the headlight connection while parking lights still worked. Had to fiddle with the switch each time it was turned on to be sure it would actually light up. Sometimes hit a bump and headlights would go out. Finally they just refused to make any connection at all, having to change the switch again.
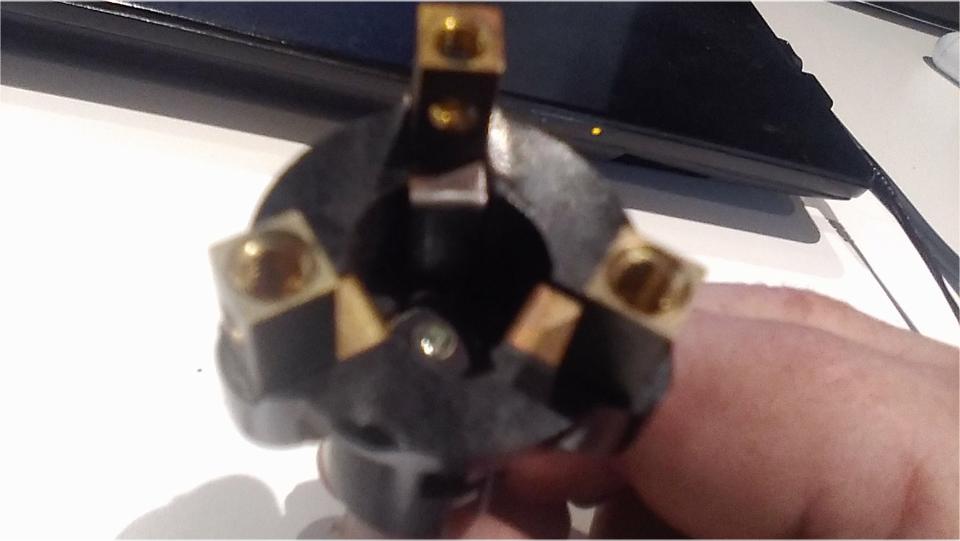
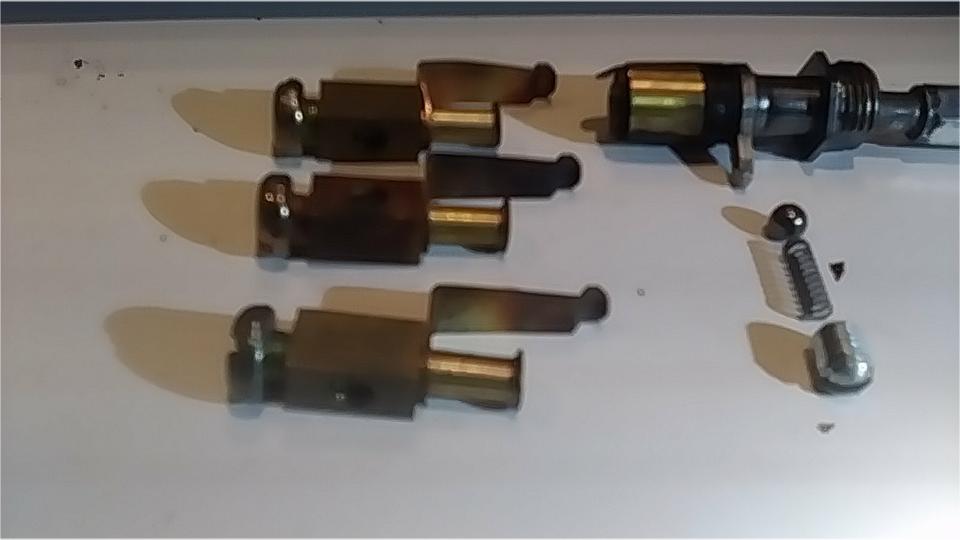
Being a riveted assembly requires breaking the Bakelite shell for disassembly for internal inspection. The one clean contact was the S1 terminal, only carrying 3 amps total for all parking lights and dash lights (and map light). The half burned and half blue contact was S2 terminal for the headlight output, carrying 10 amps regularly for the two halogen lamps. The totally burned and black contact was the A1 input terminal carrying current for parking lights and headlights together. My best guess here after failure, is that the contacts do not have enough spring force to make reliable electrical connections.
Monday, January 2, 2023:
Legal holiday here, so not much happening. Spent an hour updating the CMGC web site for upcoming events.
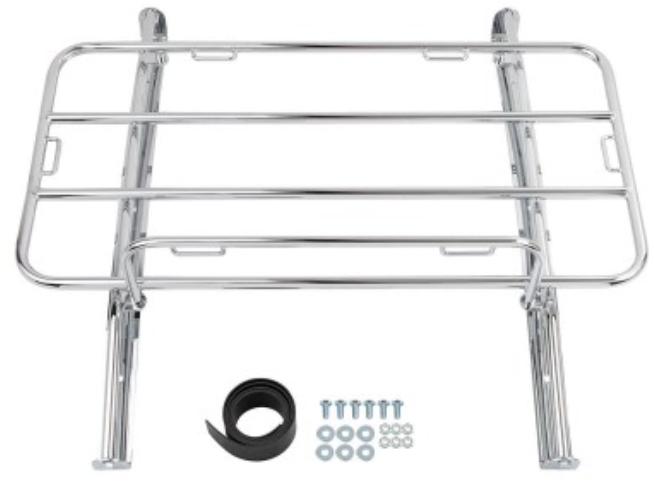
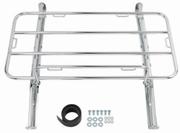 Spent a couple hours updating a Faulty Parts web page on the Moss Motors MGA luggage rack that has had entirely non-functional fasteners for at least 12 years. The kit as received cannot be installed on the car, so every buyer has to spend time building a fastener kit for installation. There is of course no reason for a major parts supplier to treat their customers like this, they just don't care about parts quality or customer satisfaction. As long as customers do not send the parts back or demand a refund, it is a perfectly acceptable retail sales part.
Someone accidentally popped the clutch when their MGA was idling in reverse. That killed the engine (as expected), but on restart it made some loud knocking noises, and could not be shifted from neutral back into reverse (don't know about the other gears yet). This should be fun trying to disengage the detents and interlocks without removing the gearbox.
Tuesday, January 3, 2023:
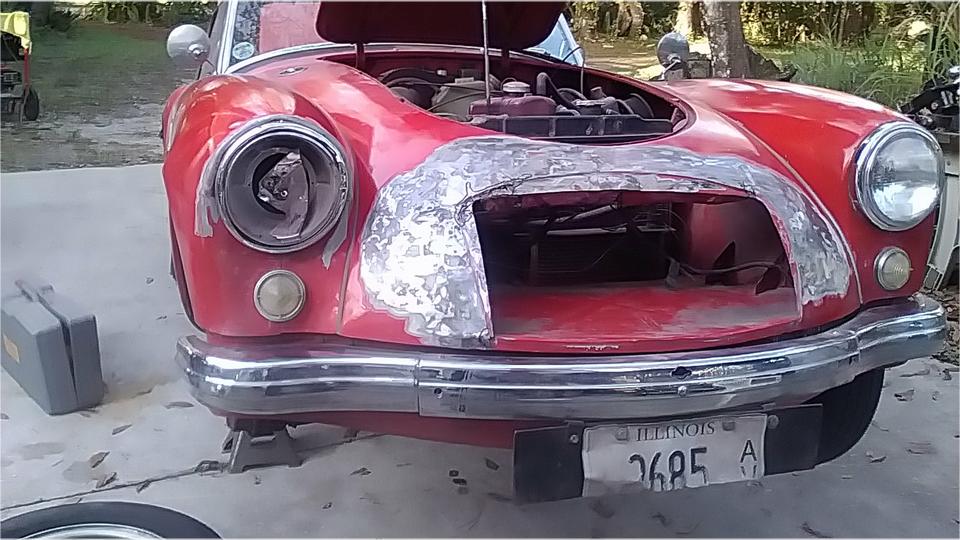
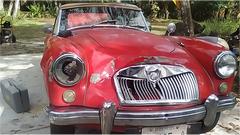
Mostly just a day off waiting for the new MGA grille to arrive, which it did in early afternoon. Finally there is new life on the forums and email activity, back to work after the holidays. Lots of people don't want to "waste time" mucking around on the internet during precious days off. But come first work day of the week the place lights up with activity again. So how many of you are really doing personal internet stuff on company time. Yeah, you can't fool me. I occasionally get a message from someone who got busted at work because some web page of mine perked up with some music in the office.
And the CMGC January newsletter arrived in Publisher format, wanting me to transcribe it to web pages for the club web site. Guess what? Bad timing, so it will likely have to wait until next week for that work. Just a matter of priorities.
Wednesday, January 4, 2023:
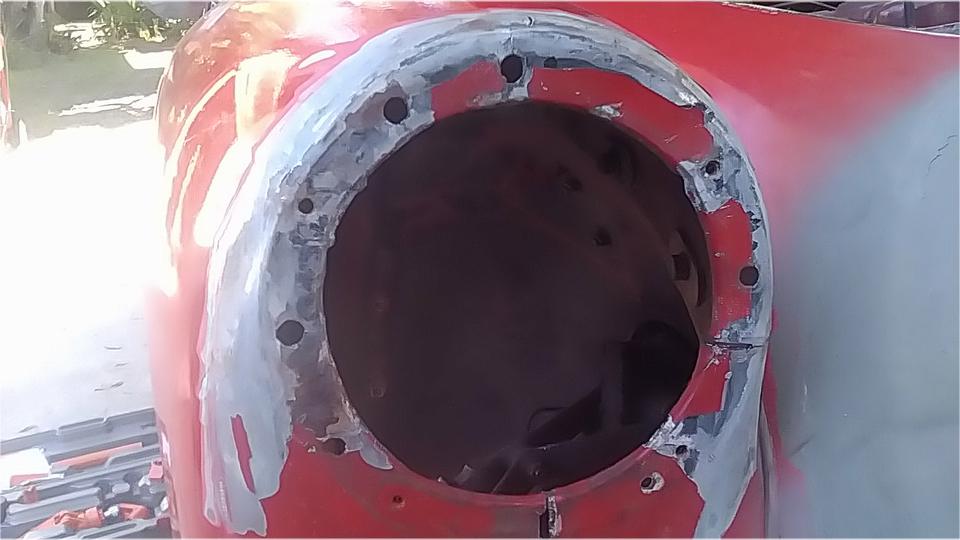
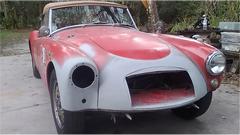
The new grille is in, so no more excuses, get off out butts and get to work repairing the car. Morning stop at a parts store to pick up supplies, couple spray cans of primer, some white, and black paint, sand paper, paint brushes, tire valves for the trailer tires. So we got a late start about 11-am.
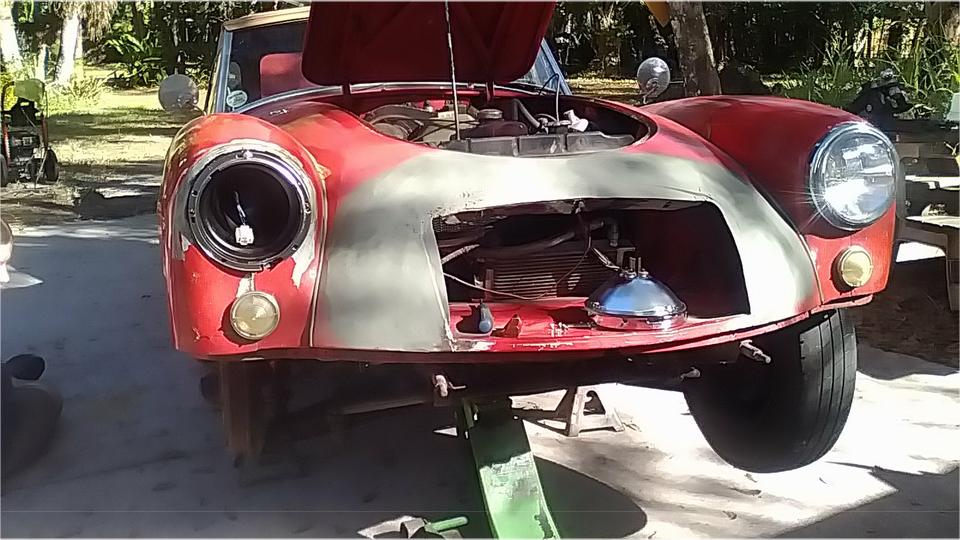
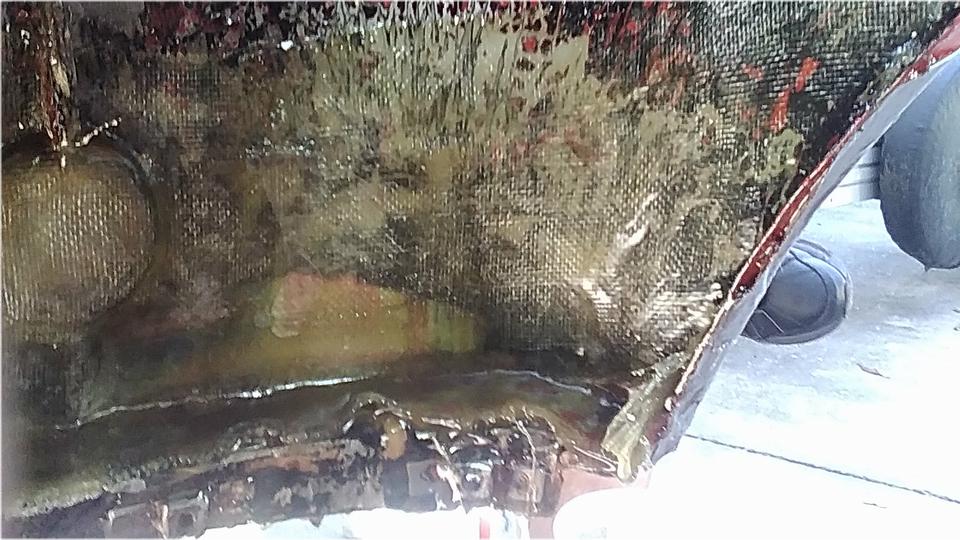
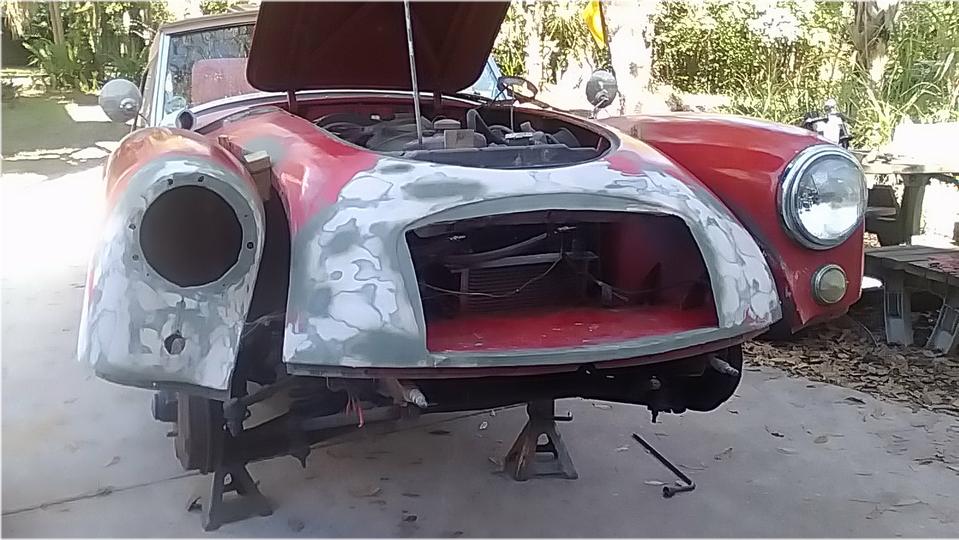
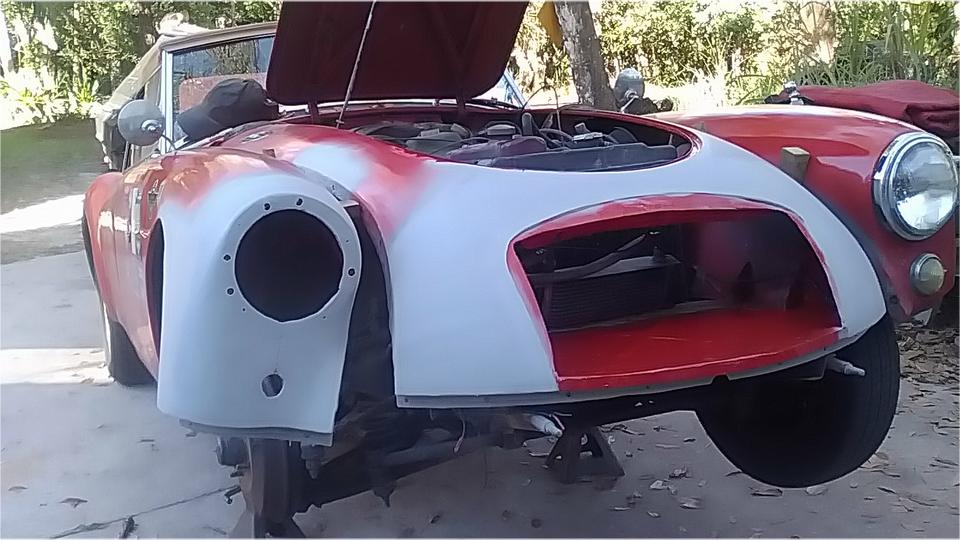
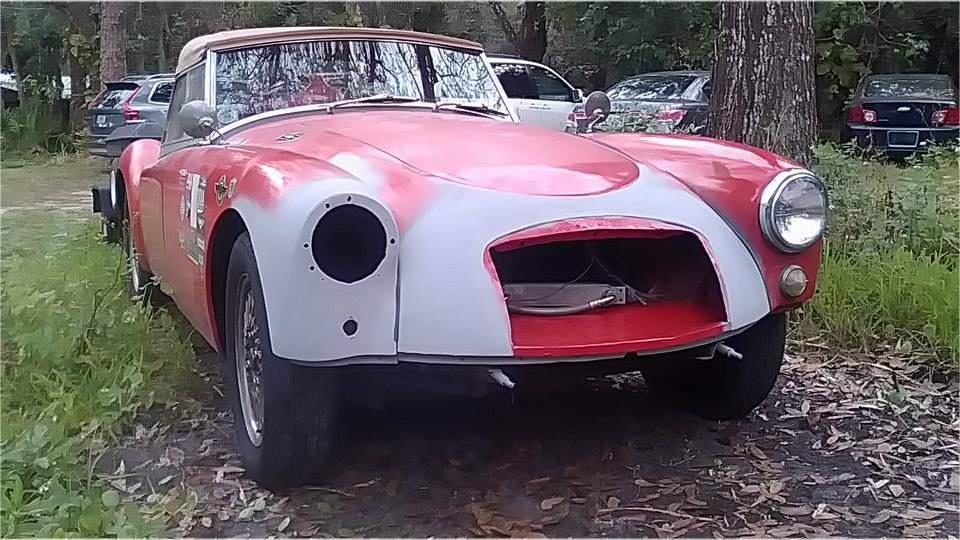
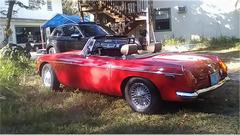
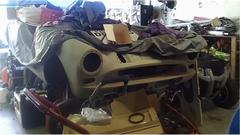
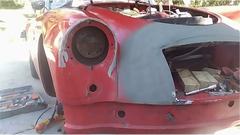
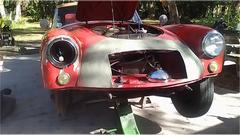
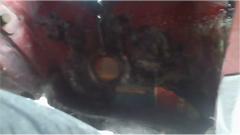
So here are the pictures of pain and ugly we have been ignoring for nearly two weeks. The car looks worse in person than it does win these pictures. Not the first time we've been here though, so we just keep saying, "It's just maintenance". The real story is that I hate dealing with insurance companies and claims adjusters and body shops that may or may not get to your car in six months or a year. This is our daily driver car, so let's just fix it and get on with life, and not even bother filing a claim with the insurance company.
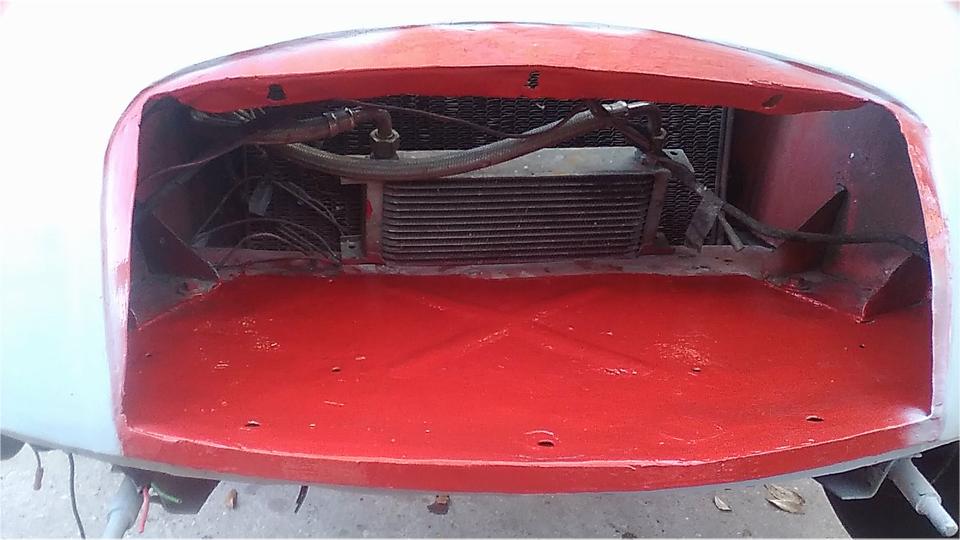
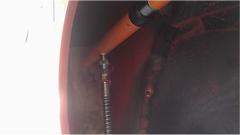
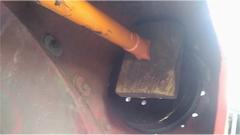
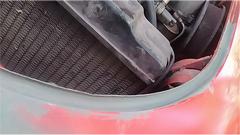
Start by jacking it up as high as reasonable in the front for easiest access. Five bolts to remove the smashed grille (yes only two on top from prior experience). Remove the two 4-inch air hoses, two small hooters that typically hide here, pull the horn fuse out so we don't have to disconnect the battery, and four small screws to let the oil cooler move a bit more out of the way.
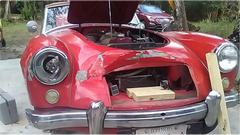
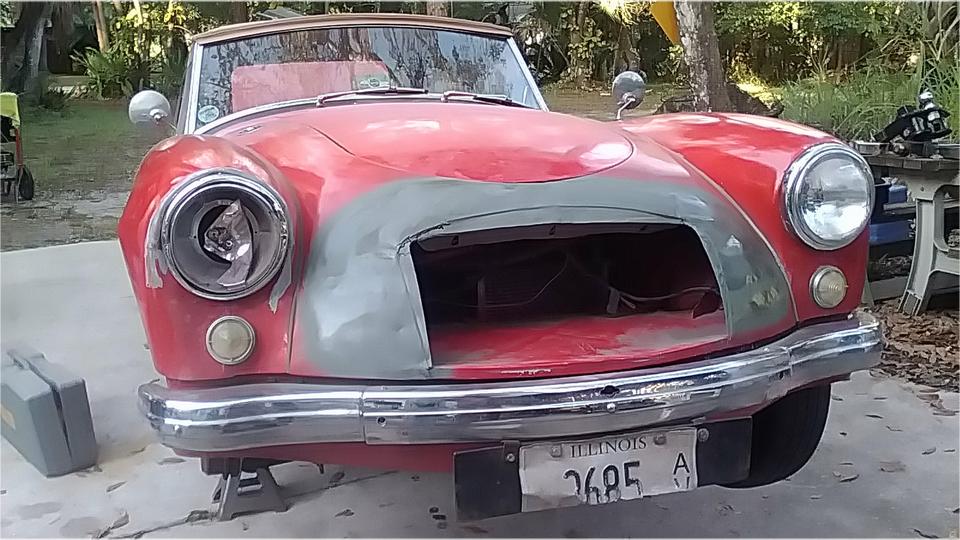
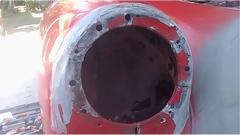
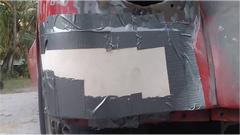
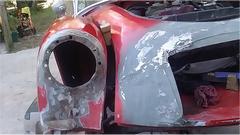
Multiple bits of board and shims, to use as pry bars, a couple of crow bars, some hammer and dolly tools, and a small scissors jack to use as internal pusher. Four hands and only a moderate amount of swearing, and a few hours later the nose sheet metal is 85% of the way back to normal position. Grab an angle grinder with sanding flap wheel, and in short order there are a few pounds of paint and filler on the ground (and all over everything else). Pretty obvious we needed to remove the overriders, so just a short pause for that. Lots of cracks we will be welding up tomorrow morning. Spray a little primer on it so it will be "not as ugly", and time to put the wheels back on it for the day. Not long to stick a couple of coach bolts in the two empty holes to hold the bumper together. Notice we didn't get to fender or headlight, didn't even take those things apart yet.


Not a bad start for a long half day's work. Not as quick as I used to be, but at least intending the take our time to do a better job of it this time around. Just keep working on it every day until it's finished,and get into a better mood much sooner.
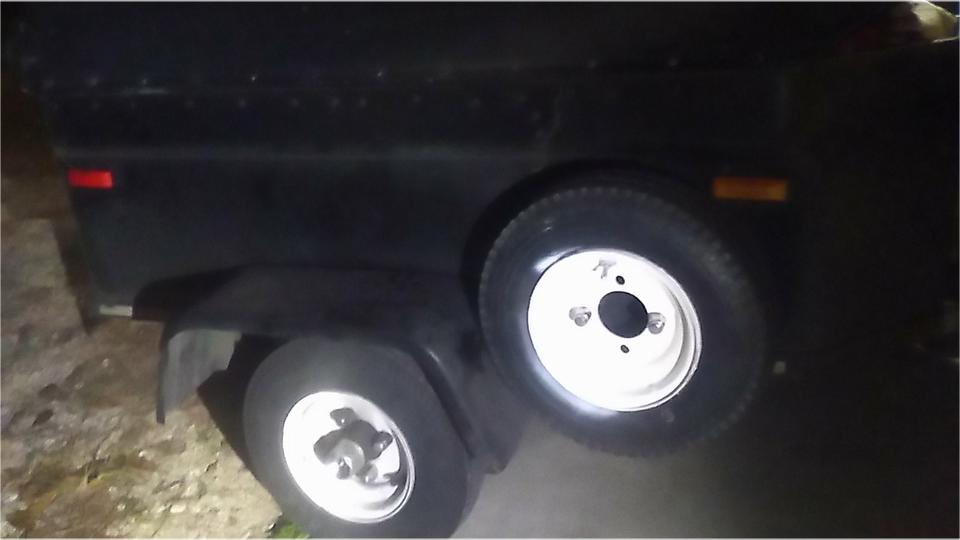
A bit of light remaining, so it seemed like a good time to put a new tire on the repainted trailer wheel for the spare tire. Easy enough to get the new tire onto the rim, but turned out to be a bear of a time getting the tire bead to seal on the rim. Two wraps of a cargo strap and a tire iron to make a tourniquet, but the didn't do it. Si I had at it with a three pound hammer pounding diligently down on the tire tread to make air pressure pulses inside the tire, and after a while the tire beads were pretty well seated on the rim. Eventually it took air and held pressure. Sheesh, what a beast of a job. Then while putting wheels back on the car we found a stripped lug nut on left front wheel. But the stud was okay, and we did have a spare lug nut in the Magic Trailer, so not long to finally pack up and get out of there.
Later evening run to Harbor Freight to pick up a couple of tools for the host shop at Tech Central. We were going to pick up a new hood for open air sand blasting, but ran into a slight snag. There were six on the shelf, and none of them had the glass eye shield in place, or anywhere in the package. One package that appeared to be still sealed, we took to the front counter and asked the clerk to open it to see if the glass was in there, in which case we would be happy to buy it. It wasn't, so there they sit with six blasting hoods they can't sell. Trying to buy one of those would be like buying a new car with no engine, pretty useless.
And out turn signals were not working, because we had pulled the horn fuse. Navi put the fuse back in, and promptly blew the fuse. Okay,so get out the black tape and tape up the horn wires that had bare ends dragging on the front air pan. Install another new fuse, and then it was working, and we were finally on our way to an 8-pm lunch and WiFi.
Thursday, January 5, 2023:
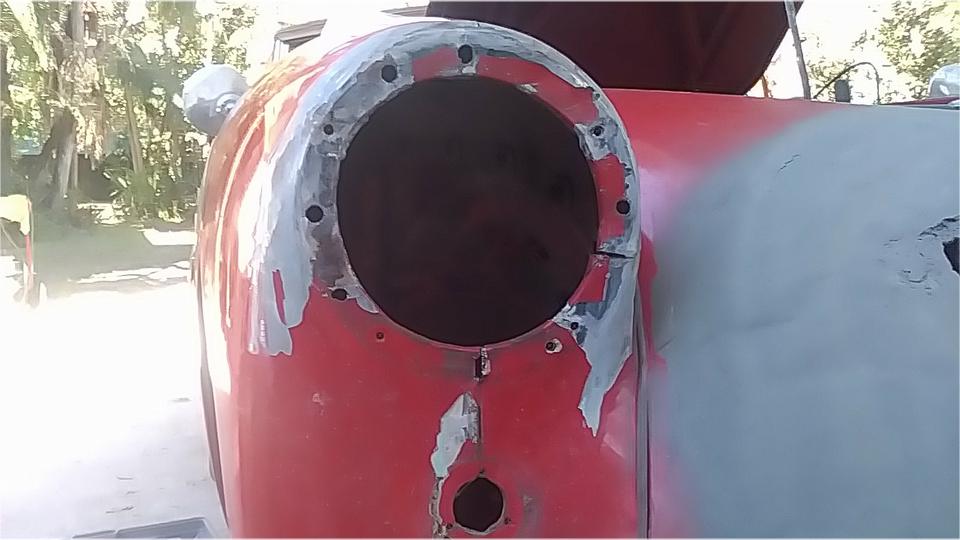
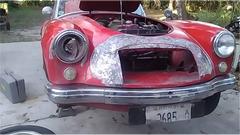
No pictures today, the one here is a copy last picture yesterday. We had a slightly earlier start, about 10-am. Spent half of the time welding up some cracks, mostly near corners of the opening, and grinding down the welds. Other half of the time spent massaging and "fine tuning" the shape of the nose to closely match profile of the new replacement grille. Not a lot of crow-barring, but more finesse.
Place a board across the body mount brackets, set a scissors jack across the board, place a few shims on top, and use the scissors jack to push up/raise the body nose, mostly around top of the opening. Push up here, hammer down the flange just over there, test fit the grille, rinse and repeat, and keep it up for a few hours as the body nose gradually sneaks up on the grille profile. This was getting very close by the time light was failing us. Spray a little more primer paint on it, and it looks almost the same as it did 24 hours earlier, but a lot stiffer without the cracks.
Pack up, clean up, have a little chat time with our host. Late evening run to Harbor Freight again to pick up a welding clamp we forgot yesterday, and some work gloves, small disposable paint brushes, masking paper and tape. Then off for dinner and evening WiFi.
Friday, January 6, 2023:
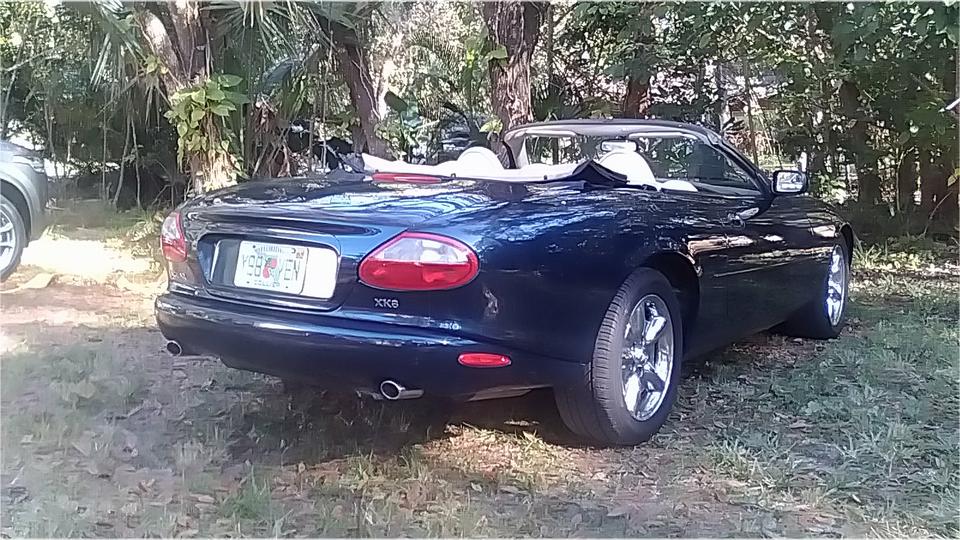
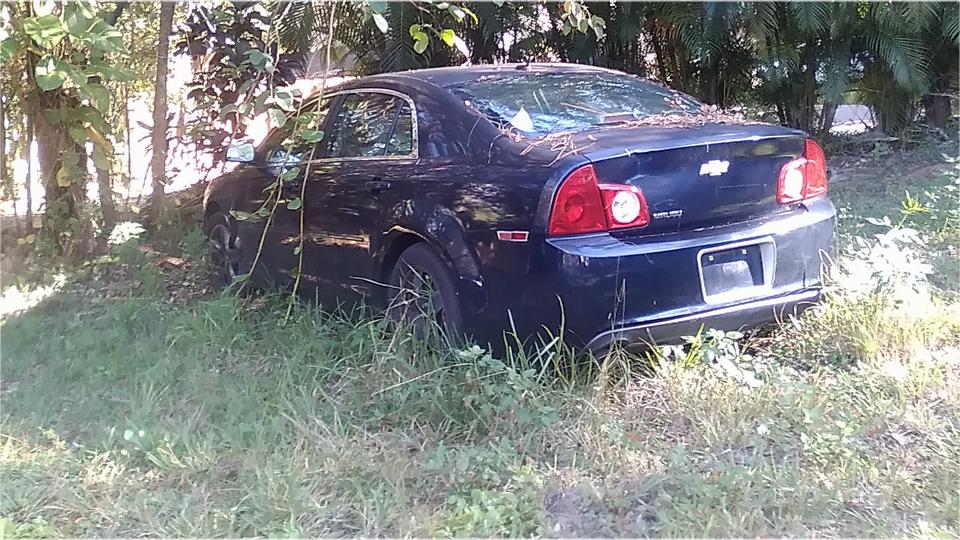
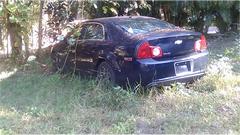
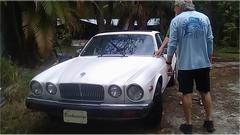
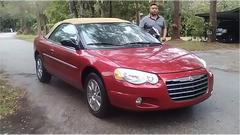
Fridays are normal tech day at Tech Central, so no work on our MGA today. But do get some pictures as we check out the current projects. The Jaguar XK8 and the MGB are regulars here. I had to ask about the Chevy Malibu in the weeds. That one needs replacement of the electric power steering column unit, and reprogramming of the chassis control computer. A dealer wanted $1800 to do it, so the guys want to do it here to hopefully save some money (and get to play with another programming tool).

Always a few sport-utes on hand, just transportation for the visitors who don't bring their sport cars.


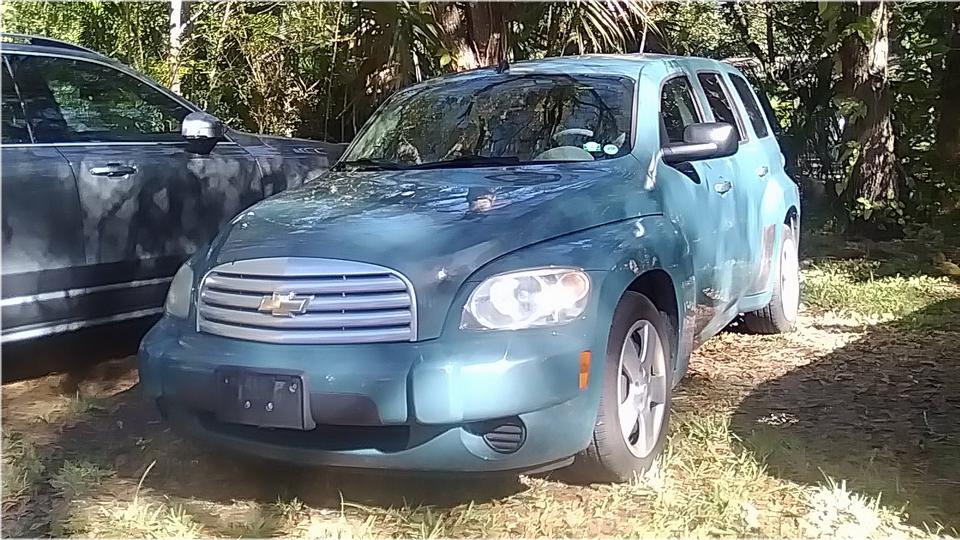
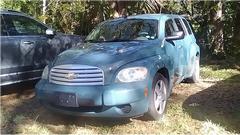
The Chevy HHR (Heritage High Roof) retro style (2006-2011) was an interesting new show. There were more than half a million of these sold in seven years, so I recon it was at least a moderate market success (while it lasted). And this one is still in service.
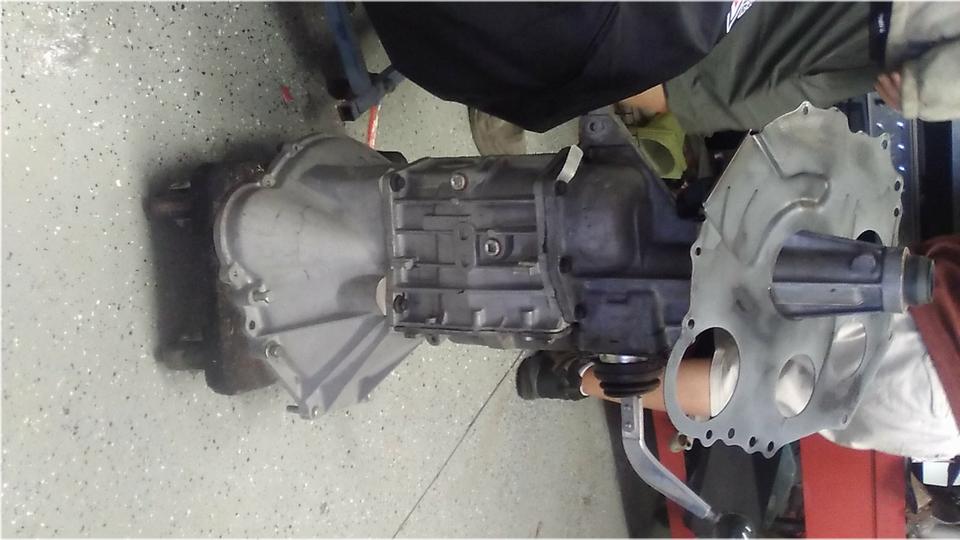
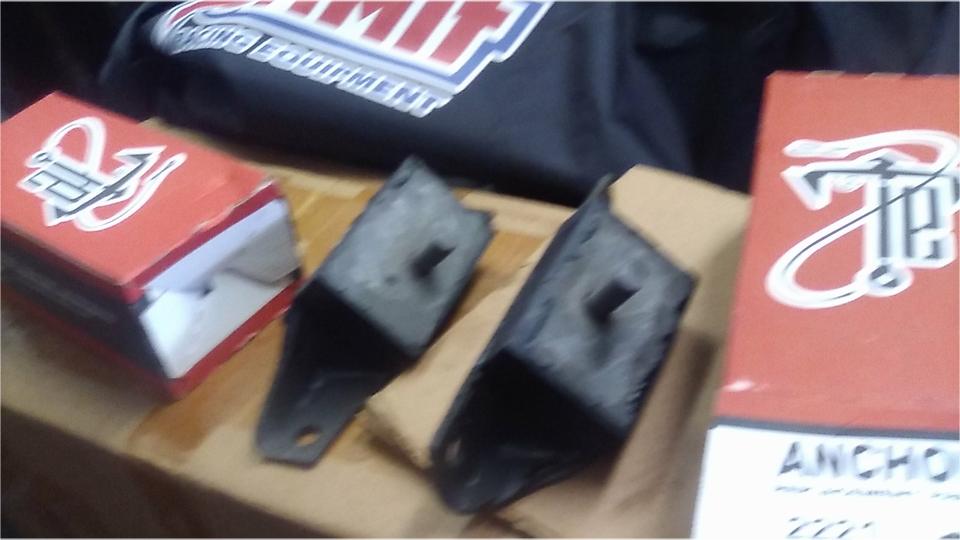
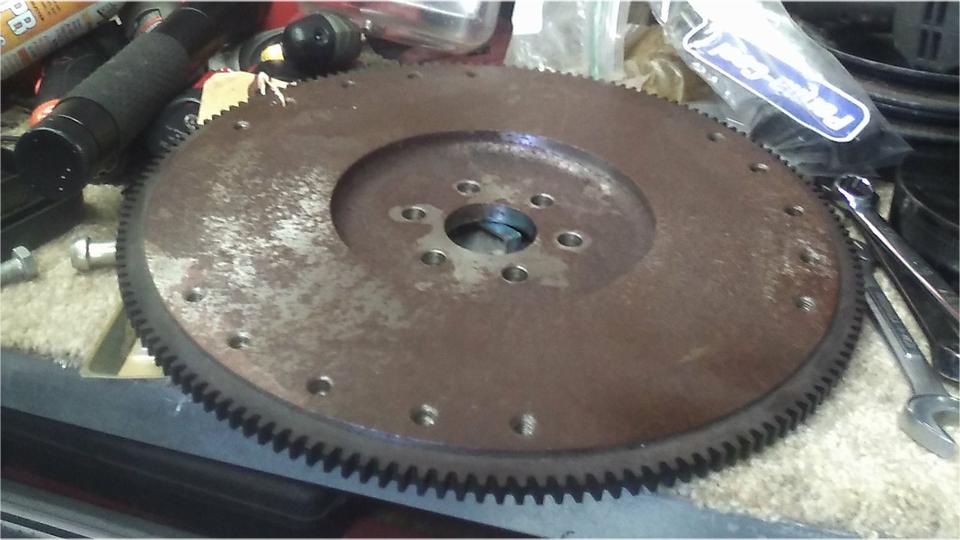
Then there was an interesting gearbox, a Ford T5 with special factory supplied race gearing (not a common public option). And a pair of engine mounts, beginning to put the list of parts together.


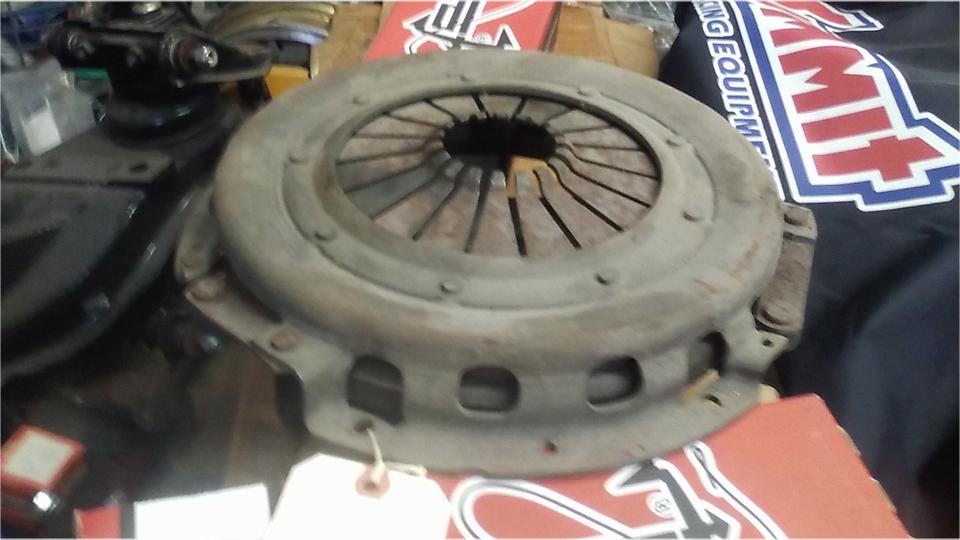
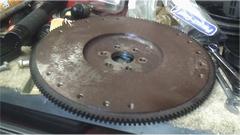
There was a lighter than normal steel flywheel (not cast), a competition pressure plate and friction disc, clutch release bearing and release arm.

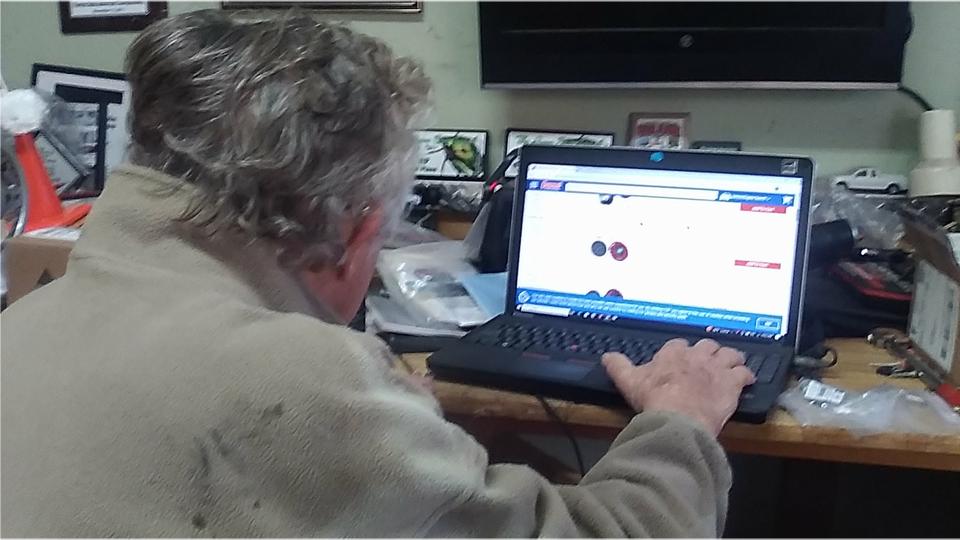
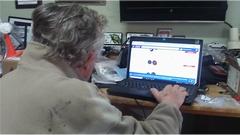
Jerry was searching the internet for the correct bolts to attach the clutch to that flywheel. Odd to find 8-mm bolts there when the rest of the engine and clutch are not metric parts. Okay, the final reveal is that this gearbox and clutch parts are to be mated to a Ford 5.0 V8 engine, another factory special race engine assembly capable of over 400-BHP naturally aspirated. And for the kicker, it will be installed in the Sunbeam Tiger that has been much ignored for the past few years. Soon it will become the next vintage race car, should be a real hoot, definitely not under powered this time.
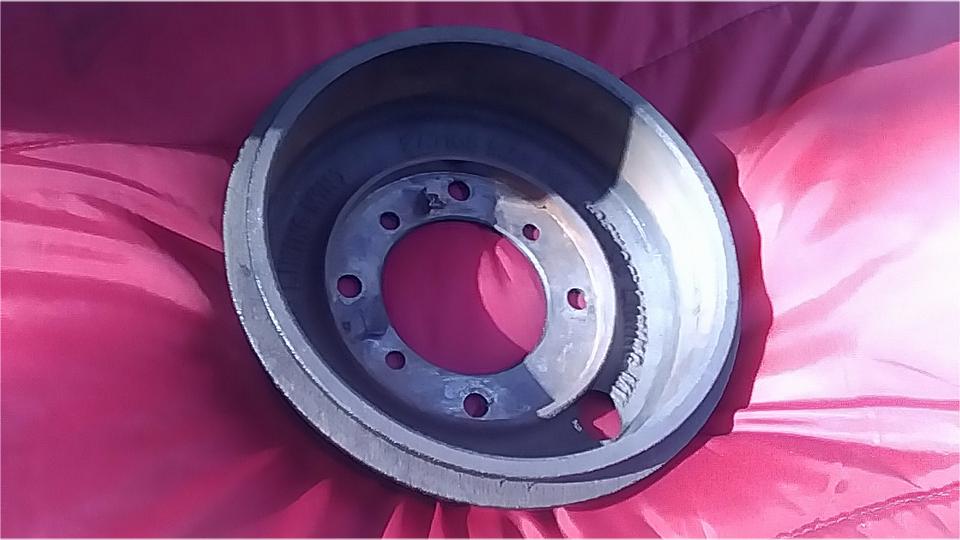
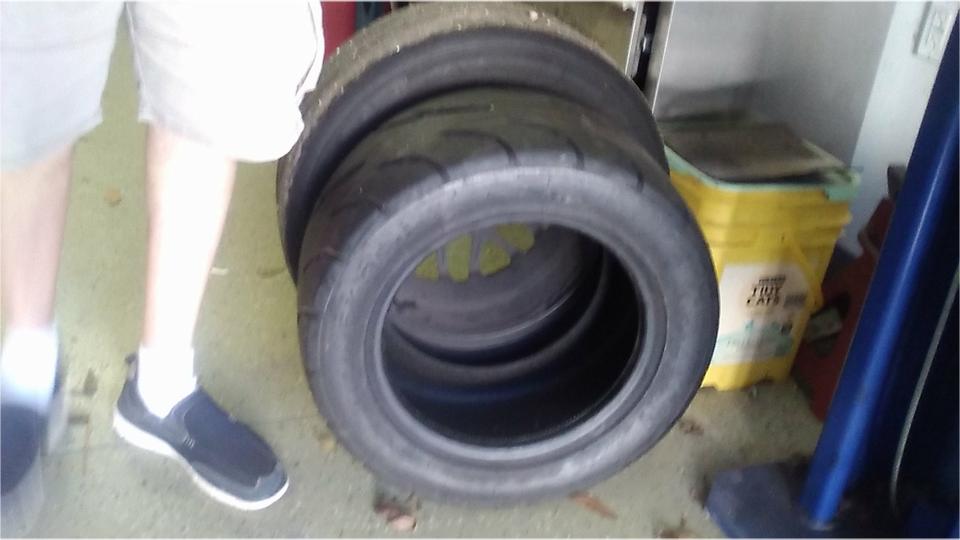
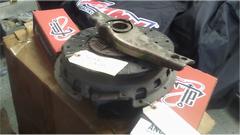
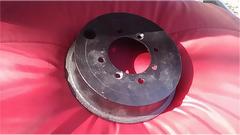
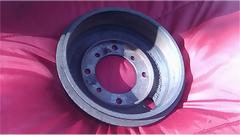
Hey, look what Jerry came up with for me today. It is a 7-inch brake drum for AH Sprite and MG Midget. Oddly, this is the perfect tool for power pushing out the 7-inch head light rim where my MGA has the RF headlight bashed in along with the nose of the car. Not today, but this will come in handy in another day or two. Then pulling out new race tires for the VW Rabbit with 13-inch wheels, sitting in front of similar size tires for 15-inch wheels on the VW Scirocco.

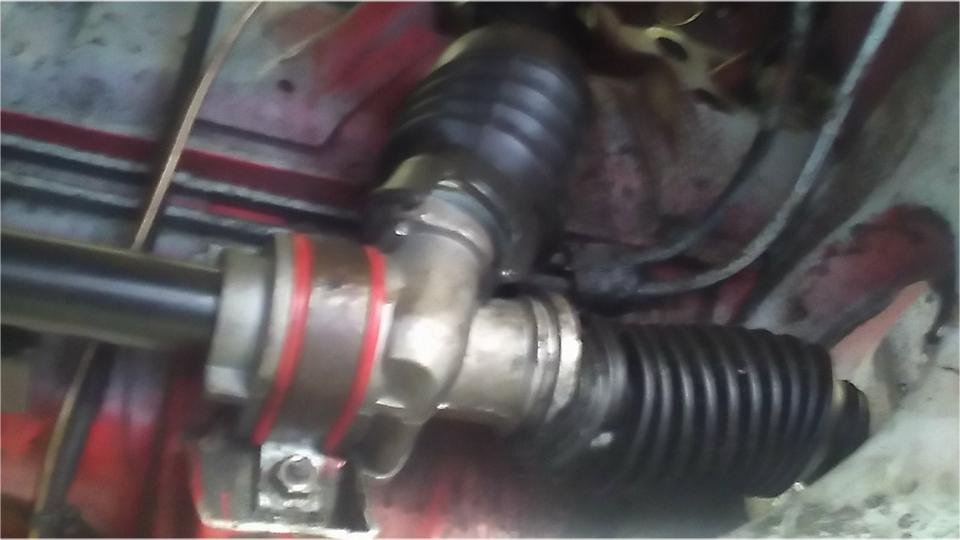
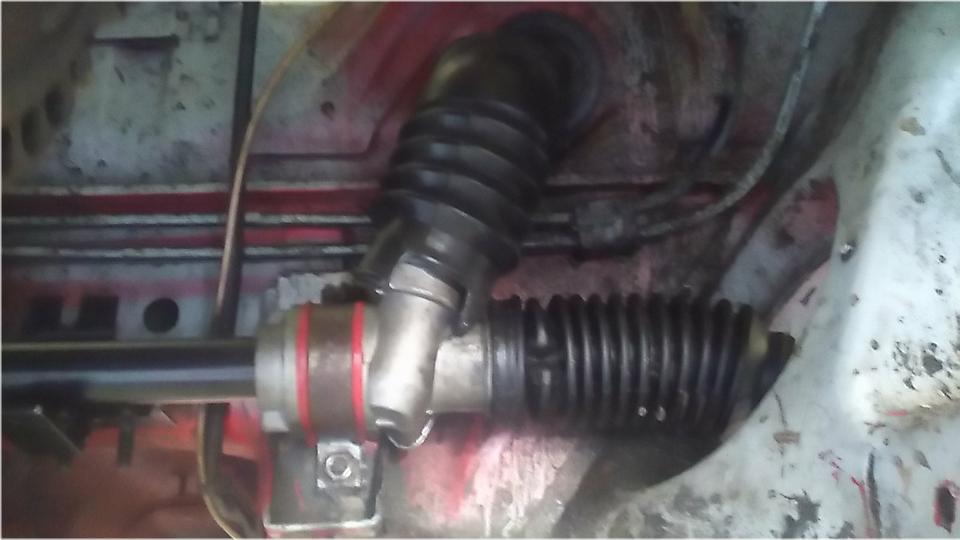
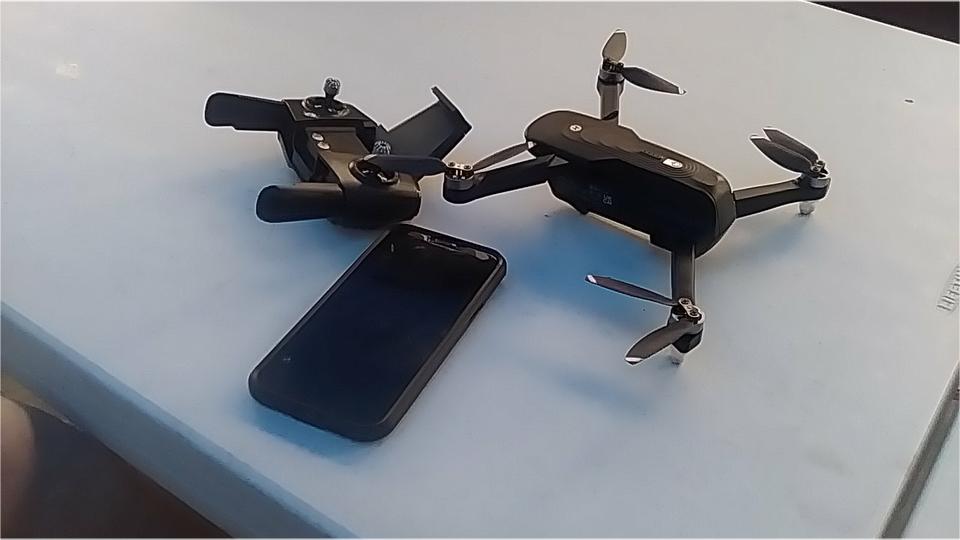
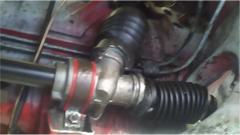
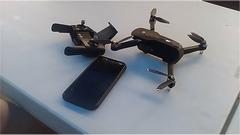
Then a little chore to install a rubber boot on the steering rack for the race car (which Jerry had been fighting for a couple days). And once the grunt work was done we got to play with another new toy, a fairly inexpensive new battery powered drone. This one is just under 4-ounces total including the flight battery, allowing operation without any special license. As Jerry was bringing it home I held up one hand to pick it out of the air. Neat little toy connecting the controller to display the live camera view on a smart phone as it flies.

About a dozen friends were hanging around long enough for burger BBQ lunch before most were heading out. Being Friday afternoon and not too late yet, this was the golden opportunity to head for a local paint supply shop in Fort Myers to pickup a pint of Red urethane enamel for the nose of the MGA (which we may actually get to painting before Monday). Finished with that before 5-pm closing time, then off for evening dinner and WiFi to bring you these photos and notes. And more good news today, as a friend has sent me two MGA gearbox shift extension assemblies for parts (likely to arrive mid week).
Saturday, January 7, 2023:
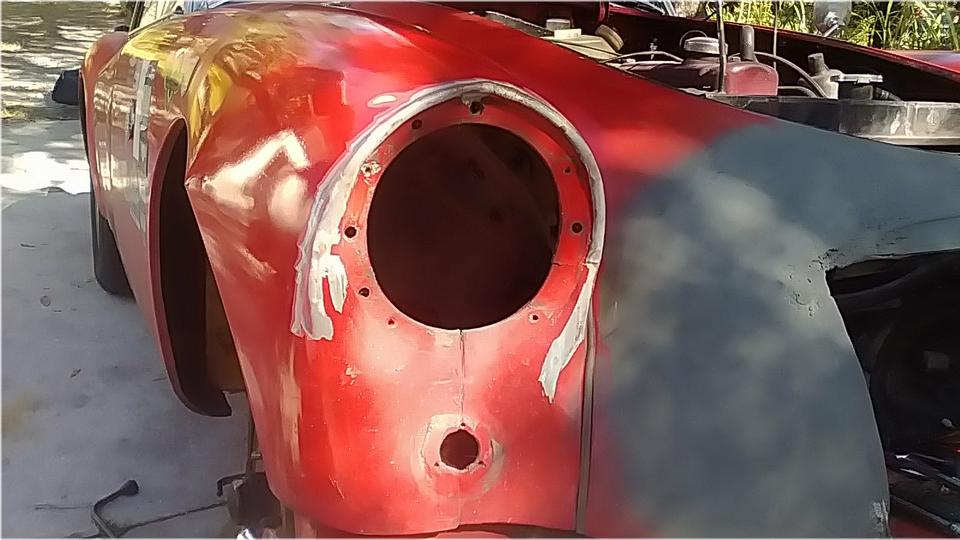
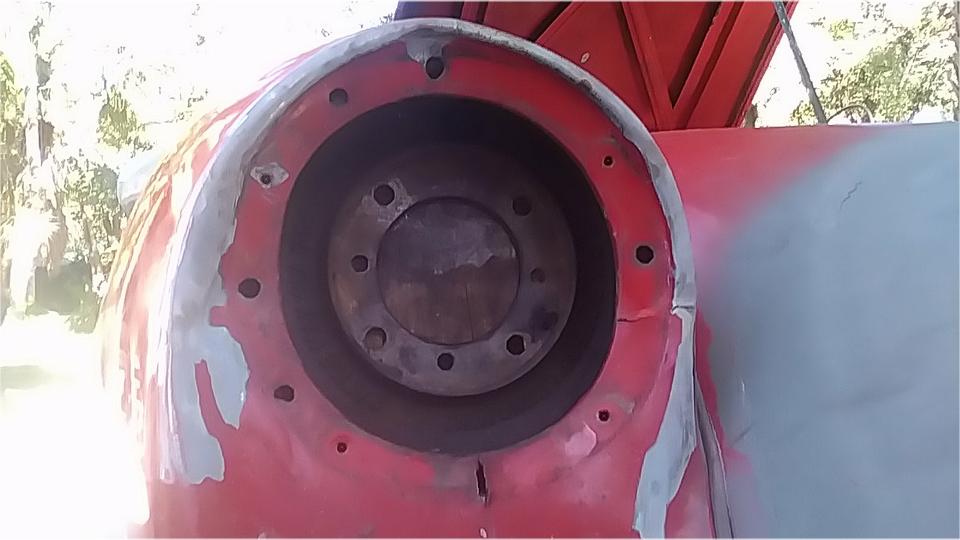
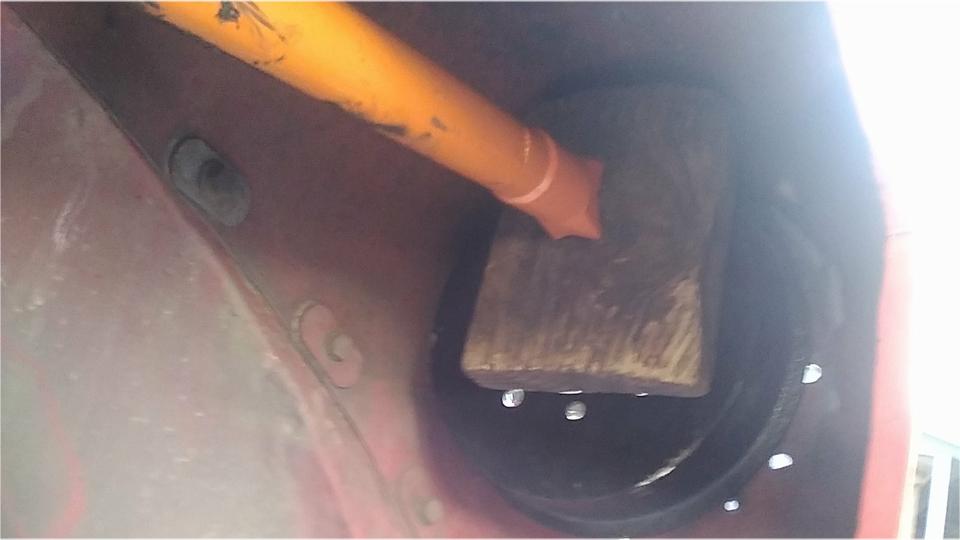
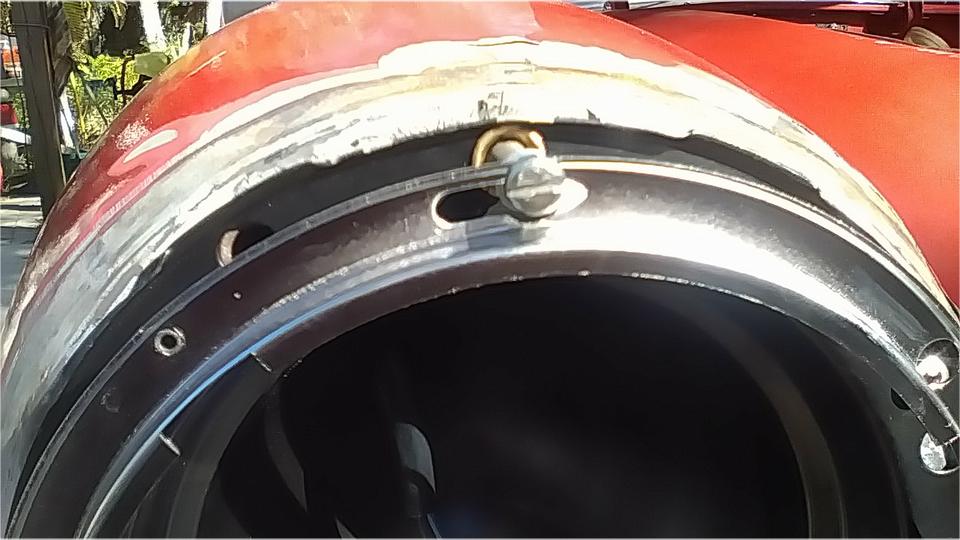
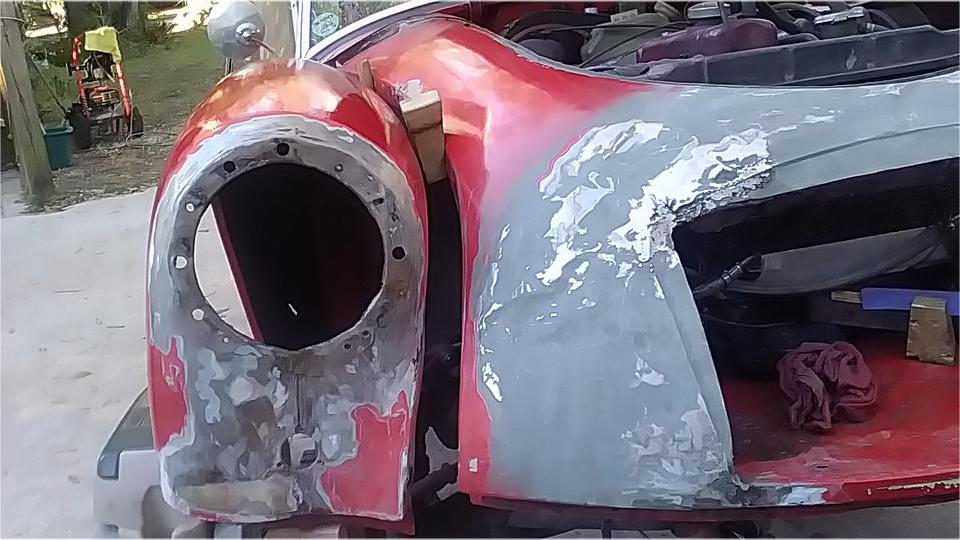
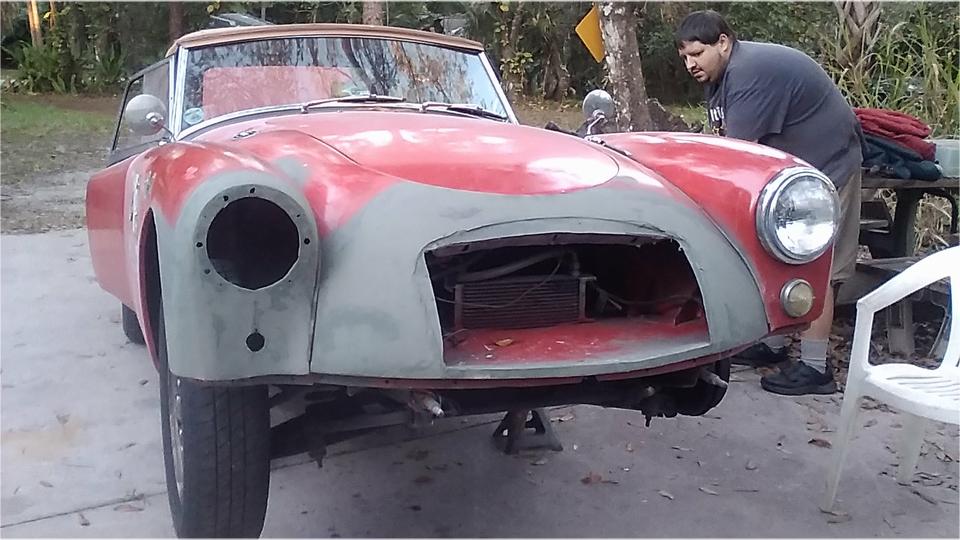
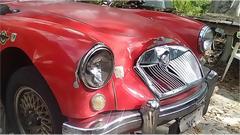
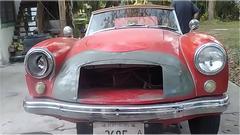
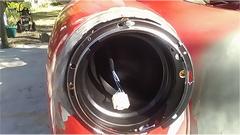
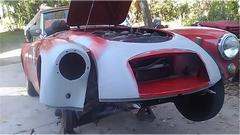
Back to the nose job on the MGA. I'll be happy if I get the fender straightened out enough to install the new headlight assembly today. After removing the munched headlight assembly, notice the lamp mounting ring area has been pushed back enough to leave a quarter inch "eyebrow" most of the way around. This was going to be interesting. The MG Midget 7-inch brake drum is the perfect pusher tool for this job. It nests right in behind the mounting ring to push the fender back out in exactly the opposite direction where it was pushed in.

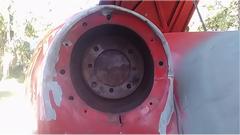
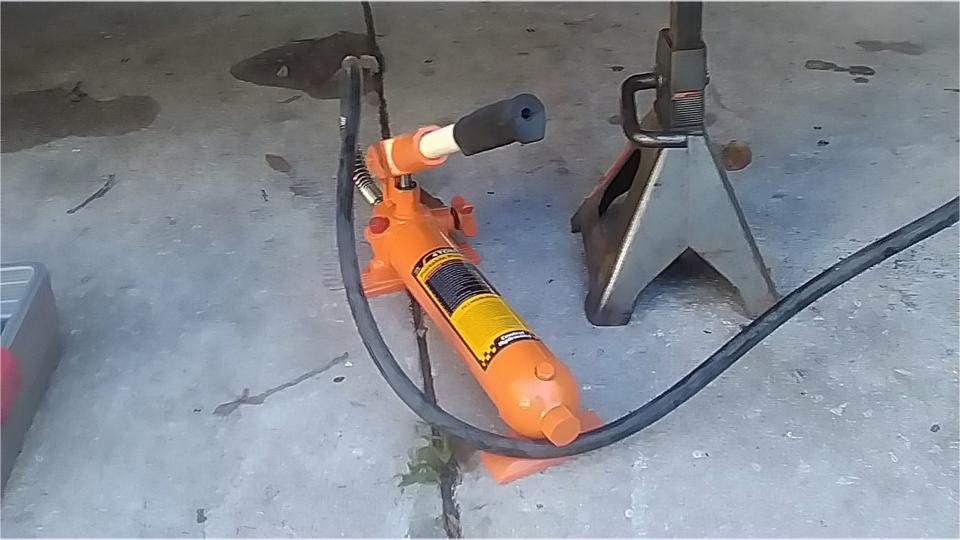
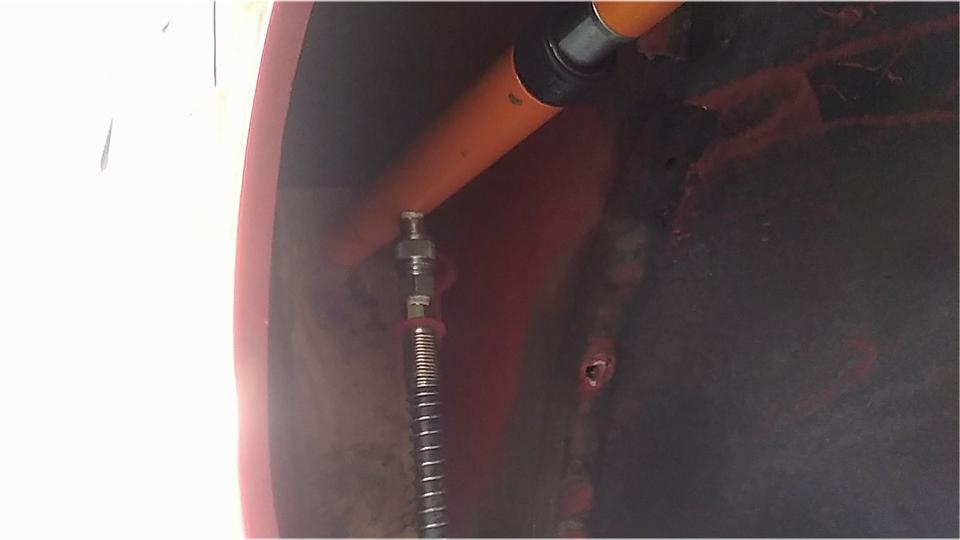
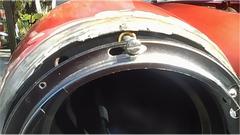
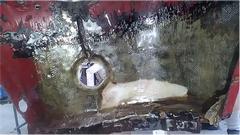
Remove the splash guard (7 screws). Place a wood 2x4 on top of the body sill in front of the inner body step in the foot well. Place the 7-inch brake drum behind the headlight mount where it needs to be pushed out. Place a board behind the brake drum, position the hydraulic body ram where it needs to be pushed, and pump it a few times to bring the flange forward as needed.
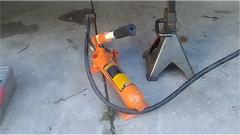
While the pressure is still on, grab a body hammer and tap the fender profile back into shape all around. With two guys and four hands this goes well, and with a few more hours if fiddling we had this area back into good enough shape to install the new headlight assembly so we could drive it away for dinner.

Not a bad day's work for some casual fiddling without working too hard. Didn't get the last pictures with the lights back in place, but maybe tomorrow.
Sunday, January 8, 2023:
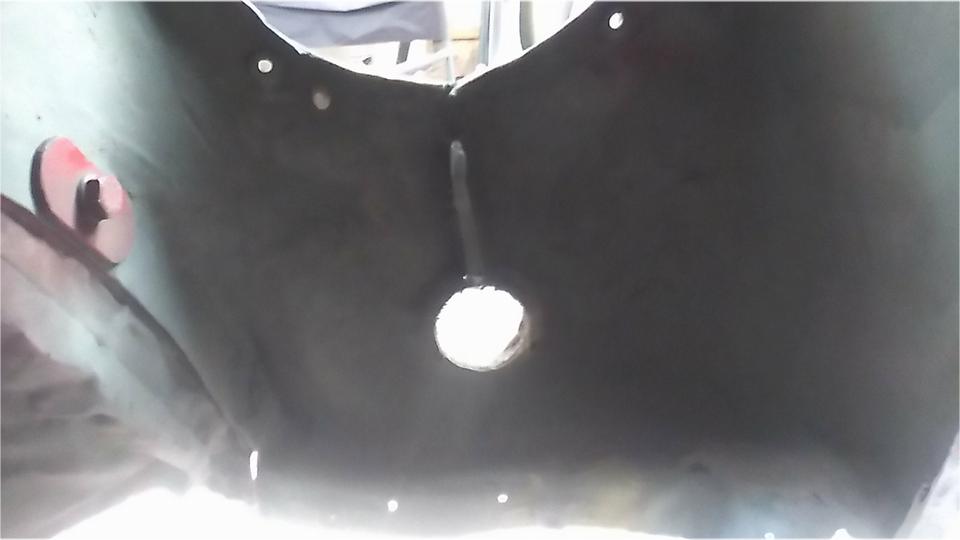
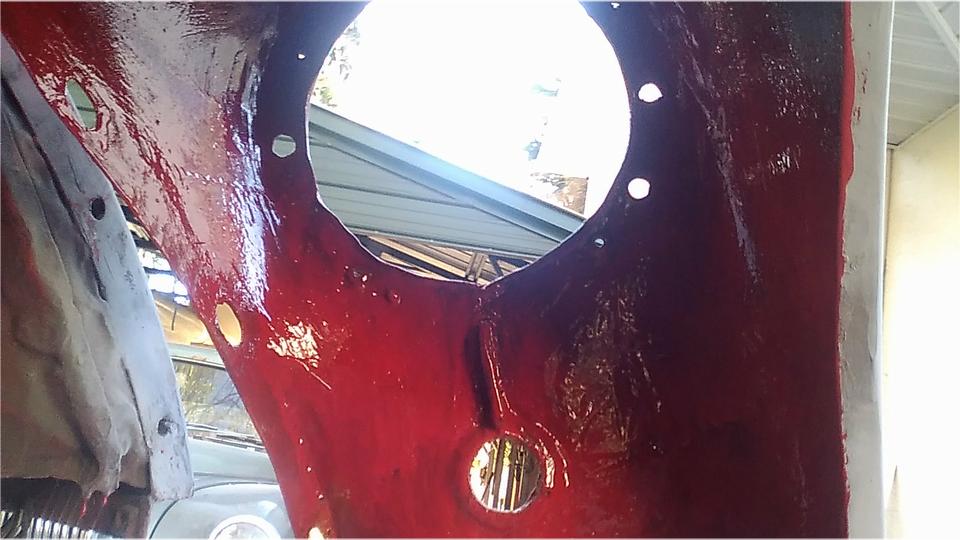
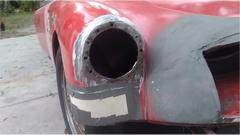
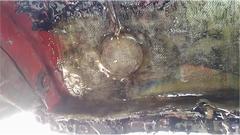
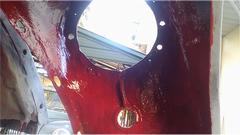
First, there's the picture I missed last night with the lights installed in the RF wing. As we were disassembling it for more work I noticed a design or construction flaw in the Moss Motors headlamp assembly. The heads of the adjuster screws were too large diameter to fit through the keyhole slots in the lamp mounting bucket (ring). So the adjuster screws had to be removed for disassembly rather than just rotating the assembly to pop it off. Before next assembly I think I will grind down the screw heads to pass easily through the keyhole slots for easier assembly (and possible future disassembly).
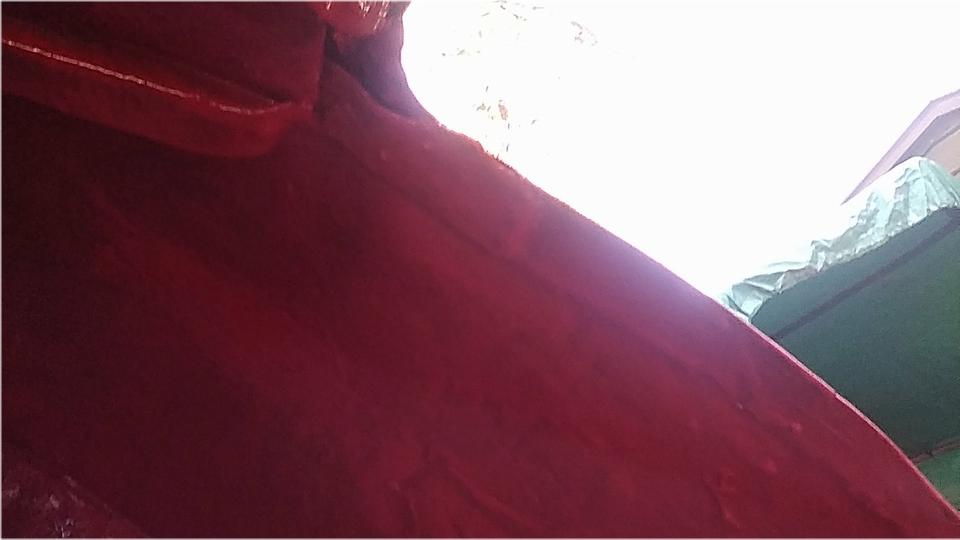
 Another half day was spent doing more push forward and hammer and dolly work to bring the face of the fender forward far enough to be all flush and vertical on the face. When close enough to look good with the rubber gasket in place, it was time to MIG weld all the small cracks to make a very rigid structure that would no longer easily deform. Part of that effort brought the kinked out side of the wing inward to the correct plane with no other fuss. While the hydraulic pusher ram was still in place under force, I welded the one small crack in the fender flange, making the side of the wing very rigid in just the right position. Hadn't had one come off that slick and easy in a long time. -- With the initial bash, followed by all this pushing and shoving and hammer and dolly work, an earlier fiberglass patch behind the parking light had cracked in a few key spots and was working loose, so that had to be ripped out and redone. Just wrap a layer of thin slick face cardboard around the outside, and tape it tight with duct tape. Then laminate a few layers off fiberglass cloth on the rear side. In itself, not a big deal to redo the fiberglass backing patch, except for one thing.
In all my years of doing fiberglass cloth and resin repairs, the resin would always set up too fast before I was finished brushing it into the cloth. Then toss the brush and unused resin, and mix up some more to finish the job. But this time the resin did not set up, not for a long time. I had time enough to lay up three layers of fiberglass cloth and brush in resin to completely fill the weave of the fabric with no included air bubbles, and it still wasn't stiff. So I kept on brushing and poking and smoothing the fabric to make a beautiful backing patch with no wrinkles, very impressive, and it still wasn't stiff. So step away, take a break, and let it cure for a while longer. A few hours later the resin was still sticky, so I don't know if it is going to fully cure or not. Clean up, pack up, wheels on the car and head out before dark (without installing the lamps for over night). Wait and see. If the resin is still sticky in the morning we may get to rip it all out and redo.
Monday, January 9, 2023:
Well, the epoxy resin didn't set up, so today we got to pull out all of the sticky fiberglass and do it all over again. Between pull-out and clean-up and re-do for the fiberglass, and waiting for it to set up to be sanded, it killed about 4 hours. Just happy it did set up this time around, knock on fiberglass, and pull the tape and cardboard off the front face.


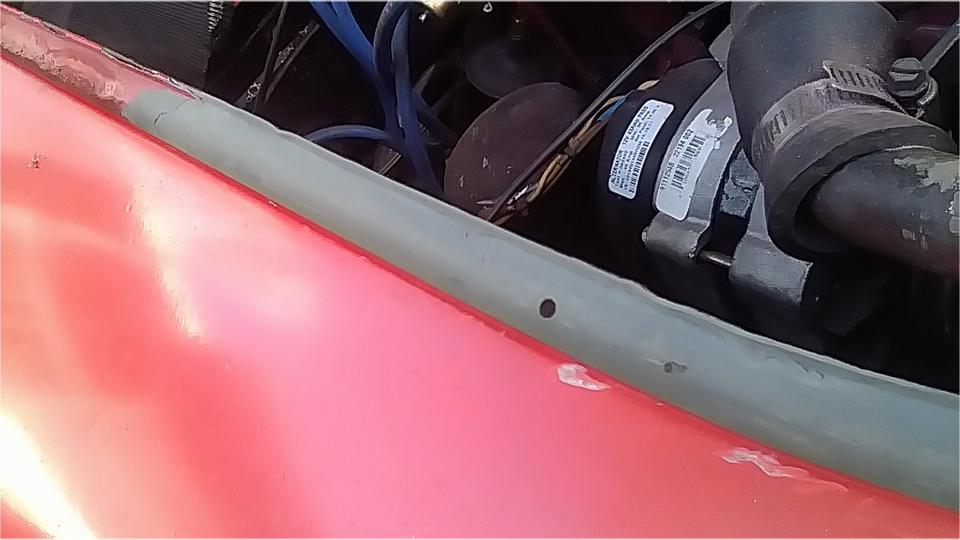
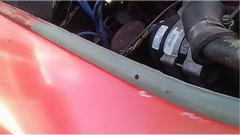
While waiting for the resin to set up, we took advantage of the time to clean out the bonnet gutter (front half) with a scotch-bright buffer wheel, polish it right down to bare metal, and brush in a primer coat.

Then going after the fender, remove bolts back to the splash guard, pull back the piping strip, and block the gap open to allow sanding the paint around the gasket joint, all around the headlight opening, and across the face of the parking lamp perch. Carve out the fiberglass from the parking lamp opening, and clean out re-tap the #8-32 mounting threads. By day's end nice work on the fiberglass, spray primer on the bare metal, and bolt the fender back in place with just one bolt near the front (where we attach the front harness grounding wire). Tomorrow will be filler and finishing day, so it may be ready for red paint the next morning.

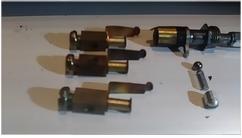
One more bit of good news, two used MGA shift extension assemblies arrived today. Now I may soon get a spare reassembled for my car, so I can send the loaner assembly back to friend in Oklahoma. Also sat in on the John Twist UML Zoom tech session tonight with up to 250 attendees. Good show John.
Tuesday, January 10, 2023:
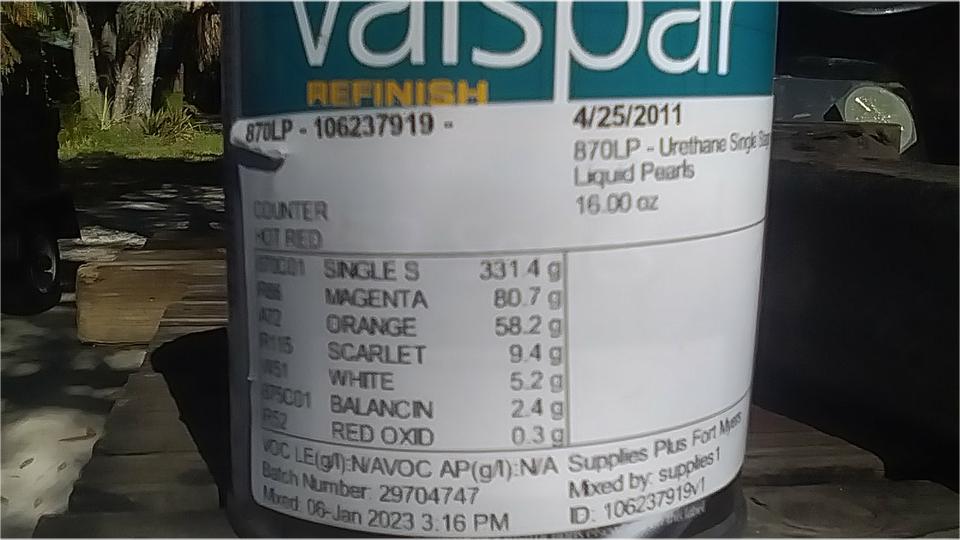
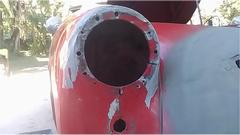
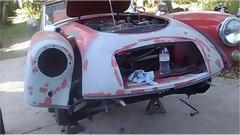
Had to remember to take a picture of the paint can label to preserve the mixing code, in case we need to do it again later. Didn't get the early picture, but we had both fenders liberated and slightly spread eagle to do finishing work on the nose. Got to work several hours today, less half hour for lunch and 20 minutes twice while Bondo was setting before sanding. Getting very close to correct contour and pretty smooth. Still needing to do a fair amount of step profiling around the perimeter of the grille opening, but sure to finish that tomorrow, and likely to paint red Thursday morning.


Wednesday, January 11, 2023:
A bit more casual work day. Start with removing two bolts to open the wings spread eagle for good access to the nose. A touch of wet sanding with a wide rubber flex sander, lots of pencil circles to note the low spots, thin layers of filler to make everything nice and bulbous and flush all over. Very little power sanding after the first pass, lots of wet sanding by hand with the flex block. Also time spent sculpturing the little shoulder all around the grille opening (the artistic part). More hand sanding, primer paint, and lots of little dots of spot putty to fill pin holes and scratches. By evening another pass at wet sanding with the rubber flex block, and one more coat of primer to look nice. If I wasn't too picky we could spray it red tomorrow. No rush, so we'll think about it. Install two bolts and put the wheels back on it, and good to go for the night.

Thursday, January 12, 2023:
First stop was a paint store to pick up a 5-gallon bucket of lacquer thinner (cheap cleaner type) for Tech Central,
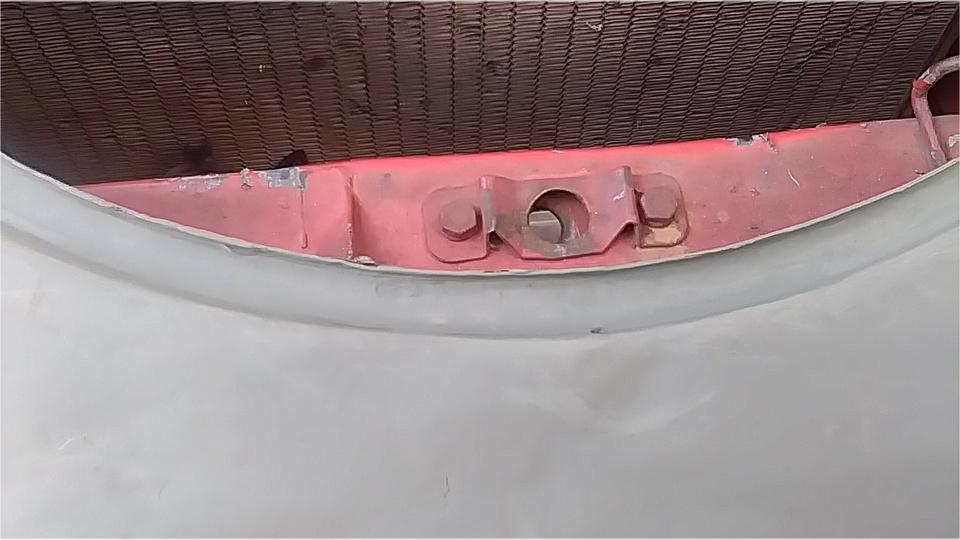
 and a few other miscellaneous bits of supplies. Then back to Tech Central for more work on the MGA. I drilled two more small holes in the gutter 2-inches forward of the radiator top tank to install two more rubber snubbers for the bonnet. Looking for new snubbers turned up none from the trailer. Rats, thought we had them, but at least put them on the wish list for next parts order. We did find a new bonnet release draw rod spring which we placed with the fender bolts to be installed with final assembly a few days hence.
We accomplished exactly what we intended today. Remove two bolts to prop the wings open for full access
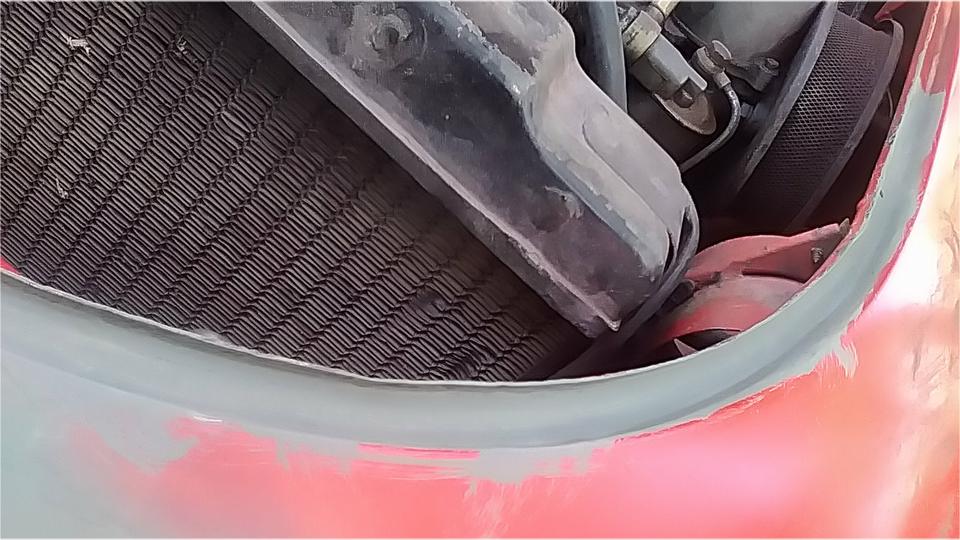
 to the nose. Time spent on fine-tuning sculpturing of the shoulder around the grill opening, followed by a few cycles of sand, prime, sand, prime. Then hand painting with 1-inch brush in the gutter under the bonnet, then inside of the RF wing, and all inside of the nose where the damage had been hammered out. Results are very satisfying, ready for final sanding and red paint finish spray (in a day or two). It looks much better after bolting together. Kind of a fun day, having gotten past all the bumps and finishing as smooth as the image that was in my head a week earlier.


Friday, January 13, 2023:
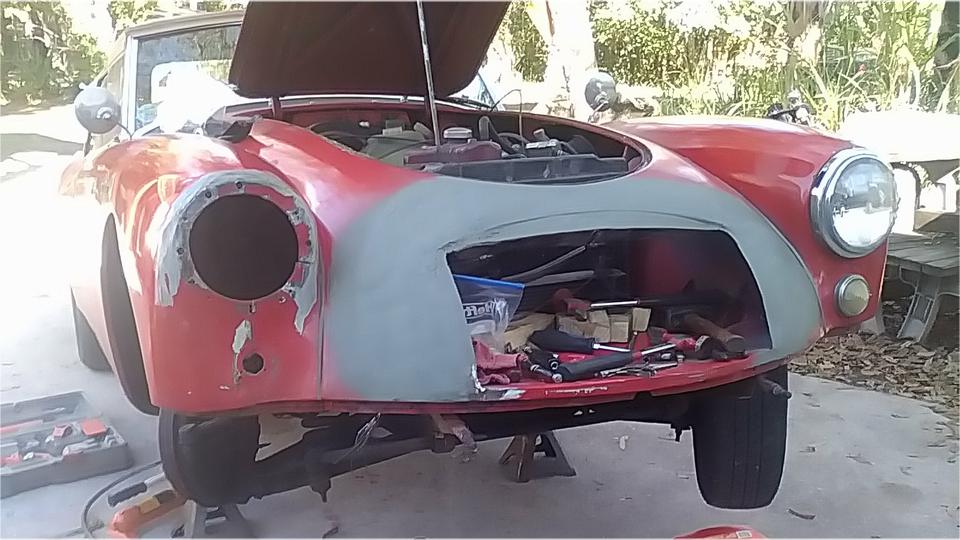
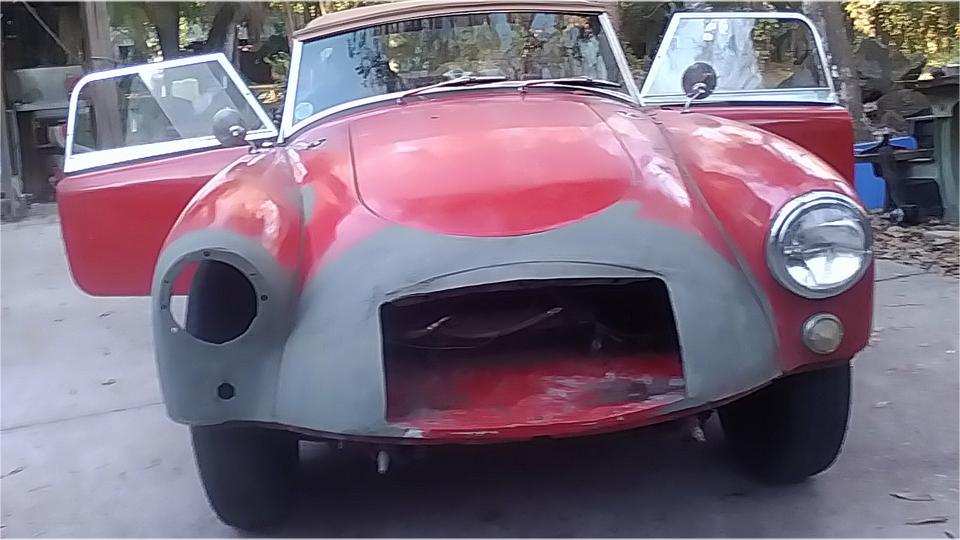
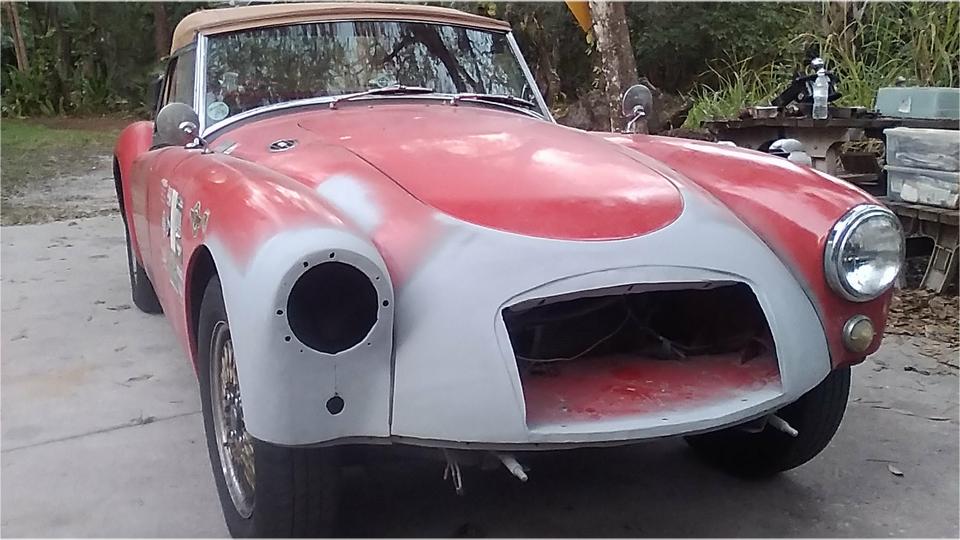
Okay, there's the picture I didn't get last night, bolted up and on the road. Needs another quick primer and sanding cycle or two before final respray, now just waiting for decent weather for painting. But going to rain today,so the preponderance of arrivals were common people movers.


There was one new addition to the club, a very nice Jaguar sedan getting the once-over with opinions and recommendations for minor paint touch-ups. We were expecting John Shoemaker to be working on his Magnette today, but instead his Sebring came in on a tow truck. Seems it blew a radiator hose the day before, so coming here for repairs. But not today, as John had some other commitment, so maybe Monday.

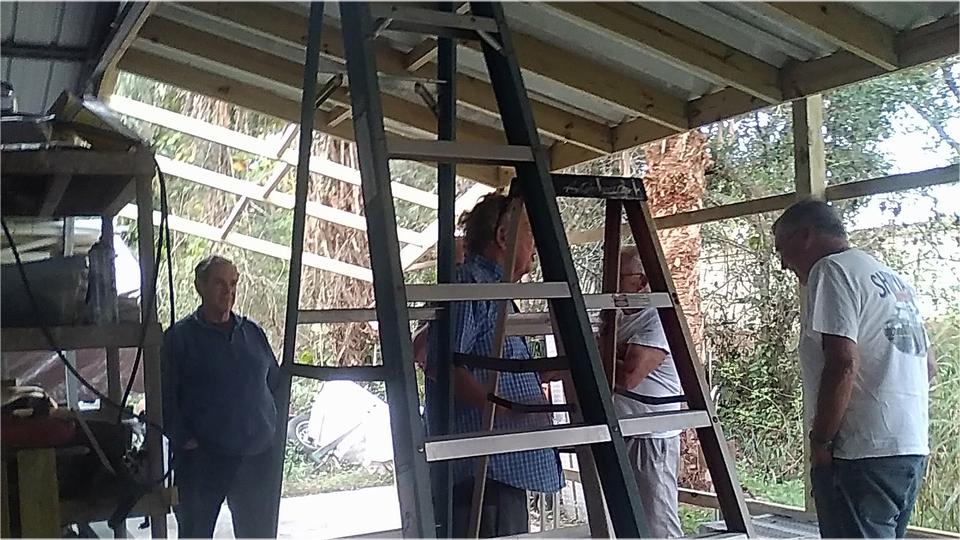
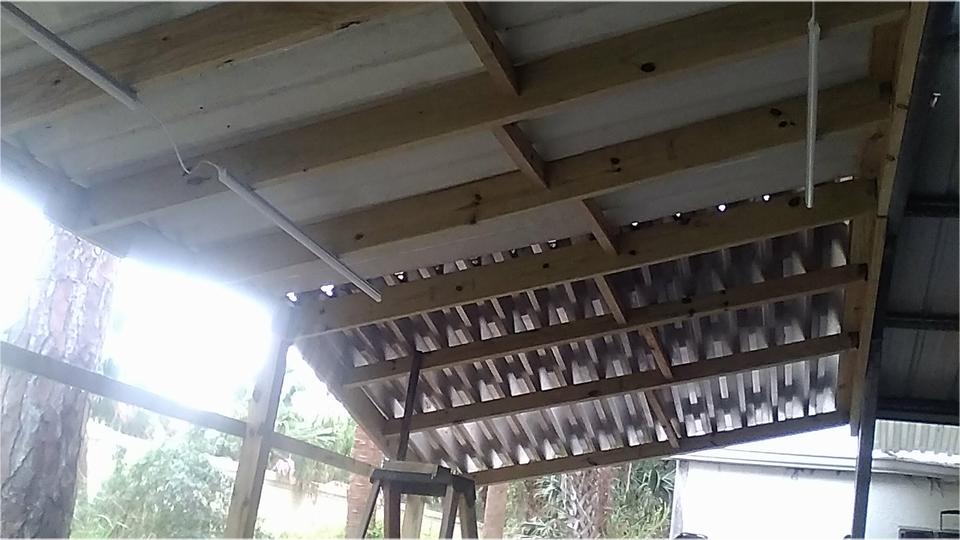
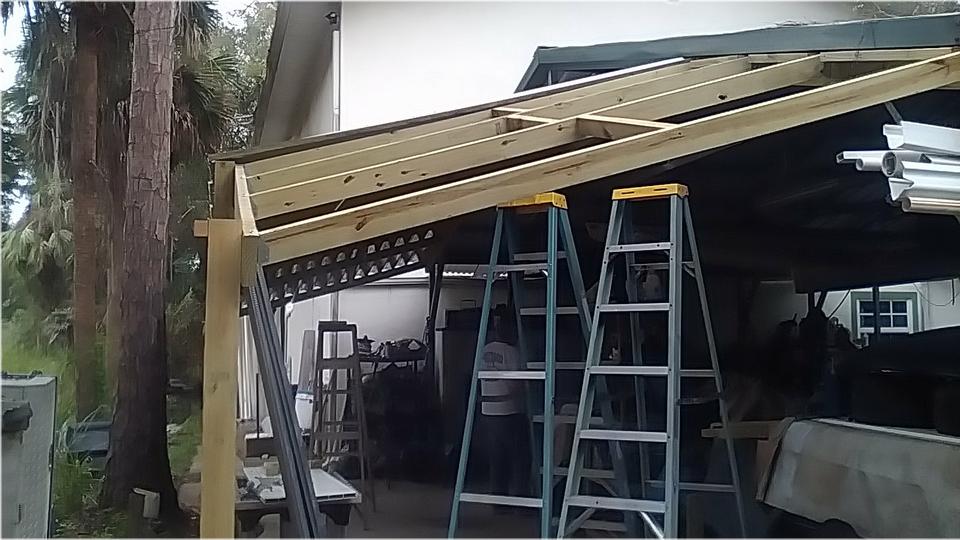
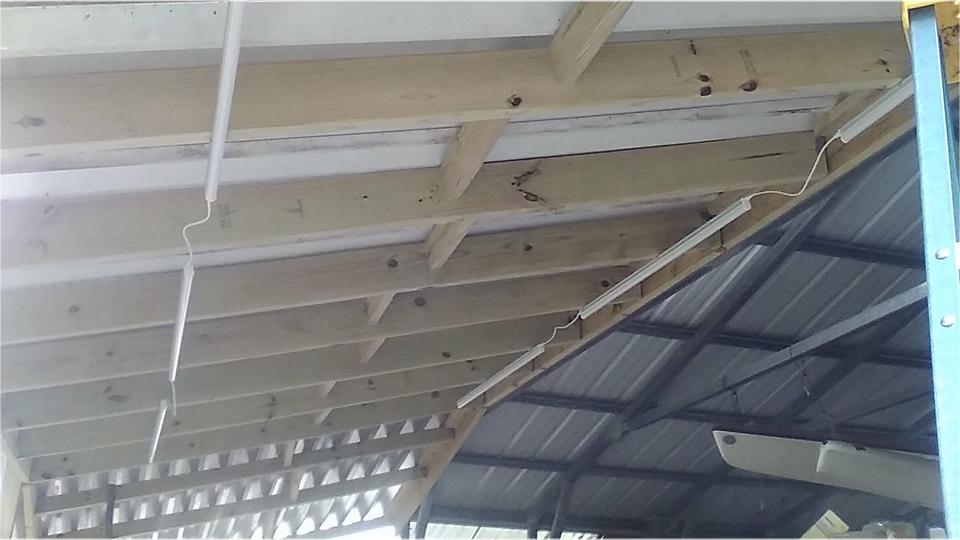
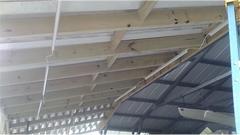
Intermittent rain, and no pressing project car today, left the guys tinkering with the rear awning re-construction at back of the left canopy. In Florida you never have too much space in the shade.
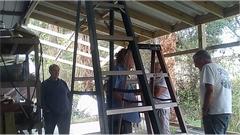
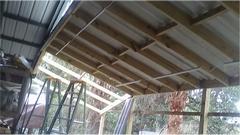
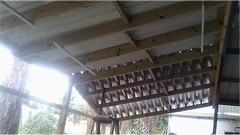
Not just for storage, this is going to be work space, so there will be power outlets and lighting and a work bench here when finished. This is about the fourth time this portico has been rebuilt in the past several years. Maybe not up to hurricane spec's yet, but it may hold up as well as the larger canopy in front.
Knock off by mid afternoon, been raining some, so no good for painting. After posting these photos and notes, I spend a few hours getting a start on transcribing the CMGC January newsletter from Publisher format to HTML web pages for the club website.
Saturday, January 14, 2023:
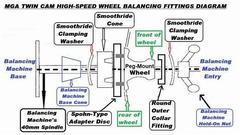
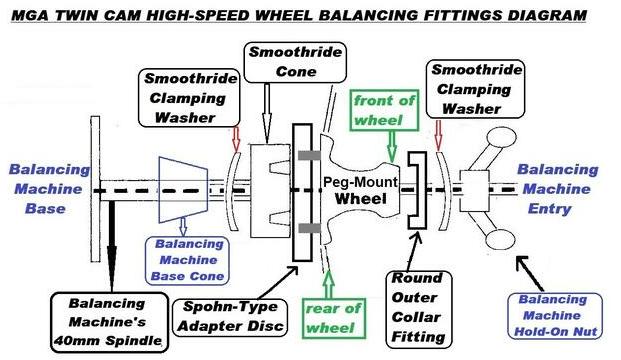
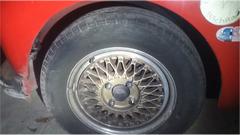
Too cold to paint today, so catching up some web site work. Posted a new tech page for a "second generation" fixture kit for balancing Twin Cam peg drive steel wheels.
Just had another inquiry about posting an alternate tech article about crankcase ventilation. This may be coming soon, hopefully within the next few days.
After ten days of no time to spare, we will have two or three days of "too cold to paint". So I got a good start on transcribing the CMGC January newsletter from Publisher format to HTML code for club web pages.
Sunday, January 15, 2023:
The replacement bilge blower I ordered (or thought I had ordered) two weeks ago never arrived. Checking into this, it appears the original order was never completed. So back to the internet to re-order another bilge blower, likely to be delivered in 6 to 9 days.
Good news from Chicagoland MG Club today. After two years delay in development via committee, it appears the new format web site is close to being launched, or at least is up for review as a prototype. No telling how much longer before it goes live on line. But the really good news is that I have no idea how it works or how to maintain it. In other words, the day this does go on line will be my last day as webmaster for that club, after 23 years of serving as "temporary webmaster's assistant" (with no assistance from club management).
Did some updates to the CMGC web site to incorporate records of the newly elected officers for calendar year 2023.
|