The MGA With An Attitude
MGA Guru Is GOING MOBILE - (February 16 - February 28, 2026)
Monday, February 16, 2026:
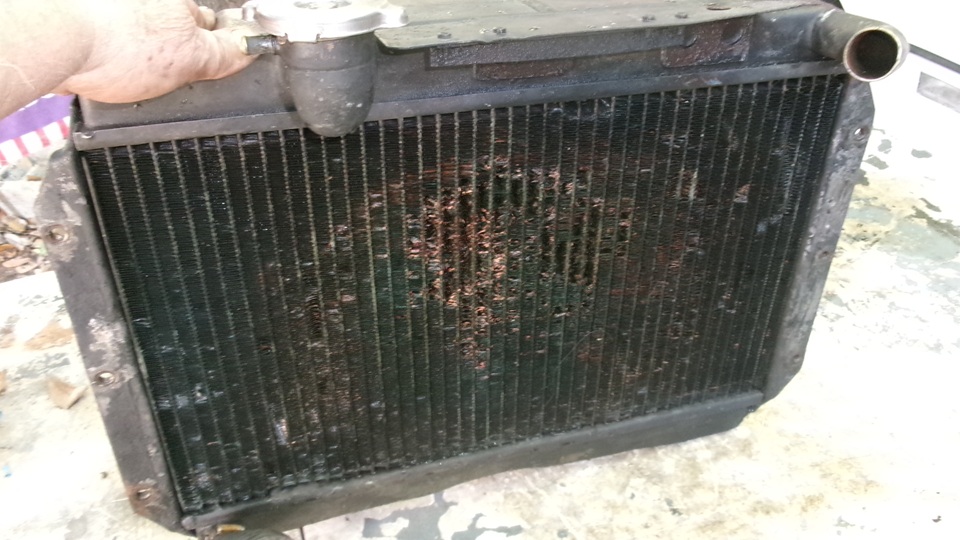
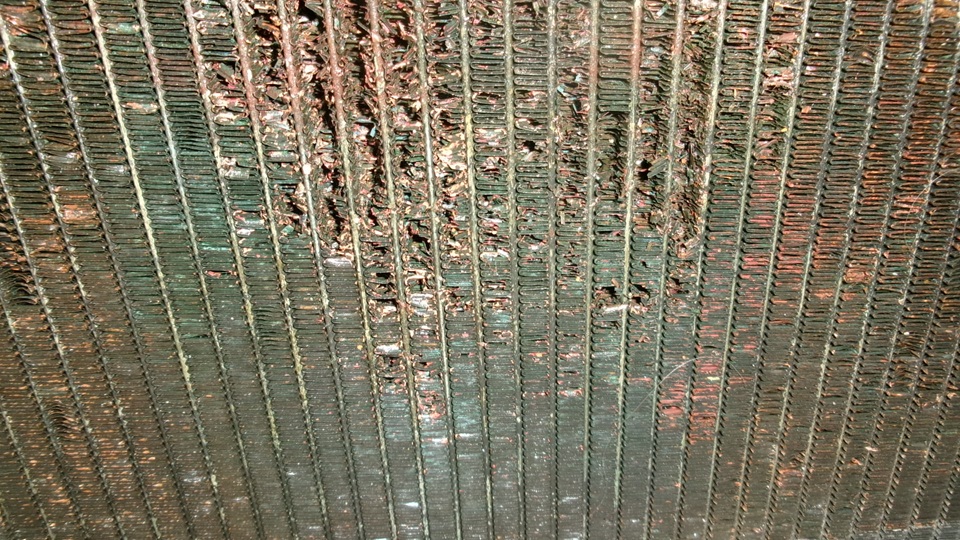
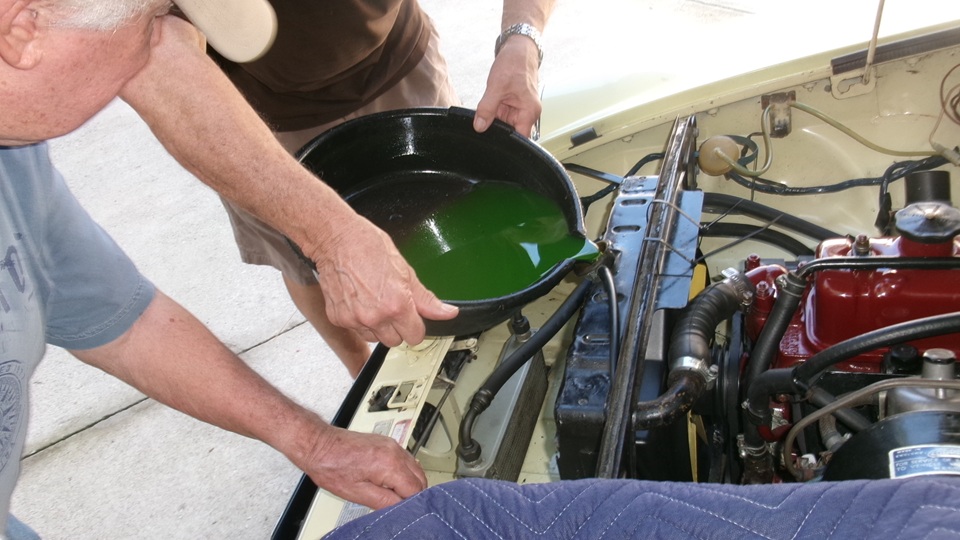
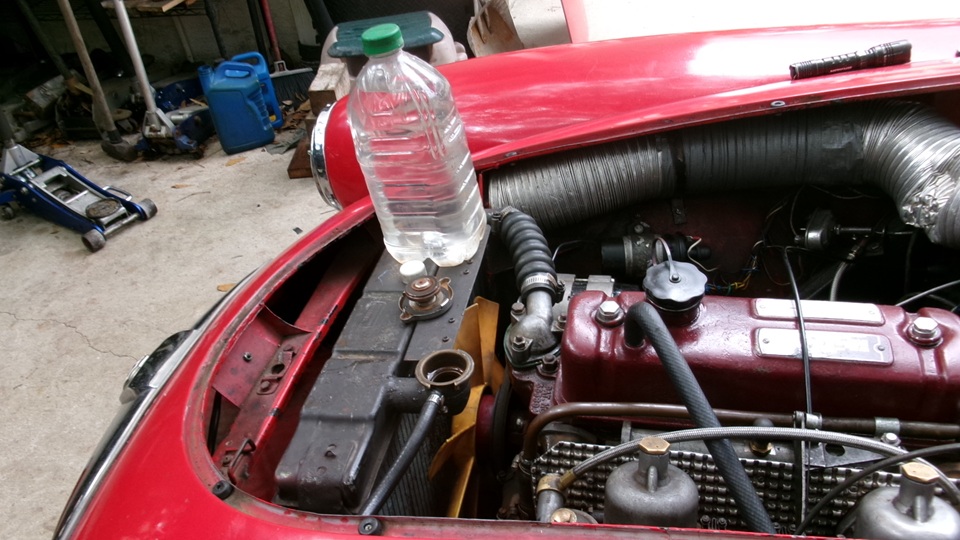
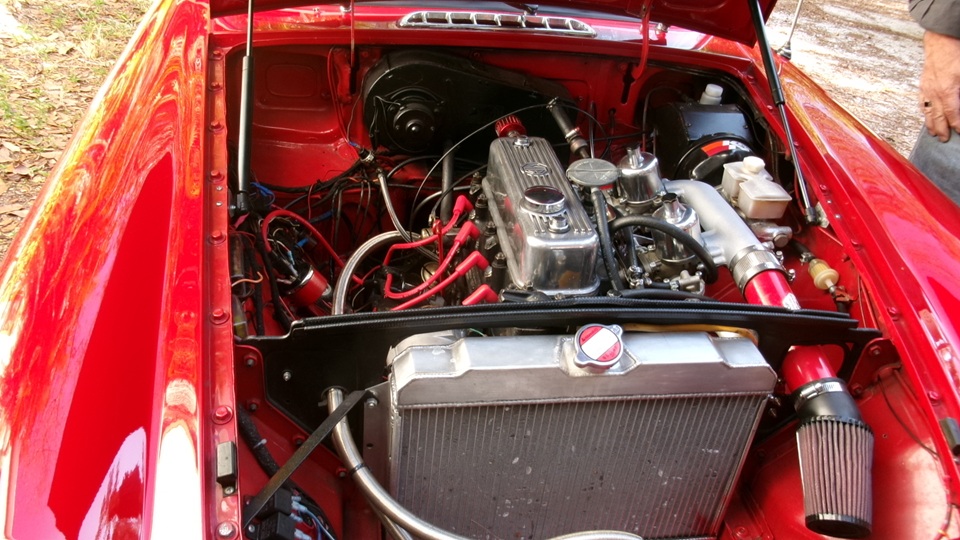
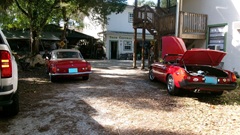
After half a day messing with Part Numbers tech pages for studs, we got a phone call saying my old radiator arrived from California. So we dashed off to Tech Central to grab the package, unpack the prize, clean and inspect it, and get it installed in the car. there are some missing fins near center of rear side of the core, possible aggravated by garden hose flushing out dirt back to front. Also too many fins too close together, somewhat obstructive to air flow. And the shallow filler neck I had installed about 30 years go so I could use the coolant recovery pressure cap. Not too bad for a 40 year old re-core that has been damaged and repaired a few times.
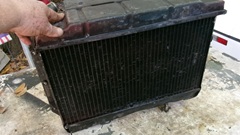


The good news is, it holds up to a pressure test. and we drove it several miles with a pressure cap installed, without losing water. So maybe in a couple more days we may get bold enough to put glycol coolant in it,and see how long it can stay there. -- Add a few minutes to reconnect a wire on the turn signal switch, and verify (again) that the miniature relay used to make 4-way flashers work has a burned contact, needing to be replaced (again). Job for another day.


We packed the original type cell core radiator into the shipping box just received, taped it up,and stashed it in a back room, until we decide what to do with it. Time for dinner and a John Twist Zoom tech session, chatting for a couple hours about MG suspension.
Tuesday, February 17, 2026:
Good progress on the Studs list. Half a day finishing up double threaded studs, and a few single threaded press fit studs, including wheel studs. Another half day figuring out and posting half a dozen pages for front wheel bearing hubs, mostly for front disc brakes on MGA 1600 cars. Also including a couple of revelations on odd press fit studs used with the front hubs.
Wednesday, February 18, 2026:
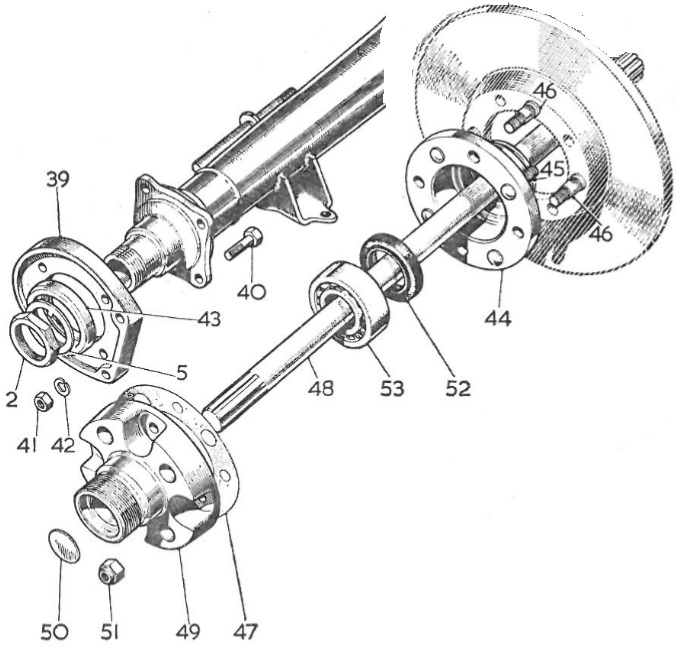
Casually working on press fit splined neck studs documentation, led me to a few studs used in Twin Cam rear bearing hubs. This led me to composing a new Rear Axle tech page RA-101E listing Part numbers for all MGA rear wheel bearing hubs and the related fasteners.

Thursday, February 19, 2026:
Spent the whole day composing Part Numbers tech pages for MGA Twin Cam (and "Deluxe") rear axle parts. We have wheel bearing rotating hubs with press fit studs, attached brake discs, and hub extensions, left, right, early and late designs (6 different parts). Still a few more pages to go, and need to find more pictures of the parts and more spec's for the studs.
If you're curious, you could start with ATB7246 Housing Assembly, Rear Hub, Twin Cam and "Deluxe", and flip through several more pages.
Friday, February 20, 2026:
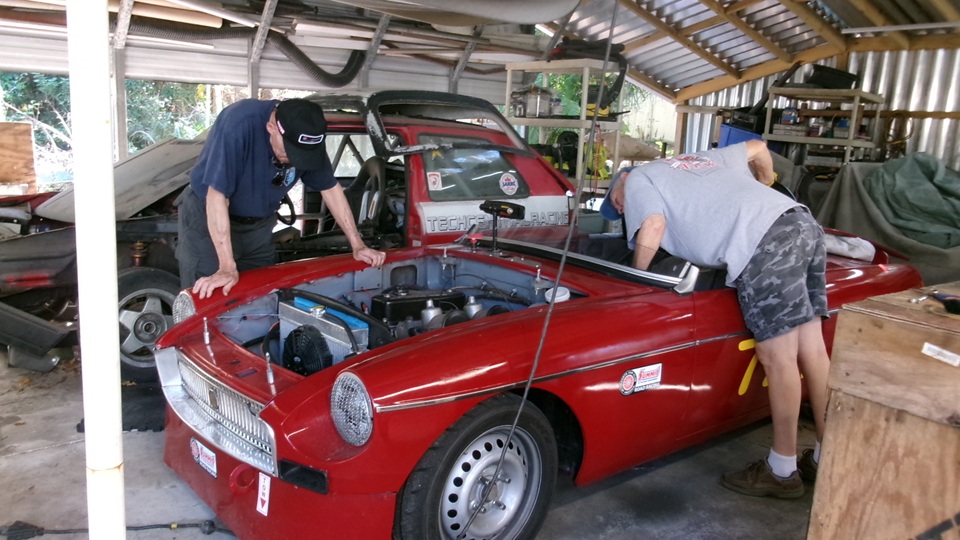
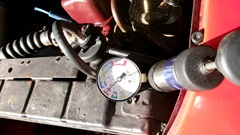
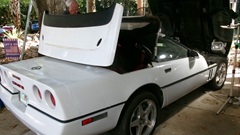
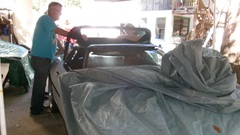
Morning at Tech Central. We have been driving short distances multiple times daily since the radiator swap last Tuesday (with the 7-psi pressure cap in place). Open the bonnet to check, and no water loss at all, not even from the coolant recovery bottle. And oil pressure has been perfectly high since the con-rod bearing swap eight days ago, like 75 psi on start up, 70 psi after five miles on the road, and 45 psi at idle. So it looks like everything is copacetic there. -- Tina the racing MGB (I think we can give it that credit since it has been on the track once or twice) was getting some minor cable adjustments and tune up. It may be heading back to the track again soon. -- The Corvette got a new battery so it starts and runs okay now. But it blew a 40-amp fuse, and seems to have a parasitic power draw of 11-amps when switched off, which would explain why the last battery failed. Checking the fuse designation, it seems to be in the tail light circuit, or maybe the prior flaky fuel pump is on the same fuse. Disconnect the battery until someone may be interested enough to trace the faulty circuit. meanwhile, the Corvette will be getting a new convertible top, and the prediction is another two weeks until the car goes home.


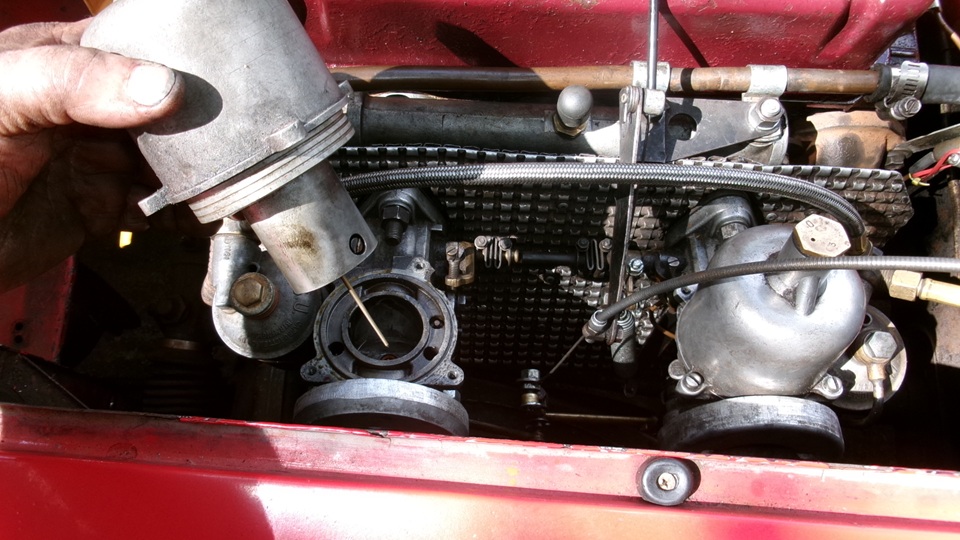
Good turn out for tech day. The yellow MGB GT was getting some attention, like it was about to get a new plastic fan shroud installed, because it had been running hot in slow city traffic. One look under the bonnet, and I had to tell the owner the cooling fan was installed backward, which may well account for a deficiency in air flow during city driving. If they just flip the fan blade around with correct side forward, maybe it doesn't need the fan shroud. Well, they already have the fan shroud in hand, so might as well do both while the radiator has to be displaced some to do either one. Next picture shows a hose off and the radiator unbolted and pulled forward, and the fan swapped around the right way. That was pretty easy.


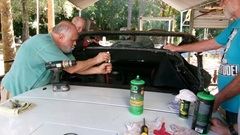
Getting the new fan shroud in was not nearly that easy. We had to disconnect the lower radiator hose to move the radiator up and forward at the bottom before the shroud would fit between the radiator and fan blade. Someone suggested take the fan off and put the shroud in first, but the radiator then would have to be dropped back in low enough for the shroud to fit in place, and then you couldn't get the fan in past the shroud. Catch 22. -- Bite the bullet. Screwdriver with wire hose clamps, royal pain. Switch to nut driver and worm drive clamps. Some skinned knuckles later it was finally in place, with fan touching the shroud. Loosen the bolts, realign the shroud, tighten up again, then not touching. Pour the coolant back in and fire it up, and all seems well with the world, except for a pair of tie-wraps securing the flexible shroud to the body brace . Bad design for a soft plastic part. I have seen somewhere (maybe on this web site), a metal strap formed to fit across top of the shroud to hold it in place. Go ahead and laugh. Ah, here it is: CO-221.

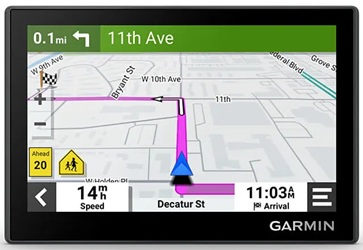
Some friendly stranger at our WiFi spot needed a ride late evening, and it seemed like a good enough opportunity to take the car for a short cruise on the expressway. Hop on the on ramp, ran about 6 minutes, 7-miles at 70-MPH, oil pressure 70-psi, water temperature topped at 185 after a few miles, everything sweet. Slowing down for the off ramp, oil pressure dropped a bit more than expected, and I think the engine had a light rod knock again. Oops. As I was dropping friend off at his destination, I think he accidentally dropped the Garmin GPS and broke the view screen. Bummer again. With a suspect engine, take side streets back at a more sedate speed. Oil pressure down to about 35-psi at idle with hot oil, not terribly bad, but there was a faint rattle when revved near 3000 rpm. Worry about what to do with the engine issue later. Get on line and order up another Garmin GPS, to be delivered to the nearest Walmart. That was easy.
Saturday, February 21, 2026:
Messages saying "Thanks for the order", and the new Garmin can be picked up any time after 11-am. Since we were kind of settled for the day, we opted to forego pickup until tomorrow morning. It's the week end, take the day off.
Sunday, February 22, 2026:
Dropped into Walmart 8-am. Never done a curbside pickup, don't have a smart phone, so parked and walked in to Customer Service to inquire about pick-up (with no smart phone). Was told, "Drive around the side and park in a Customer Pickup spot.
 They have cameras, will see you, and someone will come out". Okay, give it a try. No one coming out, but there was a sign saying, If not previously checked in, call this number". No one answered, but after several rings it said, "Leave a message", which I did. Still no one coming out, so call again, still no answer, leave another message. Another several minutes passed before someone came out, looked around, then came over and waved a cell phone at us (or maybe it was a hand held computer terminal). I had no clue, and I suppose he didn't speak English, but he went back inside to bring someone else who did. "Last Name"? Gaylord. "Barney"? Yes. "Let's get you checked in here, and I can bring your package". Sure enough, he came back out with our package, didn't even ask for any ID or code number. Check quick to be sure we got the right merchandise before we let him run away. Good news, we have a brand new Garmin in hand.
 Off for breakfast at a local WiFi spot, open the package and get to work. Navigator has BTDT before, so not long to plug in the charger, get on line to download latest updates and our previous back-up data from just a few weeks ago, so we didn't lose much. All set to use by 10-am, leave it plugged for full charge. Off for breakfast at a local WiFi spot, open the package and get to work. Navigator has BTDT before, so not long to plug in the charger, get on line to download latest updates and our previous back-up data from just a few weeks ago, so we didn't lose much. All set to use by 10-am, leave it plugged for full charge.
Nearly half a day spent on a tech discussion about 4-way hazard flashers for the MGA. This information is on my web site, but the guy in Germany doesn't speak English much, and was struggling with on-line translators. So we shared a few messages using translator first before sending in his native language, I suppose AI technology will make this easier in the near future. No pictures here, because nothing changed that you can see. Only a change of the flasher unit, a few relocated wires, and one small relay that I taped to the side of the turn signal switch. And if you can find a 2-pole pull switch, you don't need the relay.
Monday, February 23, 2026:
Pages seem to keep disappearing off the calendar. Weekend passed, back to work. I called the vendor to get update on rebuild of new distributor. He never got the data sheet, I sent three weeks ago, apparently some email failure. Send it again.
Then I called Universal Carnegie Manufacturing, AKA Carnegie Radiator, to ask about the data sheet and RFQ I sent via form on their web site last Friday (since there was no immediate response). I also wanted to know why the current address on the web site was in Salt Lake City, UT rather than in Carnegie, PA (where I had visited them in 2018). First, they moved to Utah in 2020, so I will have to update information on my web site. Second, the RFQ form page on their web site no longer works (I'm learning), so I had to recompose and resend the information via email. That done, as soon as I get the response we intend to ship the (already packaged) cell core radiator to Utah to be rebuilt as original. That should be a feel good moment.
So now what to do about this 1800 crankshaft that seems to have developed a slight rod knock again? Phone call to inquire at the known good local engine shop. They have never ground crankshafts, needs too much space for the machinery, but they did provide some information. Of two local shops that did, one is too backlogged and slow to work with, and the other guy retired a month or two ago and sold the machinery. Next closest crank shop is Pyramid Automotive Machine in St. Petersburg, FL, so call there. Apparently they bought the remains of the last guy in southern Florida, nothing they actually needed, and now selling off the machinery (mostly old stuff). The good news is, they have their own good machinery, and they do still grind crankshafts with about two weeks turn around time. So now give us one more day off while the current cold weather may warm up a little. Then Wednesday and Thursday we may be swapping the Magnette engine back into the car, and disassembling the 1800, then maybe get the crankshaft up to St. Petersburg on Friday, to beat the weekend, maybe. Even then, the crank is already 0.030" undersize on the rod journals, so no guarantee of success until the shop can get into it to see if it is good enough to finish clean at 0.040" under. It's only time, right?
Tuesday, February 24, 2026:
Chilly morning, cool day, take the day off. State Of The Union Address at 9-pm EST tonight. Another chilly night, but it will be 60dF by 10-am tomorrow, and we are going to be very busy.
Wednesday, February 25, 2026:
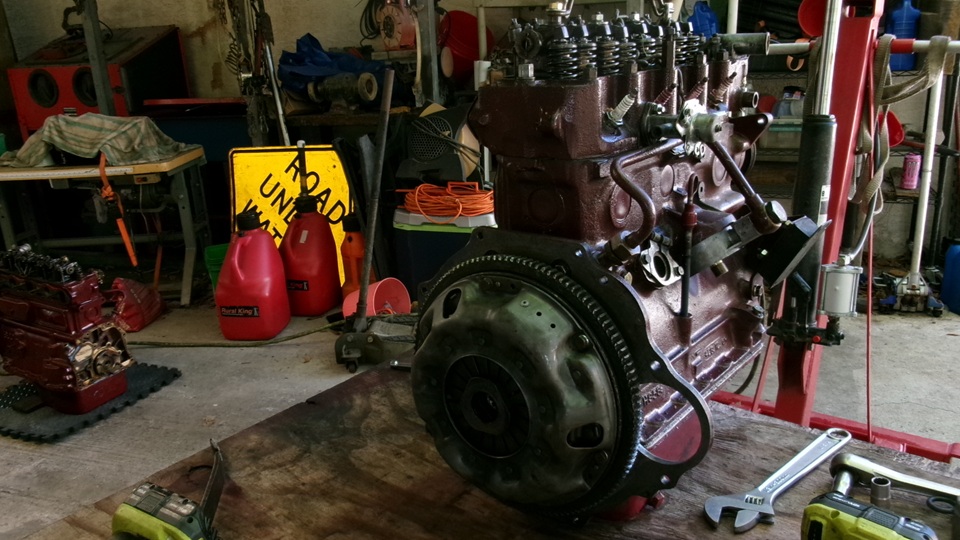
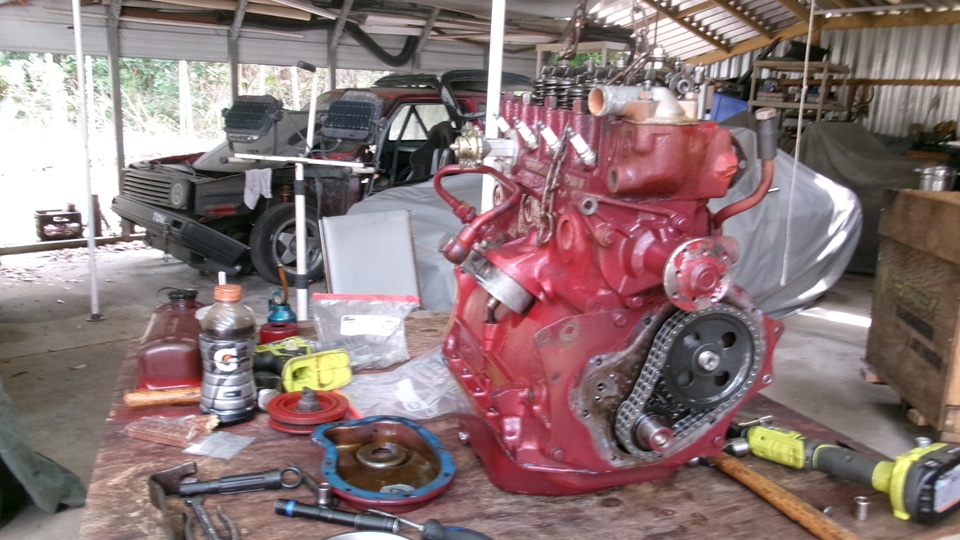
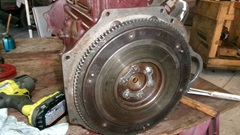
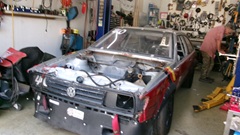
I warned you we would be busy, which means we may not get very many pictures. The short of it is, since the 1800 engine with replacement crankshaft developed a rod knock again, after eating all of the rod bearings once, it was now coming out again to have the crankshaft reground (again?). A little late starting, maybe 10:30, drain fluids, remove peripheral parts, and pull the 1800 out of the car. strip off clutch, flywheel,front pulley and engine mounts, and set it aside.


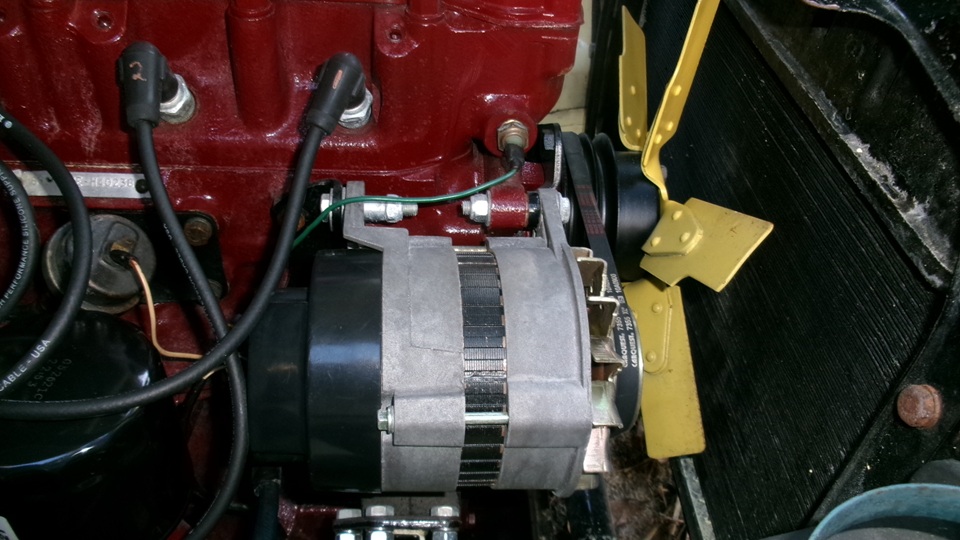
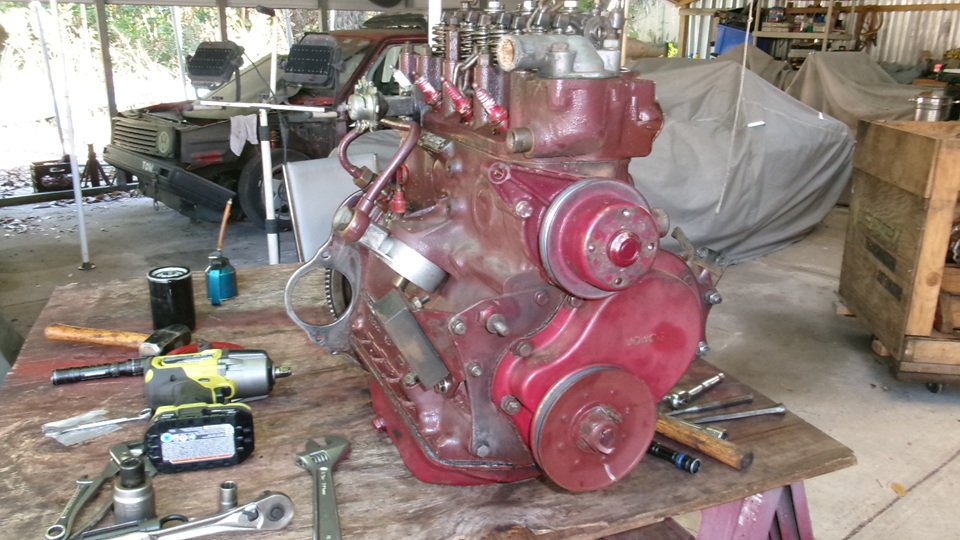
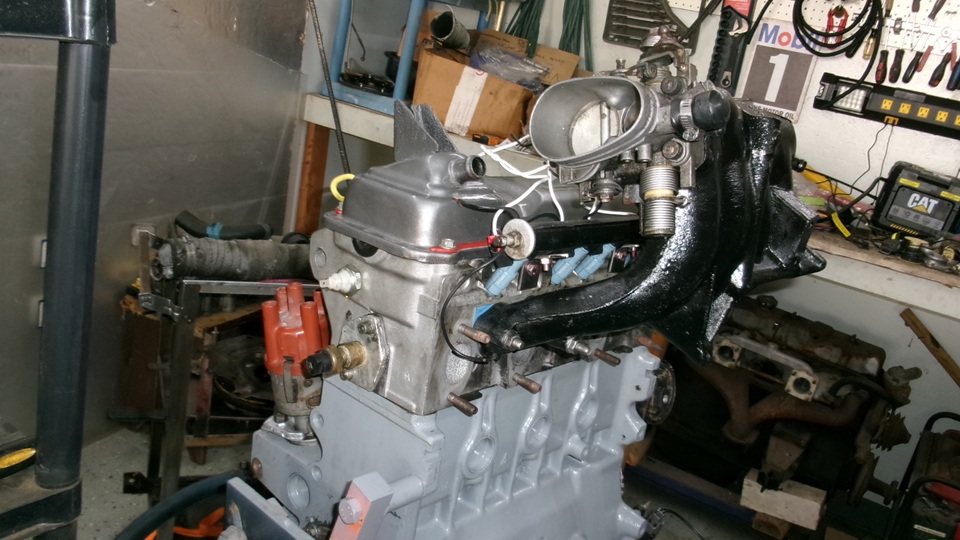
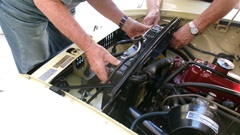
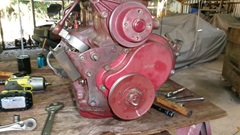
Pull the 1500 engine out of the crate, set it on the work table, swap the front pulley,and install rear plate, flywheel, clutch and engine mounts. Carefully set the 1500 into the car, bolting up bellhousing, starter motor and engine mounts. Days are getting slightly longer with change of seasons, so we worked until near 630-pm. Got a bit farther long than anticipated, installing exhaust and intake manifolds, water pump pulley, fan,alternator, oil pressure signal hose, distributor and oil filter. Not enough light left for carburetors, so quit there for the night.


Then I do something unusual, posting up these photos and notes over dinner, with time to check BBS and email, and watch a little YouTube. See you in the morning.
Thursday, February 26, 2026:
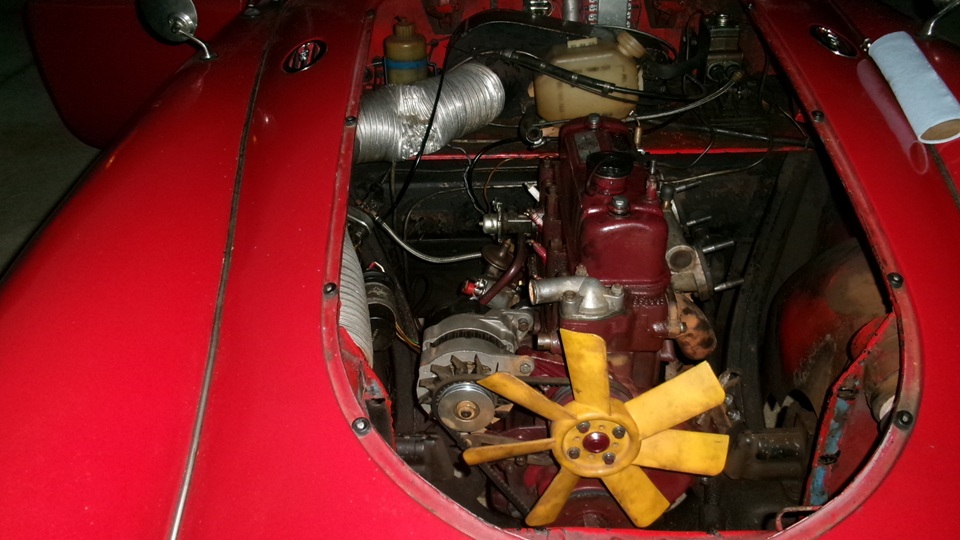
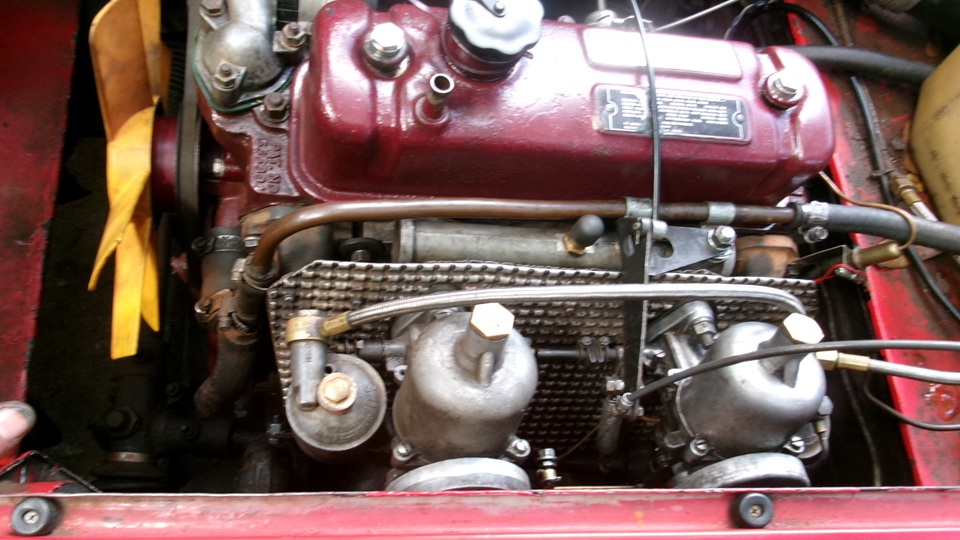
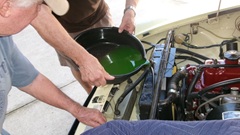
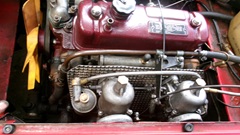
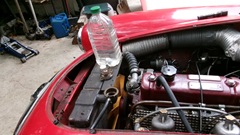
When the sun popped up it was warming up in a hurry. Taking up where we left off, not long to install the carburetors, then changing of the guards, reinstall the GS needles for the1500 engine. By noon the radiator was in, filling with water, and by 12:30 it was running. Peachy.

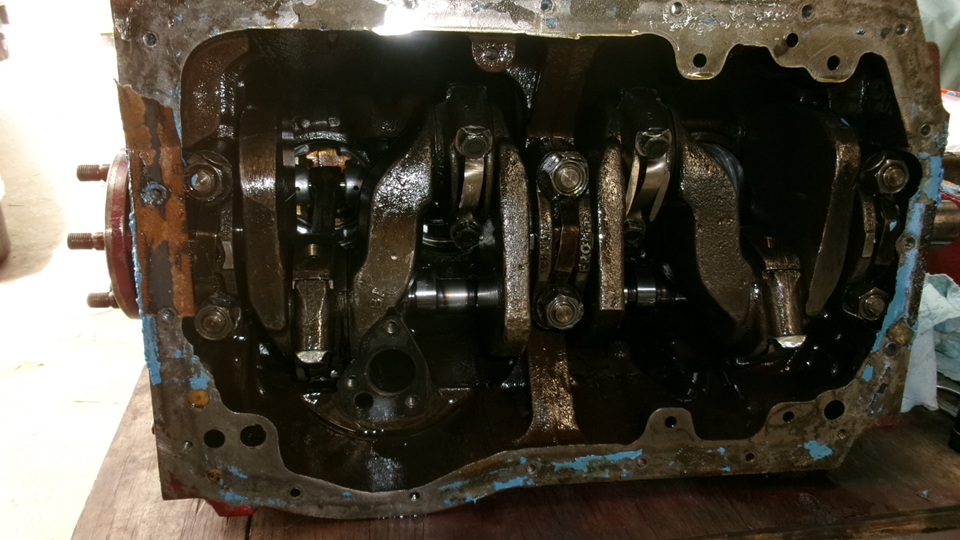
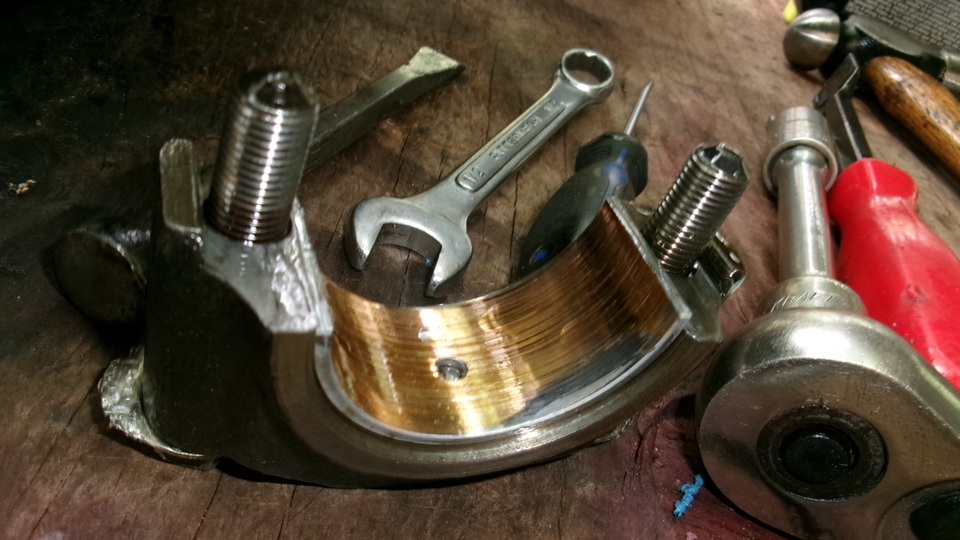
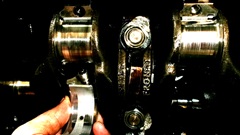
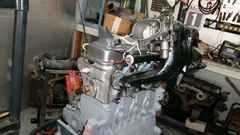
Pick up the 1800 and set it on the work table, rear plate and front pulley already off (in the car). Remove the timing cover, tensioner, sprockets and chain, cam retaining plate, and engine front plate all quick work with a power wrench. Lay the engine on its side,and remove the sump and oil pump, also quick. The truth is close at hand as we begin to remove con-rod big end bearing caps. Number 1, 3 and 4 rod bearings in decent condition. but #2 half shells are down to copper,and the crank pin journal is toast with scratches to catch a finger nail. I recon it was like that when we slapped in the new set of rod bearings two weeks ago, and this never had a chance.


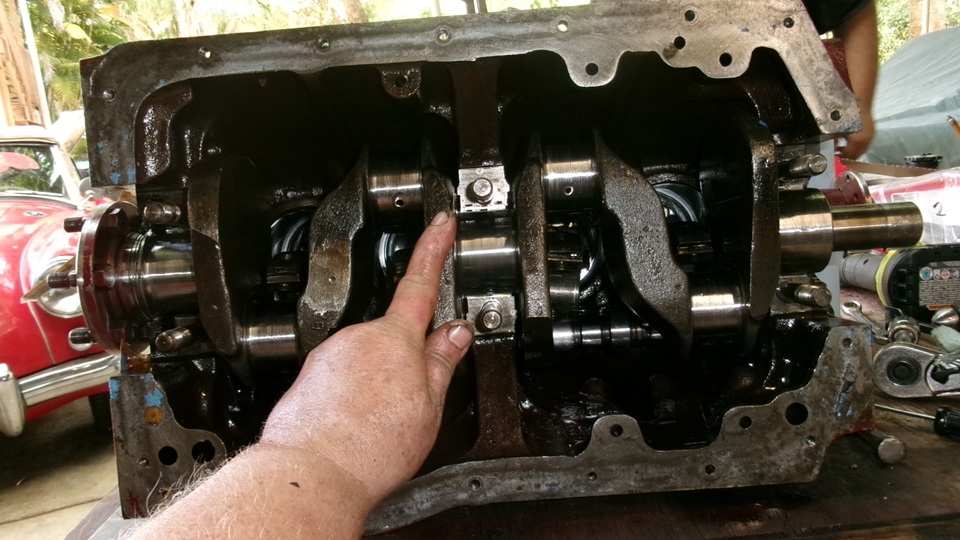
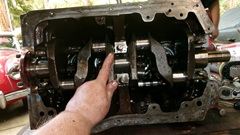
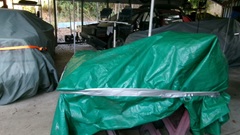
Okay, get the crank out of the block. Bend back all of the lock tabs, remove #2 and #3 big end caps first, bagging and numbering each separately along with the half shells, and push the pistons full up into the cylinders. Turn crank half turn, and repeat with #1 and #4 big end caps and shells,and push those pistons full up into the bores. Then pull the front and rear main bearing caps, and bag those. Last, pull the center main cap and half shell, along with the thrust washers, and bag those. That left me holding the crankshaft with two fingers against the last three half shells. Carefully pull the crank out and set it on the table. This is to demonstrate that you can remove the crankshaft without removing the cylinder head or pistons. -- Collect and place all of the loose parts into the oil pan, and place it between the engine and crankshaft before covering it all with a tarp, not just to keep the stuff protected, but also to discourage anyone from trying to move the table.
Clean up, pack away tools, and head out before dark this time. Having already decided this crankshaft is beyond salvaging, we will not be driving it up to Saint Petersburg for regrinding. We are already thinking about where to get the next replacement crankshaft. Stay tuned.
Friday, February 27, 2026:
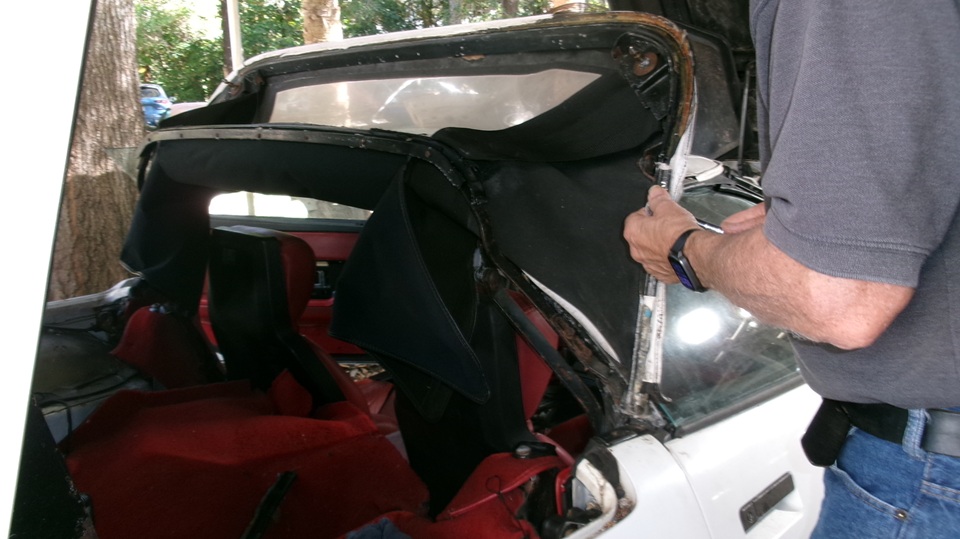
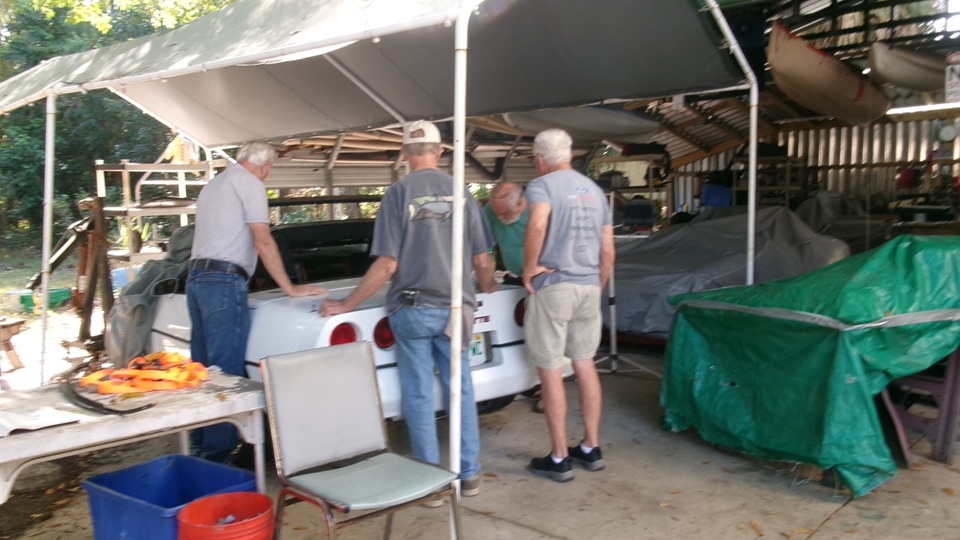
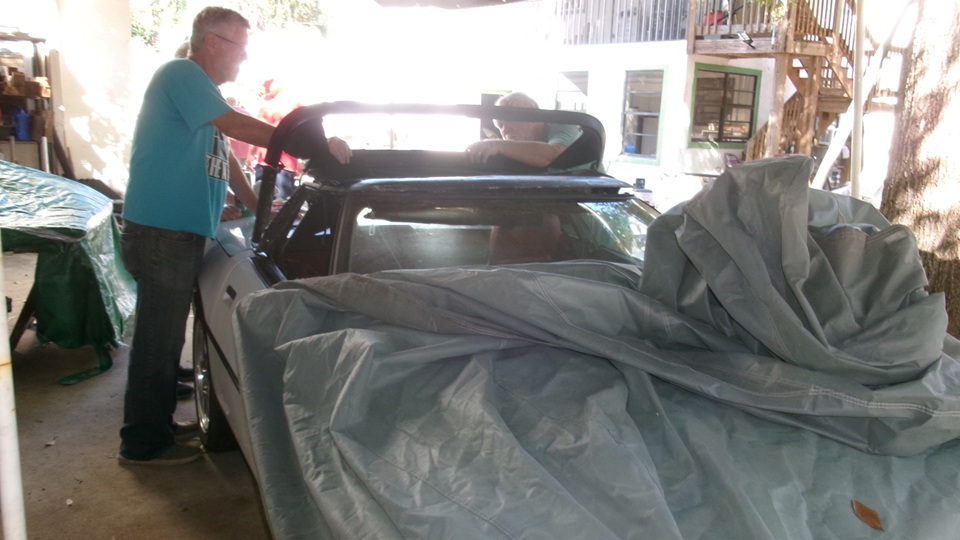
Good turn out on a warm day at Tech Central. Guys will be working on replacing the convertible top on the Corvette.

Question, can you replace a camshaft in an MGB without pulling the engine or removing the sump? Answer, yes, but you have to remove the radiator, displace the oil cooler, remove carburetors and manifolds, valve cover and pushrods, side covers and tappets. Also remove crank pulley, timing cover, tensioner, sprockets and chain, and the camshaft front retaining plate. That was about time the questioner declared that his friend could do it himself. Some discussion about this TR#with aTR6 front frame and suspension and rack and pinion steering gear, fat tires and 2-inches of ground clearance. Don't try to drive over a speed bump.


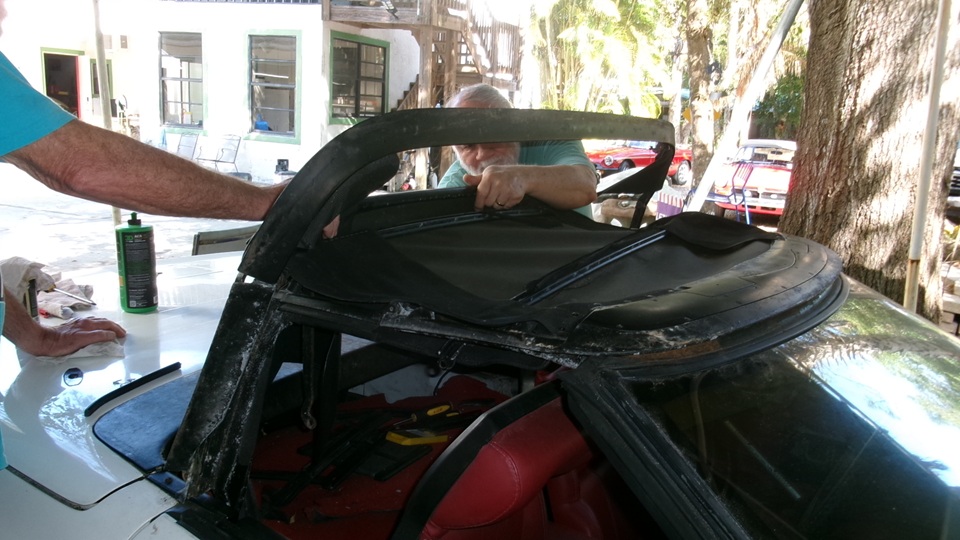
The Corvette rag top was turning out to be a lot of work, even though the owner had done it before on this same car. Stubborn corroded screws, some pop rivets to be drilled out, and a couple of long plastic inserts that didn't want to be driven out, even though they were supposed to be hand push parts. Turned out to be couple of errant pop rivets embedded in the middle of the plastic parts. Live and learn. They will be back next week for more.

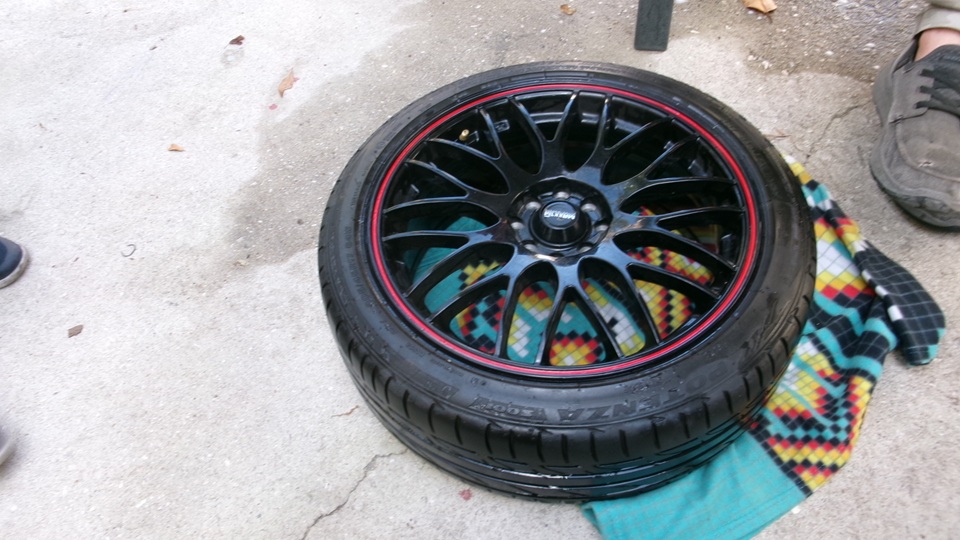
Some time searching for a very slow leak in a Miata tire and wheel assembly. No luck, put it back on the car and check tire pressures before driving it,every few weeks or so. Some paint touch-up work on the racing Sirocco after a fire under the bonnet, due to failed rubber O-rings on the fuel injectors. And a bit of work on the air intake for the same engine. -- Breaking up shortly after lunch, as usual. Just as well, as we need to get on with the crankshaft hunt.
Saturday, February 28, 2026:
I think we have found (another) replacement 18G crankshaft, in central California. It looks very good in pictures, including good looking bearing shells that came out of the running engine. Not taking any chances here, so it is going to a shop Monday for assessment, and likely for regrinding. That will most likely take a week or so (to fit into the shop schedule). Do be patient, to be sure we get it right.
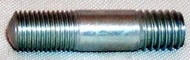 Meanwhile, we have some time to kill, so I can do some more documentation on threaded studs. This one is AHH5070 Stud for mounting front shock absorbers in all MGA and MGB.
|