The MGA With An Attitude
MGA Guru Is GOING MOBILE - (November 1, 2015 - November 15, 2015)
Sunday November 1, 2015
Spent nearly all day finishing posting CMGC newsletter on line. http://chicagolandmgclub.com/driveline10/1115. Also some time with email and BBS and updating a couple web pages. Just found out that MSD bought up Mallory, and Mallory Distributors will cease production (but service parts will still be available).
Monday November 2, 2015
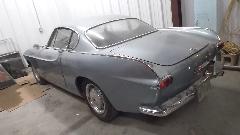
Installed three new brake hoses on the Alpine today, and bled the brakes again, Result is, the car will now roll fore/aft with push or pull of two fingers.
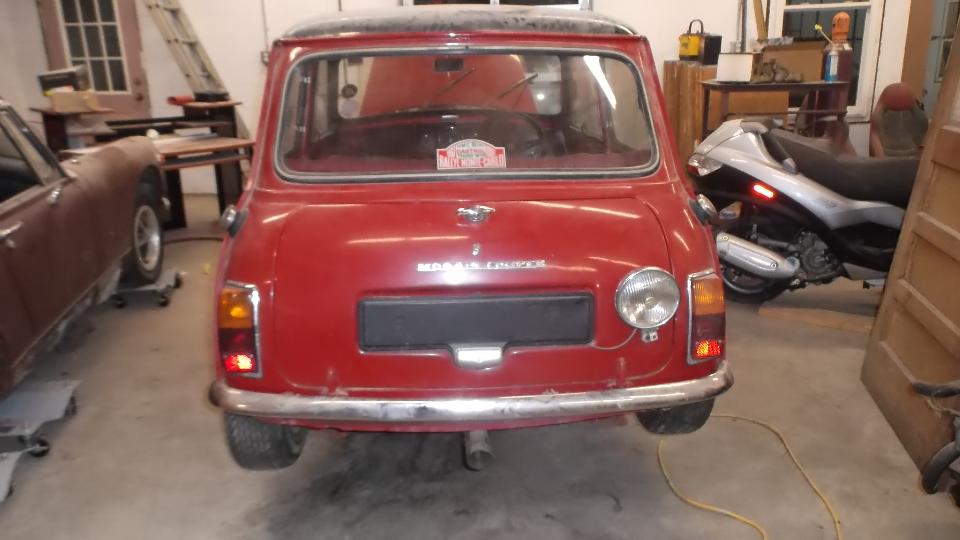
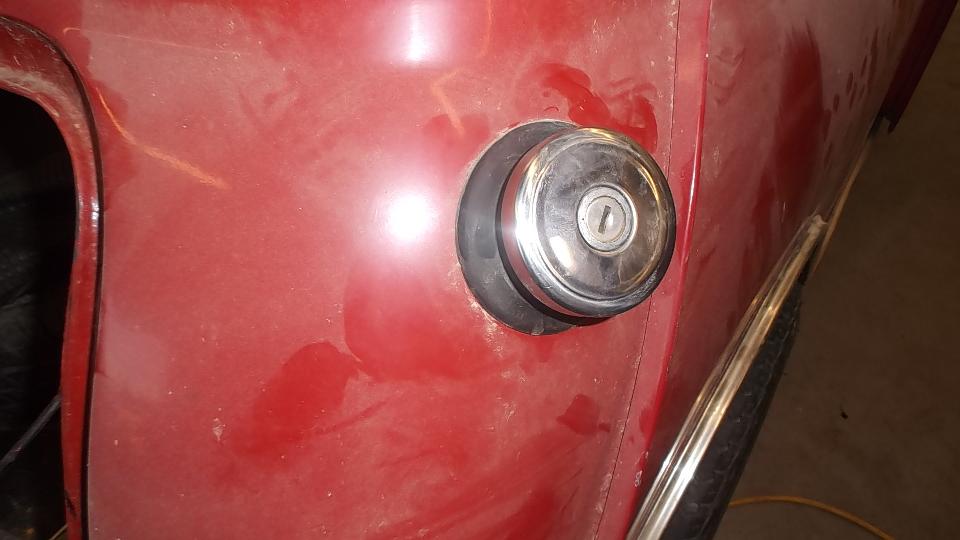
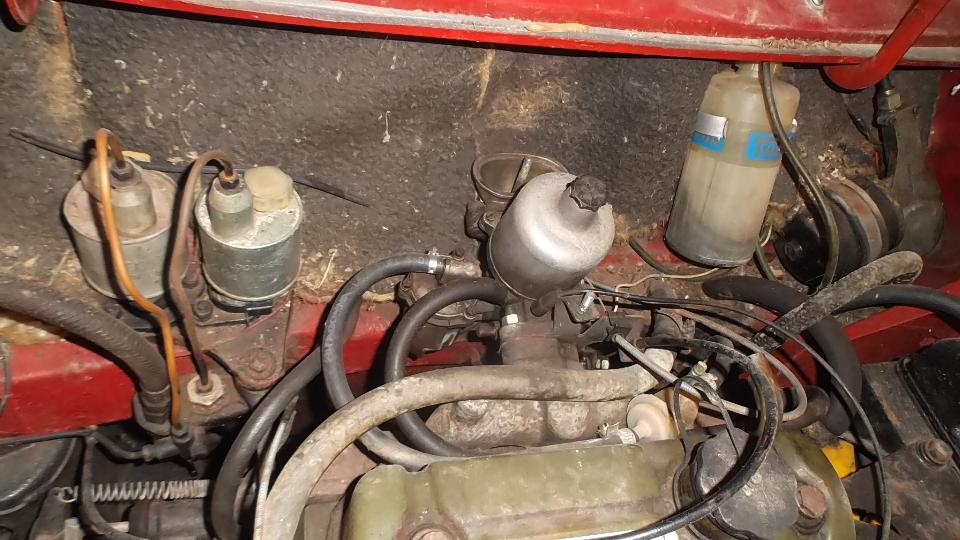
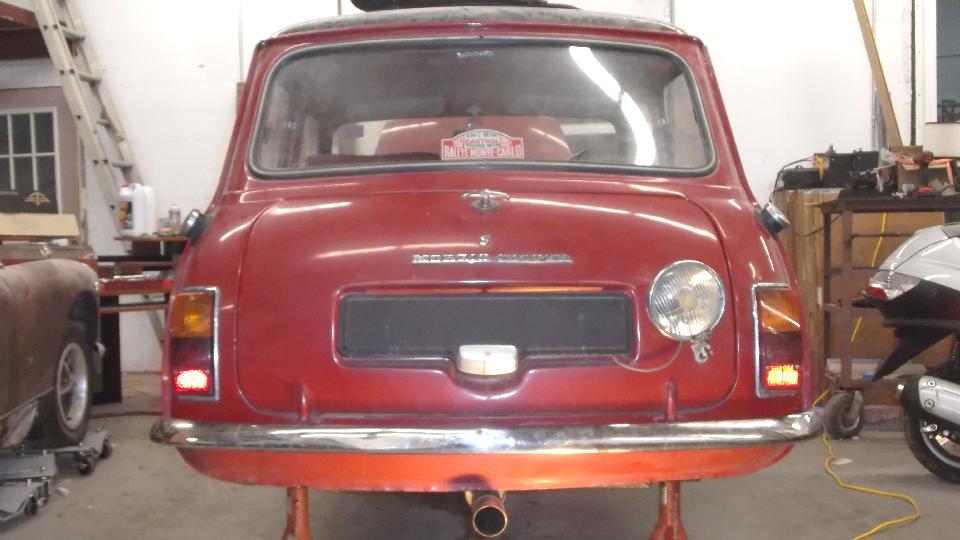
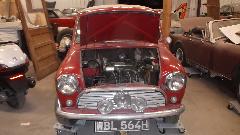
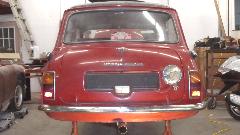
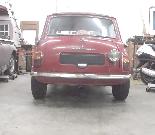
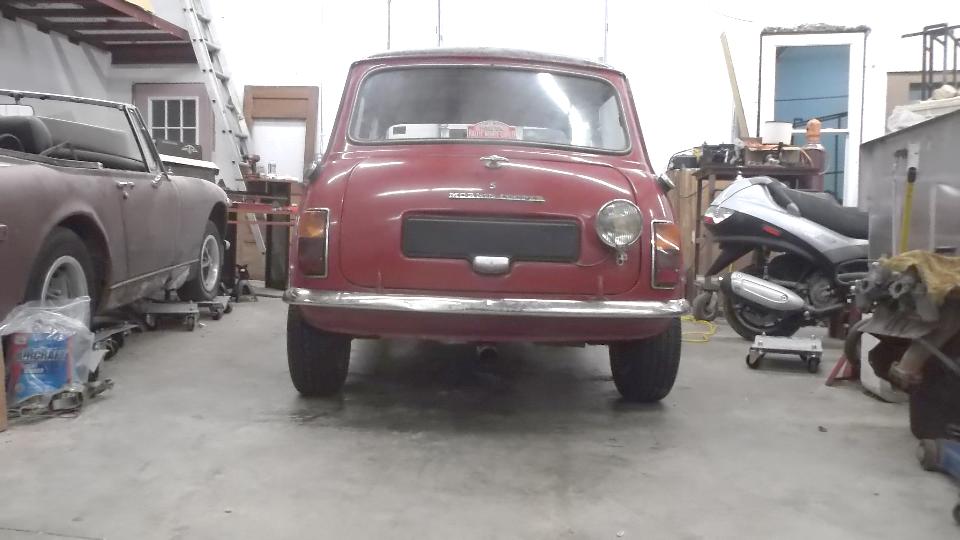
 Also took another shot at the Mini, jacked up, dusted off, tried a battery but it was mostly dead. Drained the stale fuel and pulled the fuel pump off, some aftermarket part but it seems to work so will reinstall it. Poked around the engine bay a bit, noticed single carburetor, so I suppose the "S" emblems front and rear are for decoration only. Also found curious dual fuel filler caps, but only one fuel tank on left, so the filler cap on right is a dummy for decoration only.

Tuesday November 3, 2015
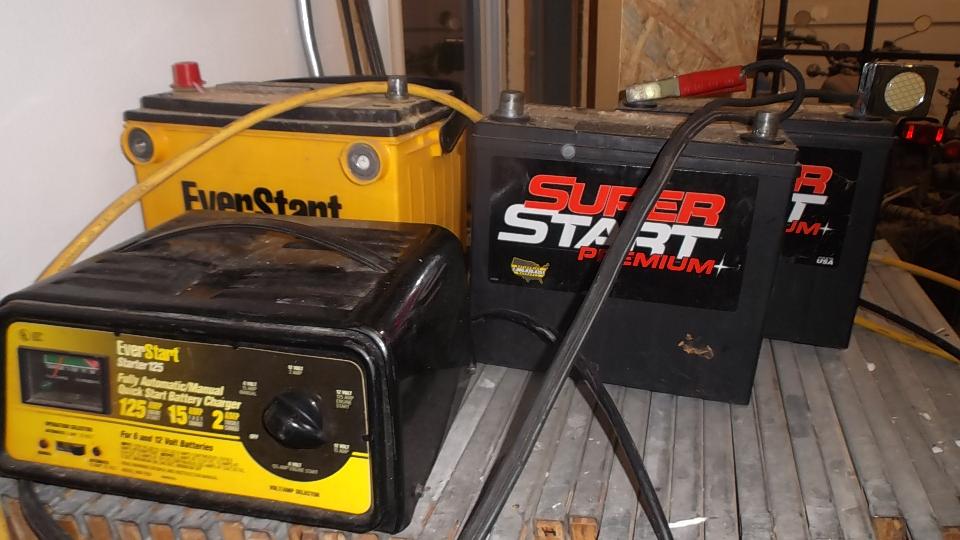
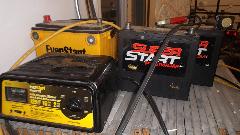
Let's see if the Mini will run today. Pulled a battery out of the non-op Subaru Samurai last night. (Have I mentioned the Samurai before)? Had it on the charger overnight, and it seems to have taken a charge. Power cable in the Mini had a loose connector, so a bit of time to fix that, and the battery was installed.
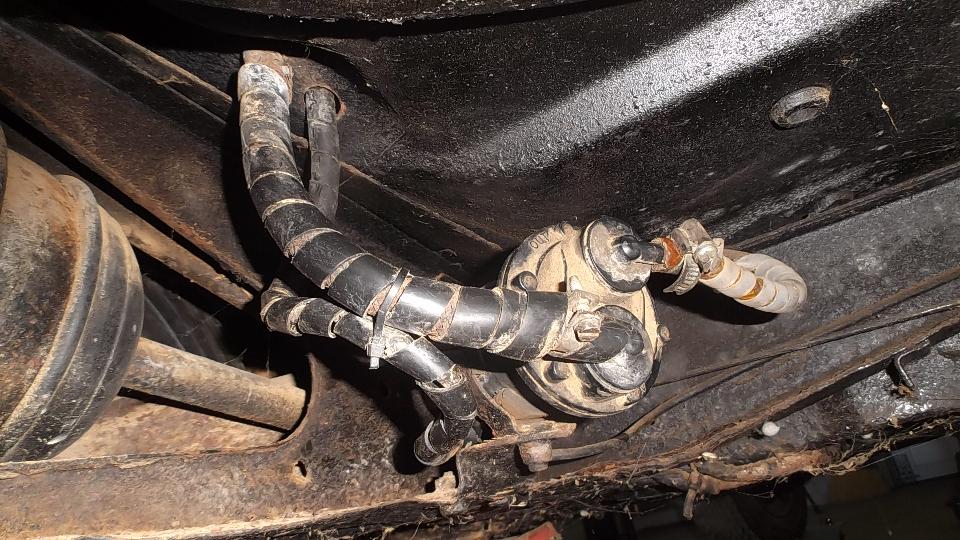
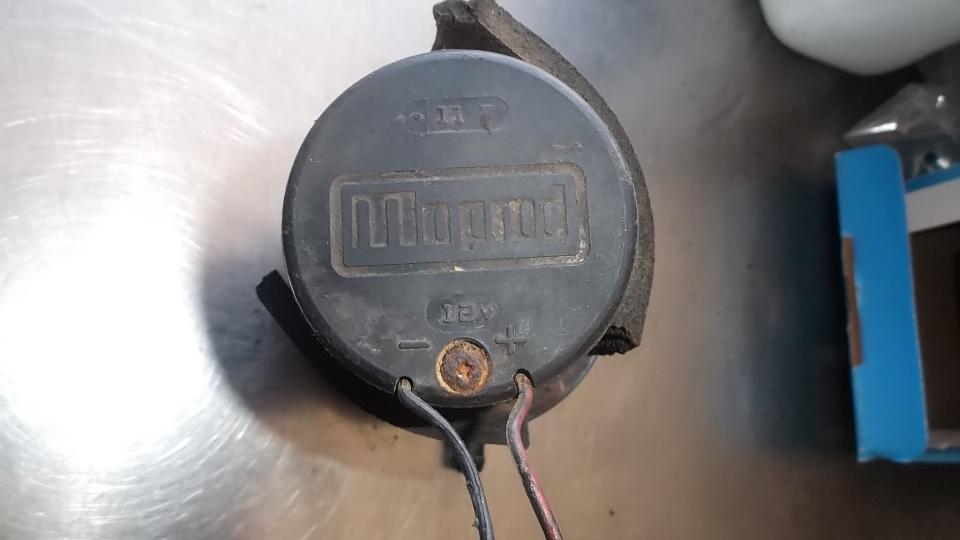
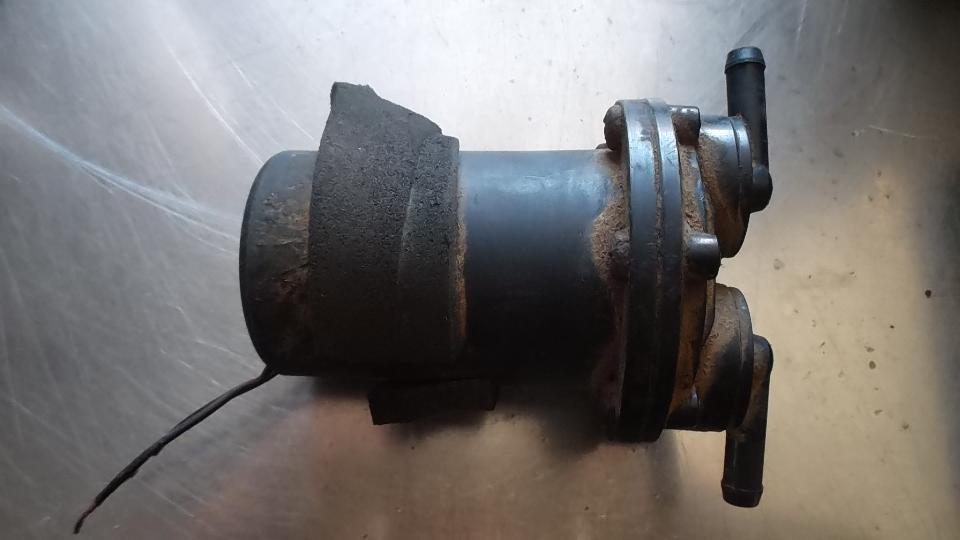
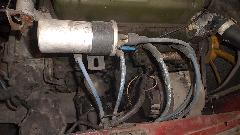
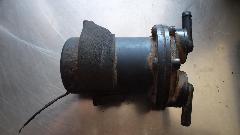
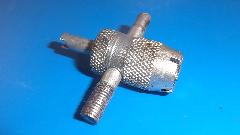
 The fuel pump is a Moprod unit, all plastic, so be very careful with the hose connections. It works on the bench, so the reason it didn't work in the car was because the wires were twisted and taped with unreliable connection. An interesting feature here is the hose connectors appear to be snapped in place with O-ring seals so the hose barbs can be rotated to different orientation. This is handy when it comes to mounting it right side up with the output port on top as noted on the pump housing. The fuel pump is a Moprod unit, all plastic, so be very careful with the hose connections. It works on the bench, so the reason it didn't work in the car was because the wires were twisted and taped with unreliable connection. An interesting feature here is the hose connectors appear to be snapped in place with O-ring seals so the hose barbs can be rotated to different orientation. This is handy when it comes to mounting it right side up with the output port on top as noted on the pump housing.

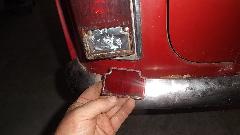
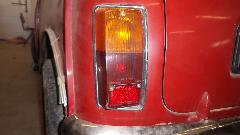
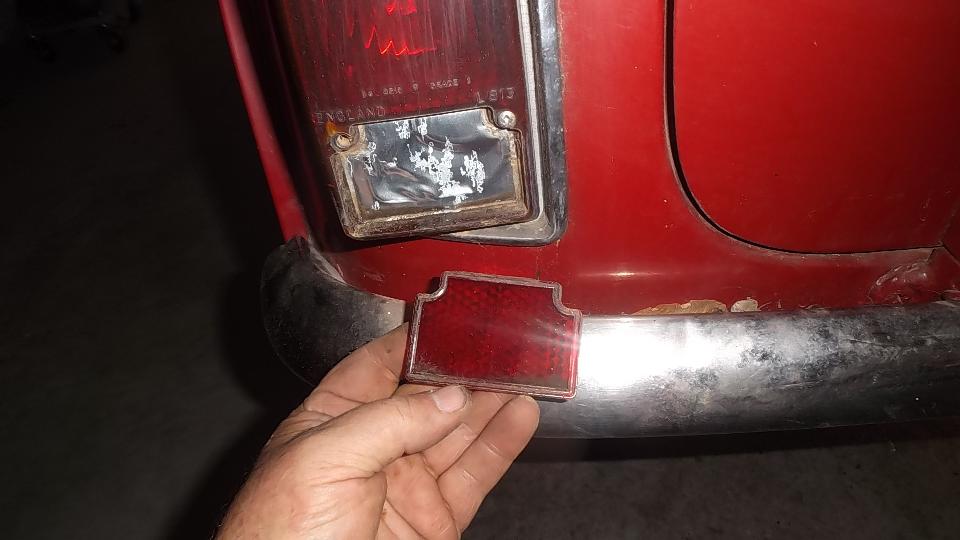
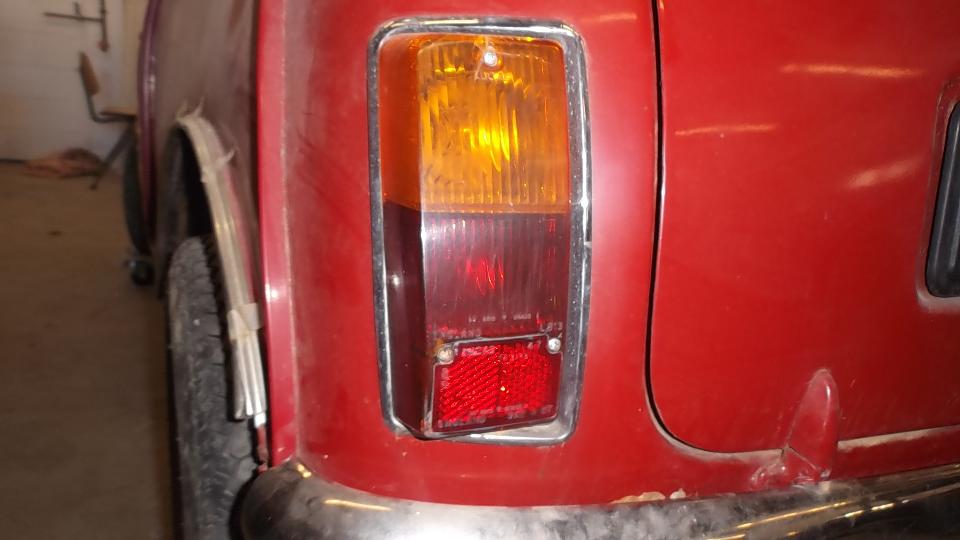
The left side tail light reflector kept falling out when bumped so I took a few minutes to glue it in with a bit of epoxy.
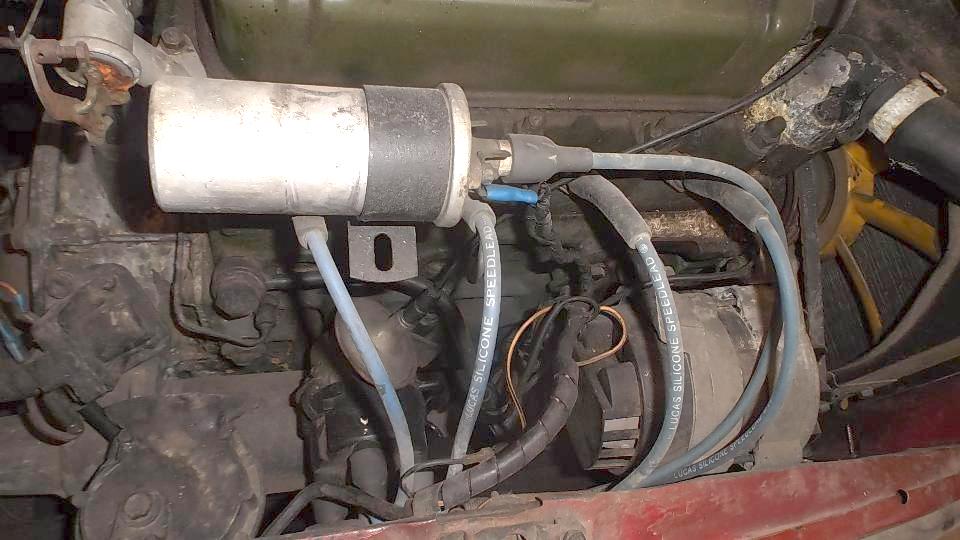
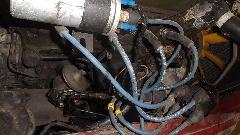 First attempt at start cranks well but no fire, no spark. Sand paper the points, but still no spark, so pull out the test light. The non-standard distributor has an extra connector in the wire between coil and distributor, and that had a faulty connection. Once the contact was cleaned it had spark, but still no fire. Just to be sure, I pulled all four spark plugs, laid them in a row with HT wires connected, and cranked it again to see spark on all four plugs. So far so good, reinstall the plugs, and go after fuel problems.
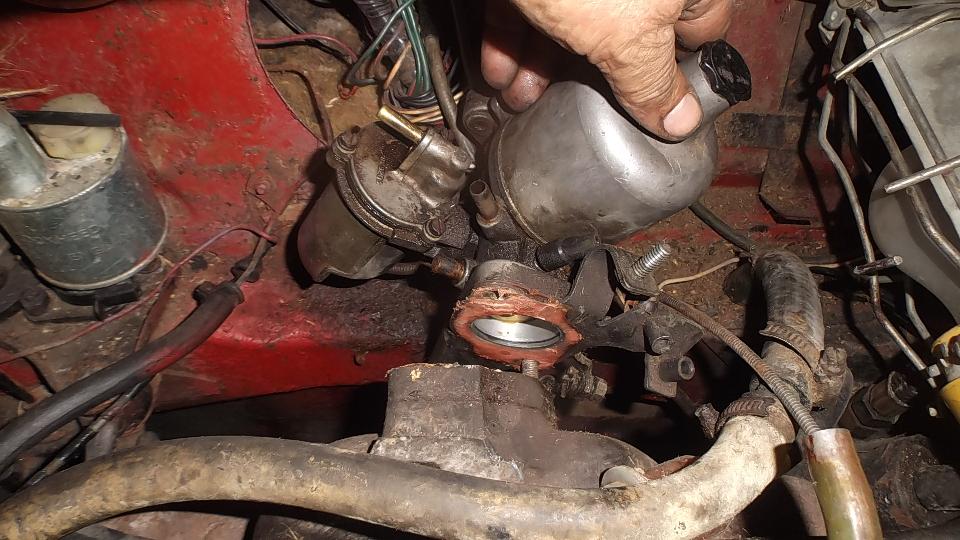
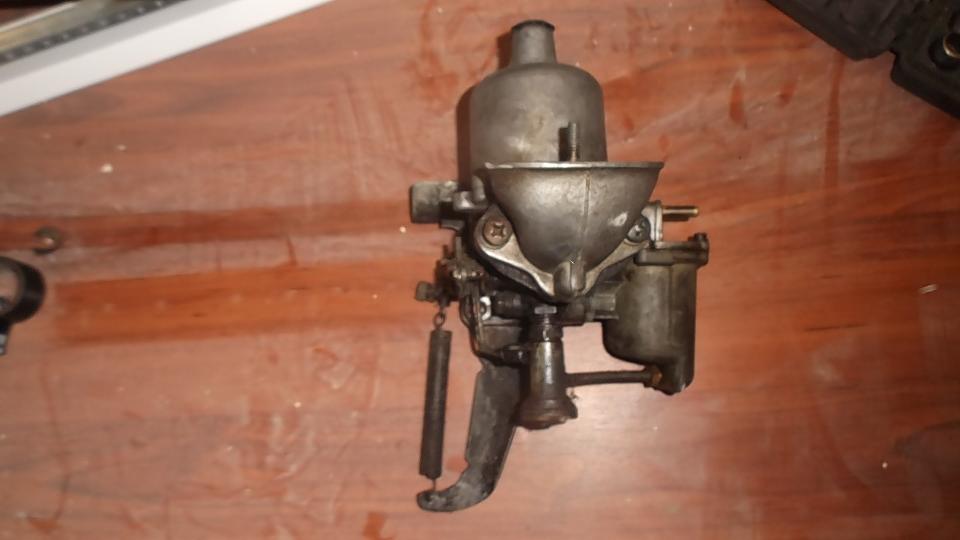
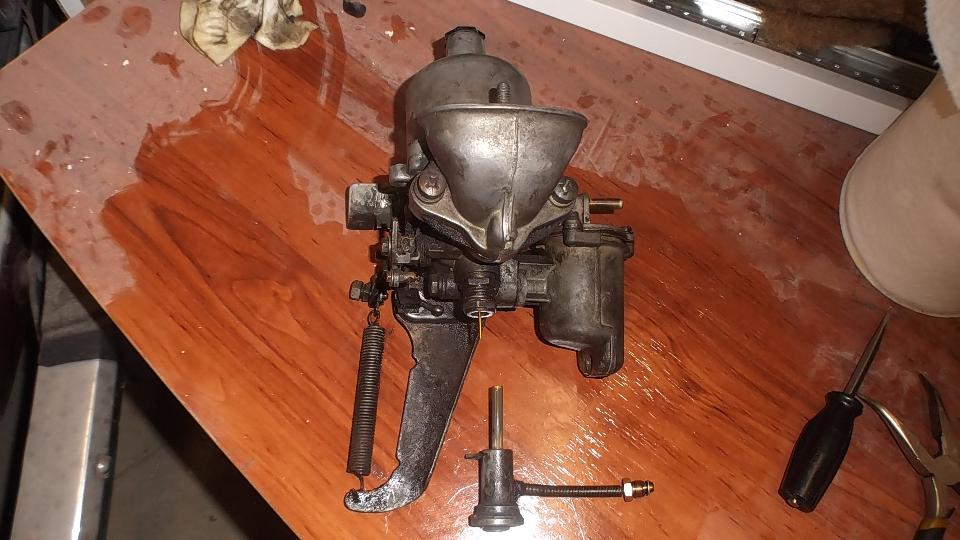
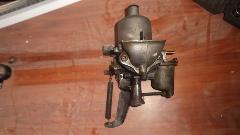
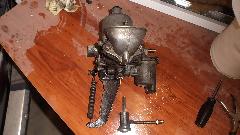
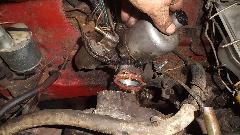 Remove top from float chamber, find fuel at correct height, replace top. Put small amount of fuel into the air intake throat, cranked it, and it started and ran for a few seconds. So fuel in the float chamber is not getting to the main jet. Time to pull the carburetor. Now this is a bit of a pain. The carburetor would not come off of the studs because it hit the bulkhead first. Bummer. Use long nose Vice-Grip to unscrew the top stud, after which the carb could rotate some for removal without removing the lower stud.
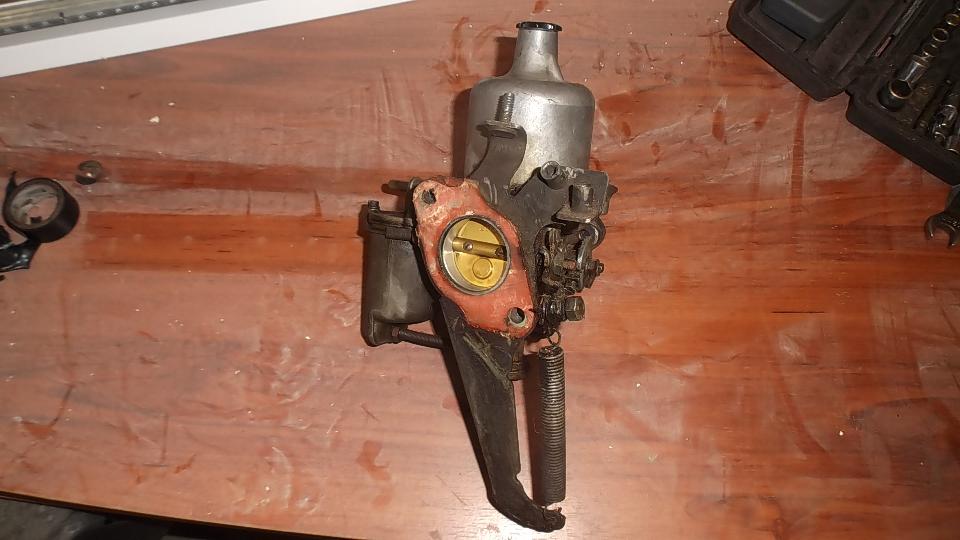
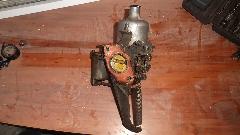
Nice that the bracket stayed glued to the carburetor so I didn't have to remove the throttle return spring. And there's that pesky main jet with feed hose (typical of the SU HS-type carburetors) that had to be removed for cleaning. With jet removed I ran a wire through the jet and hose to clear a clog which was in the hose near the jet. With jet clear it was reassembly time, just grunt work, after which the engine fired up on the first crank.
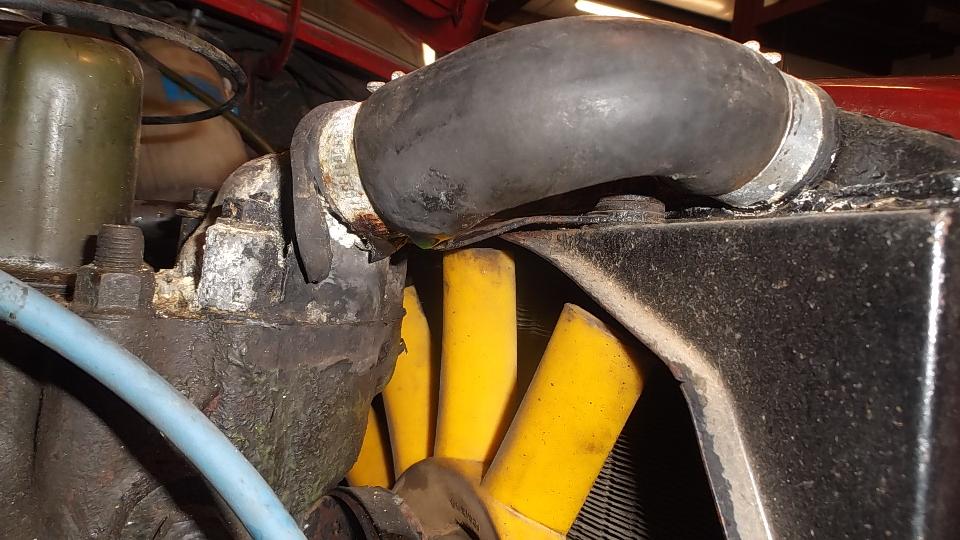
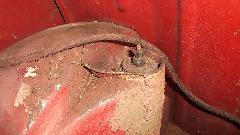
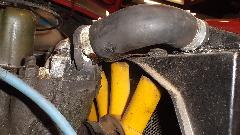 It needed a couple quarts of coolant, and it was soon obvious why. The top radiator hose was in bad shape, leaking, needing to be replaced.
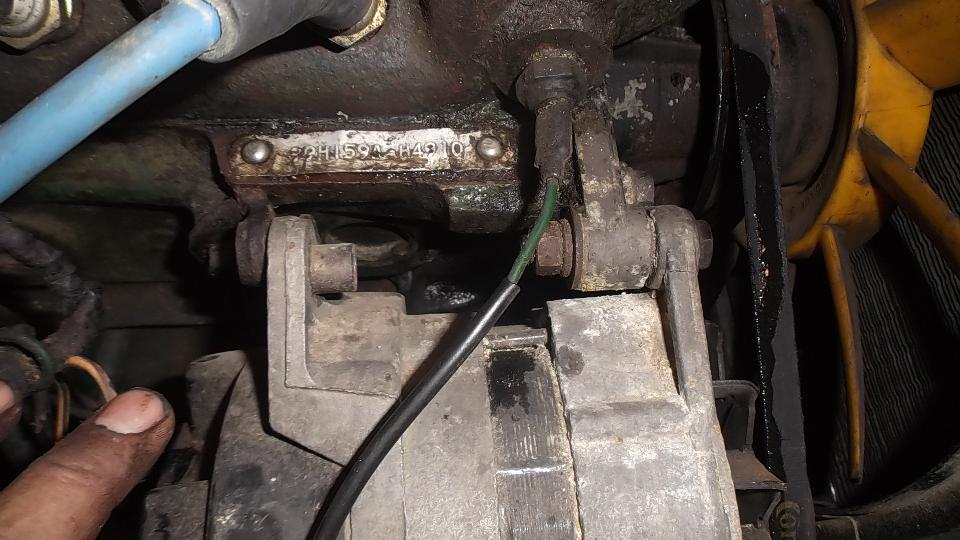
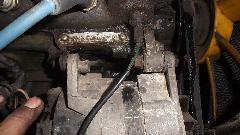 A more serious problem was a missing bolt in the alternator rear mount. When running the alternator was vibrating. It appears that the front mounting ear is cracked, probably all the way through, so will likely need a new alternator. That missing bolt turned out to be a rather costly omission. Time to break for the night.
Wednesday November 4, 2015
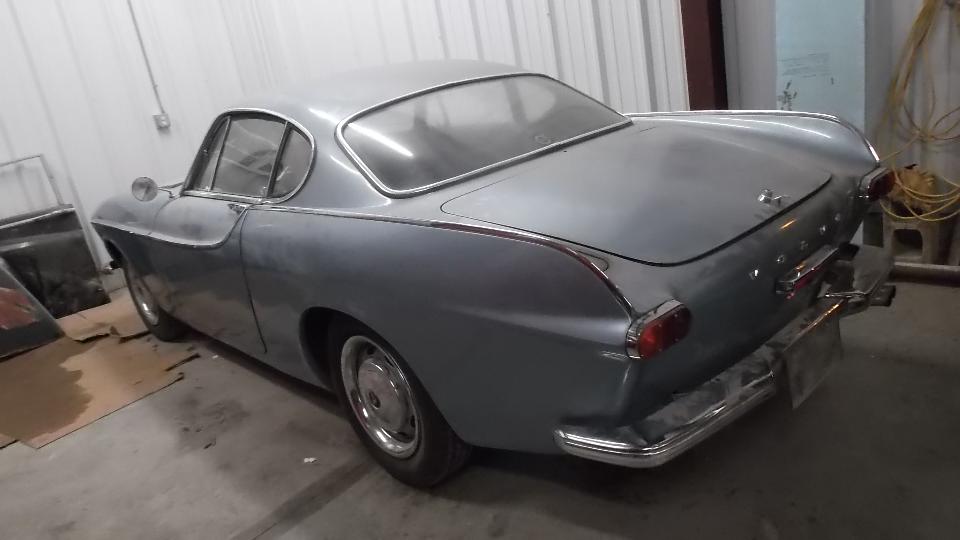
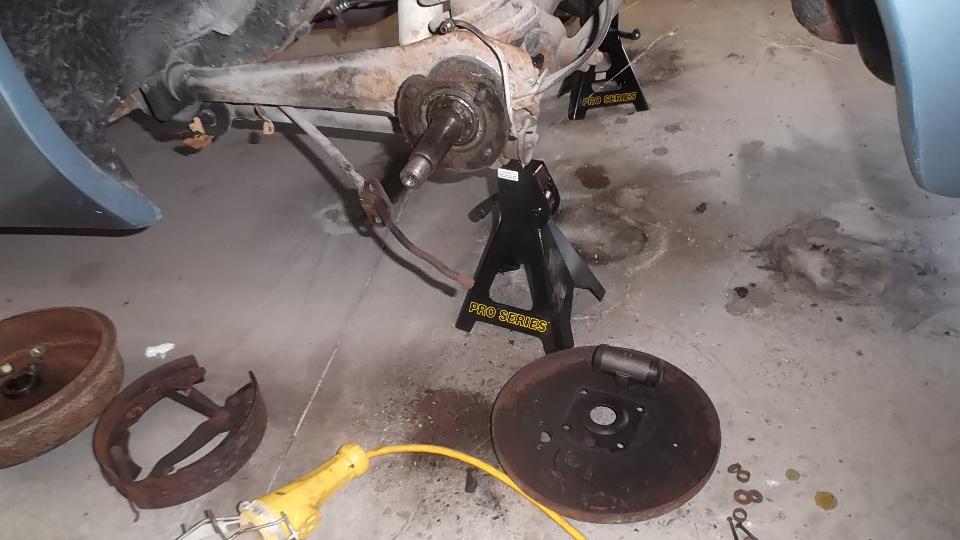
 Slightly shorter work load today, not easy but more simple grunt work. The 1800S got new rear brake shoes and hardware and wheel seals. Reverse bled the brakes, and it may be ready to drive away (unless we find something else wrong with it).
Thursday November 5, 2015
For anyone watching the calendar, today would be 18 months on the road, so far just shy of 64,000 miles, and we are still "off to a good start".
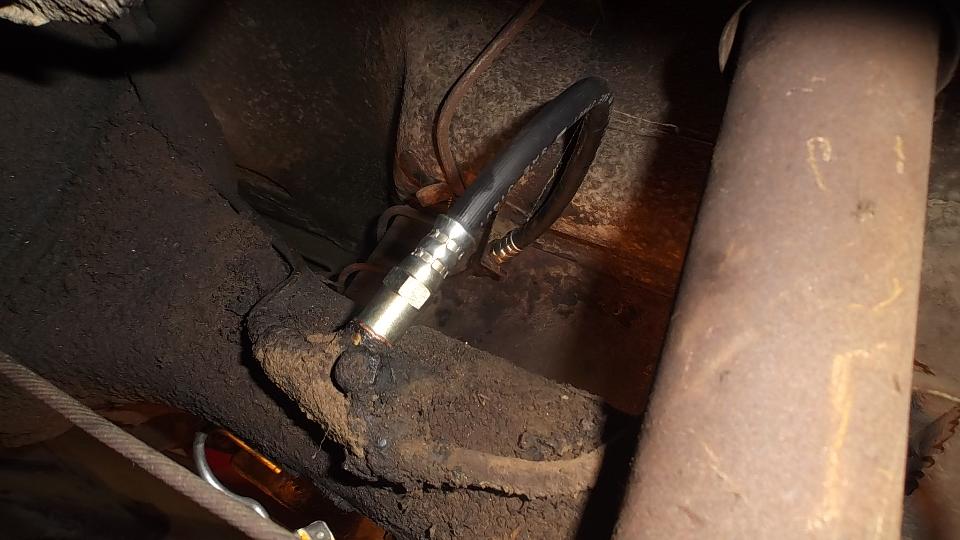
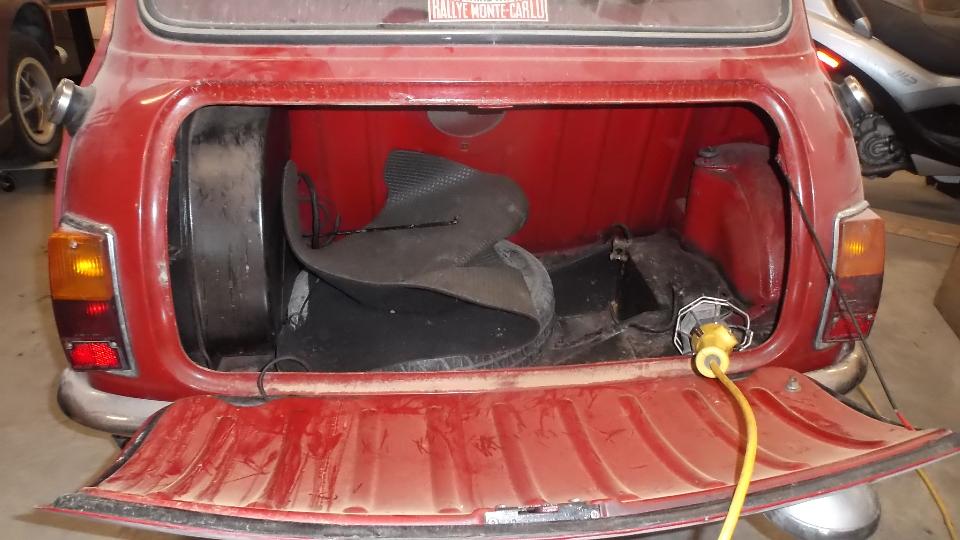
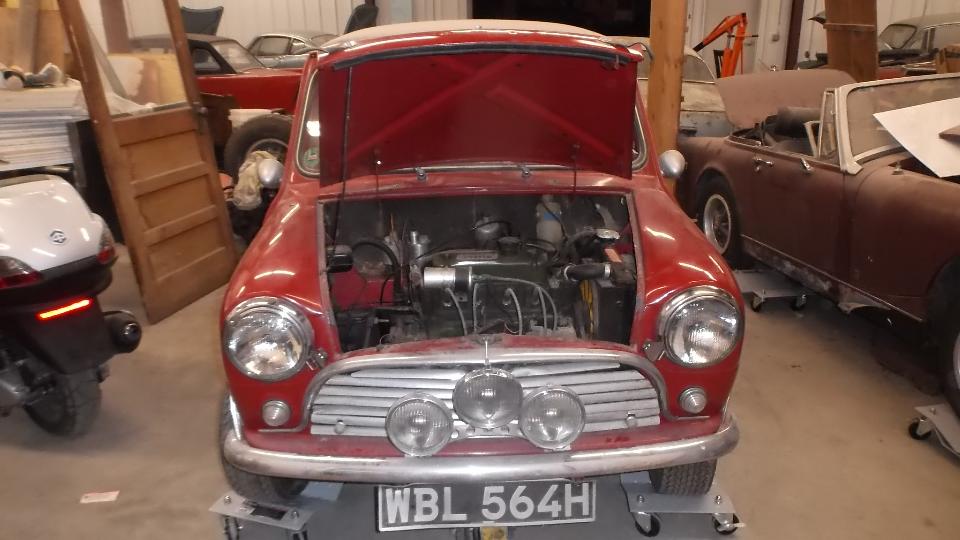
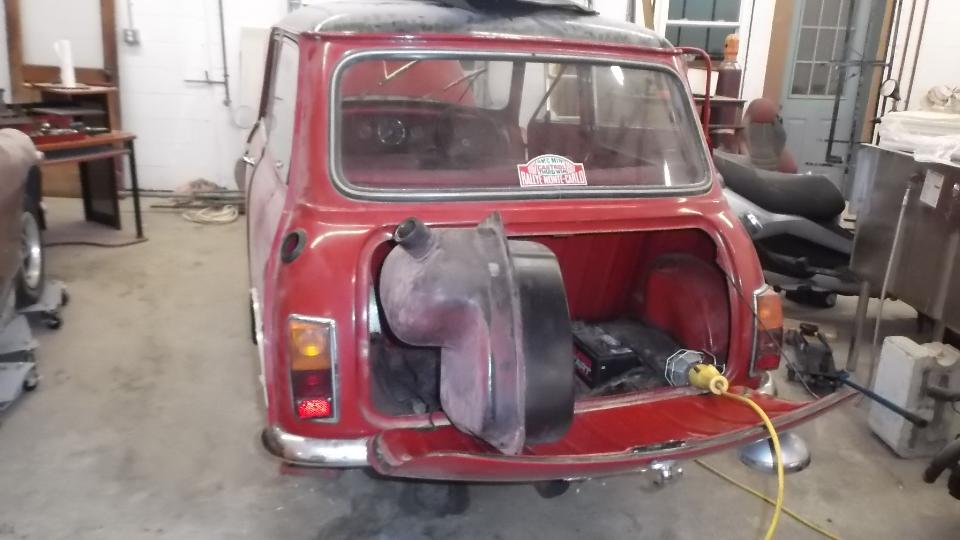
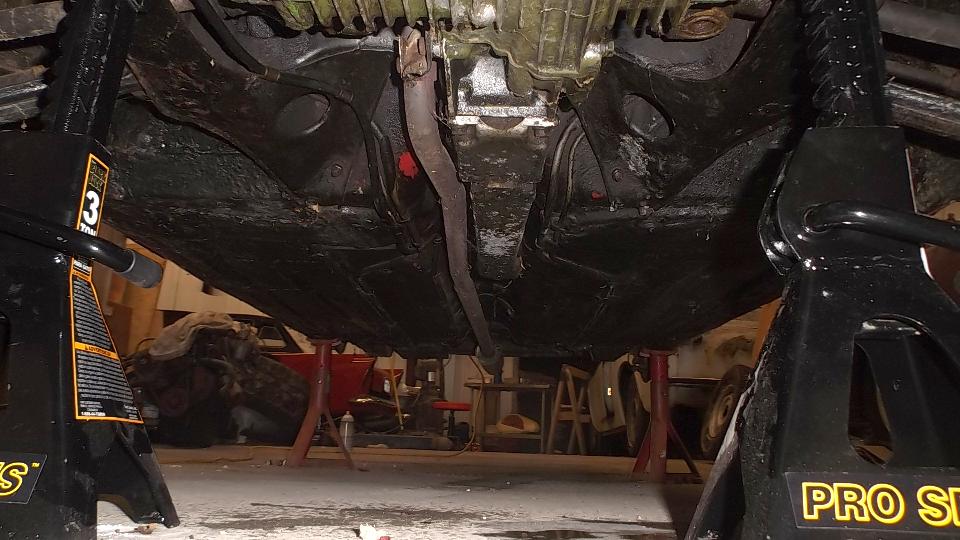
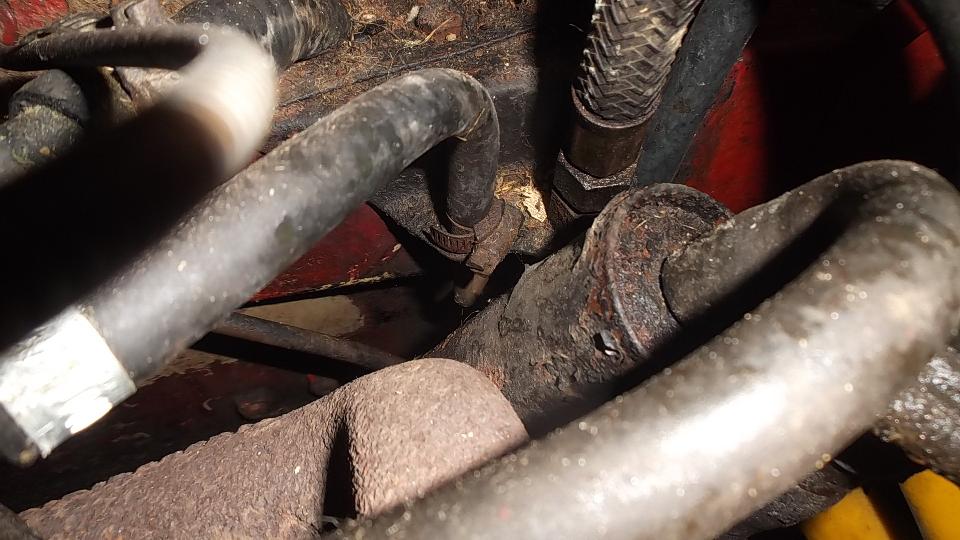
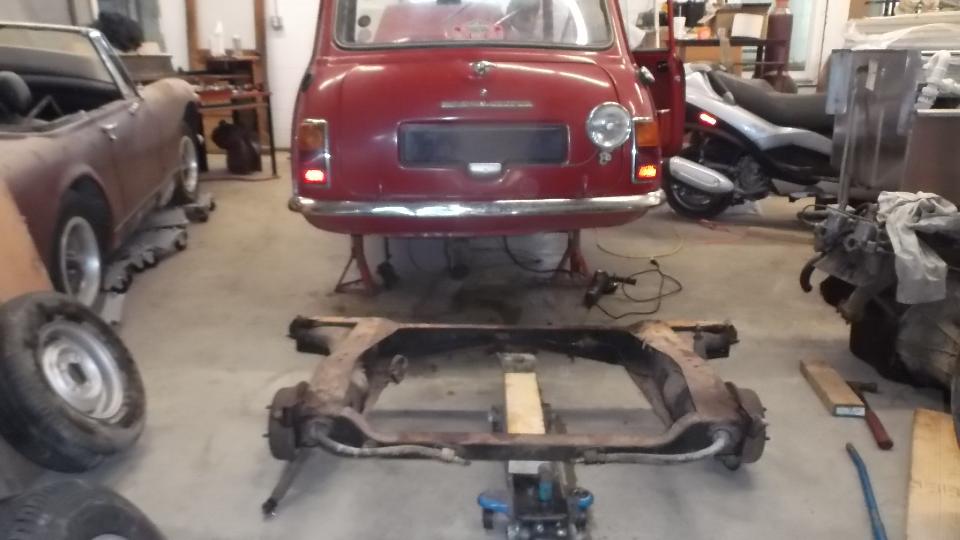
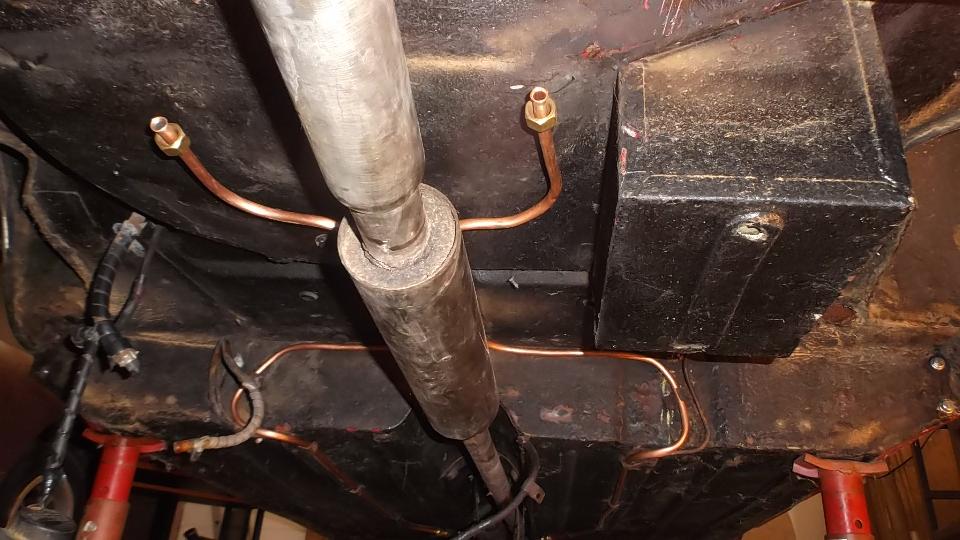
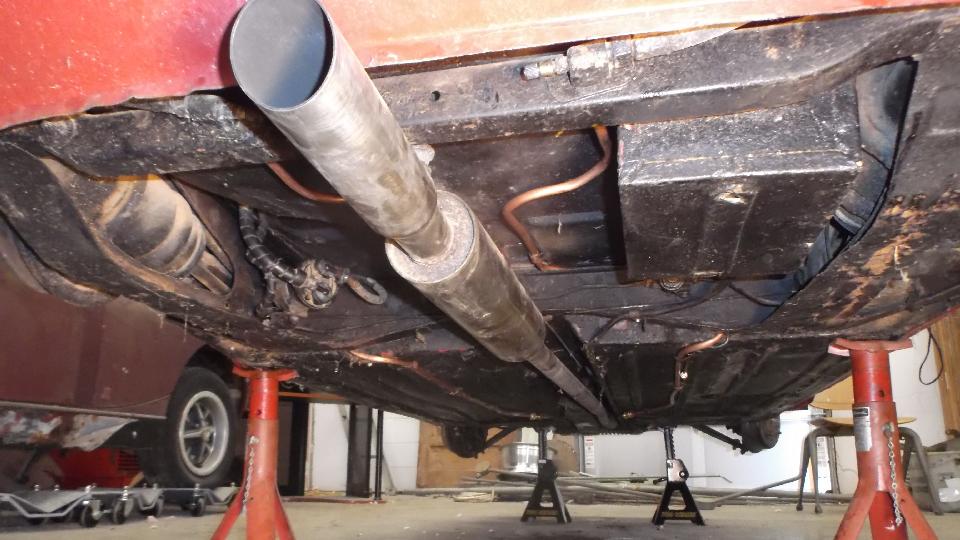
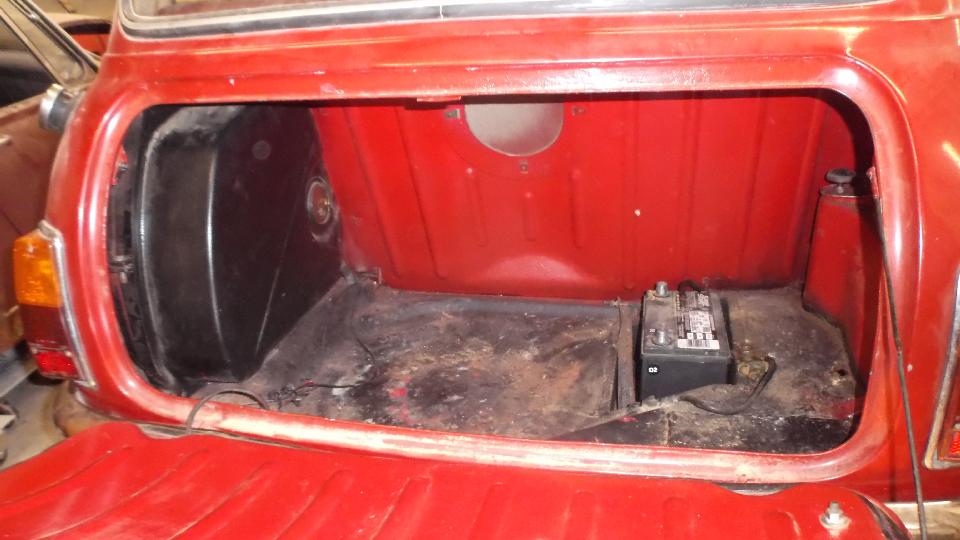
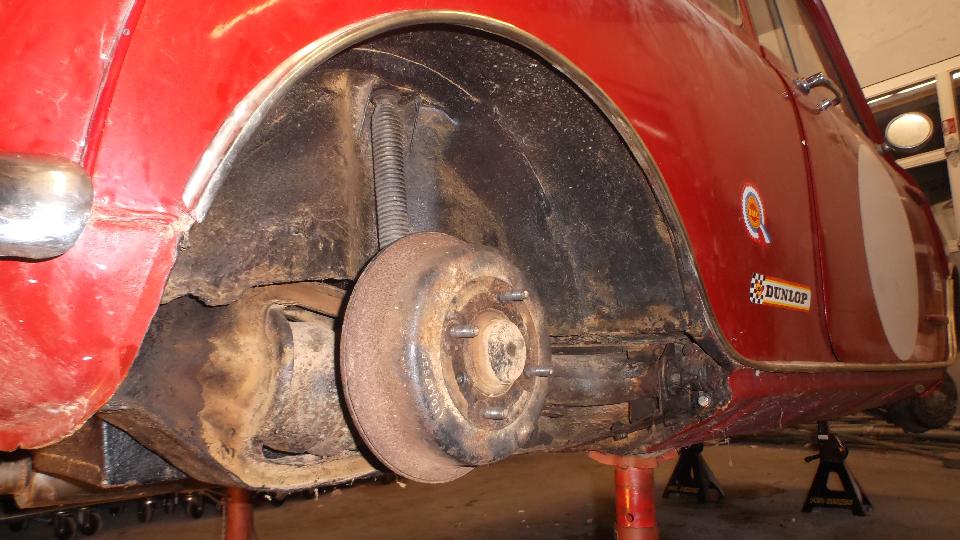
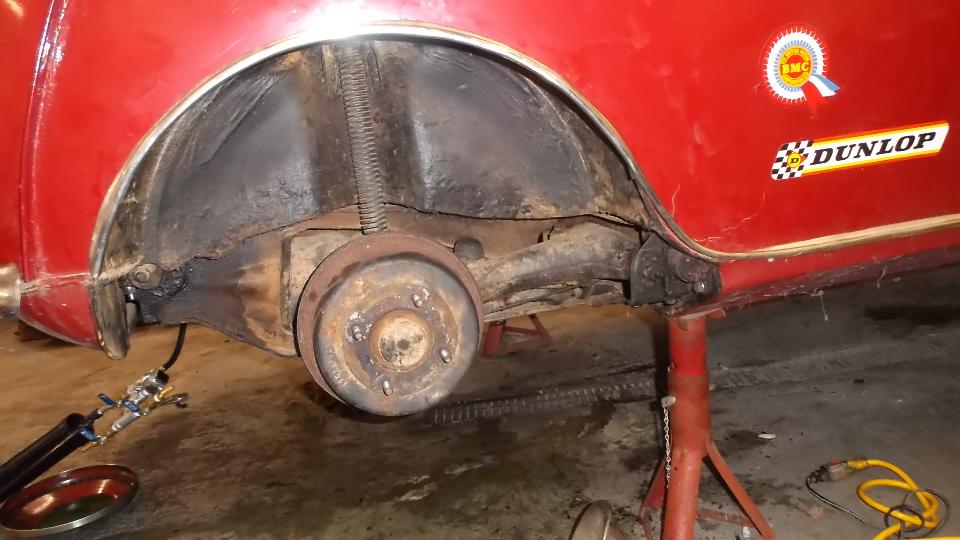
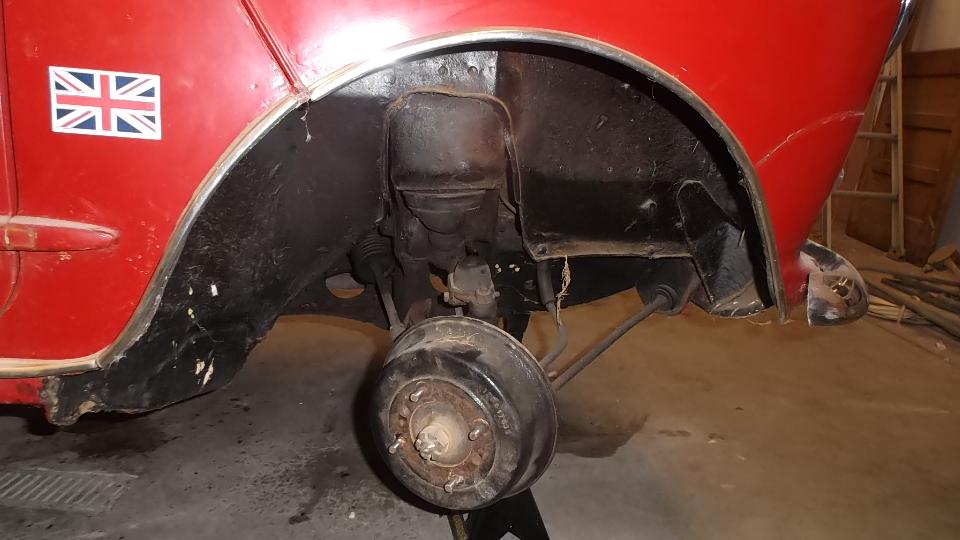
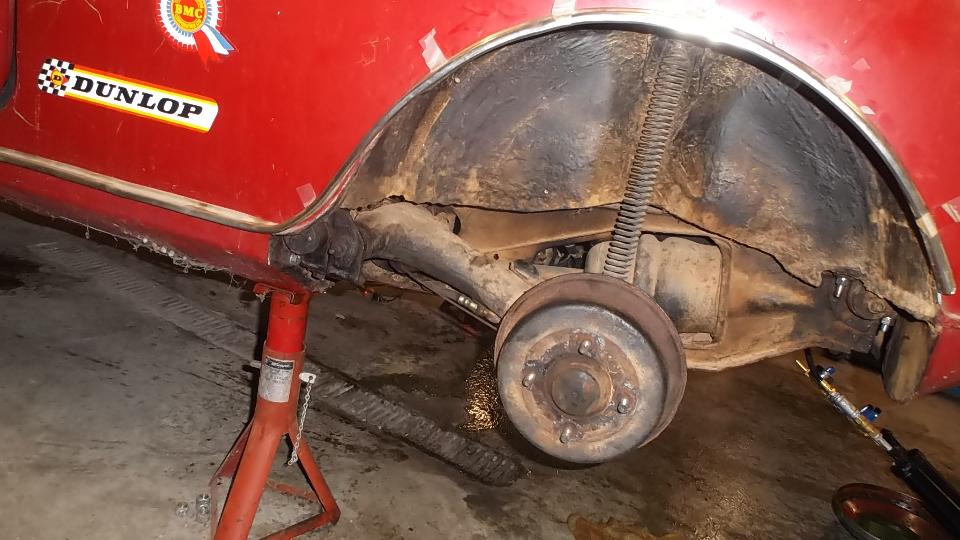
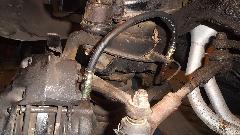
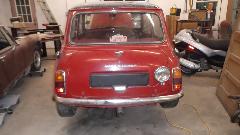
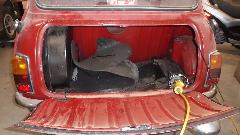
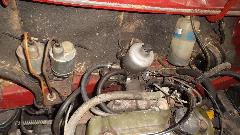
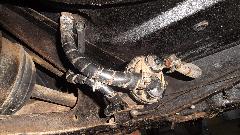
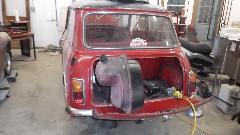
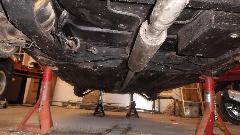
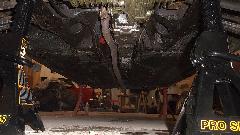
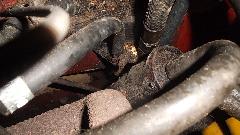
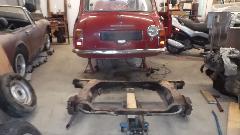
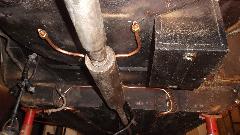
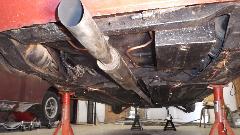
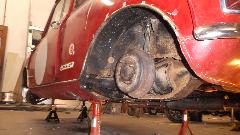
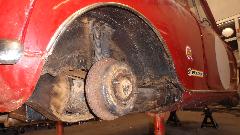
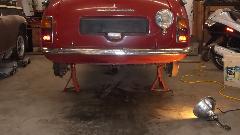
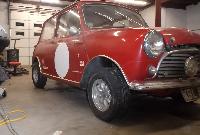
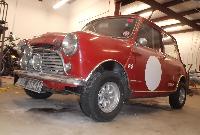
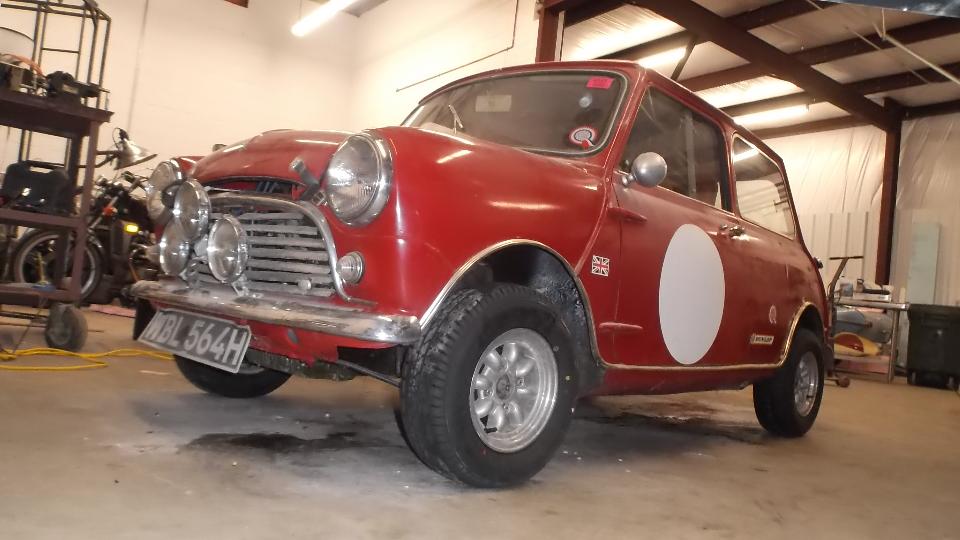
That adorable little Austin Cooper Mini is about to change personality a bit. I bit the bullet and decided to remove the rear subframe for access to the suspension fluid pipes (because it needs it, and the car is too good to crush). So now it's up on jack stands all around with wheels off, and I get to struggle with rusted bolts that haven't been apart in more than 50 years, and some DPO bodges. Would you believe that fuel tank came out of that little boot? Fuel pump disconnected and tucked up in the subframe. Brake pipe disconnected, thinking how to disconnect the hand brake cables. The suspension fluid pipes are visible above the muffler. The pipes run above the subframe, then turn outboard to turn down over the front near the sides, then turn back inboard to run under the floor near the tunnel (a rather convoluted path). In front they turn inboard and upward just inside the wider mouth at front of tunnel, then angle outward a bit to terminate on brackets at rear corners of the engine bay.
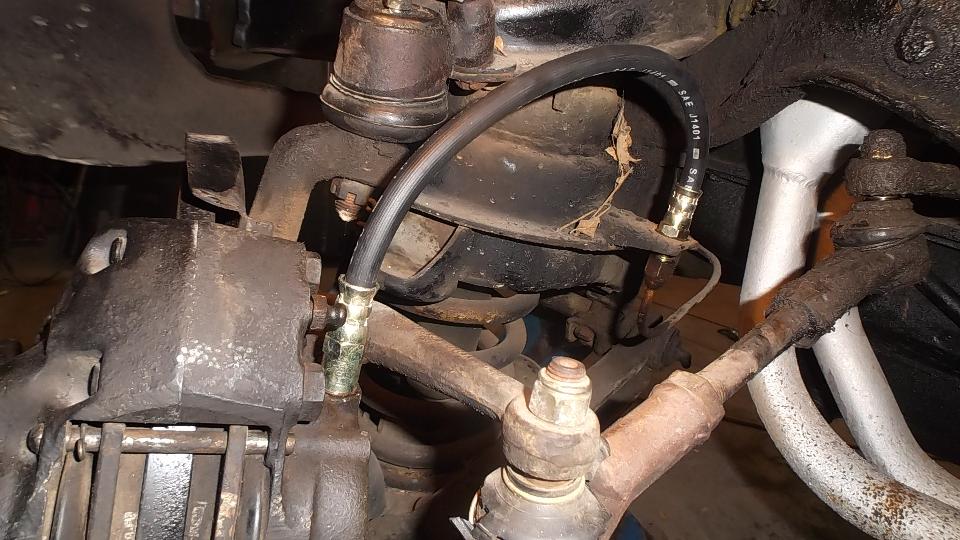
In the engine bay the "off side" pipe to hose fitting is accessible, sort of (if I make like a double jointed chimpanzee). The "near side" connector fitting is, to be generous, a lot more difficult. Maybe we can splice the pipe somewhere underneath and not have to remove the front connections (or the engine). Meanwhile, put another battery on the charger. Thane just brought in two more batteries out of his other two Subaru Samurai. (Did I mention he has three of those)?


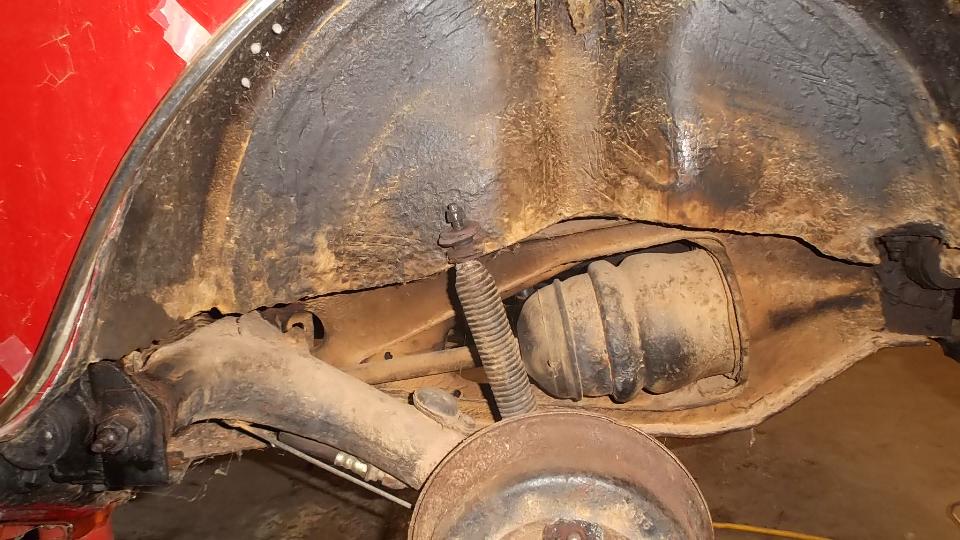
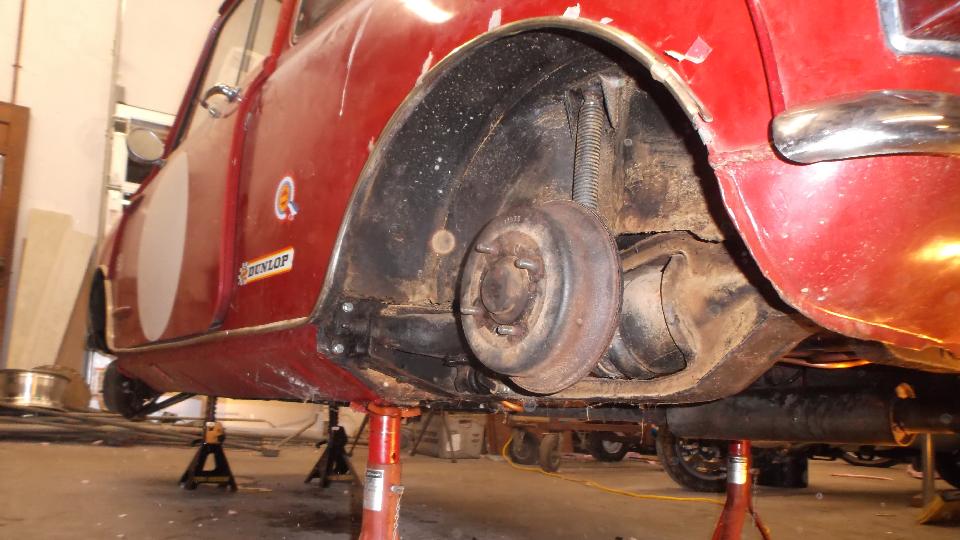
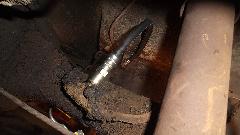
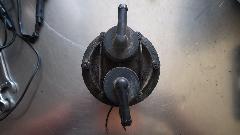
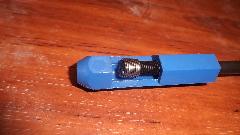
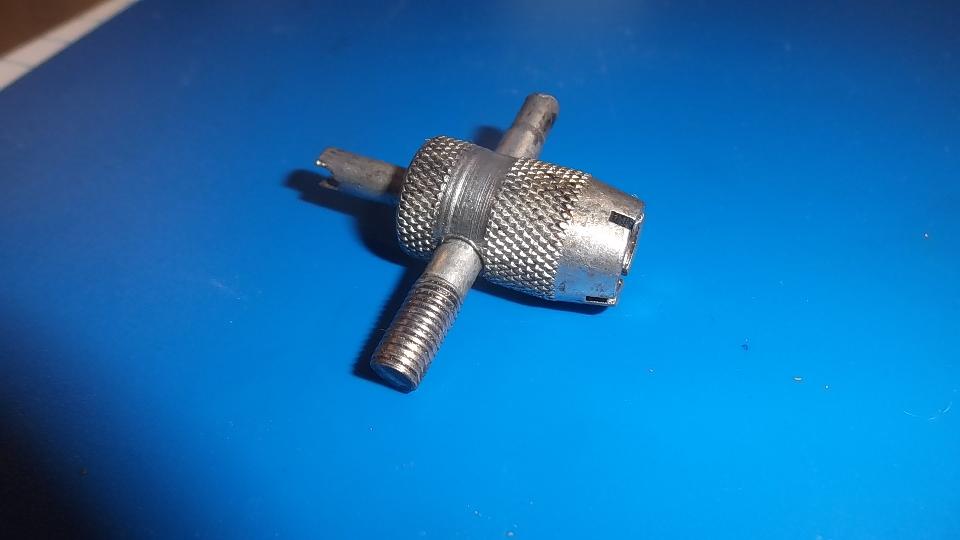
 In the boot, this thing that looks like the top end of a tubular shock absorber is actually the top attachment bolt for a tension spring. Jack up the trailing arm to full up before releasing this one. I recon the spring is to prevent too much drop of the suspension when the car gets airborne.
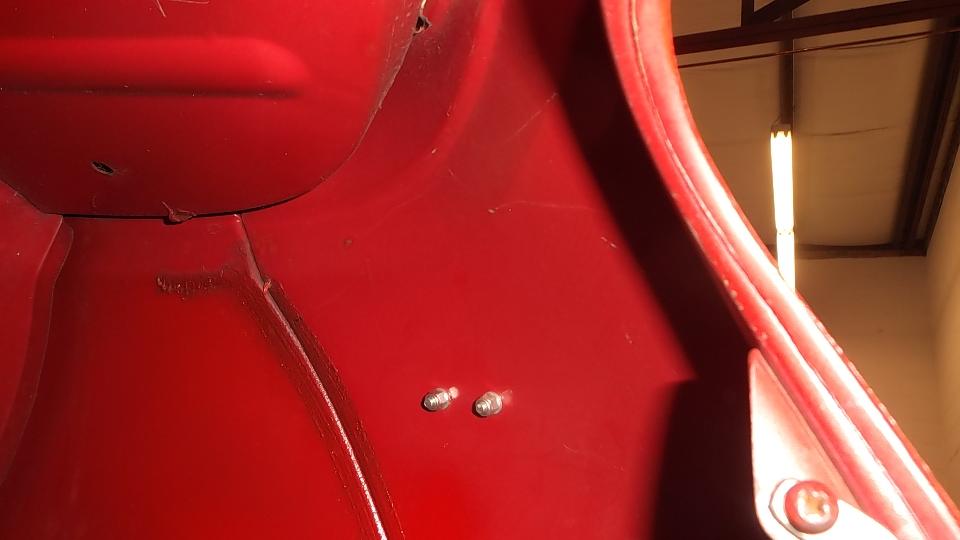
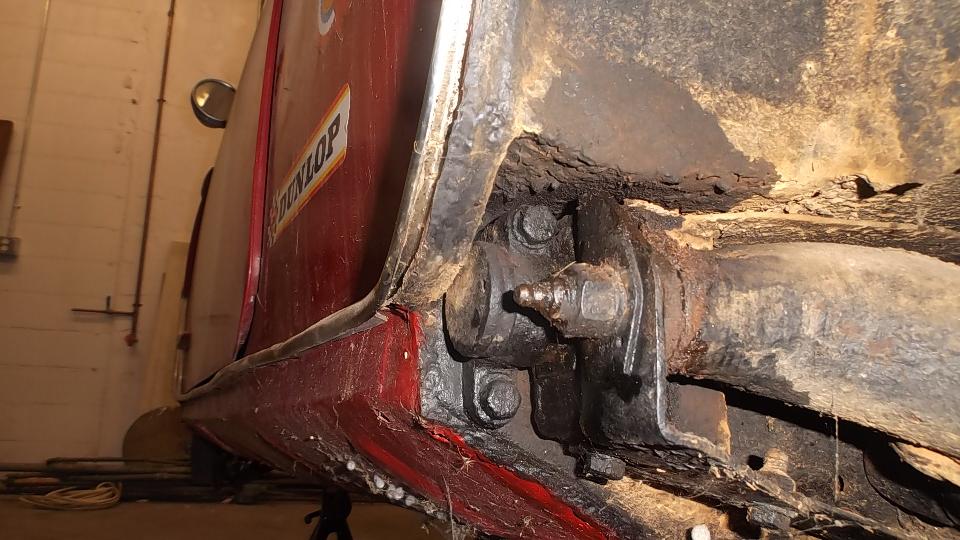
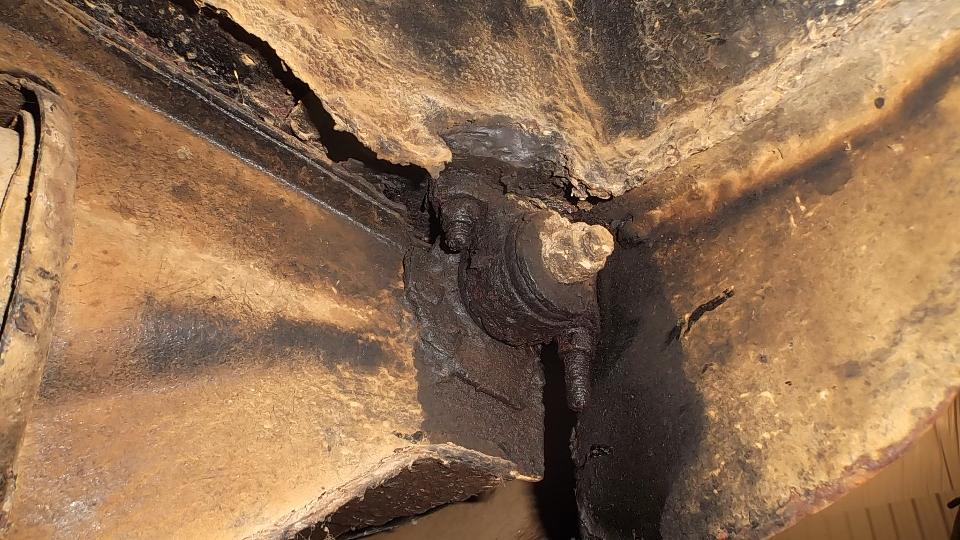
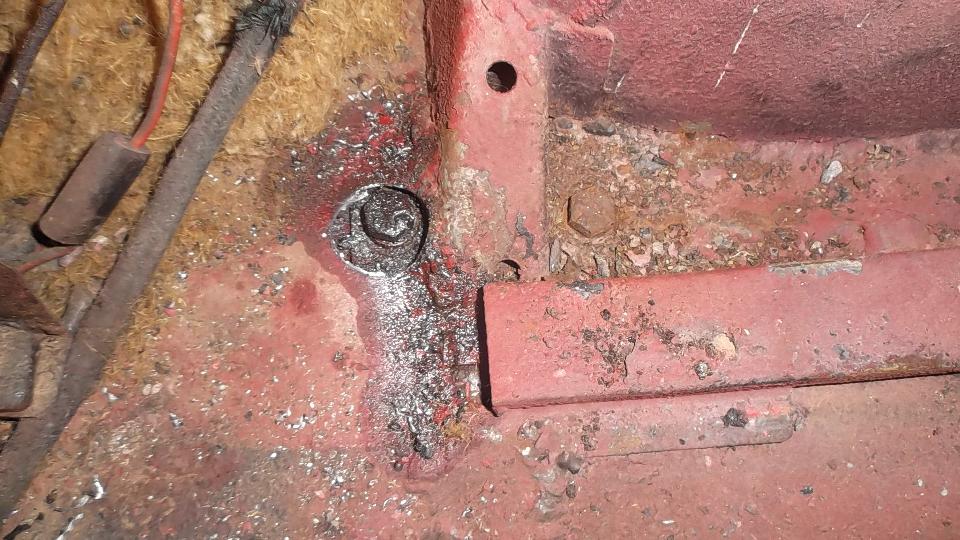
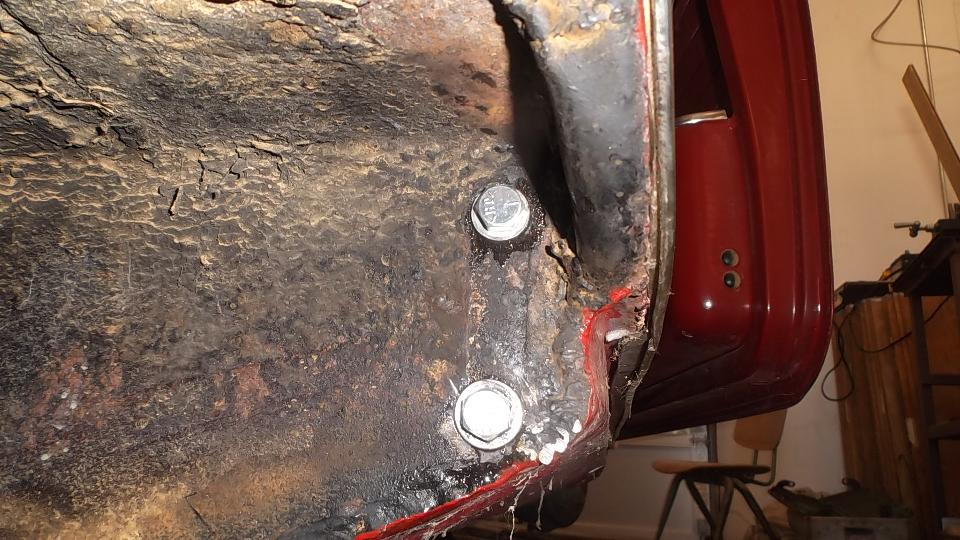
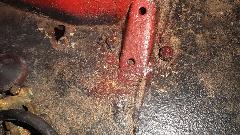
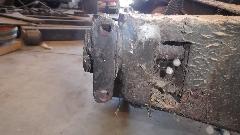
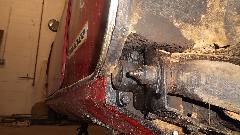 The next two pictures show attachment points for the four corners of the subframe, in front two horizontal bolts into the body sill. Apply PB Blaster and wait a while before trying to undo these bolts. The top bolts came loose, while the two lower bolts are stuck solid. I have a sneaking suspicion that the thread ends (hidden inside the body sills) have been inadvertently welded in place as part of a prior body sill repair. Grrrr. Start thinking break bolt, cut flush, drill out, and install a HeliCoil.
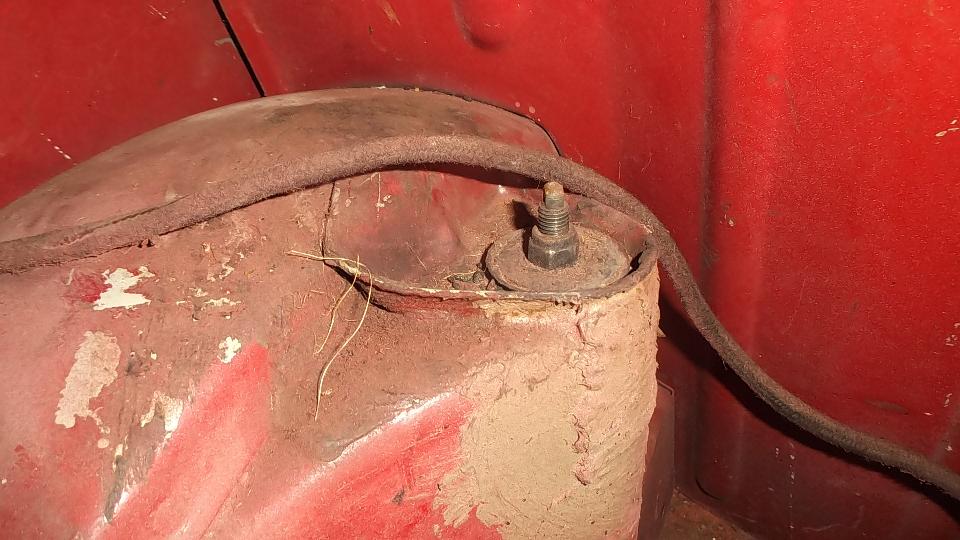
In the back corner find two vertical bolts. The bolt heads are in the boot, or at least they are supposed to be in the boot. A prior sheet metal repair to pass MOT in England several years ago has a sheet metal patch welded in over the head of one of these bolts. The bolt turns but has no wrench access. Bummer. The adorable Mini is beginning to look like Evil Mini. This is where I stop to think about it over night, before I do something stupid.

Friday November 6, 2015
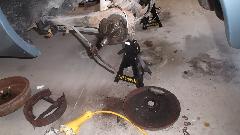
 After breaking the two lower forward bolts (as expected), plan-A worked okay. We bought a hole saw to remove a plug over top of the hidden bolt. Then cut the two rotted fluid pipes near the rear connectors. After a bit if fiddling to disconnect hand brake cables, the rear subframe was pried loose from the body.
Then I crawled under to disconnect (unbend) several clip tabs holding the right side fluid pipe under the floor pan. After mucking around in a tight space for 20 minutes the front flare nut was loose. However, after fiddling with the pipe for another 20 minutes or so it was determined that the bent pipe and flare nut were no way coming out from between the foot well floor pan and the steering rack and front subframe. So we figure the front part of the pipe is in good condition, so leave it there and make a pipe splice below the floor. Then of course another 20 minutes fiddling in cramped space to reinstall and tighten the flare nut.
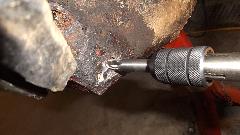
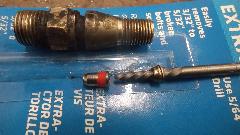
 Now where the best laid plans can go awry. There are these two broken studs in the back end of the lower body sills. I don't want to take a torch to it, not wanting to screw up the outer paint. So Plan-B is to grind flush and drill the bolt out, followed by clean the threads with a tap. If that doesn't come out right, then drill a little larger and install HeliCoils. Off shopping to pick up a drill set with 1/64-inch increments up to 3/8-inch diameter. Three stores and an hour later, Ace Hardware has a Craftsman brand drill set with the appropriate sizes. To make it short, two broken drill bits and one dull drill bit and nearly half an hour killed, I have a 9/64 pilot hole drilled through about 1-inch length of one broken bolt. Either these are the hardest bolts on Earth, or the Chinese made drill bits in the Craftsman box are crap (and I'm pretty sure these are not the hardest bolts on Earth).
But with the pilot hole finished it should go a little easier (maybe). Step up a little in size to 3/16 drill, and it doesn't drill. Really? Back down to 11/64, and it still doesn't want to drill. Really! Step down to 5/32 drill, just 1/64 larger than the pilot hole, and it does drill, but hard going. At that point I should have wised up and tossed the whole drill set in the trash. But we are not always that smart. With a bit more determination I drilled a little more before the drill bit broke off in the hole and could not be removed. Now I don't particularly mind hard work and tough going, and I don't really mind that I wasted good money on the cheap drill bits. But it bugs me no end that I just screwed up with a broken drill bit in a bolt in a part of the car that cannot be removed to carry to a machine shop. I hate to end a day on a sour note, but I need some time to think about what comes next.
Saturday November 7, 2015
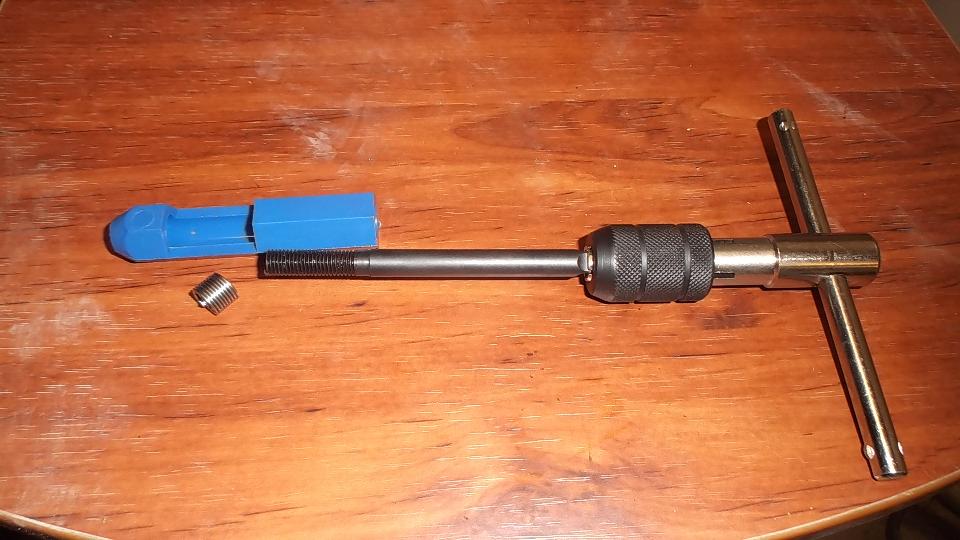
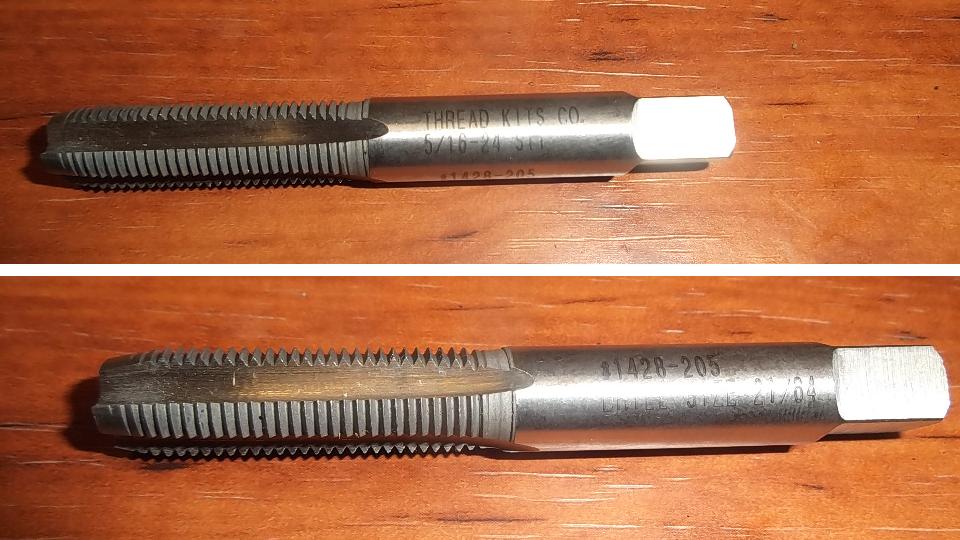
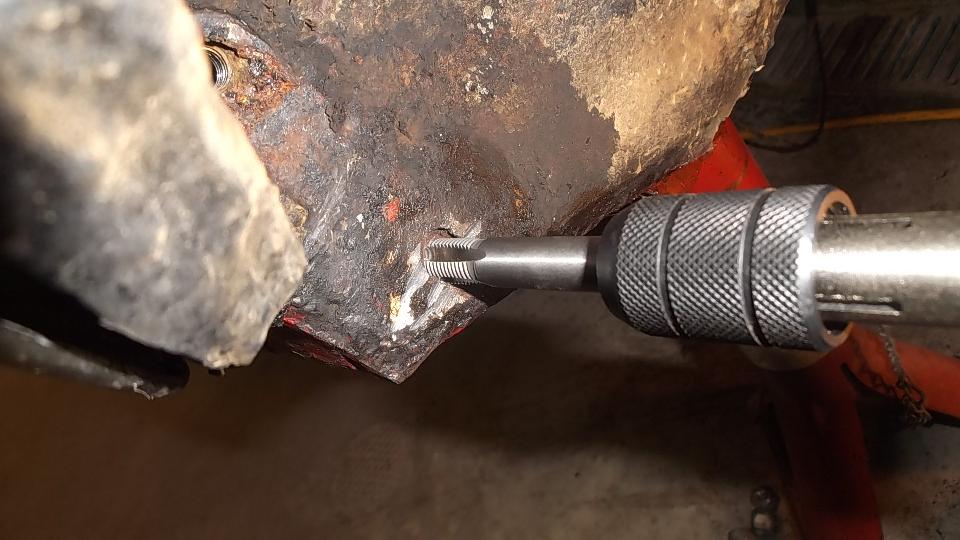
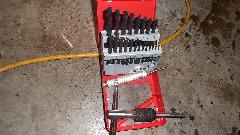
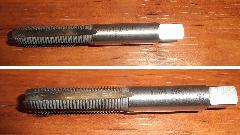
Last night I posted a request for suggestions on the BBS. There were several responses, and the winner was, Ed Bell in Oregon who suggested punch the broken bit on through the pilot hole. So I did. There was a 9/64" pilot hole all the way through, and the drill that broke was only 1/64" larger. I got a piece of 1/8 drill rod (tail from a longer drill bit) and used it as a punch to drive the broken bit all the way through the pilot hole. Then I bought a set of High Speed Steel drills, after which the drilling went much better. Drilled out to 21/64" and tapped and installed a 5/16-24-UNF HeliCoil.
I was expecting much the same on the other side, but by the time I got the larger hole drilled for the HeliCoil the weld nut broke loose inside the body sill. Grrrrr. Such is life when working on old rusty cars. Time to knock off and sleep on it again, and tomorrow maybe make a tapping plate and figure out how to shoehorn it in there.
Sunday November 8, 2015
Would you believe Day Off? Nah, I didn't think so. Aside from normal daily WiFi work, I spent a lot of the day enhancing the cross reference list for the propshaft U-joint (which must be the most common auto part in world). Also spent some time thinking about the pesky tapping plate I needed to install in the Austin Cooper. I was also trying to recover from some sinus problem, so figured to stay out of the cold-floor workshop for a day.
Monday November 9, 2015
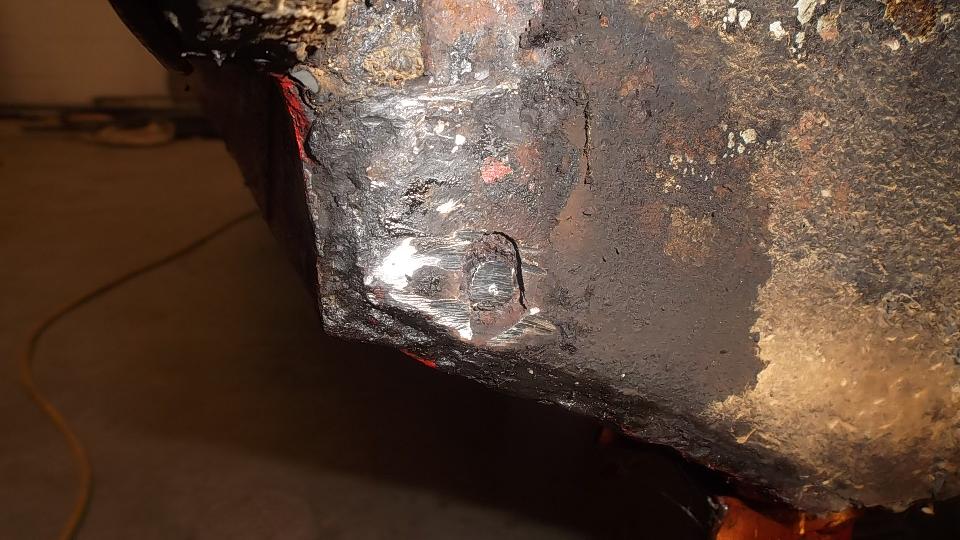
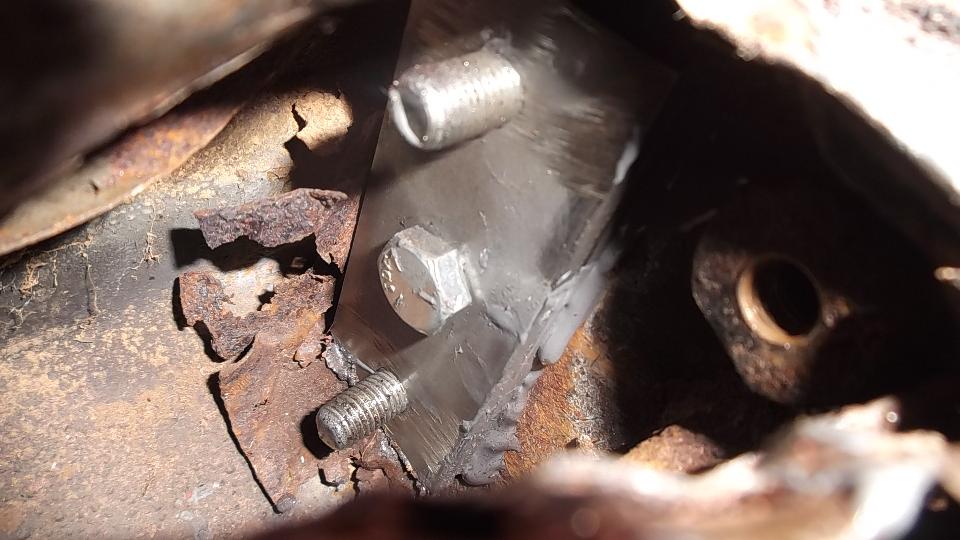
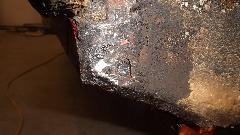
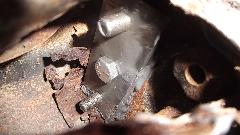
Today was the day to fix the sticky problem with missing captive nut in the Cooper body sill. I was figuring to make a tapping plate for a single missing nut. Having pried the top of the sill open a bit (way down inside the map pocket by the rear seat), I discovered the original captive nuts were attached to a thin sheet metal flange from the inboard side of the unibody channel. Opening the channel moved the top captive nut away from the hole, leaving two empty holes. This was actually good, as it is easier to make a tapping plate for two bolts.
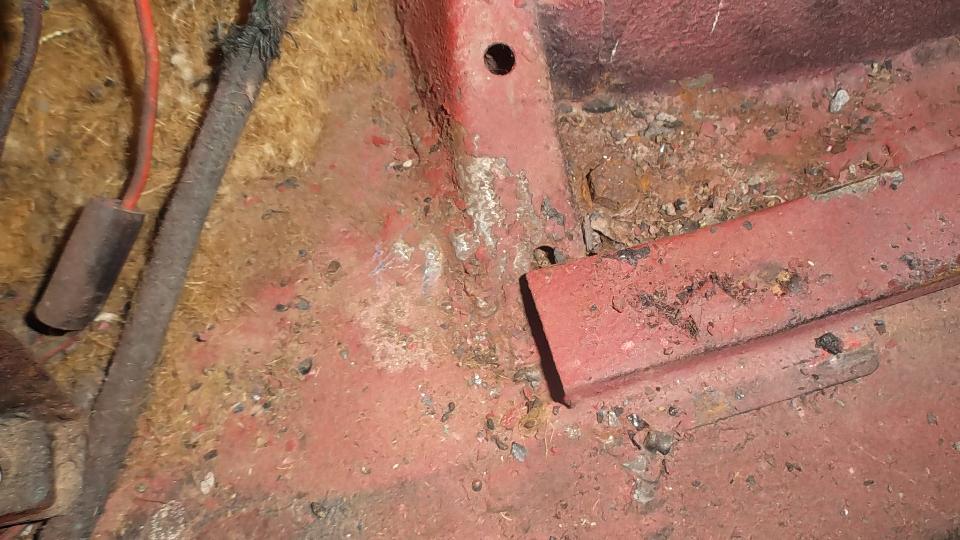
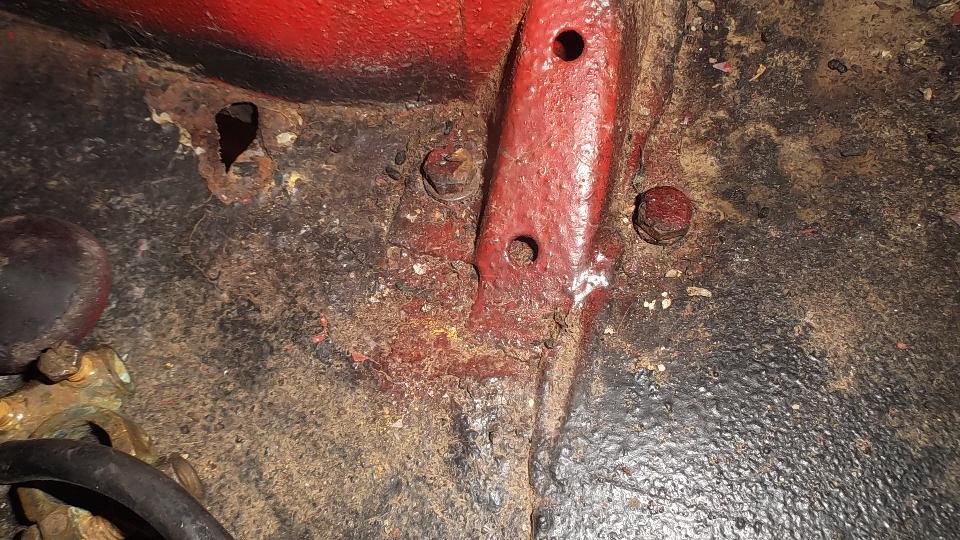
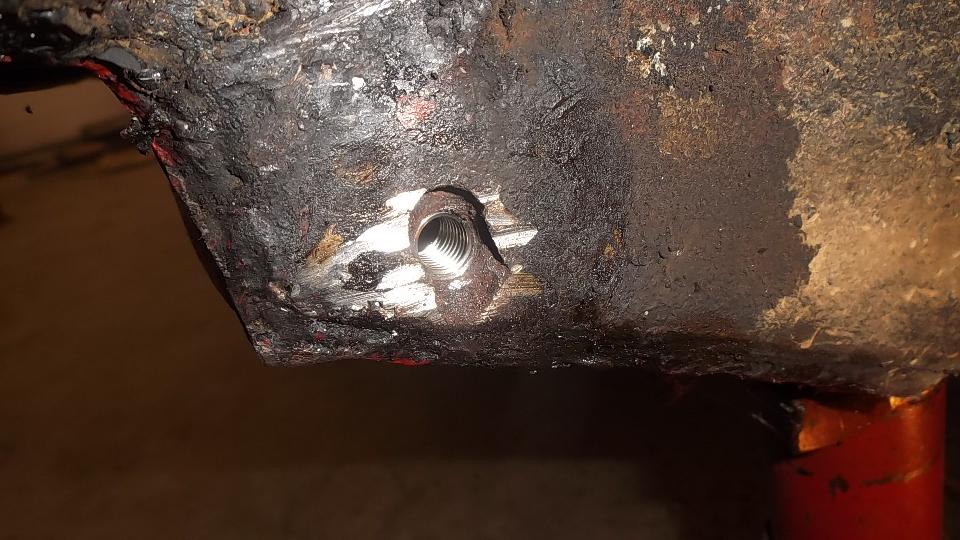
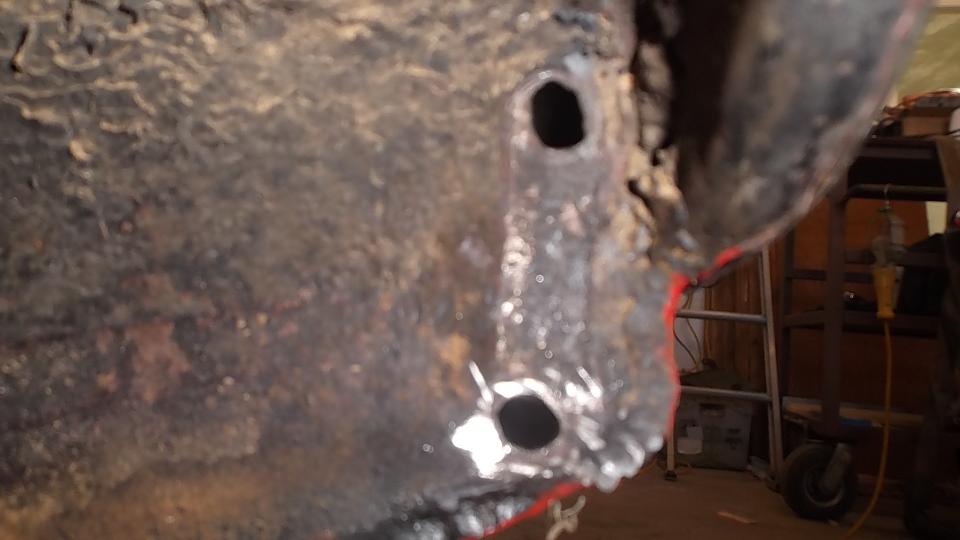
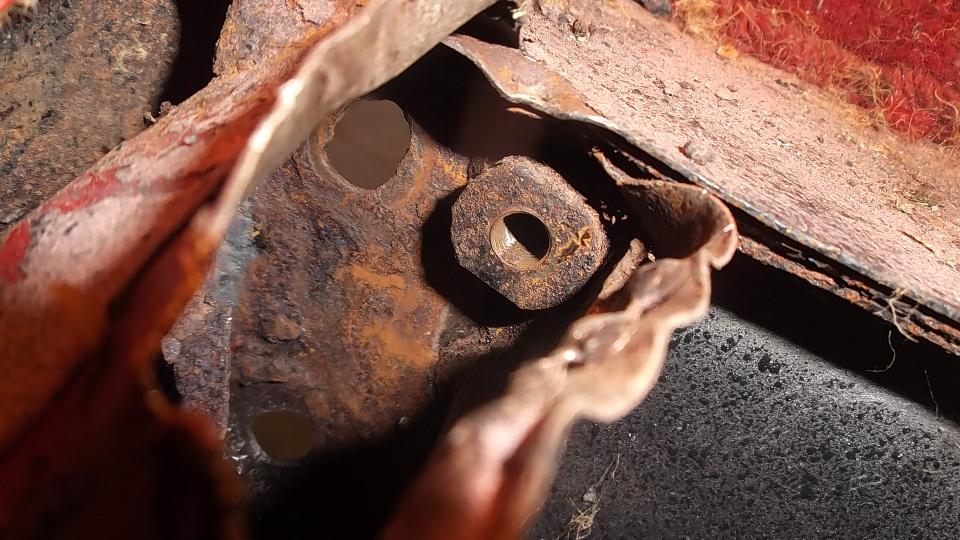
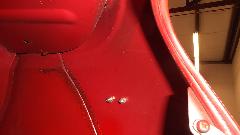
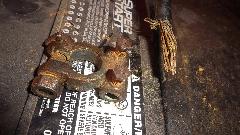
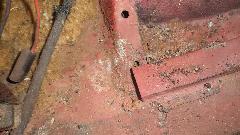
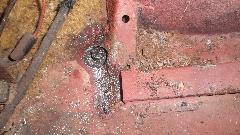
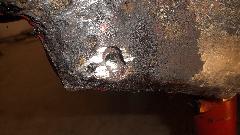
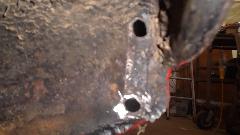
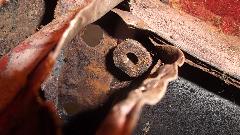
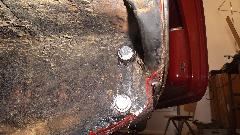
First picture is the RF mount for the rear subframe, two holes 2-1/4-inches on center for 5/16-inch bolts. Second picture is the rear end of the mating body sill with two empty holes. Third picture is inside of the body sill at the same location. Prying the channel open was tough enough, but getting the picture in tight confines was trickier. Good thing digital film is cheap. That captive nut on the right used to be in front of the hole on the left before all the prying moved the sheet metal and the nut. So much for 50 year old spot welds.
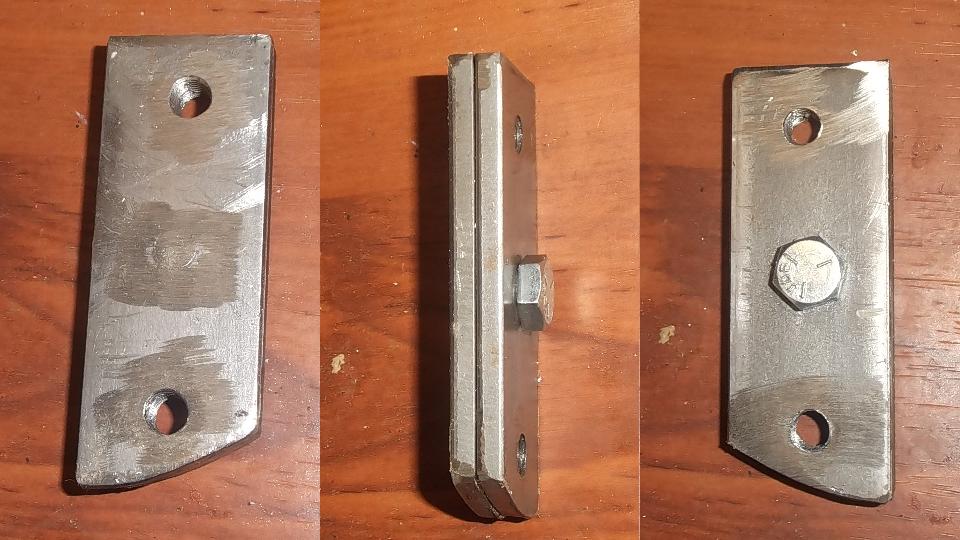
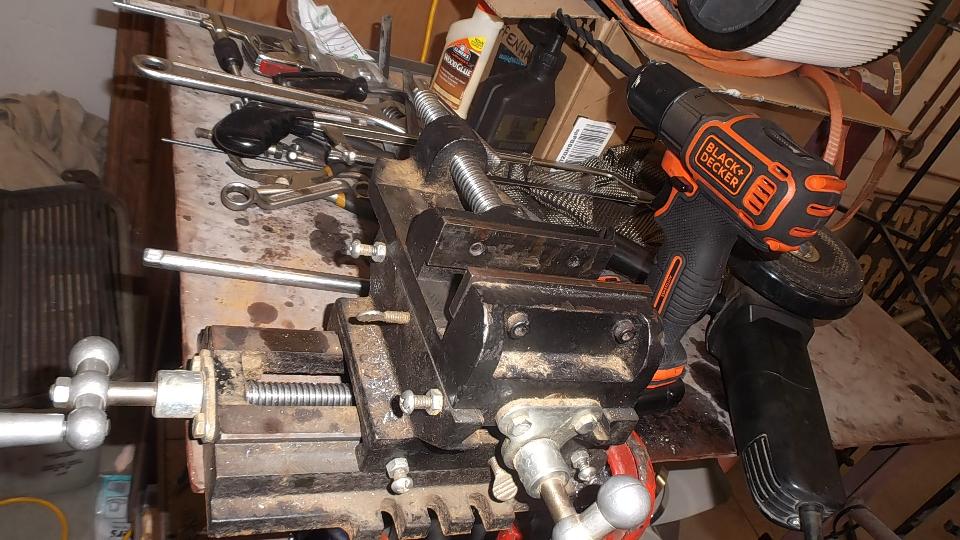
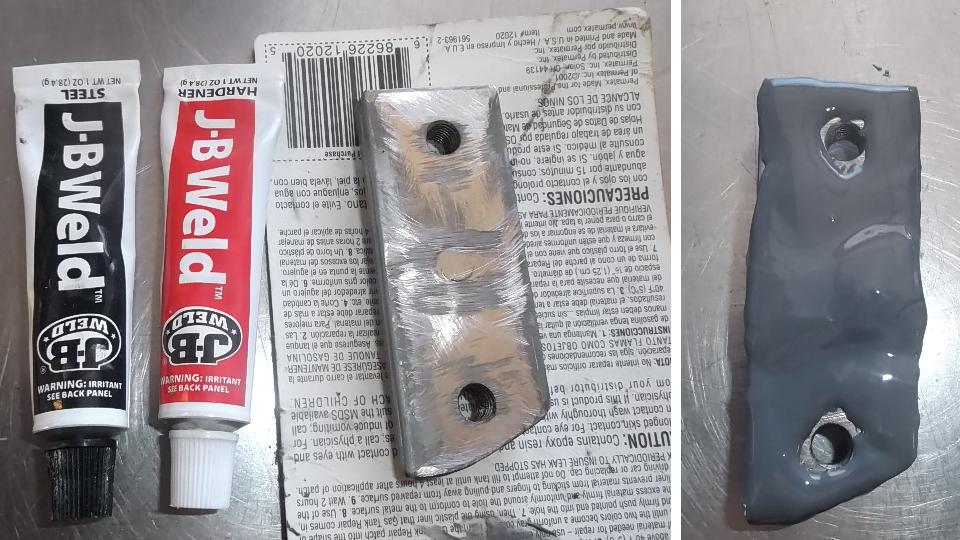
Then I needed to make a flat steel strap (as large as possible) with two tapped holes to fit in the space allowed. Given the resources available today (no welder handy), this is what I came up with. The thickest steel strap available at Ace Hardware was 3/16-inch, so I double layered it
 to make 3/8-inch thickness to hold the threads for a structural part. We found a drill press vice and a C-clamp, good enough to hold the part for sawing and grinding and drilling and tapping. I bought a (cheap) hacksaw from Ace (obviously with sub-standard carbon steel blade) and a couple of High Speed Steel saw blades. I needed to make at least three cuts across the 3/16"x1-1/4" steel bar. The carbon steel blade cut 3/4-inch in mild steel bar stock and had no teeth left
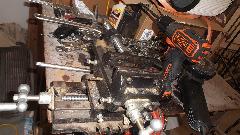 (even with lots of oil). The High Speed Steel blades (with Ace Hardware brand name) must have been High Speed "Steal", because they managed about 1-1/2-inches cutting each before having no teeth. With way too much effort I finally got the cutting done. I used a small angle grinder to remove burrs, then clamped the two pieces together, and proceeded to drill and tap three holes through the assembly. The center bolt (cut flush behind) holds it all together as one part.
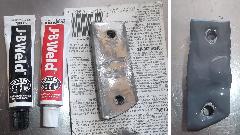
Then I got to use my favorite adhesive, JB Weld (lots of it). I wanted to be sure it would completely fill the voids and wet the irregular rusted surface in the body sill. Also apply oil to the bolt threads so they (hopefully) won't stick to the JB Weld. And, "Whoop, thar it is"! Done by 4-pm, rest of the day off (for daily WiFi work).
Tuesday November 10, 2015
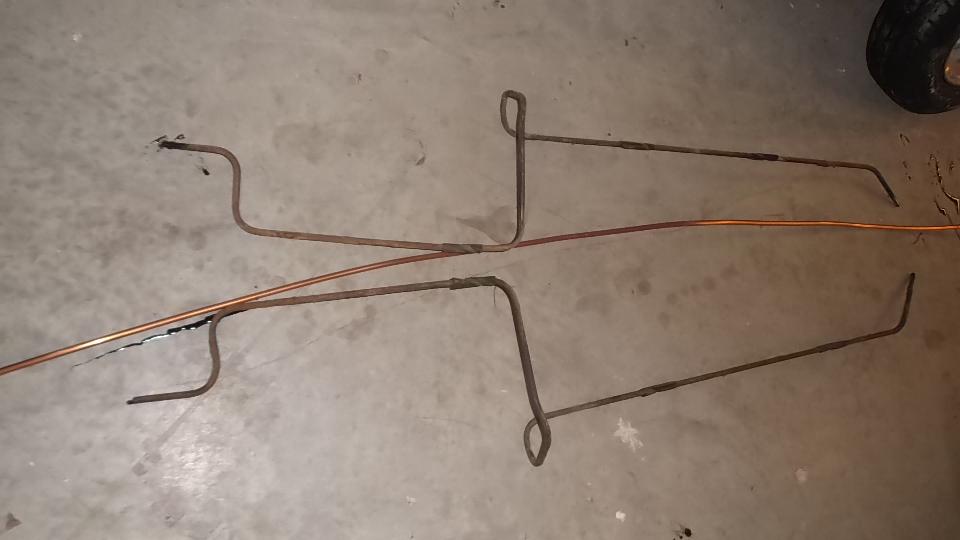
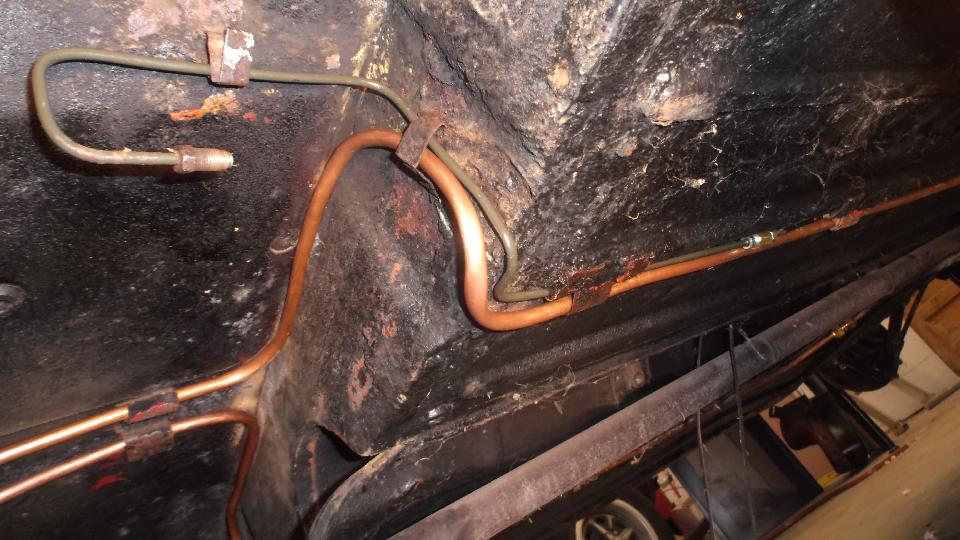
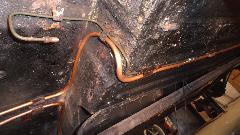
Today's prime objective was to replace rusted and leaking fluid pipes for the Hydolastic suspension on the Mini. Had a HVAC guy show up with cutting and flaring tools and some 3/8-inch copper tubing. Late start 4:30-PM, but it has to be done. Hand forming the tubing to fit
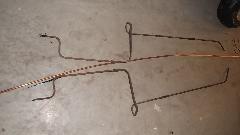 tight to the body was slow going. Large radii are easy.
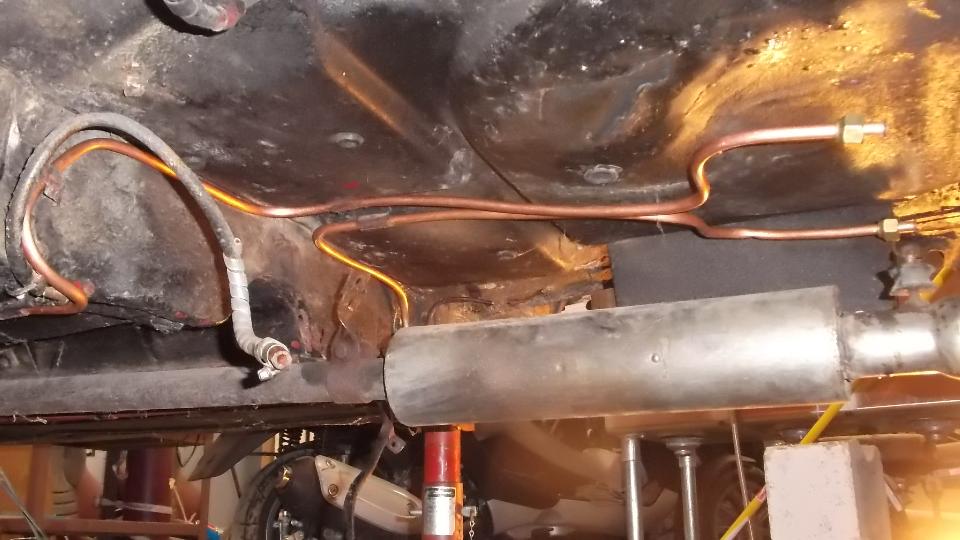
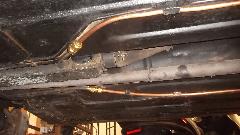
Tight radii are a pain without kinking the tube. Back to back bends a few inches apart in different planes is a royal PITA. 100 minutes to fit one 7-1/2 foot tube on the right side and get the flares and compression nuts connected. We stopped near the gearbox, as the front part of the pipes is good (and near impossible for access). Then the help had to leave.
tight to the body was slow going. Large radii are easy.
Tight radii are a pain without kinking the tube. Back to back bends a few inches apart in different planes is a royal PITA. 100 minutes to fit one 7-1/2 foot tube on the right side and get the flares and compression nuts connected. We stopped near the gearbox, as the front part of the pipes is good (and near impossible for access). Then the help had to leave.
measurable
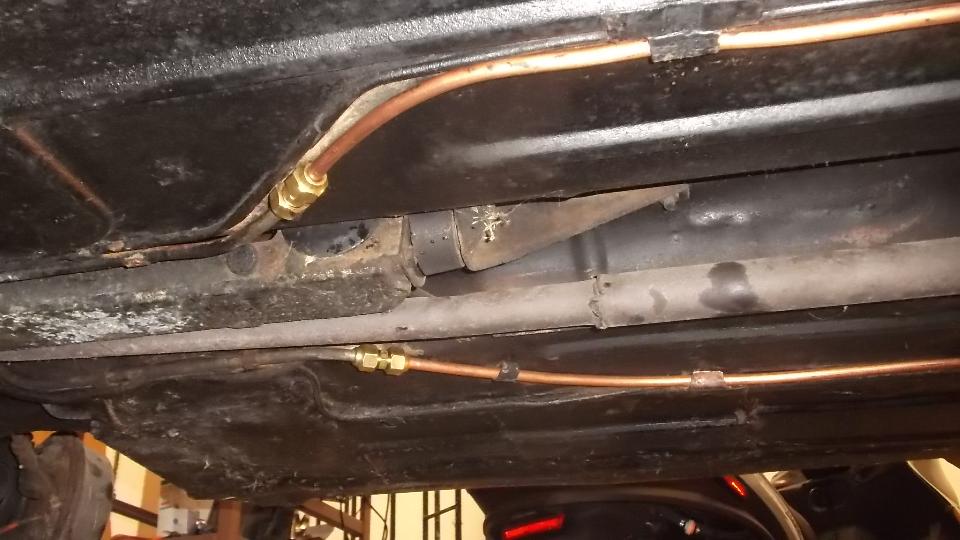
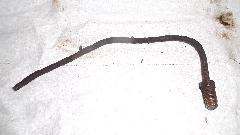 By that time I had the hang of it, fitting up the the left side in 80 minutes. Before we can evacuate and add fluid and pressurize it, I have to install the rear subframe. Before that I need to replace a piece of rusted and broken 3/16" brake pipe (first chore tomorrow). Pushing 8-pm, and was pretty miserable crawling around the cold cement floor, so enough for one day. Time for a warm shower and some WiFi work. Help with the vac pump will return tomorrow evening.
Wednesday November 11, 2015
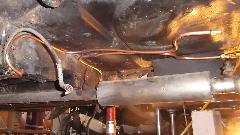
Pretty good day. Look ma, all back together and no left over parts. There's the new brake pipe. Subframe installed with everything connected, fluid pipes, fuel pump and hoses, hand brake cables, all the suspension parts and tension springs, and the fuel tank is in.

One trip to the parts store for the brake pipe and a bender tool and connectors. Another trip to the store for a fist full of new bolts. Too bad the HVAC guy didn't show up. Still need to evacuate the suspension lines, install the fluid, pressurize it, and be sure it doesn't leak before putting the wheels on it. Good night ladies.
Thursday November 12, 2015
This was supposed to be an easy-peasy kind of job, by the book, just evacuate the fluid suspension, fill it with antifreeze mix, and set the pressure right. The HVAC guy was concerned about running E-G antifreeze through his air conditioning service equipment, So I was going to build a simple isolation reservoir to catch the evac fluid, so his vacuum equipment would only see air. And I have been asking him a couple times daily for three days what kind of connector is needed to connect to his vacuum equipment. If you can't get people to do things that need to be done "now", then do it yourself? So I made a sketch and a shopping list and set out to see what I could find in Bolivar, MO.

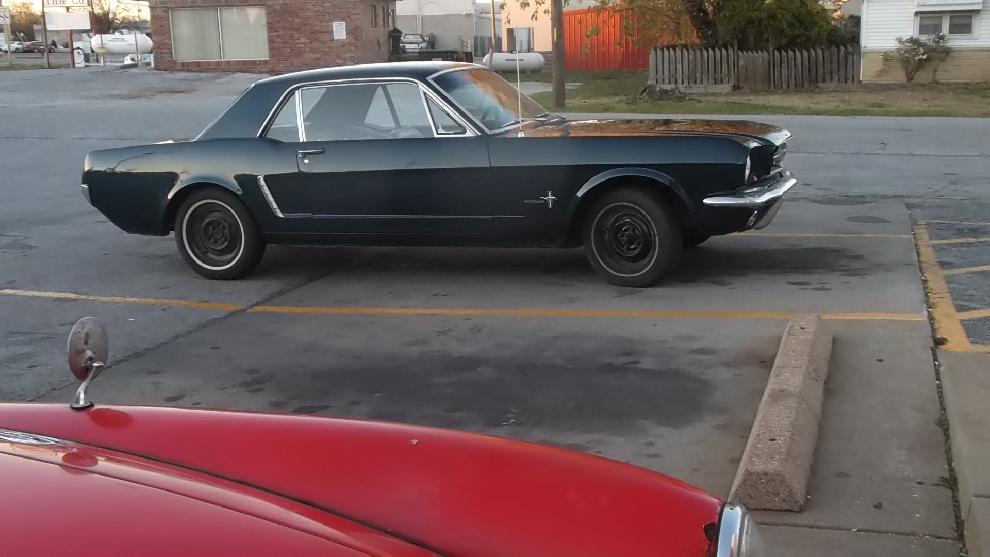
Customer car found in O'Reilly parking lot
|
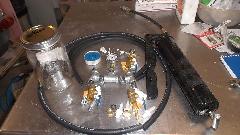
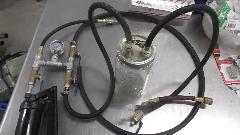
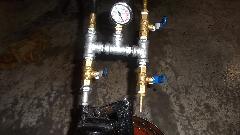
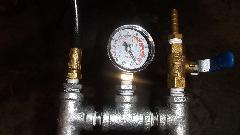
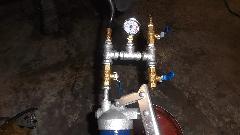
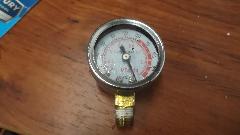
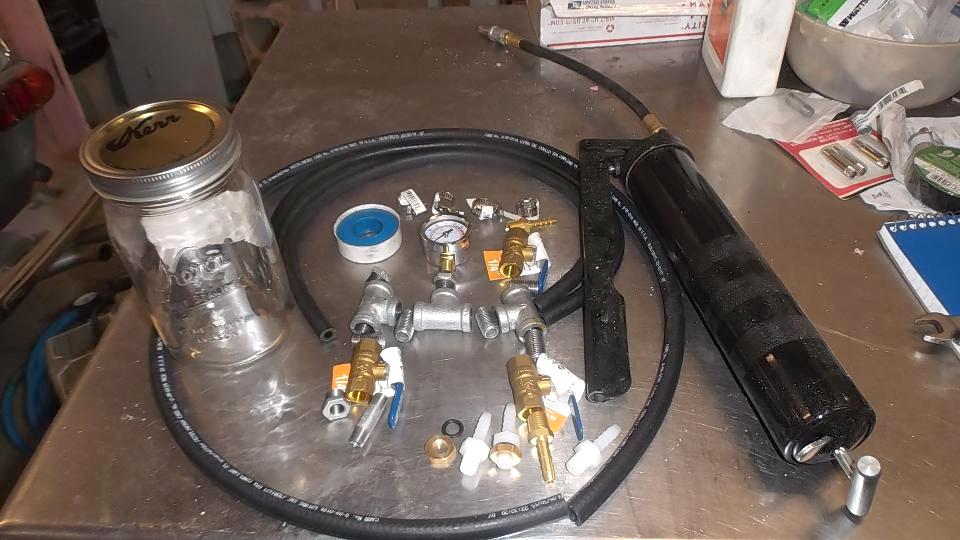
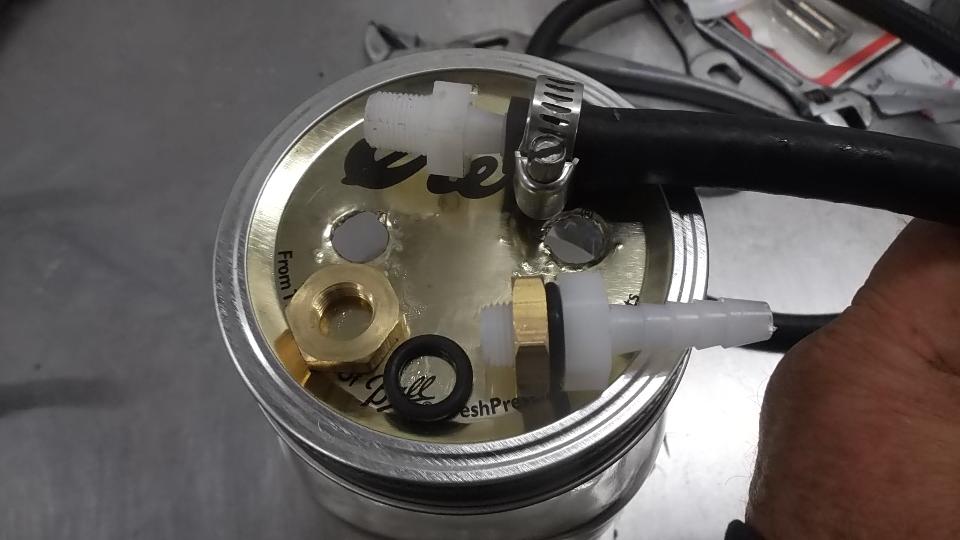
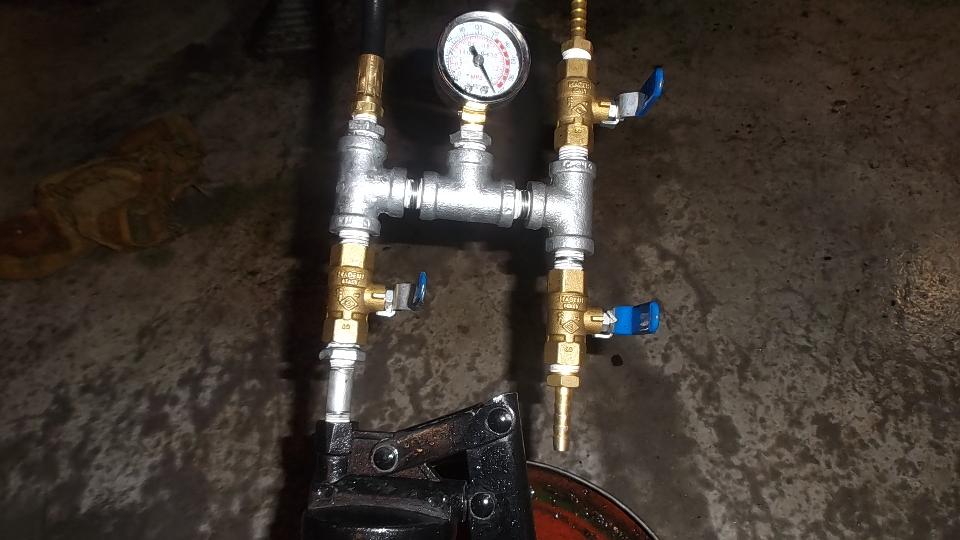
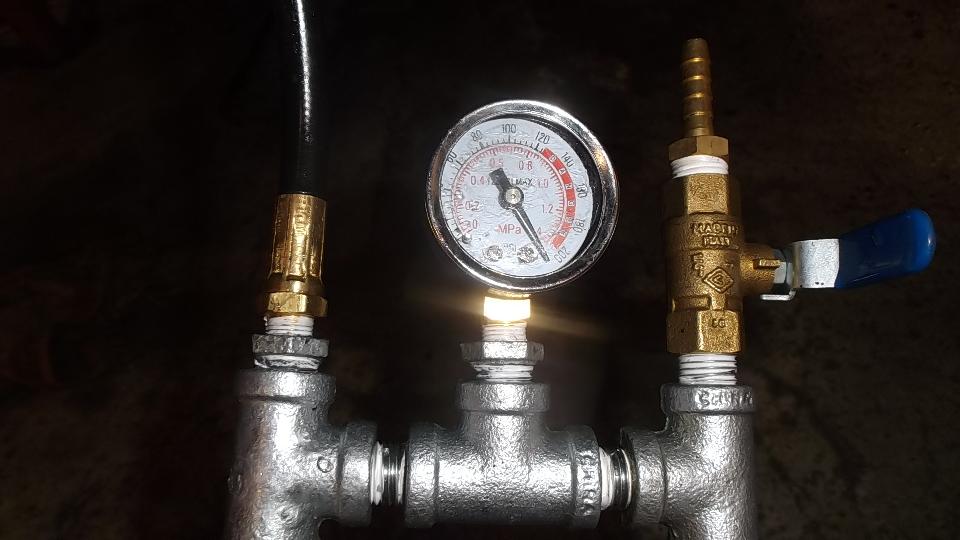
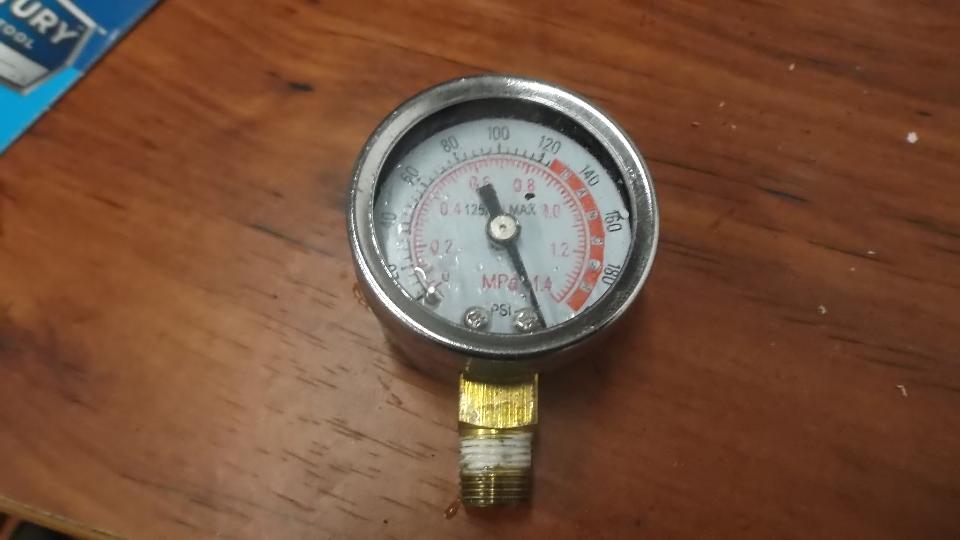
 Thane's wife Ann came up with a 1-quart Mason jar with sealing lid. The tractor supply shop struck out on all fronts. The farm store had 1/4-inch ball valves and lots of pipe fittings. Ace Hardware had O-rings and the magic "pipe-lock" nuts to make small bulkhead fittings. O'Reilly had a 200-psi pressure gauge cheap. Nobody has 300-psi pressure gauge so I will have to estimate 220-psi. Thane's wife Ann came up with a 1-quart Mason jar with sealing lid. The tractor supply shop struck out on all fronts. The farm store had 1/4-inch ball valves and lots of pipe fittings. Ace Hardware had O-rings and the magic "pipe-lock" nuts to make small bulkhead fittings. O'Reilly had a 200-psi pressure gauge cheap. Nobody has 300-psi pressure gauge so I will have to estimate 220-psi.
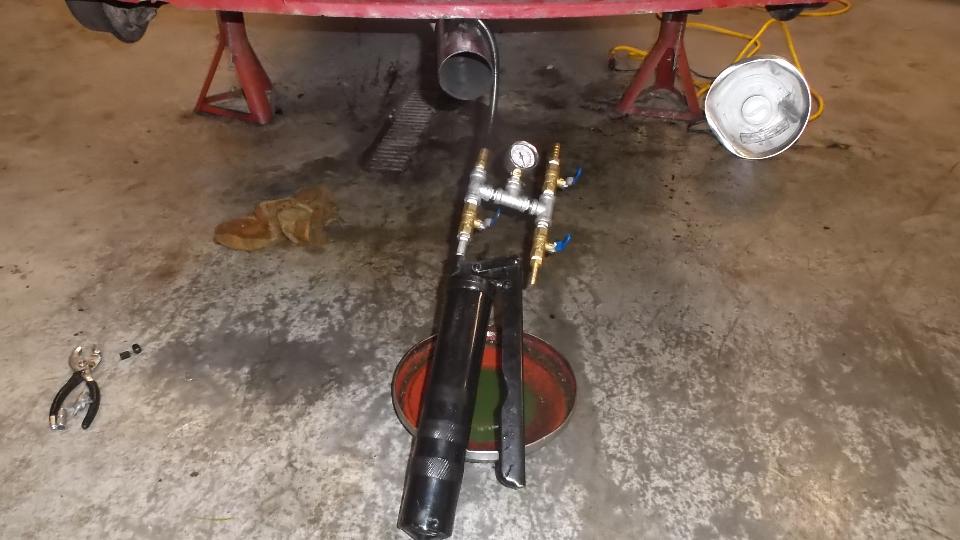
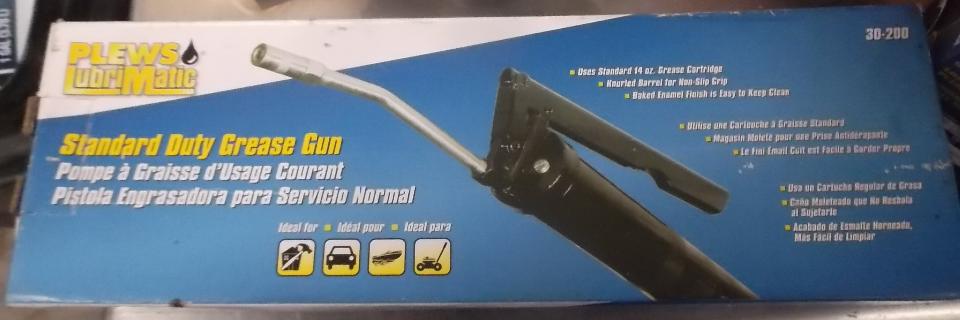
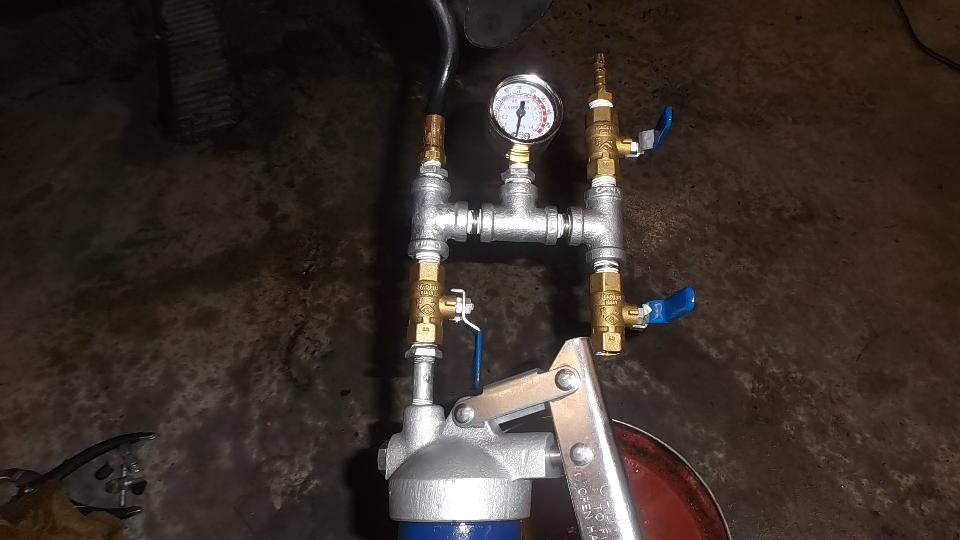
Stating with the prior grease gun, flex hose, pipe coupling, tire valve extension (about $30), throw in another $83 worth of miscellaneous fittings. Every good country boy knows what a Mason jar is good for, it's a reservoir, what would you like to put in it. This odd collection of bits and bobs would assemble to serve as a Pressure/Vacuum Manifold capable of pulling vacuum to evacuate the suspension system (while collecting expelled fluid in the jar), filling the system with fresh fluid, and raising the pressure to 220 psi standard specification. Except for that one hose with a plastic hose barb stuck in it.
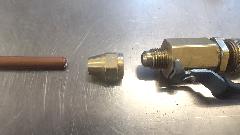
The HVAC guy showed up again (for another 15 minutes), so we now have a vacuum pump with vacuum gauge. What is still missing (and stopping the day's work again) is an adapter to attach my vacuum hose to his threaded and O-ring sealed fittings. It looks to me like a standard female threaded flare nut should work, but O'Reilly says it is coarse thread where automotive flare nuts are fine thread. Back to the tractor shop in the morning.
Friday November 13, 2015
Considering I began disassembly of the Mini on November 5th just to change the suspension fluid pipes, this thing is beginning to get on my nerves. I've been driving my (restored) MGA for decades, so I occasionally need a reminder about what it's like to work on an old car. This one is certainly dropping lots of hints.
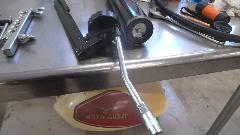
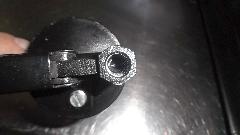
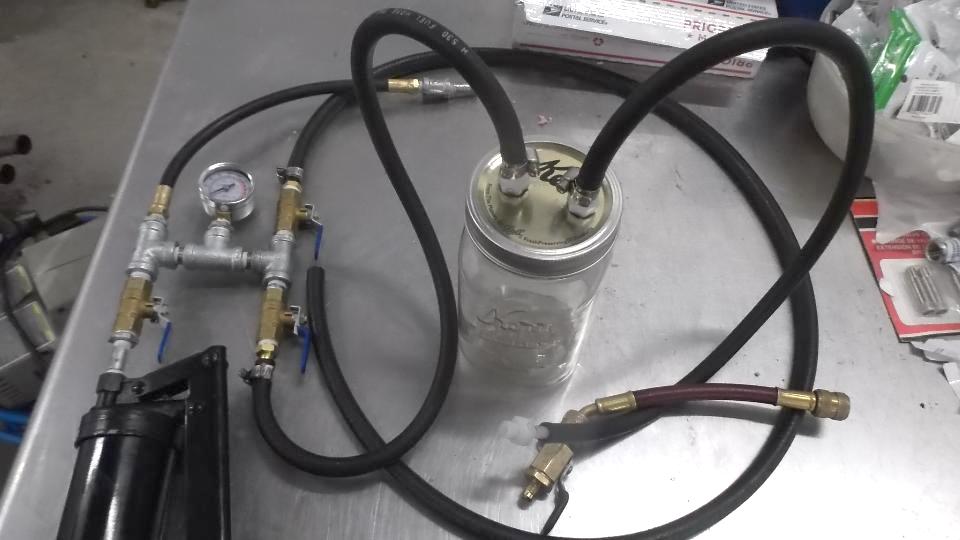
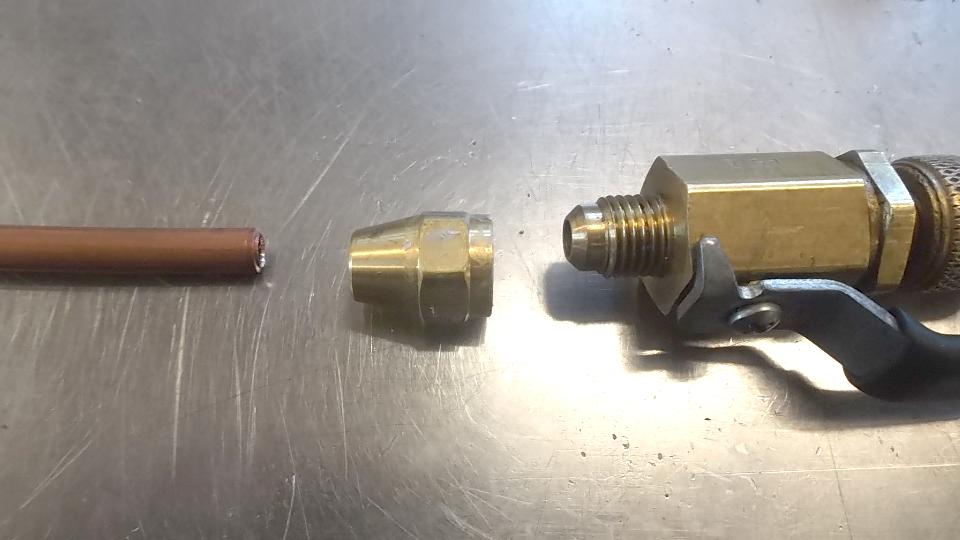
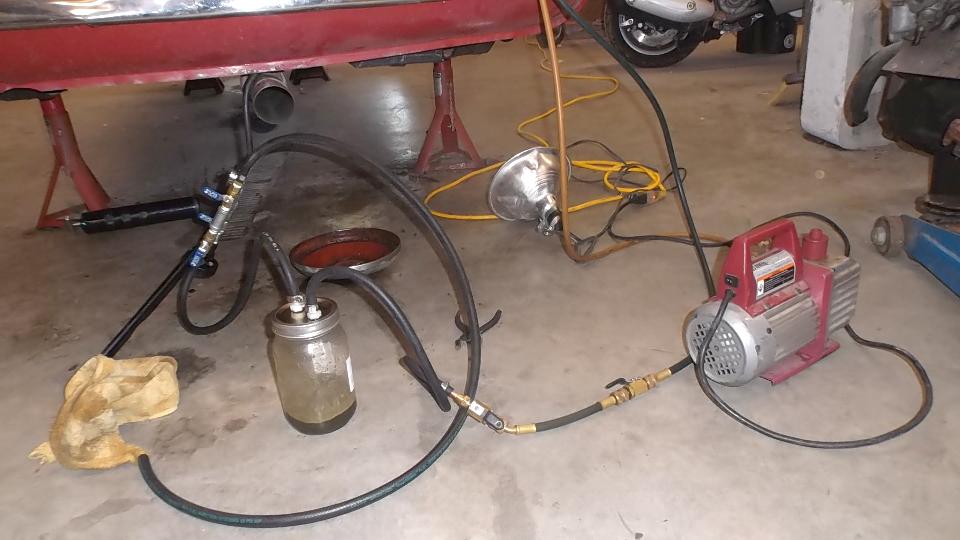
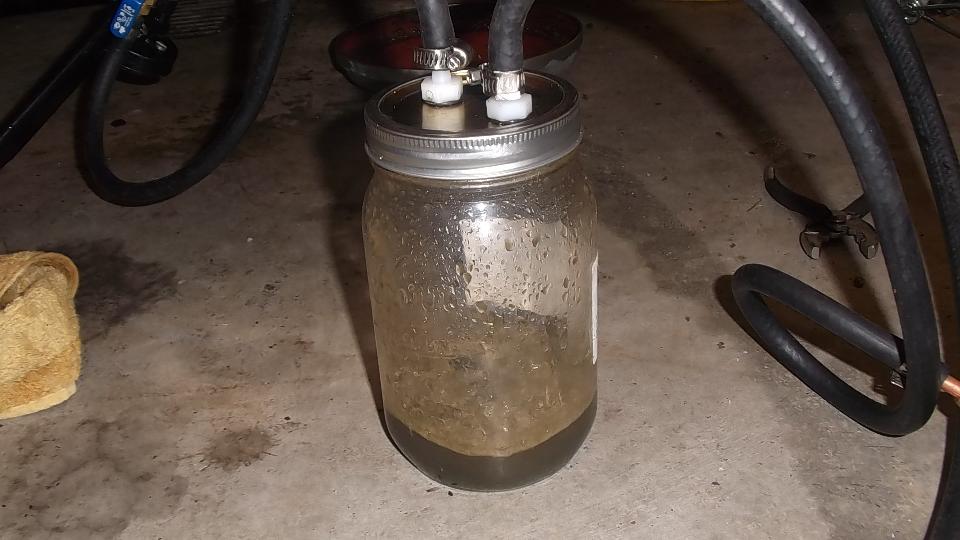
Ah, now there's the fitting required to connect my new vacuum/pressure manifold to the vacuum pump connector. It is a simple 1/4-inch flare nut fitting (if you get the right thread). Local tractor supply shop came through on this one. Flaring a short piece of tubing gives a suitable hose connection. Since I don't have a connector that will release the Schrader valve on the car when connected, I remove the valve core before attempting to evacuate the system. With the complete vacuum circuit working, the pump pulls vacuum on the jar, and the jar is pulling everything out of the suspension fluid circuit (save empty space we hope). Don't ask what the 55 year old stuff in the jar smells like, but trust me you wouldn't like it (and I suspect it will kill anything that walks, flies, crawls, swims or grows roots).
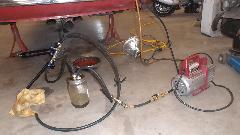

Suspension is then full up, like the turtle pulled in his feet. The longer hose with free end goes into a jug of fresh 50/50 antifreeze mix. A short blip on the supply valve pulls a bit of the fresh fluid into the jar, showing there is no air left in the supply line. Then close the vacuum valve (keeping the car circuit vacuum sealed), and open the supply valve again to let fresh fluid into the car circuit (big slurp), which will then contain fluid but no air. After suspension relaxes to position of neutral atmospheric air pressure, close the supply valve. Then I get to disconnect this contraption from the car long enough to install a new valve core, and reconnect again.
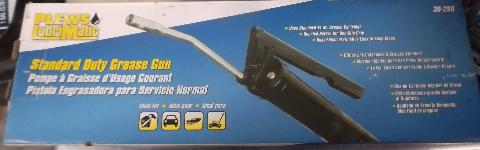
Then the grunt work starts. Fill grease gun with antifreeze and get it assembled and connected (pressure source). Open pressure and supply valves and pump the pump until it spits fluid through the supply line, showing no air left in the manifold. Close supply valve, and pump the gun until your arms may come loose. Gun is forcing fluid into the car circuit with higher pressure, so now watch the pressure gauge. Well, you might be watching for a long time. It takes a few hundred strokes of this pump to move 20 ounces of fluid. It could work better if the pump actually worked well, but this grease gun is not so good at pumping water solution. It leaks a little around the pump plunger (not serious), and it leaks backward on the back stroke. Higher the pressure goes the more it leaks back, until it is not moving much fluid forward. It needs new seals (but it is new). Curse the cheap Chinese made tools. This one is killing lots of time. I try a technique of opening the pressure valve for the pumping stroke and then closing it quickly so it won't leak back. It seems to help, so kill another hour touring around the town suppliers looking for a check valve (to supplement the faulty grease gun). When all of them strike out I'm back to the two-handed valve and pumping technique to see if I can make some progress.
I eventually got 140 PSI in the right side, front suspension full down and rear suspension started down. This seemed like a good time to switch to the left side and repeat everything, so at least I could finish with the vacuum pump so it could be returned. It then dawned on me that the pumping was working, just very slow going, so I persisted for a while longer, stopping a couple of times to refill the gun. All somewhat a pain, I knocked the supply bottle over a couple of times wasting a pint or two down the drain, the gun was leaking some, and I was getting wet from the knees down. Eventually I managed to conjure up 210 psi in the left side.
Really? Well, maybe not. I think the gauge is sprung and sits at 80 with no pressure. Front suspension full down, and rear suspension at least half down, and with no load on the suspension. I'm guessing this is about full up, and can certainly be adjusted later with wheels and load on the suspension. I was somewhat chuffed, but just ran out of antifreeze, so I think this can resume tomorrow, back to the right side. The best news is, no leaks in the fittings on the new fluid pipes.
Saturday November 14, 2015
For all of the enthusiasm and optimism, this day did not start well. I bought another jug of antifreeze mix, and had at it for a while trying to pump more juice into the RH side. After a few loads in the gun and sore arms there was no measurable progress, not even approaching where the LH side went before, and nearly all of the juice ended up in the drip pans from the leaking. If I put my thumb over the outlet an pumped it slowly, there was very little pressure as fluid was leaking back internally.
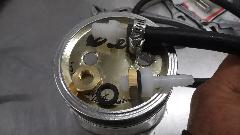
So doing what an engineer does I took the grease gun apart to see what was wrong with it. What a piece of Chinese CRAP! There is supposed to be one check valve in there, but it leaks back badly. The plunger is a single rod as small as a pencil with about 1/2-inch stroke, fit into a sloppy bore with no seal. This is where most of the leaking and dripping goes, out past the plunger. And with the sloppy fit of the plunger in the bore, it won't develop much pressure except for maybe a tenth of a second during a very quick forward stroke. Even if I did get half the fluid into the system, there was no way to finish with high pressure using this pump. Find the nearest trash can, and go shopping again.
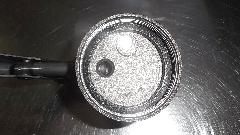
 Typical Chinese junk.

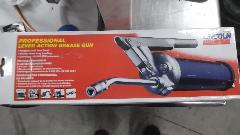
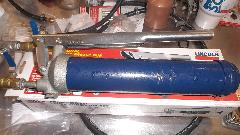
Saturday afternoon the tractor shop was closed. The home center where we ought the junk grease gun was open. They had three more models of grease gun, all using the same junk Chinese pump head, one of them air powered for big bucks, and another one battery powered for over $100. Go sing. Ace hardware was next up, similar story, a few different models of grease gun, all Chinese made, and I swear all had to come from the same factory. Thought I'd try AutoZone on a lark, haven't been in there in three weeks. No joy, same story, lots of junk Chinese made grease guns, some for under $10. Last chance was O'Reilly Auto Parts, which I am beginning to be rather fond of. After finding a couple of the cheap Chinese copies, I finally found a "Professional" model for about $35, Made in India. Now I kind of like Made in India for lots of other things Like Austin B-Series engine parts. So open the box and take the gun apart for a closer look.
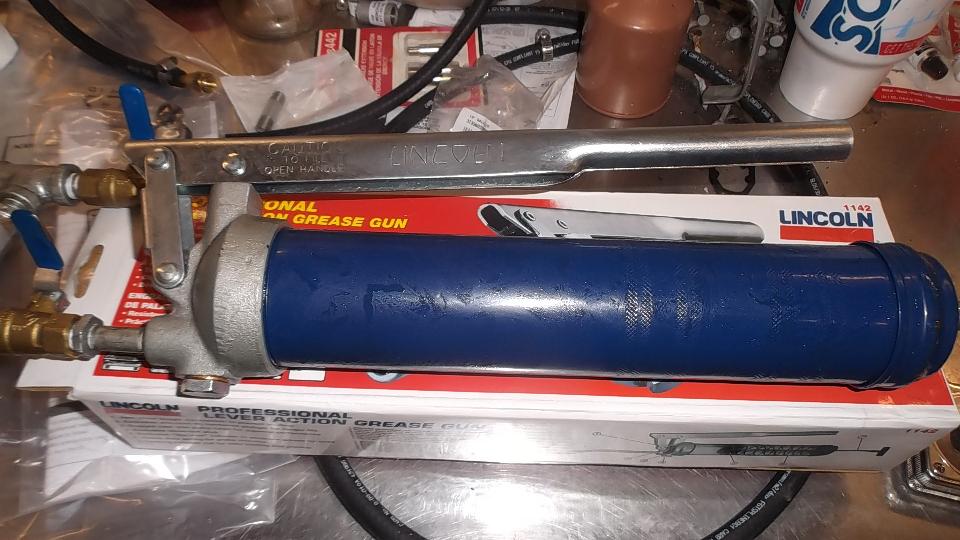
 Much better quality, cast iron head, nicely machined. The plunger fits well in the bore, and it has a seal. The check valve looks robust, and indeed it does seal. Not to worry about the price, it is the only one in town that looks like it could even work at all. So back to the shop, get it connected to the valve manifold, fill with antifreeze, and burp the air out. On the very first stroke it pegs the pressure gauge (which by now is pretty well sprung anyway). Finally I can get back to some serious work. Keep repeating to yourself, you will never regret buying good tools.
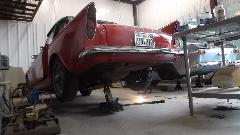
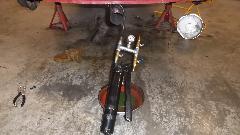
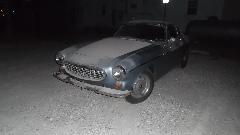
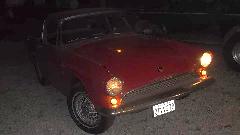
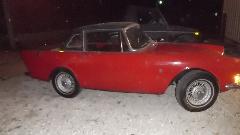
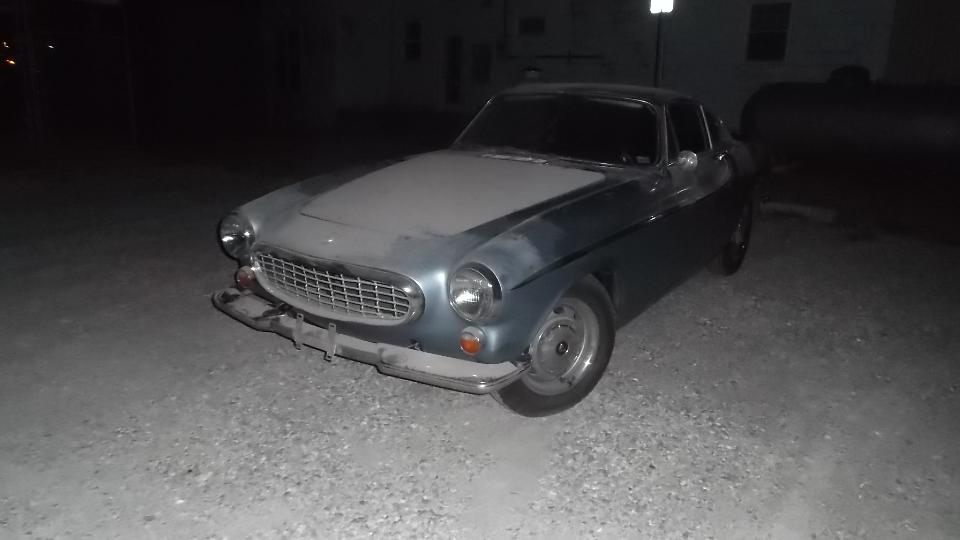
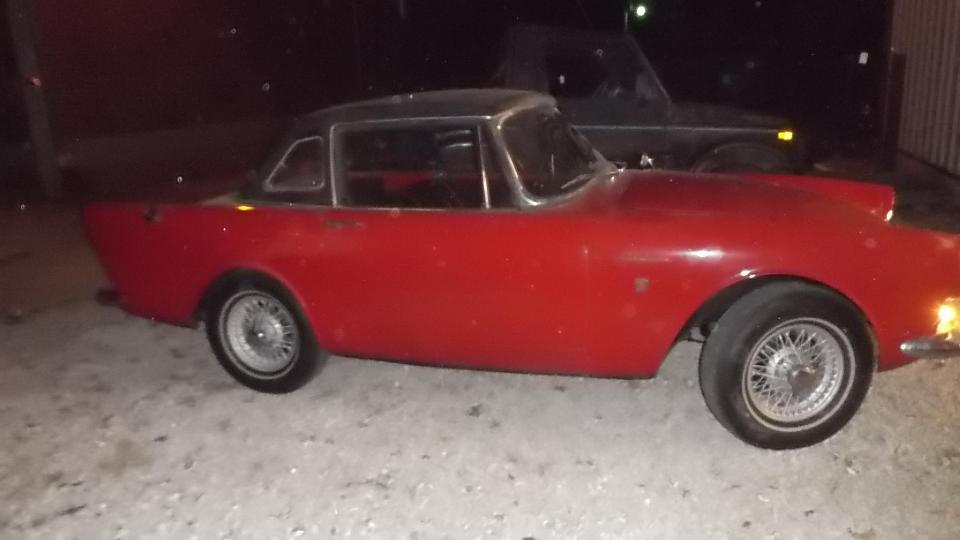
Then Thane's younger son popped in for a visit to see how the Guru works. Good thing he wasn't there an hour earlier when I was in a killing mood. Aside from a little snoop, apparently his assignment for the evening was to give the 1800S and the Alpine a test drive (since the Mini wasn't going any where). My cheap digital camera takes horrible pictures in the dark, so this is the best you get. The 1800S fired up and ran smooth with the SU carburetors. First impression is, very tall 1st gear. Slip the clutch and goose it. We had a fairly large parking lot, but took a couple tries to get up to 2nd gear, and a few more vigorous laps to get it into 3rd gear,and finally 4th for a few seconds. I think this one is going to like expressways, but maybe not so good for autocross. The Alpine started right up as well, but needed heavy choke to stay running, and then it didn't. Out of gas. Pour in the last quart from the lawnmower can and give it another try. This one responds more like a sports car, quicker off the go in 1st gear (straight cut no synchro), easily cruises the parking lot in 2nd gear, and catches 3rd and 4th gears on a short straight. I wasn't driving, but I suspect the steering is a little slow.
 Okay toys back in the barn, and the young fellow off to dinner with the folks so I can get back to the Mini. This grease gun actually works as it should so not long to pump up as much as I like.
 The badly sprung pressure gauge sprung a leak, but wasn't doing much good anyway, so off with the gauge and plug the port. Very soon "landing gear down" on both sides.
Get the wheels on (with the new tires), and get the car off the stands and onto the floor to load the suspension. Sitting much too high, so let some juice out of the left side. Press the Schrader valve to release juice, release to stop, but it doesn't stop, new valve core jammed open. Bummer.
The badly sprung pressure gauge sprung a leak, but wasn't doing much good anyway, so off with the gauge and plug the port. Very soon "landing gear down" on both sides.
Get the wheels on (with the new tires), and get the car off the stands and onto the floor to load the suspension. Sitting much too high, so let some juice out of the left side. Press the Schrader valve to release juice, release to stop, but it doesn't stop, new valve core jammed open. Bummer.

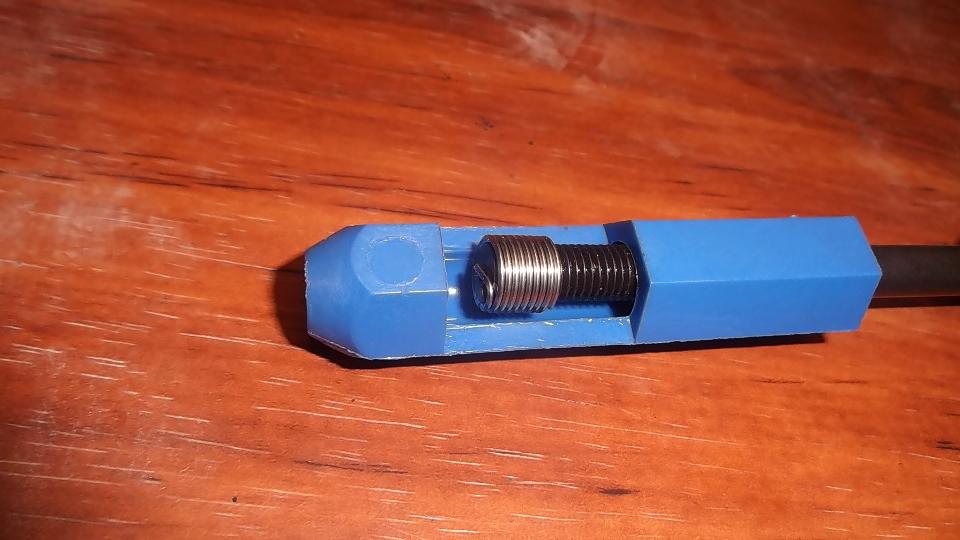
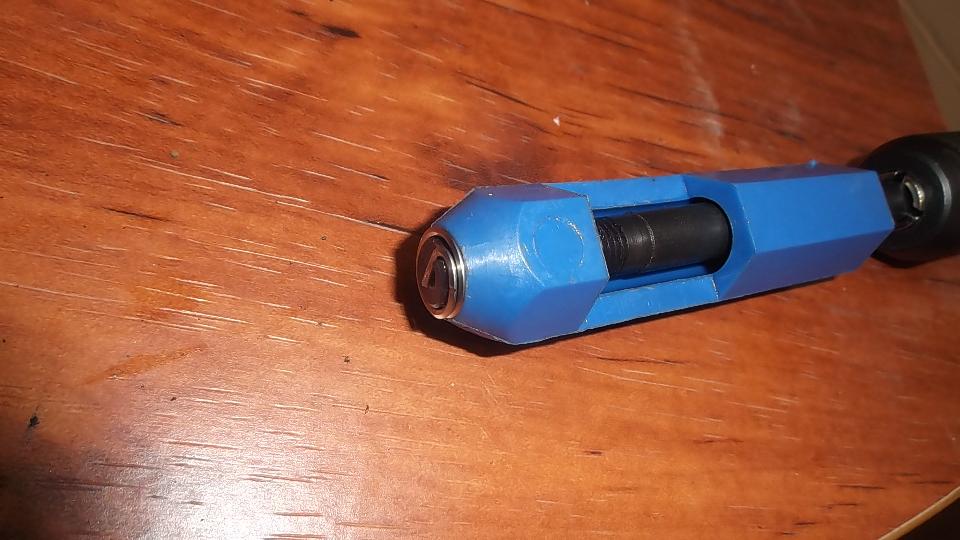
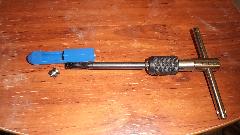
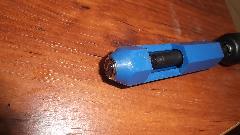
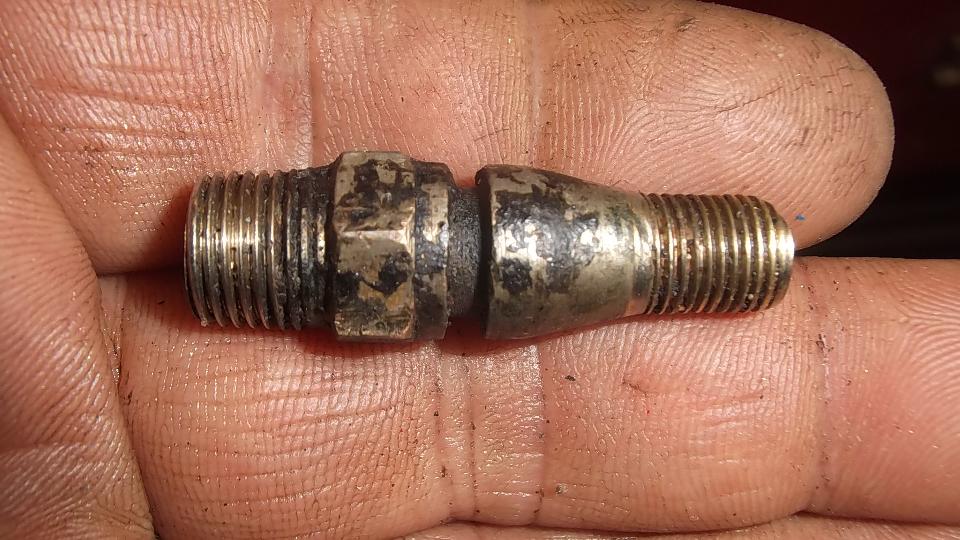
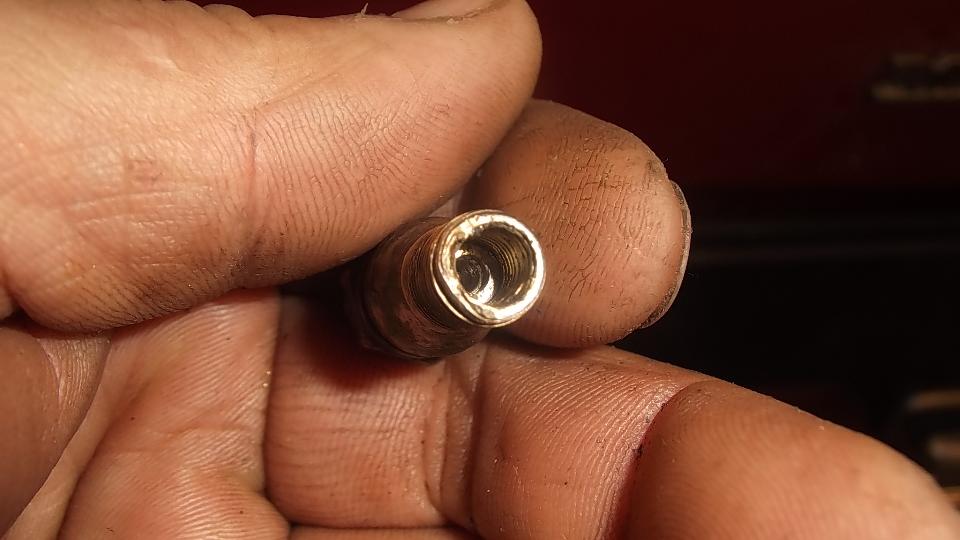
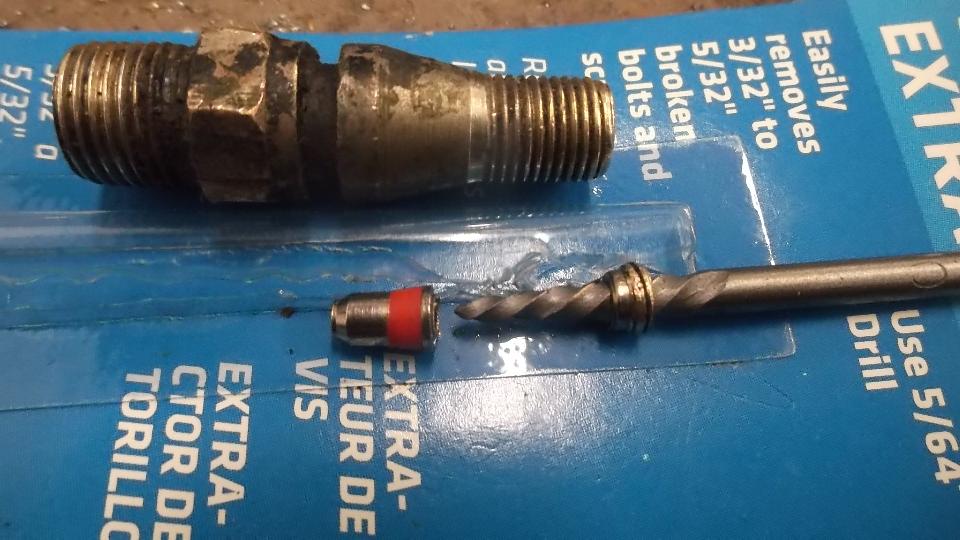
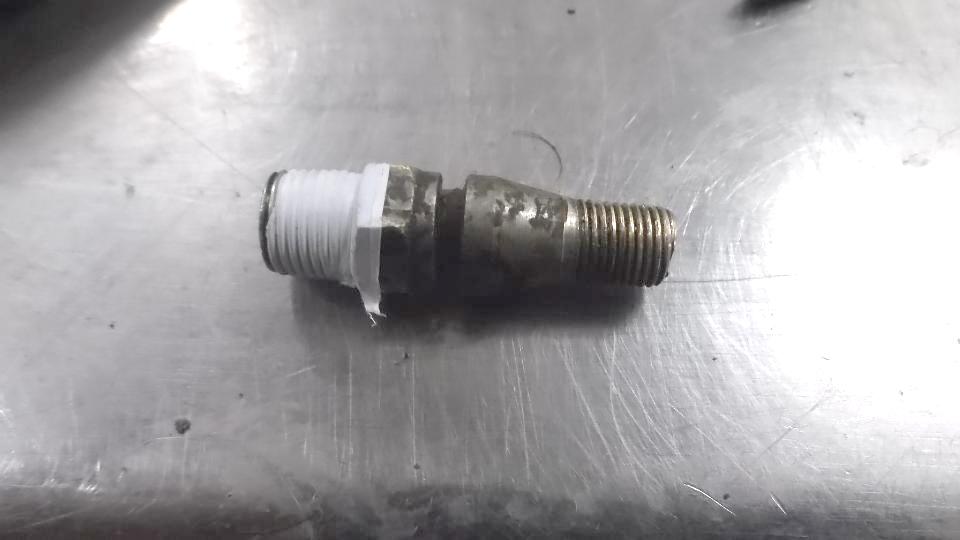
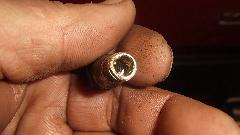 Trying to remove the core resulted in a broken core (inside the valve body of course). This Schrader valve has a pipe thread bottom end, not available from any known source. So I bought the smallest screw extractor available (easy-out style), 5/64-inch drill size size I think, and took a shot at it. This may be the first time in my life that an easy-out has actually worked. I also have a valve core tool with both male and female thread cleaners, so I had the part repaired with a new valve core and reinstalled in a few minutes. Whew, just dodged another bullet.

 Schrader valve back in place, and pressure pumped up again. When these things are first raised after complete release of the suspension, It is apparently common for the pushrods to jam and not seat properly in the displacer units. I hear if you let some of the pressure out and then bounce and kick the car around enough it is supposed to loosen the rod end joints to seat properly. The rears dropped into place early, the fronts much more reluctant. The front of the car is still stuck up in the air, but after a series of victories today I will let it enjoy its one last problem while we sleep for the night.
Sunday November 15, 2015
Late start today as I spent a couple of hours browsing Mini forums on the internet and looking at assembly drawings of the front suspension. As evening bore down on us I felt compelled to stick my fingers in it again, as I thought I had the answers it shouldn't take long to fix. Jack up one side to let front and rear suspension drop, and remove the front wheel. Position a board above the rear wheel to prevent it from moving too high (due to the tension return spring). Relieve fluid pressure to allow front suspension to relax. Get a couple of pry bars and poke the lower suspension knuckle sleeve joint back together. Add fluid to pressurize the system again and it works. Ditto everything for the other side, and it is soon sitting on all four wheels with a normal looking stance.

 I got to walk around with a bit of a grin on my face while I was picking up tools, cleaning up the work space, and taking some pictures. Not quite finished yet, still needing to re-install the driver's seat, bleed the brakes, connect the battery, put in some gas, and see if it will do a test drive. I think the ride height is about 1/2-inch too high, but I won't tinker with it any more until it has a test drive, some real action of the suspension, and another measurement or two. Tomorrow may be fun.
Meanwhile, during the past few weeks we have been staying in Bolivar MO, gasoline price across the street from out favorite WiFi spot has dropped from $2.13.9 to $1.87.9 per gallon. Twenty-six cents in about the same number of days.
Addendum, August 10, 2016:
Having poked around another Mini yesterday, I noticed it had rubber come springs and tubular shock absorbers. This led to a bit of research revealing that the Minis only had hydrolastic suspension from 1964 to 1968 model years (when it went back to rubber cone springs as a cost reduction).
|


 Much better quality, cast iron head, nicely machined. The plunger fits well in the bore, and it has a seal. The check valve looks robust, and indeed it does seal. Not to worry about the price, it is the only one in town that looks like it could even work at all. So back to the shop, get it connected to the valve manifold, fill with antifreeze, and burp the air out. On the very first stroke it pegs the pressure gauge (which by now is pretty well sprung anyway). Finally I can get back to some serious work. Keep repeating to yourself, you will never regret buying good tools.
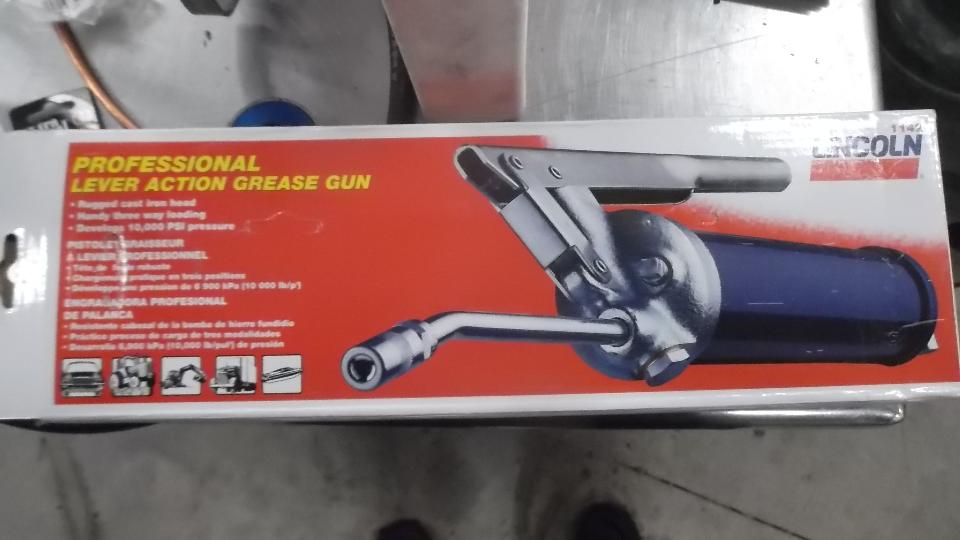


 Schrader valve back in place, and pressure pumped up again. When these things are first raised after complete release of the suspension, It is apparently common for the pushrods to jam and not seat properly in the displacer units. I hear if you let some of the pressure out and then bounce and kick the car around enough it is supposed to loosen the rod end joints to seat properly. The rears dropped into place early, the fronts much more reluctant. The front of the car is still stuck up in the air, but after a series of victories today I will let it enjoy its one last problem while we sleep for the night.
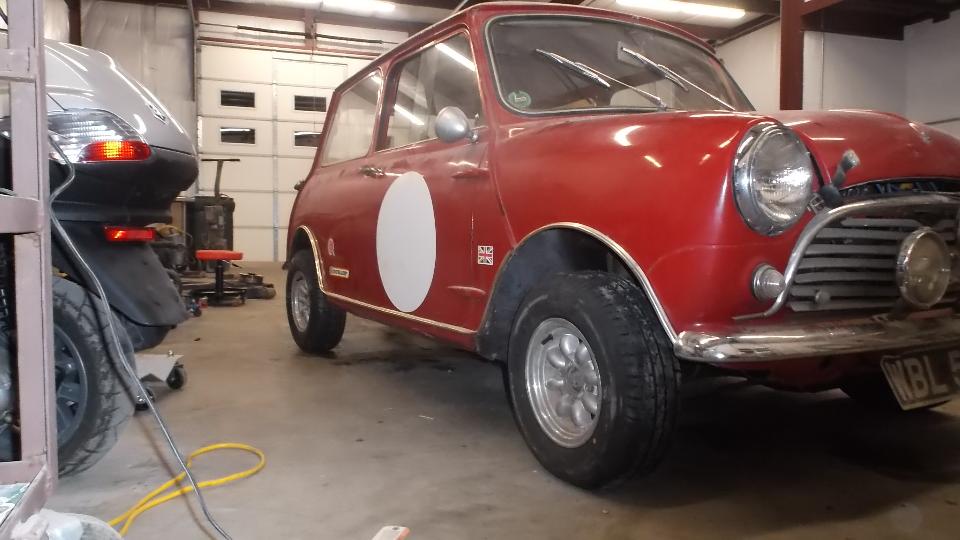

 I got to walk around with a bit of a grin on my face while I was picking up tools, cleaning up the work space, and taking some pictures. Not quite finished yet, still needing to re-install the driver's seat, bleed the brakes, connect the battery, put in some gas, and see if it will do a test drive. I think the ride height is about 1/2-inch too high, but I won't tinker with it any more until it has a test drive, some real action of the suspension, and another measurement or two. Tomorrow may be fun.