The MGA With An Attitude
MGA Guru Is GOING MOBILE - (April 16 - April 30, 2016)
Saturday, April 16, 2016
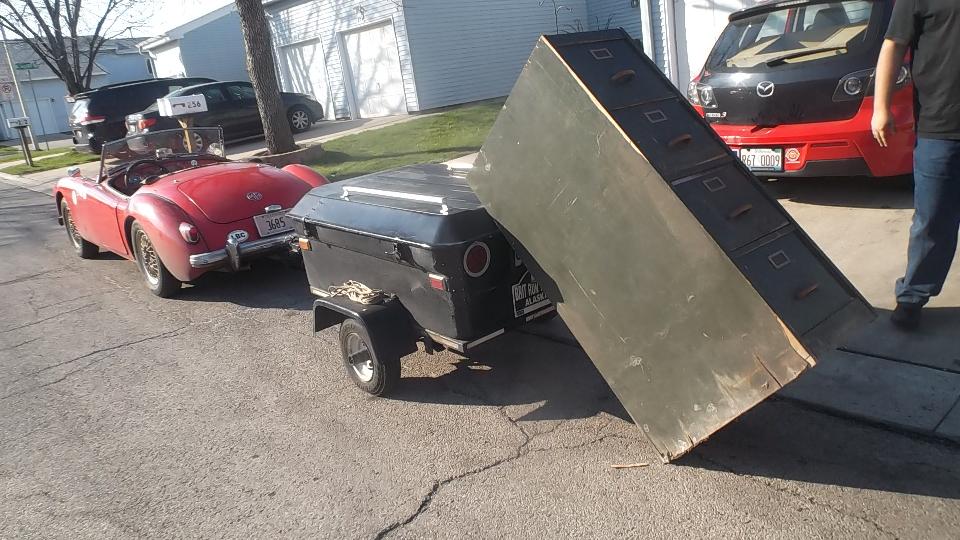
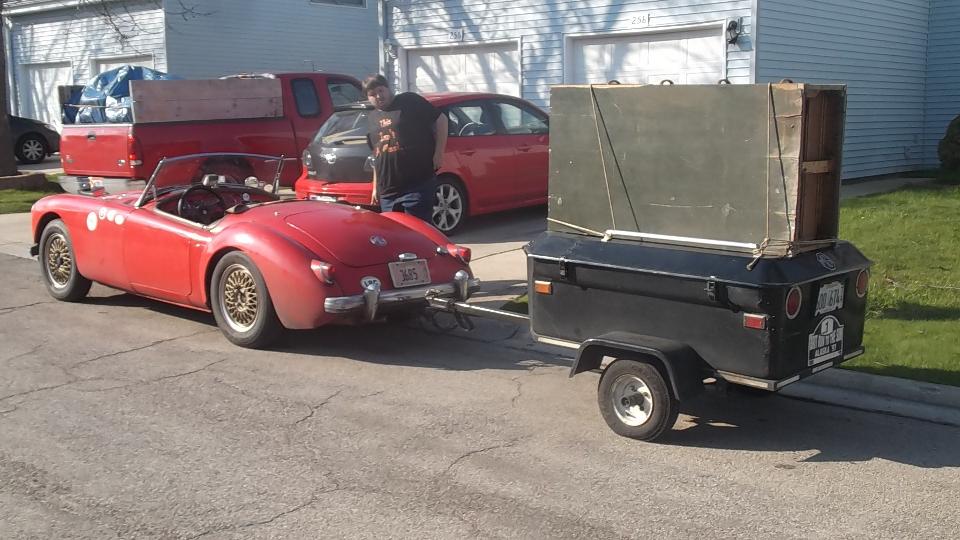
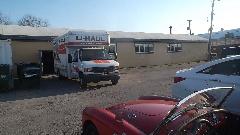
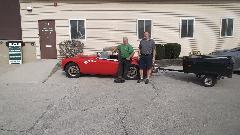
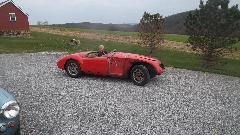
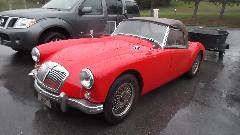
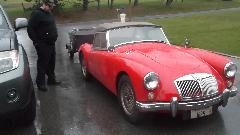
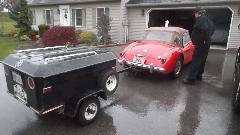
Gas up and give the new cylinder head its first work out. Mid day run 58 miles south from Crystal Lake to Romeoville, IL, to pick up a few more tools from my storage locker. We also picked up a little care package which we would deliver to Seth Jones, 22 miles back north in Glendale Heights, IL. It doesn't look like much on the outside, as it is a WW-II vintage wooden 4-drawer file cabinet that may weigh 75 pounds empty. The trick is,
 it is loaded with about 200 pounds of tools, power tools, welding tools, grinding and sanding and painting tools, and lots more. It has been sitting idle in my locker for two years, and Seth is about to embark on restoration of his Midget, so maybe these tools can find another useful life. As soon as he figures out where to put things in his limited space, there are also an electric welder, acetylene and oxygen tanks and hoses, a pedestal grinder, a 2-hp air compressor, and a few more power tools that didn't fit in the cabinet. Did I mention it was 83dF in Romeoville today? First time the rag top was down since January in Florida. Beats the snow we had last week.
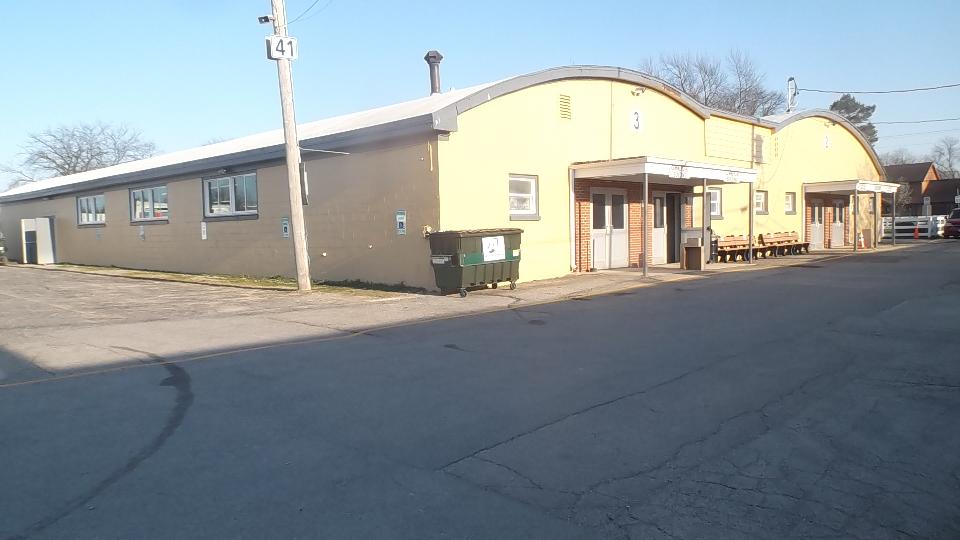
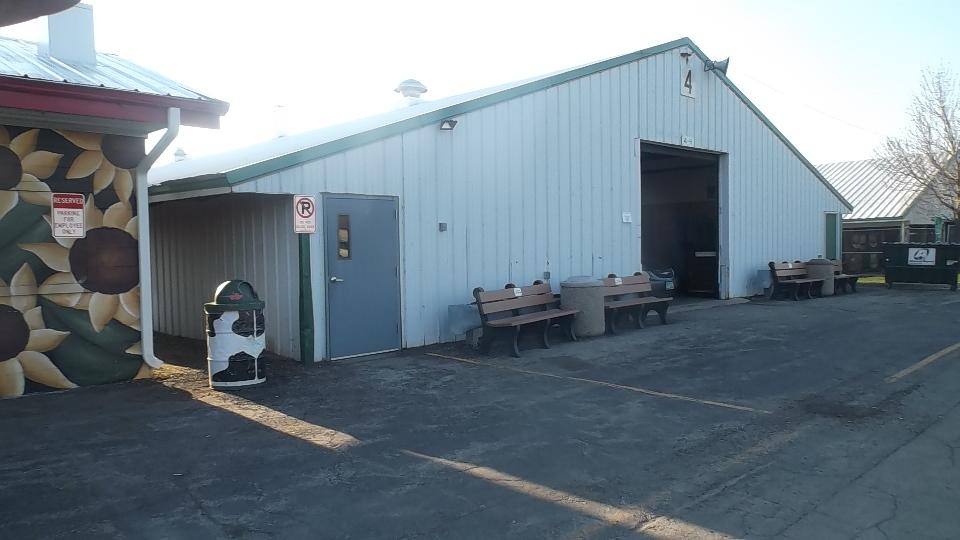
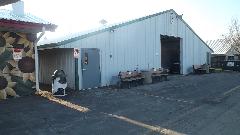
Then we were off to DuPage County Fairgrounds in Wheaton, IL, a short hop of 10 miles, to help with setup for the All-British Swap Meet And Autojumble. As usual, pretty quick operation in 90 minutes or so. Tomorrow these halls will be filled with vendors and shoppers, and the weather promisses to be absolutely devine.
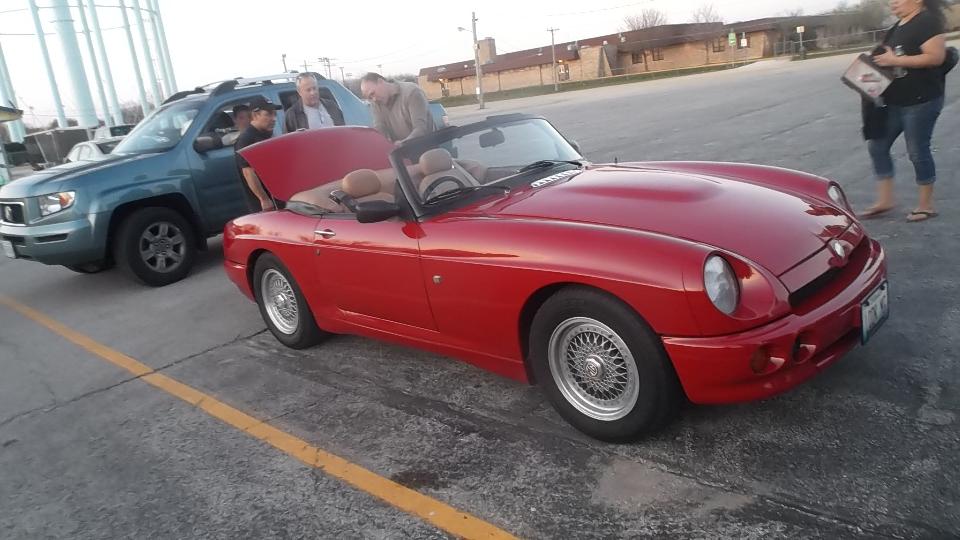
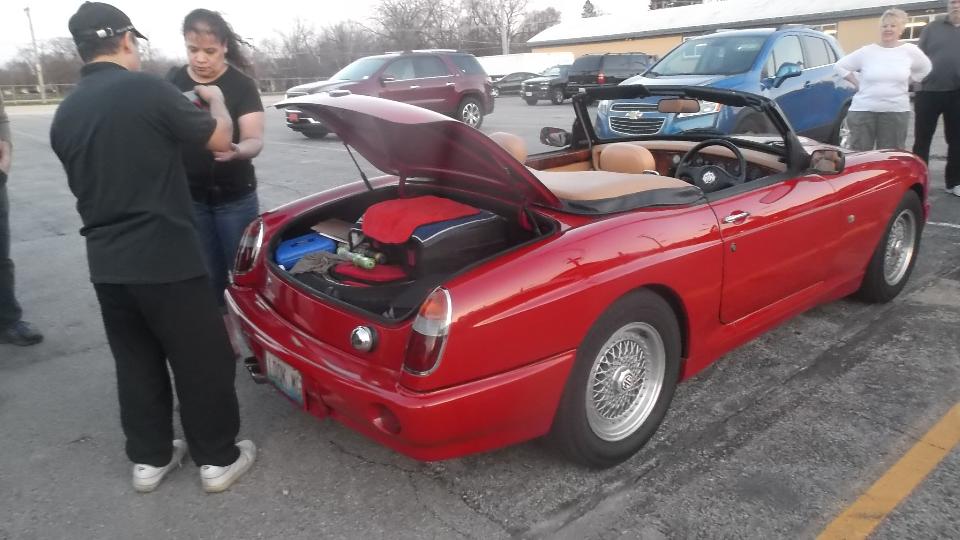
 Dino Perez was there with his MG RV8. It had a bit of a problem with a dead battery, but a jumper box got it running easily. Then off to dinner with the crew at Alfies. We figure to spend the night in Naperville.

Sunday, April 17, 2016
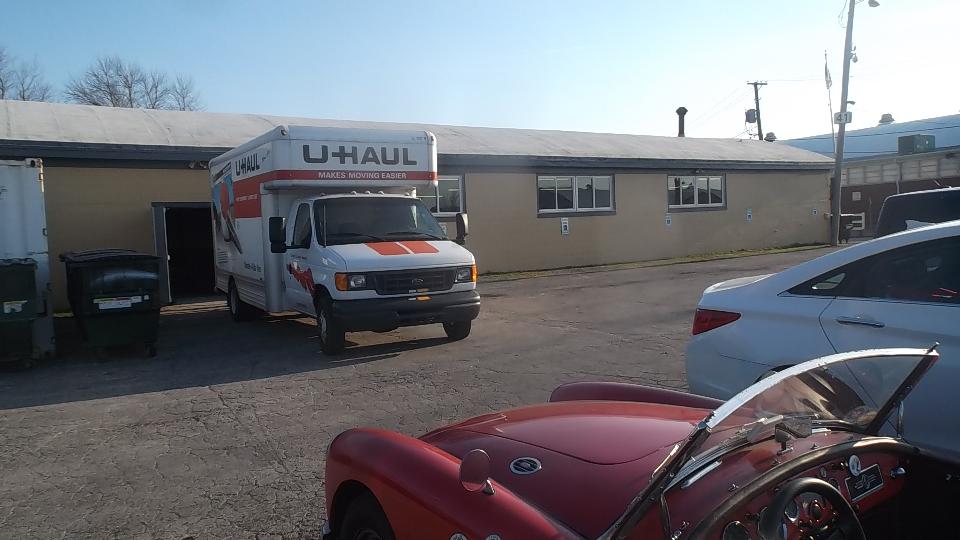
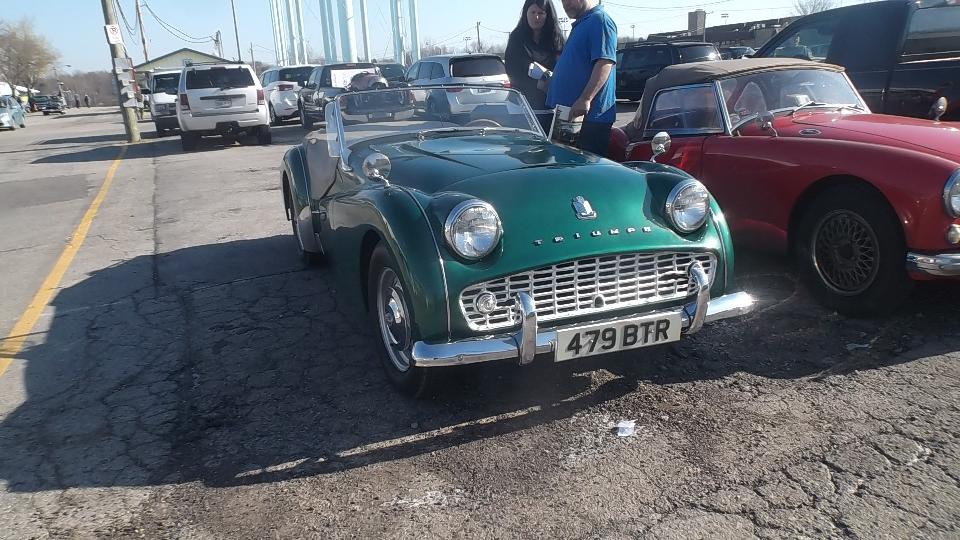
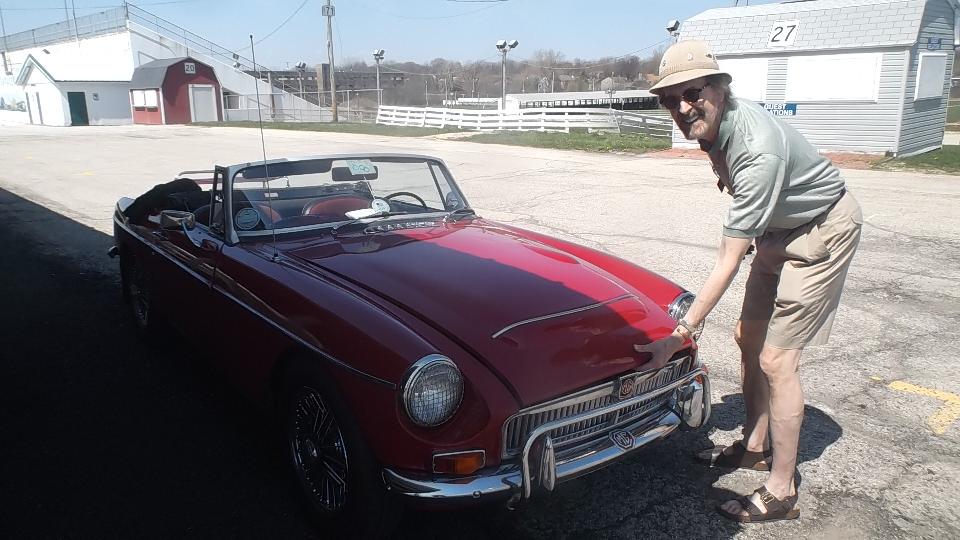
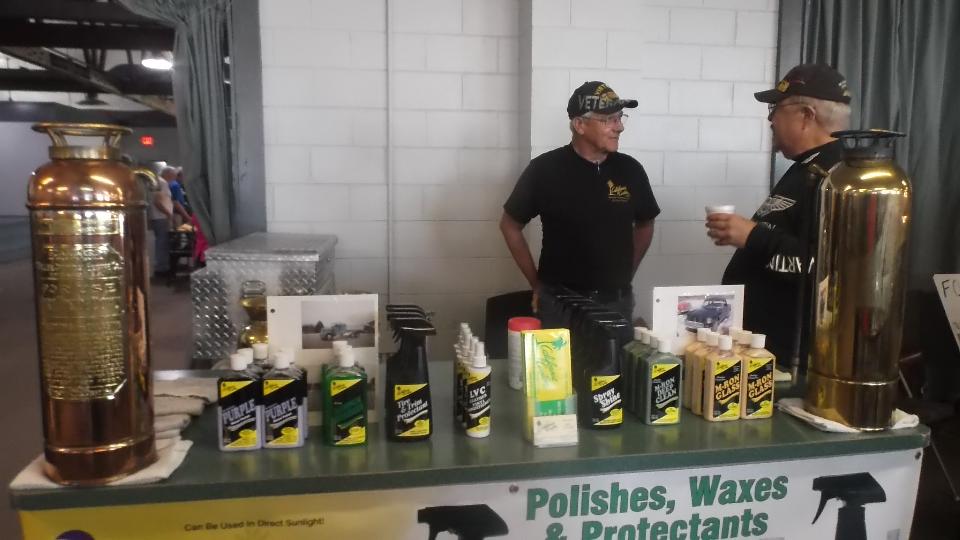
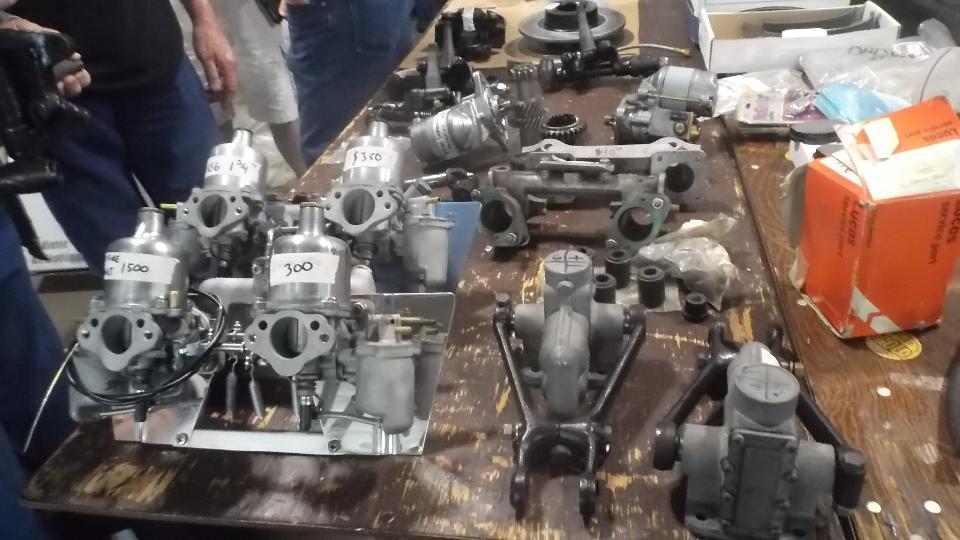
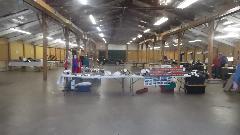
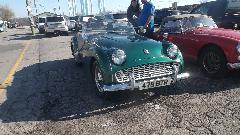
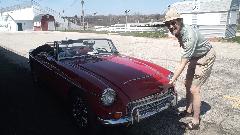
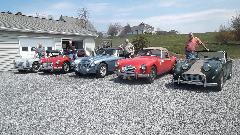
The big push today was execution of the 20th Annual All British Swap Meet And Autojumble at DuPage Conty Fairgrounds in Wheaton, Illinios. After short sleep we pop into the fairgrounds at 5:30 am to open the buildings. Vendors began moving in their goods at six, and the doors opened to the public promptly at eight. Weather was wonderful, something like 80dF by mid day. Low and behold, more than two dozen British Cars showed up in the parking lot just for the joy of it. This is a far cry from one to three on a cold and sometimes snowy day in past years.

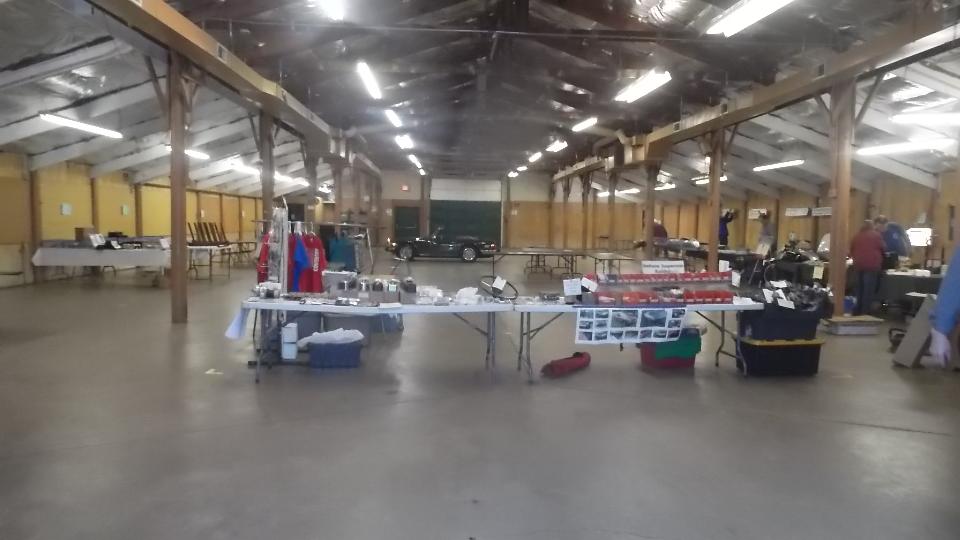
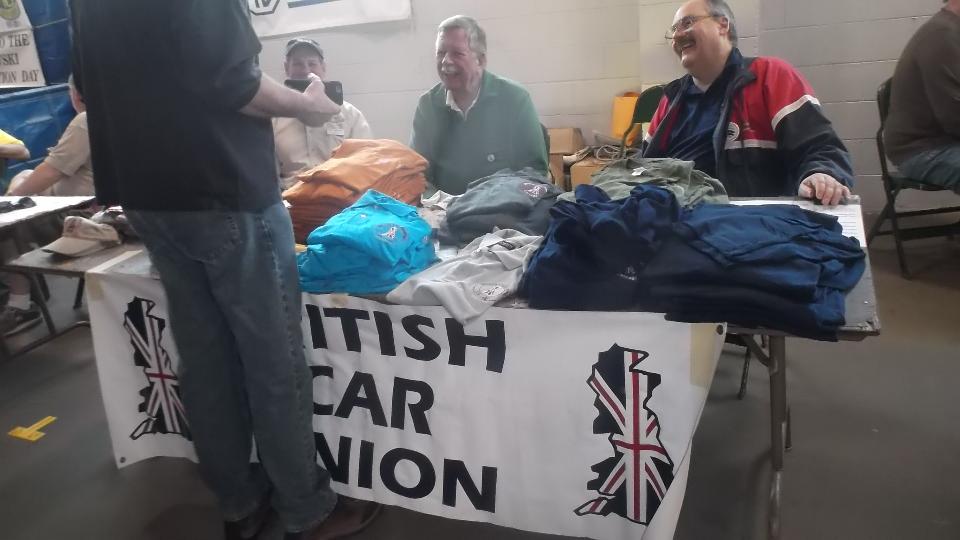
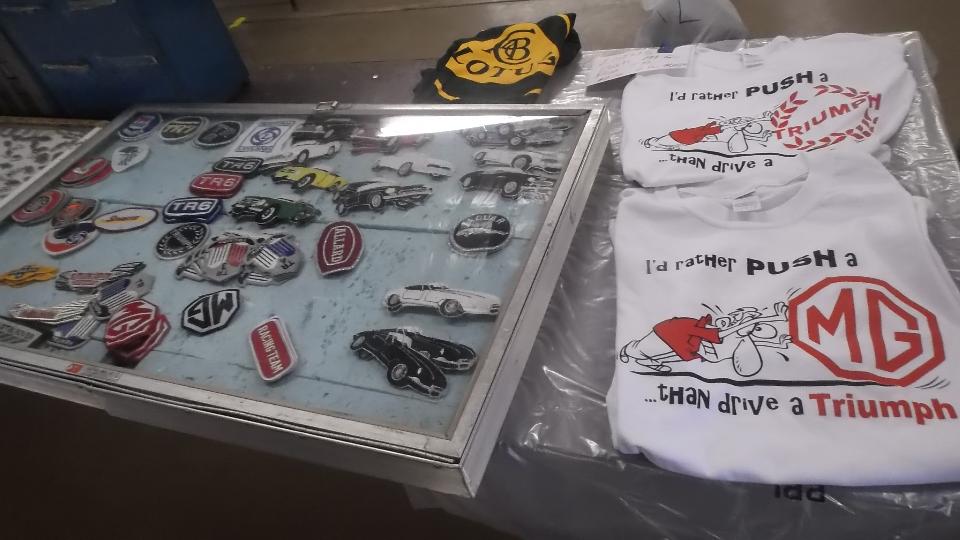
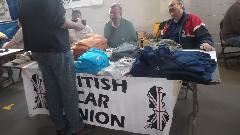
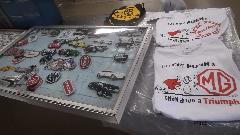
Then neat stuff started walking out the doors with people attached, so it was worth investigating where it was coming from, inside. There were at least eight car clubs present, each with a booth to serve members and friends.

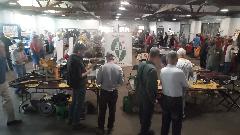
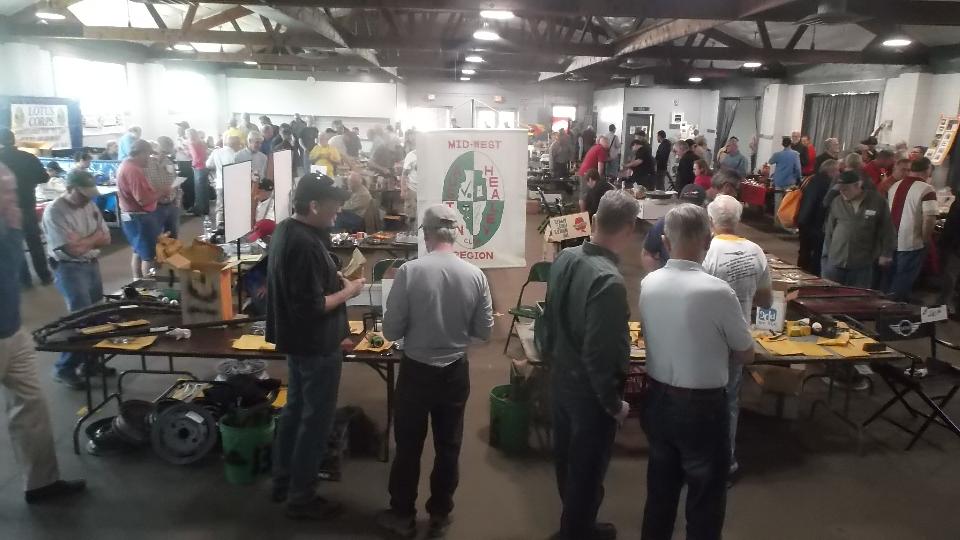
There were vendors galore offering goods and services, car prts new and used, car care products, memorbilia, books. And there were elbow to elbow shoppers. You need to come early to get the good stuff before it's gone. The party was breaking up a bit earlier this time, so we had the place pretty much clened up around 2pm. You can check out more than 100 pictures from the event at www.ChicagolandMGclub.com/photos.swap2016

Navigator spent the day with friends early morning until 7-pm. Any spare time I had was used on web site work. Late night we ran up to Vic's place in Crystal Lake to catch some Z's before an early morning rising for another appointment.
Monday, April 18, 2016
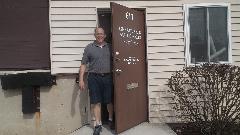
 Early morning dash (two hours) to Madison, Wisconsin today, another trip to World Wide Auto Parts to swap out one shock absorber for more road testing, and have a chat with Peter Caldwell about how to make the parts more reliable.
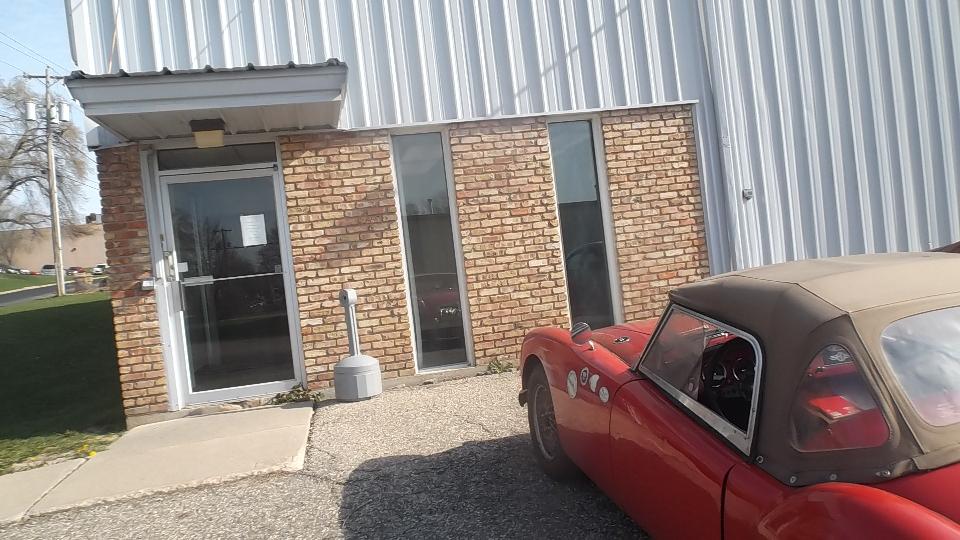
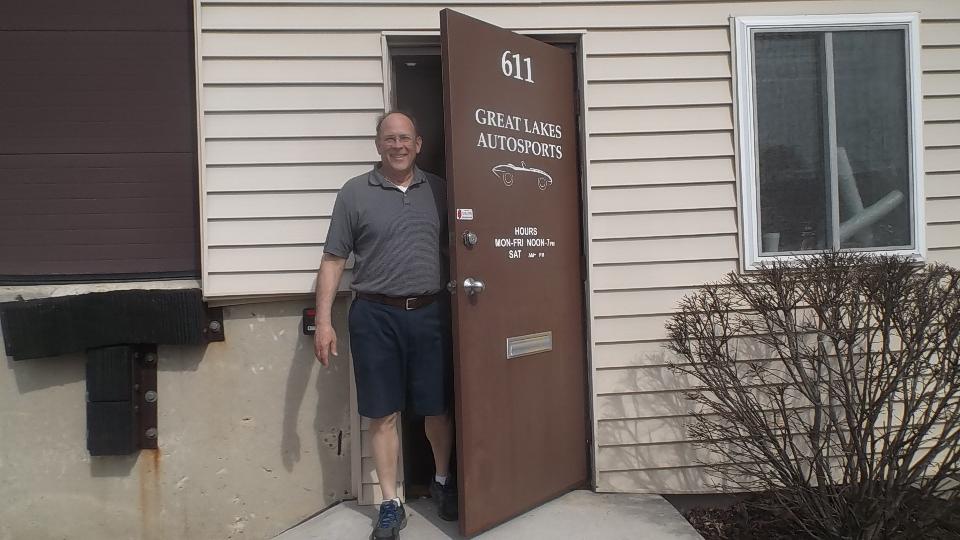
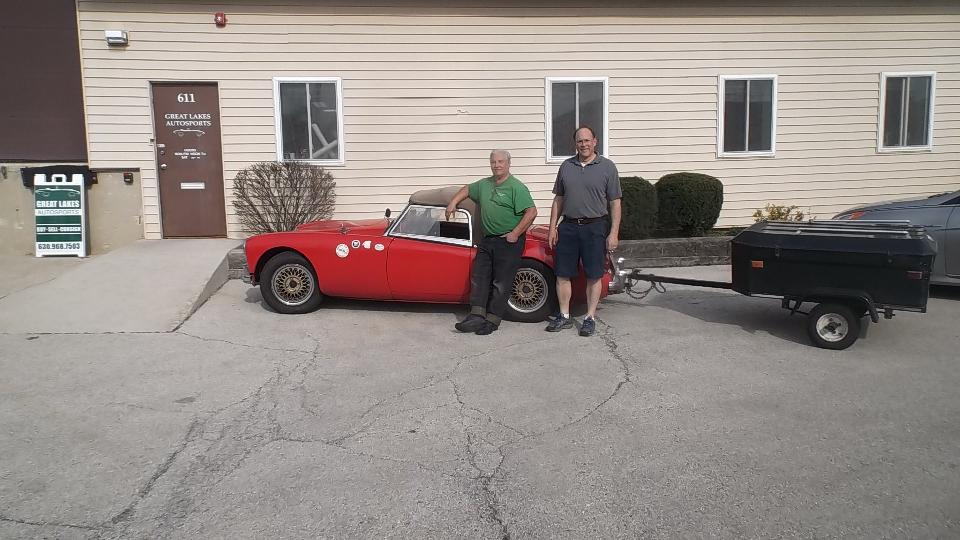
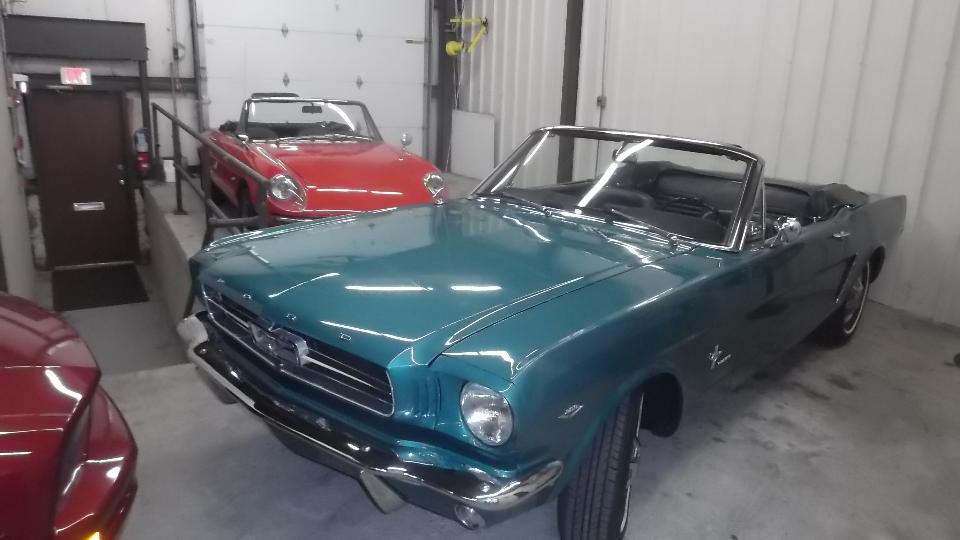
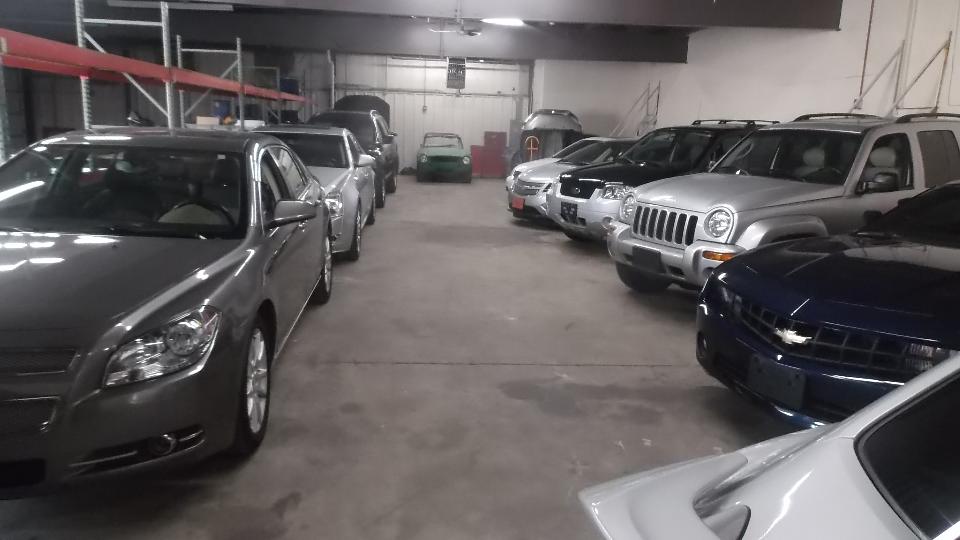
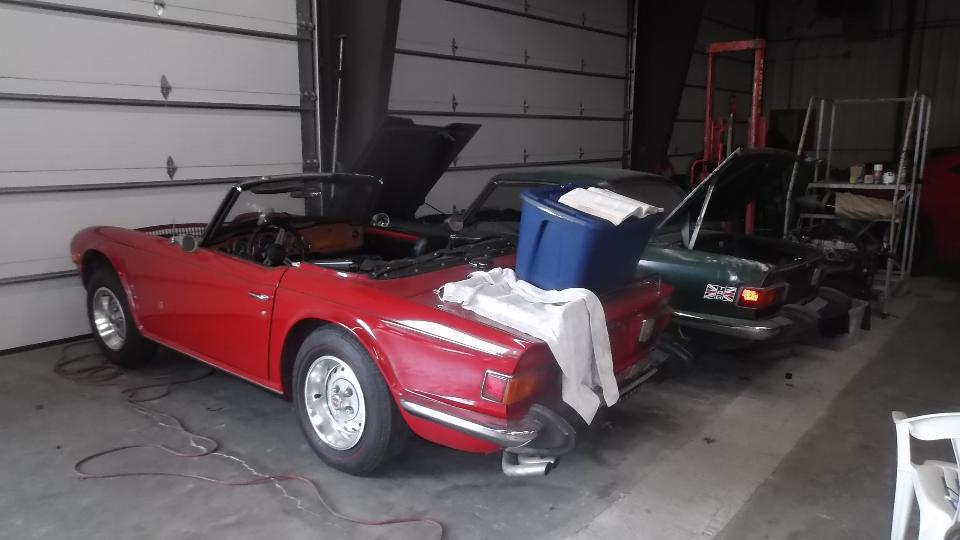
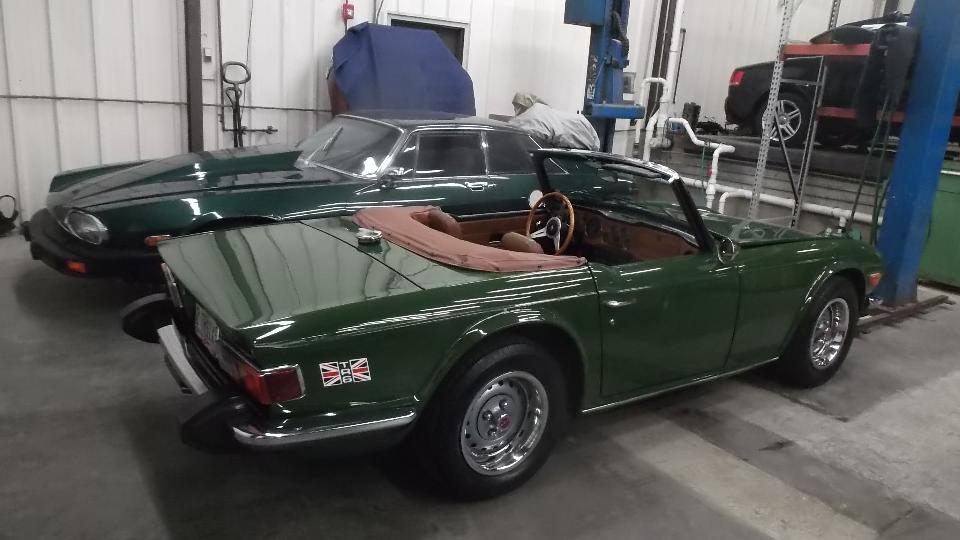
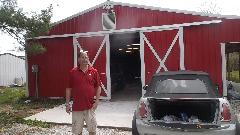
Then a dash back to visit Mike Maienza, owner of Great Lakes AutoSports in Westmont, Illinois. Mike has been restoring, modifying, racing, and selling cars for 30 years. There is a wide variety of cars in stock, including some vintage British cars, and a few more in the service shop.
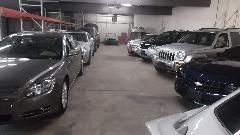
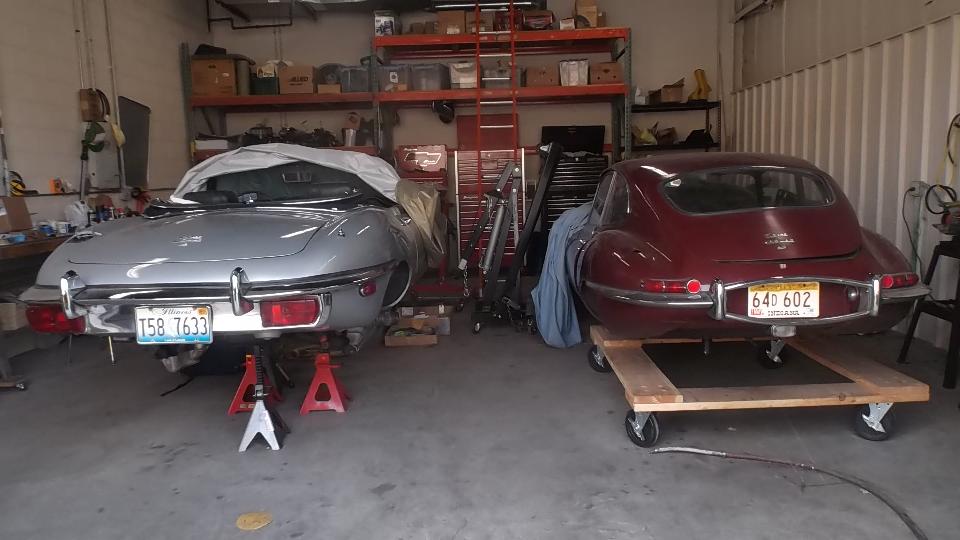
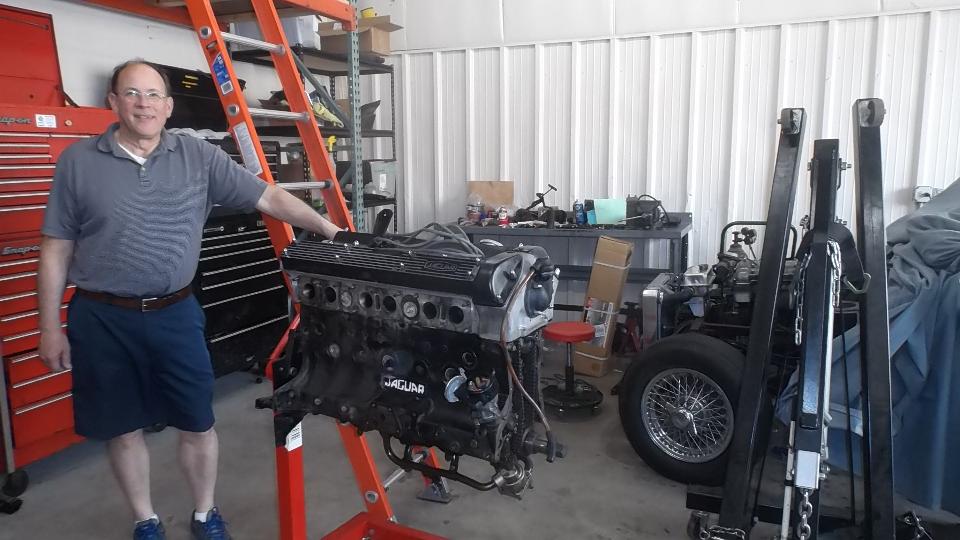
 There are a couple of Jaguars in for restoration work, one E-type and an XKE, one engine being rebuilt.

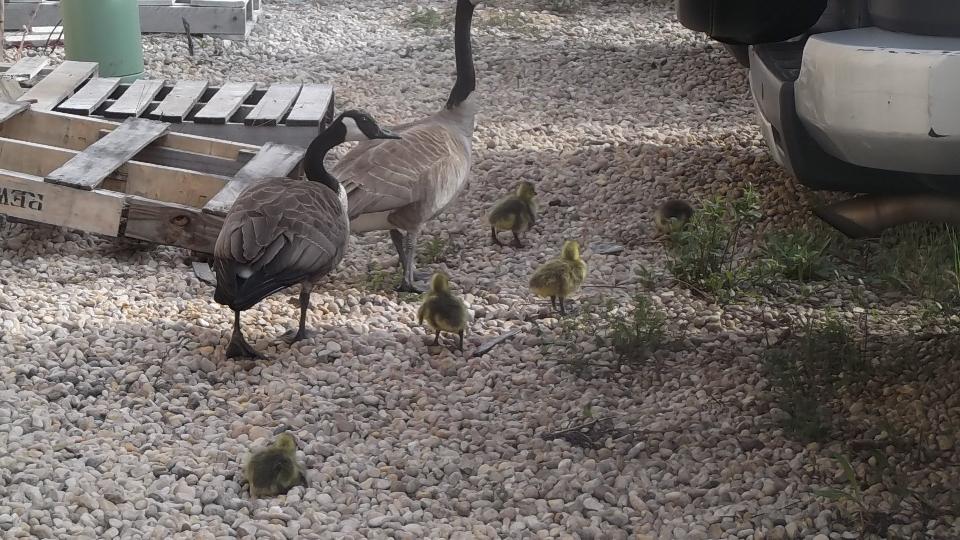
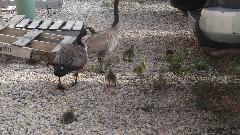
The MGB had some fuel system work, and I lent a hand with getting one of the cooling fans to run the right direction. I had nothing to do with the flock of day old gooselings that hatched in the side yard.
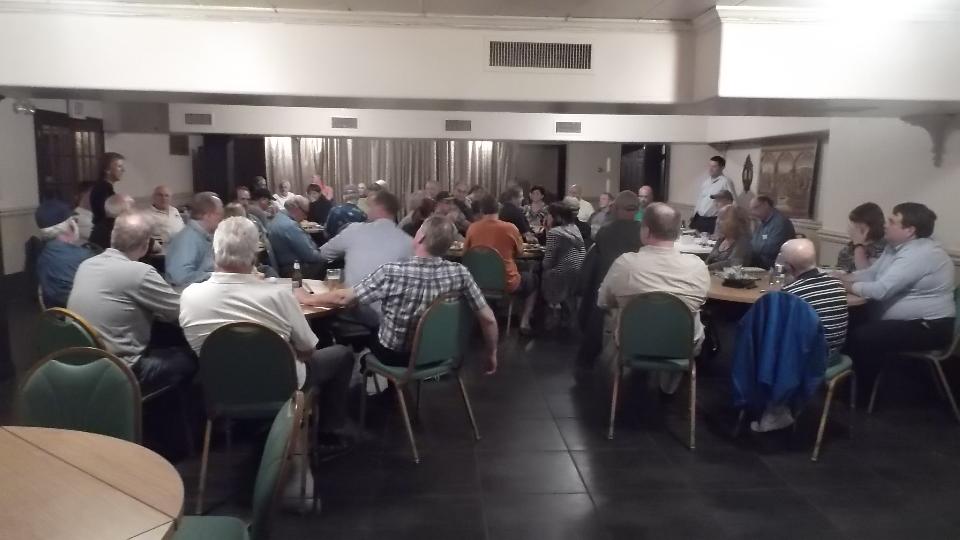
 In the evening we were off to a dinner meeting with Chicagoland MG Club with about 40 people. Boy, these folks look familiar, but I haven't seen most of them for a year. Discussions run from new members and visitors to working on cars to past andfutire club events, and also a few minutes to catch up on MGA Guru's activities for the past year. By midnight we were hanging out 50 miles away in Merrillville, Indiana playing Spin The Bottle again.
Tuesday, April 19, 2016
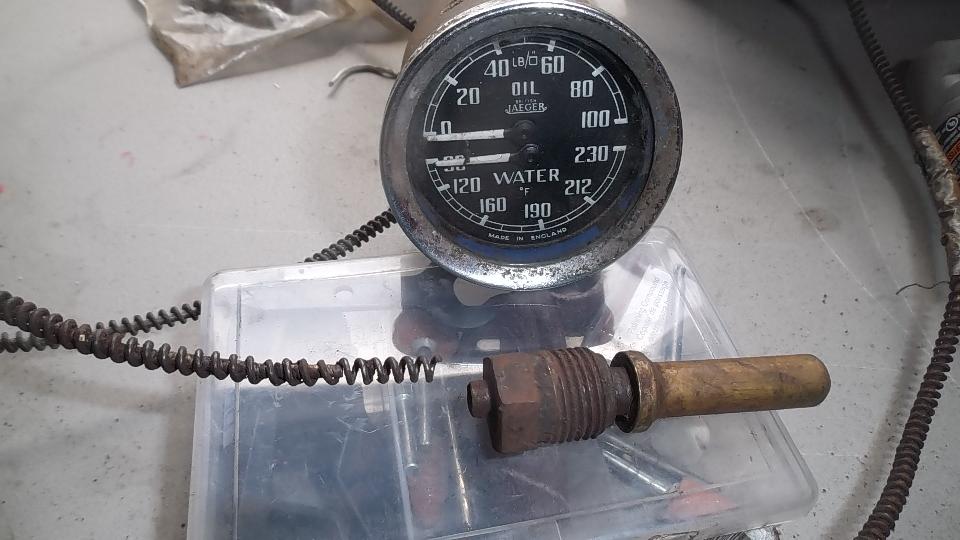
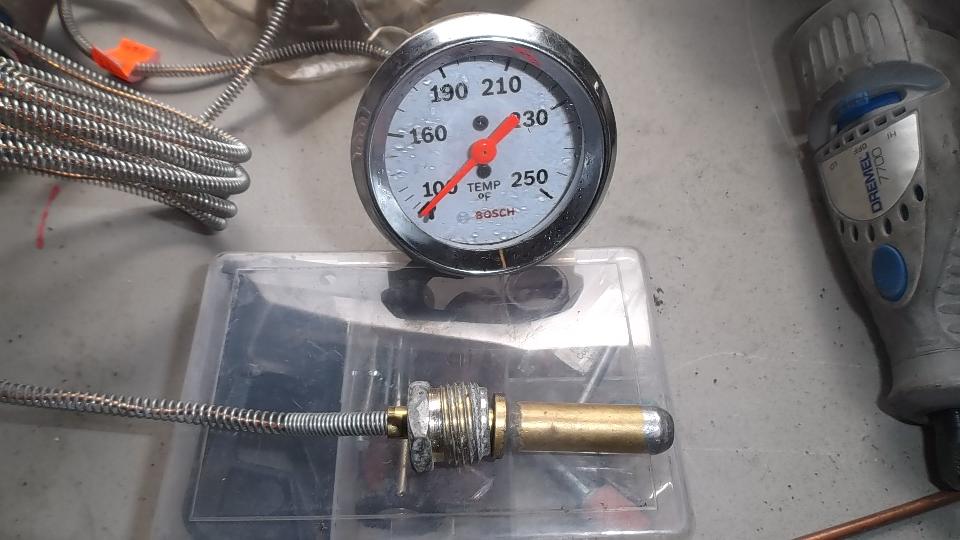
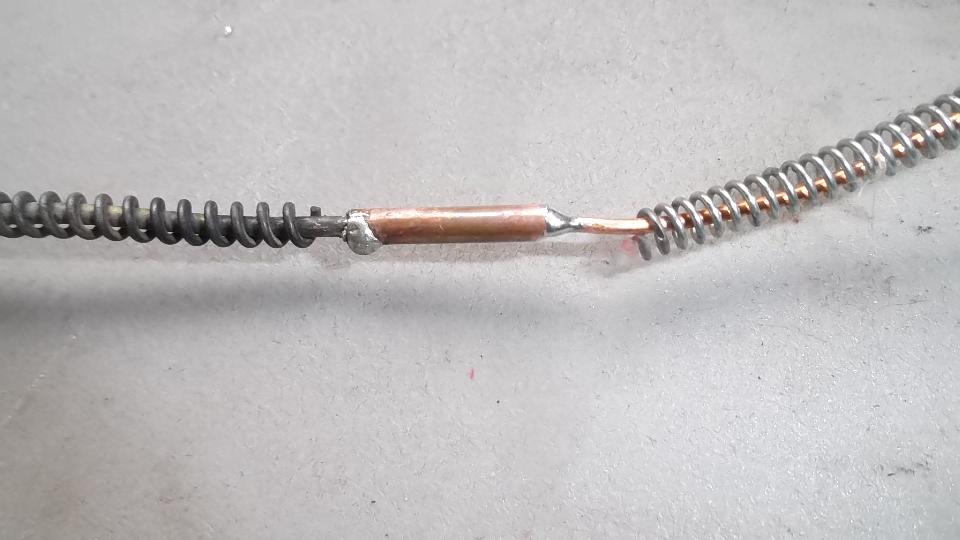
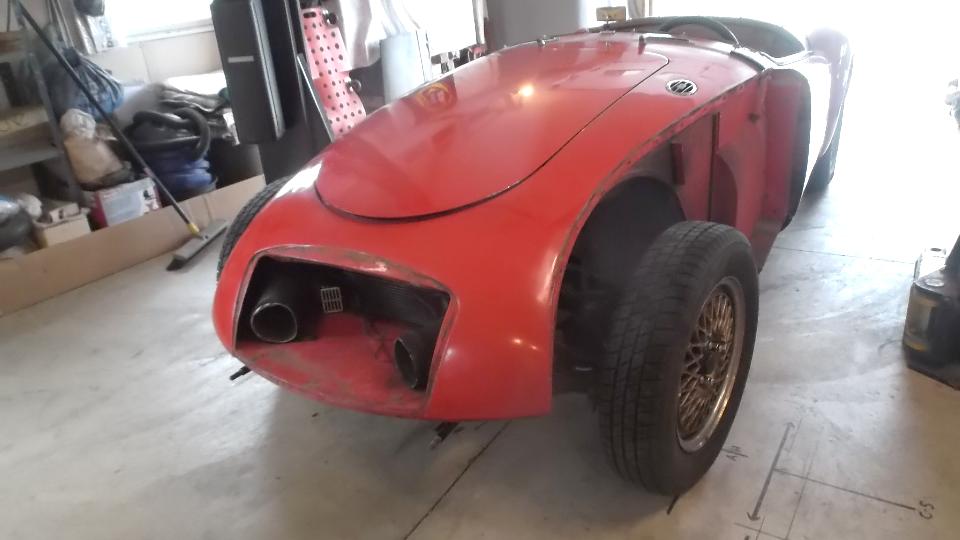
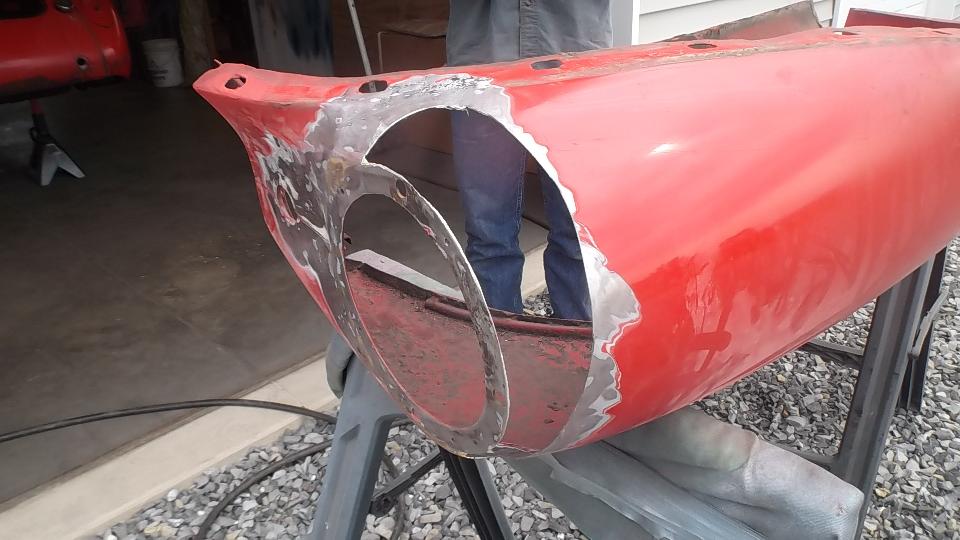
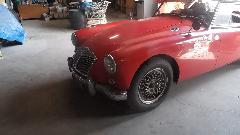
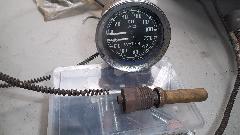
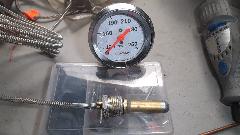
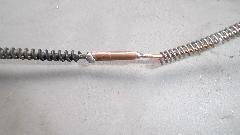
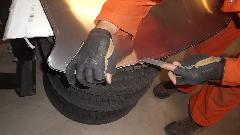
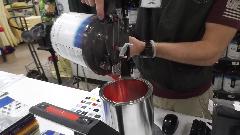
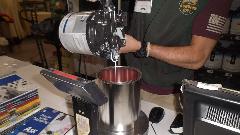
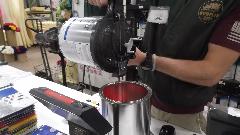
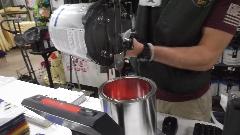
Early morning reality check, breakfast, WiFi, e-mail, phone call, and we dash a couple hours south today, back o visit Eric Nelson in Zionsville, Indiana. You might remember the MGA from two weeks earlier, not quite ready to run yet. Today we were intending to fix a few electrical problems. First up was the non-functional temperature gauge, which is not electrical was calling us loudly for help as it had a broken signal pipe that had lost its ether. Rather than sending it off for an expensive repair, I thought I might take this opportunity to see if I could fix one, especially since I had been carrying the materials around for more than a year.

The idea here is to buy a new analog temperature gauge at a local auto parts store for about $15, and cut the signal pipe off of it to graft onto the old gauge (without losing the liquid ether which is very volatile). I am disappointed to report that my first attempt failed. This was due to using cold water rather than ice/brine solution freezing water, and the ether boiled away. Working in a remote shop with no ice handy, I thought I would give it a try, but no go. Some time later I will buy another analog temperature gauge and try again. See more pictures and a preliminary report in tech article DT-102B
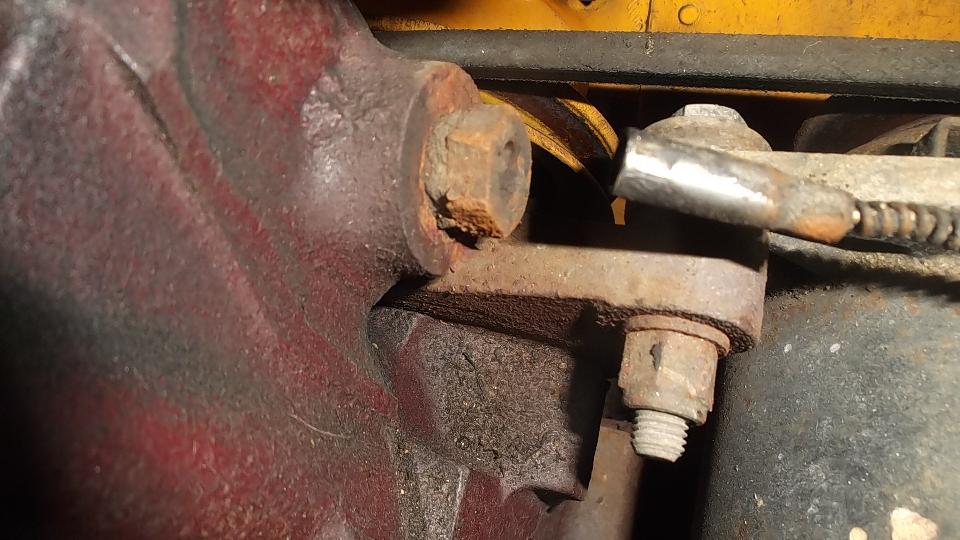
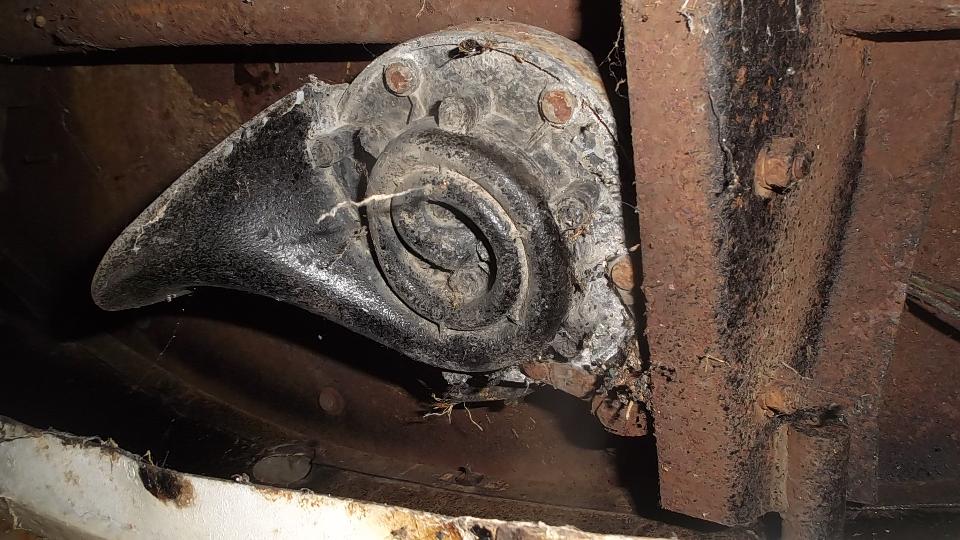
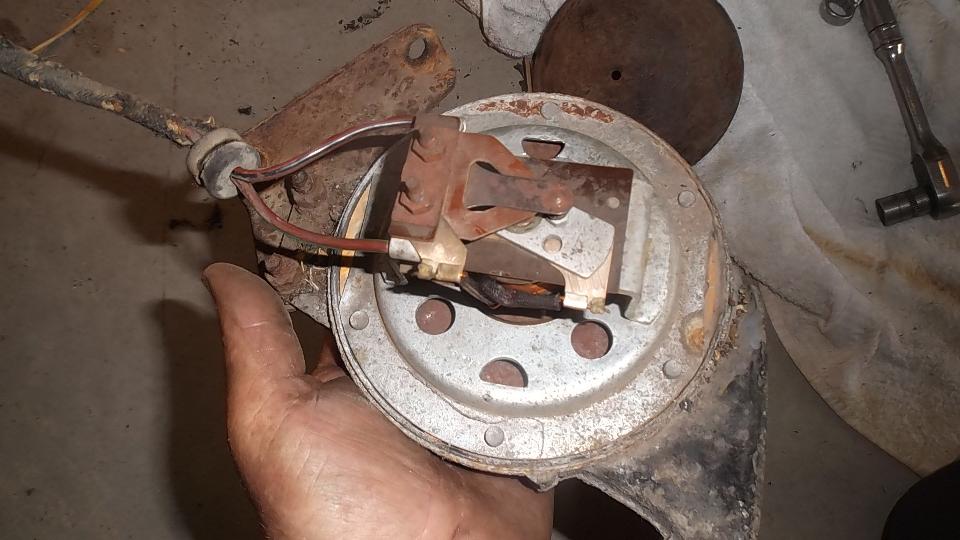
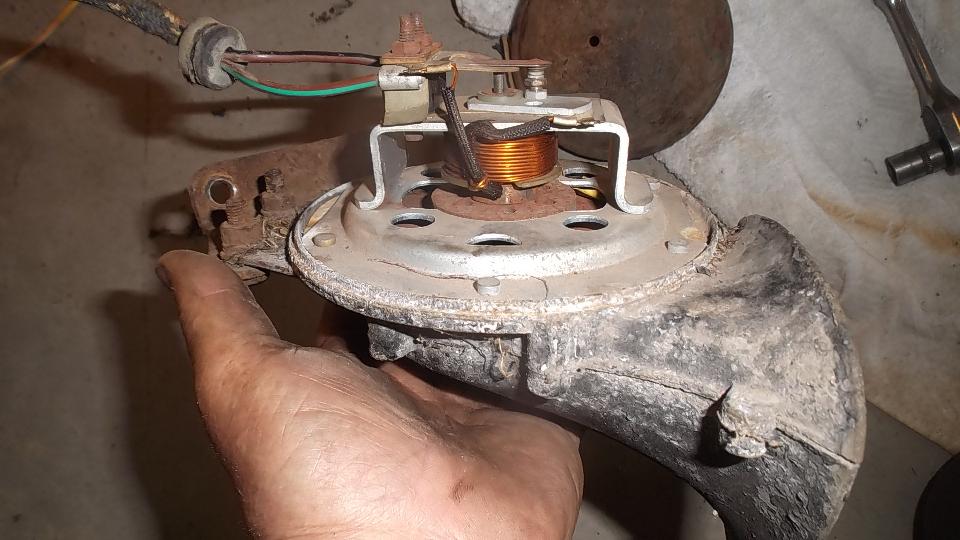
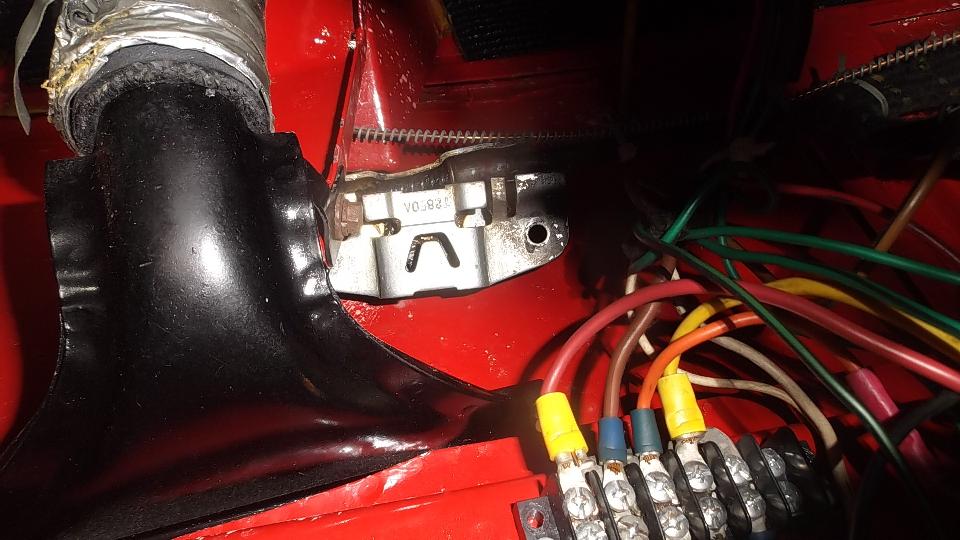
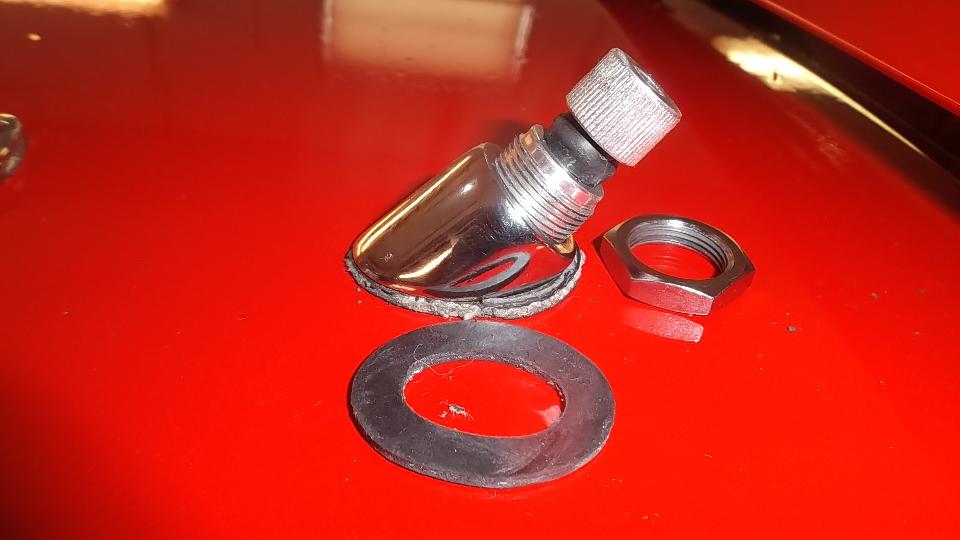
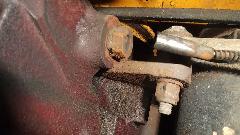
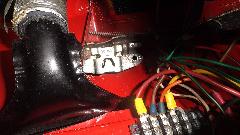
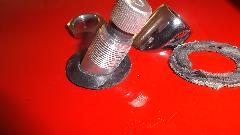
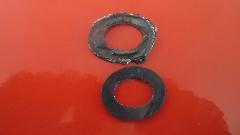
Finally getting on to the electrical issues, we attacked the non-working horn ("hooter" to the Brits). Five minutes with the test light reveals good power on the horn feed wire at the fuse block, and good grounding contact at the horn button, so the problem must be in the horn itself. Having to dismount the horn to get at the internal bits, those two rusted bolts turned out to be a real chore, as the bolt heads were nearly inaccessible above the L-bracket. That done, one screw pops the cover off, and we soon had the contact points cleaned to make it work, and all back together in short order.
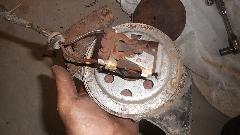

 Then on to brake lights, where the pressure switch cannot be functional with an open/broken hydraulic pipe. So we spent some time installing a new brake pipe on top of the rear axle. Then bleeding the brakes, all was well until the left front brake would work but not release. Spend more time to install a new brake hose on left front, and finish bleeding the brakes (again), after which not only the brakes work but also the brake lights.
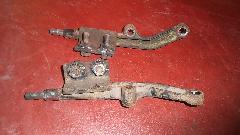
The turn signals then also work, but the left front parking light does not illuminate. Remove the front lens to find a very corroded lamp assembly with broken parking light bulb. Right side lamp holder is not much better (although it still works), so put two front parking lamps on the wish list. Heater blower not working, but jumper wires assure the blower is functional. Trace this to a few corroded bullet connectors and a bad heater blower switch, so put these parts also on the wish list. Non working fuel gauge traces to a couple of disconnected green wires. We were moving fast, no time for pictures, and then had to quit for the day. I still want to drive this car, but it seems the clutch hydraulics are not working, and pedal pivot pints are stiff, so put those items on the to-do list, and maybe some other day.
By now we had killed the entire day, and as darkness was setting in we zipped down to north side of Indianapolis near the expressway for dinner and a bit of WiFi time. Around 11-pm we high tailed it on the expressways, heading east with 600 miles to go by tomorrow evening, so we would put down some tracks tonight. 120 miles on, a fule stop in Dayton, Ohio, and keep going. Bounce off of the Columbus expressway loop, then heading northeast, ultimately running through Akron and finding a rest stop shortly thereafter. Pretty sure we drove over 300 miles after 11-pm, so it must have been 3:30-am for snooze time.
Wednesday, April 20, 2016
Sleep in a bit before haul out around 10-am. Brunch stop in Austintown, Ohio, 15 miles short of the state line, check two days worth of email and download pictures from the camera. Haul out of there before 4-pm
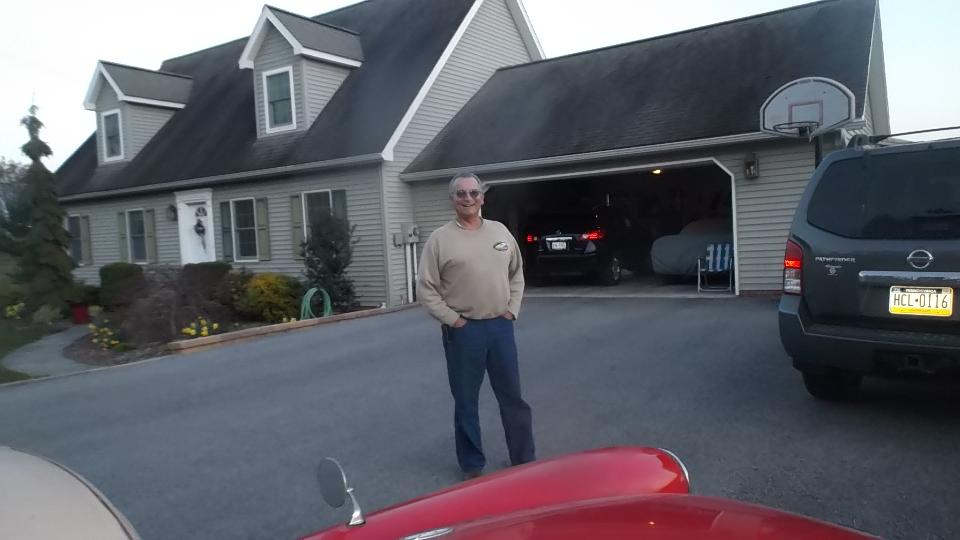
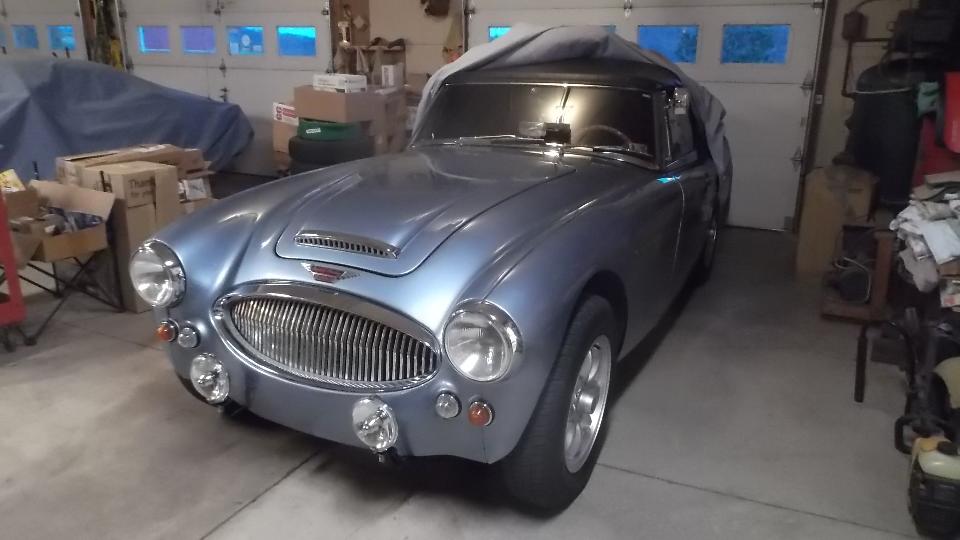
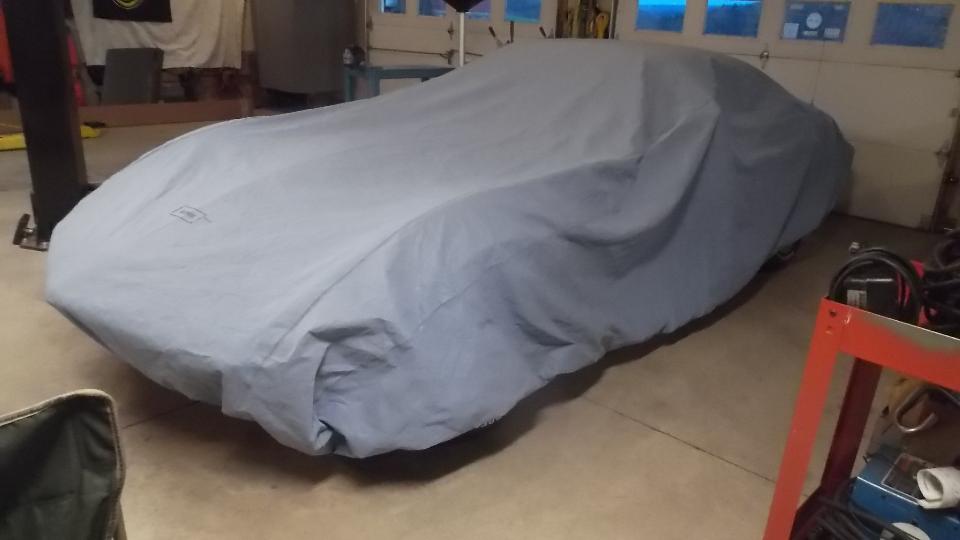
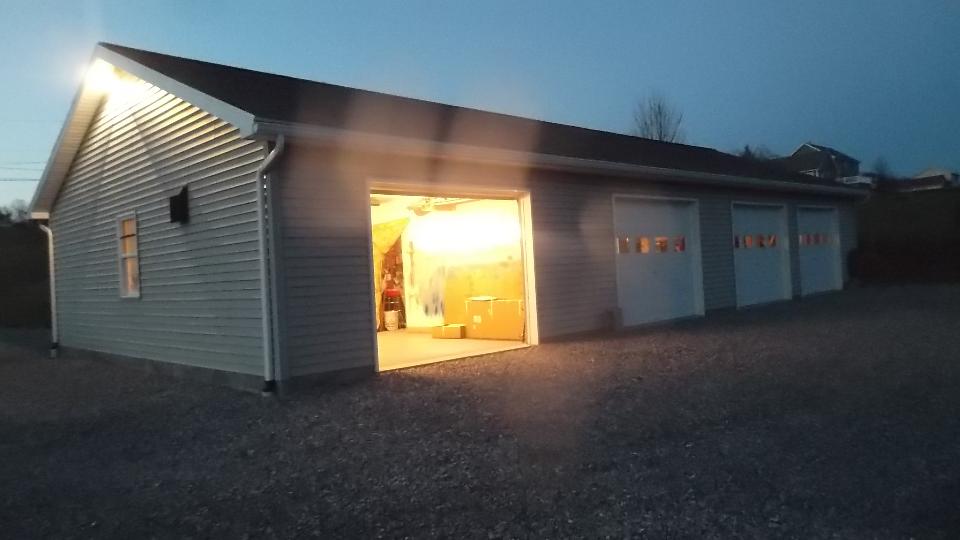
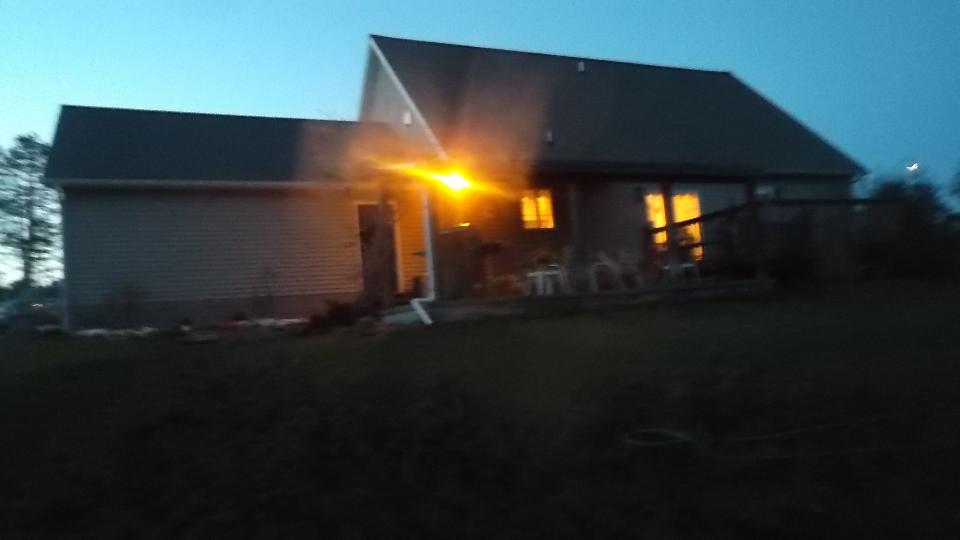
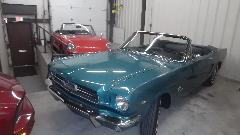
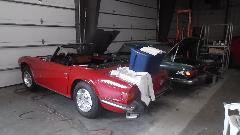
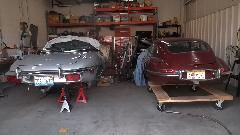
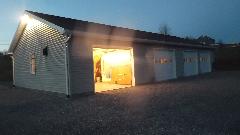
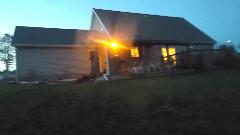
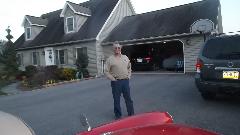 with another 230 miles to go, arriving rural Cogan Station, Pennsylvania before 7-pm (right on schedule, actually). Say hello to Dave Cappa, as we are about to be voluntarily sequestered here for a while to do some "serious" work on my MGA. I took a few photos before dark, then engaged some chat time. That's Dave's very nice AH-3000 with a well known racing history. We didn't bother pulling the cover off the other car, as everyone knows what a Corvette looks like.


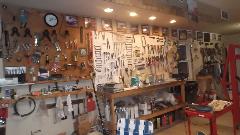
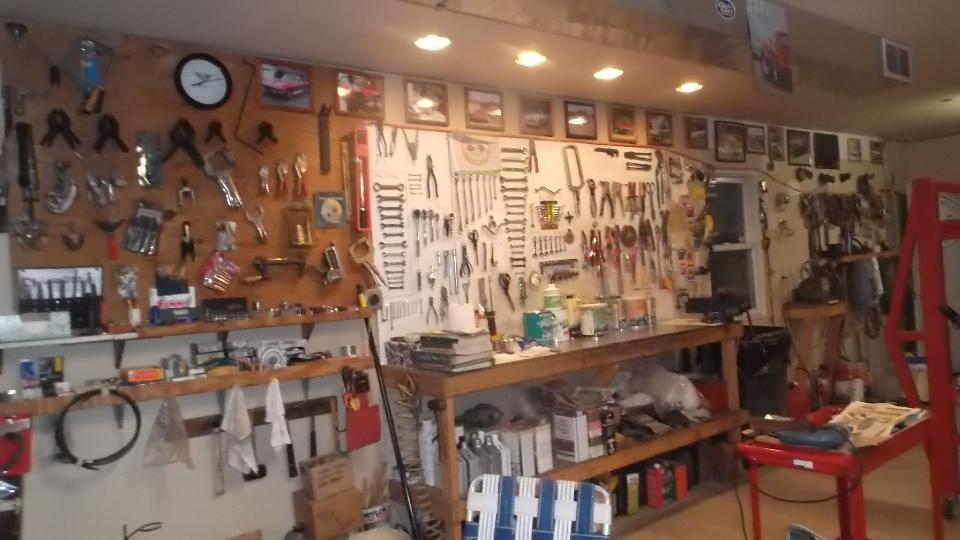
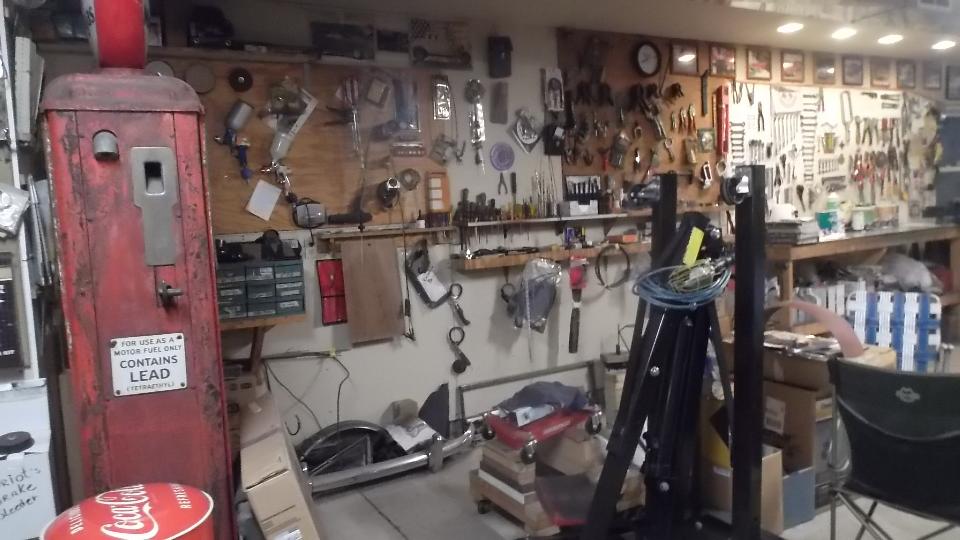
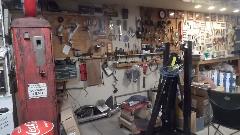
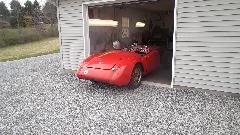
The workshop is large and well organized. That left bay is going to be home for my MGA for several days (actually a paint booth). The right bay has a two-post lift that will also come in handy.
An easy dinner was followed by chat until 10-ish. When the hosts turn in I go to work (as usual). Primary accomplishment tonight was posting of 110 photos for the past Sunday swap meet on the Chicagoland MG Club web site. See and enjoy the swap meet pictures at www.chicagolandmgclub.com/photos/swap2016. I also finished travel log photos and notes through Sunday night, the rest to follow later. Ultimate crash time was about 6-am. Really?
Thursday, April 21, 2016
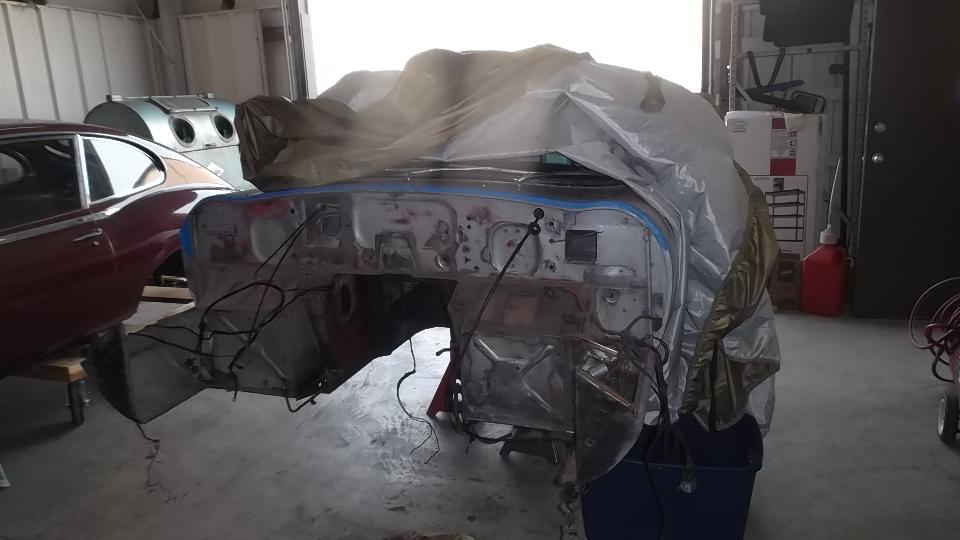
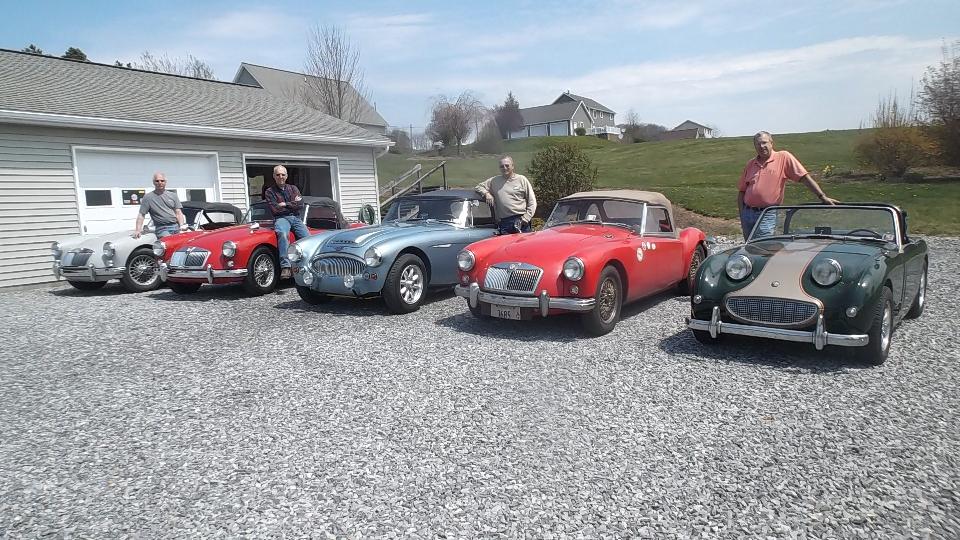
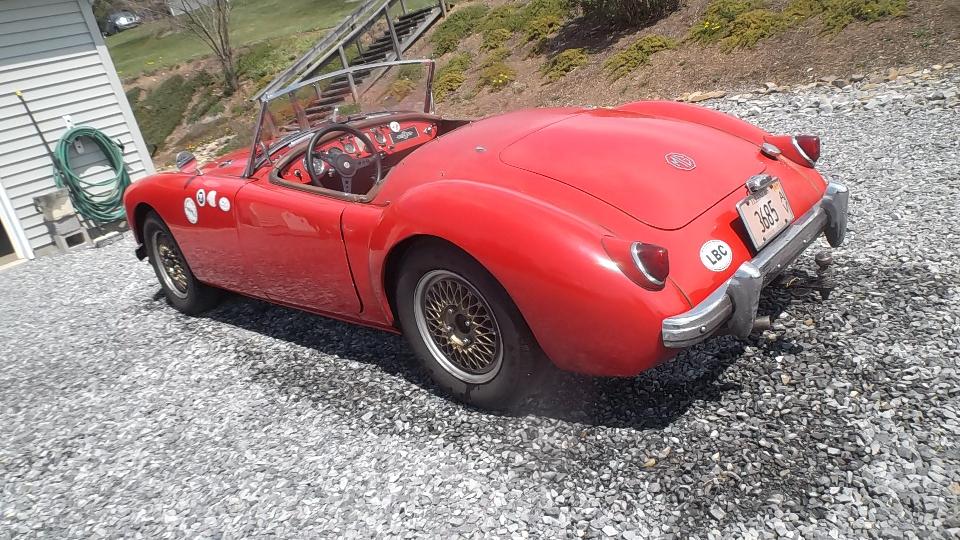
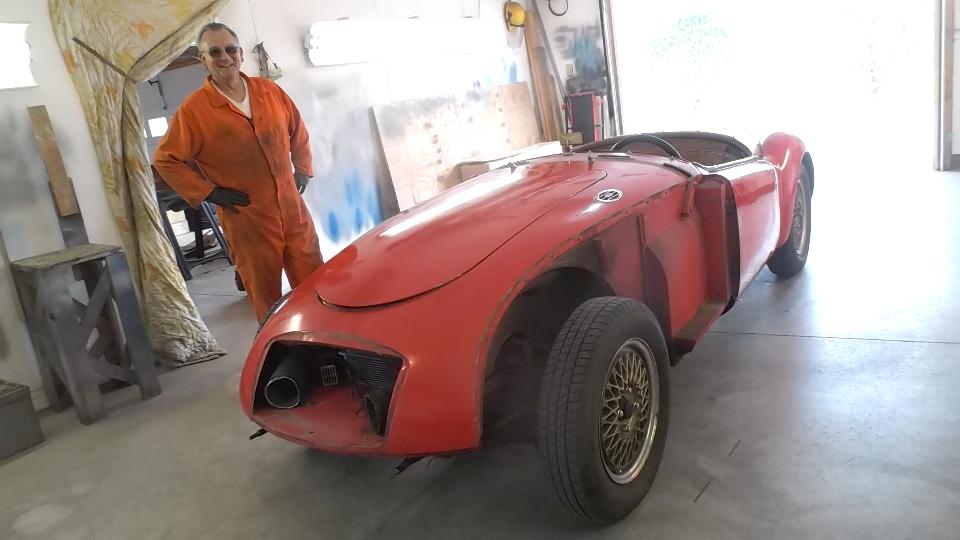
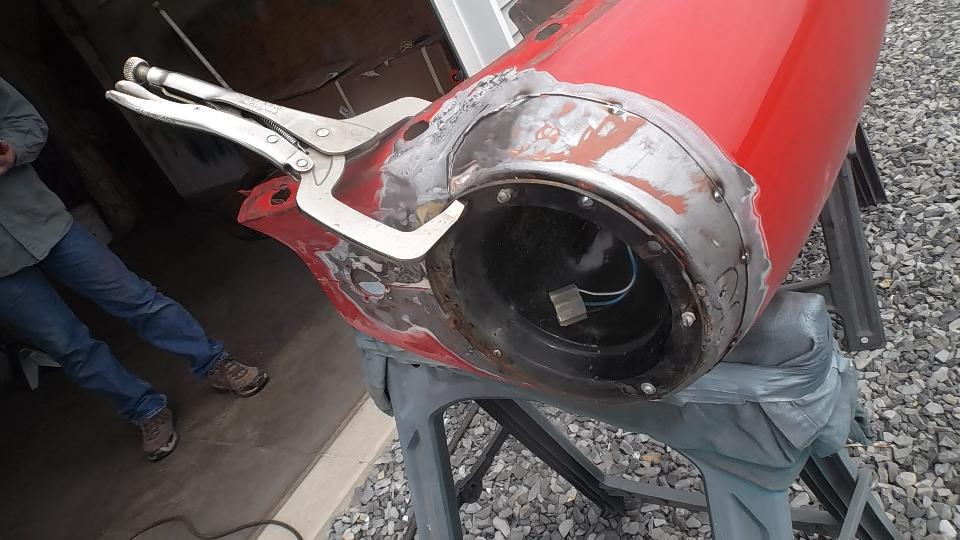
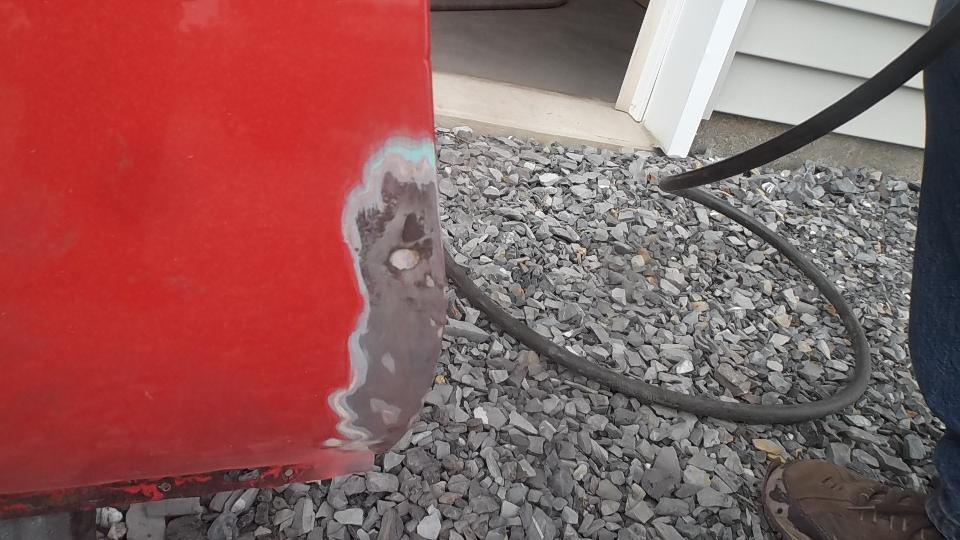
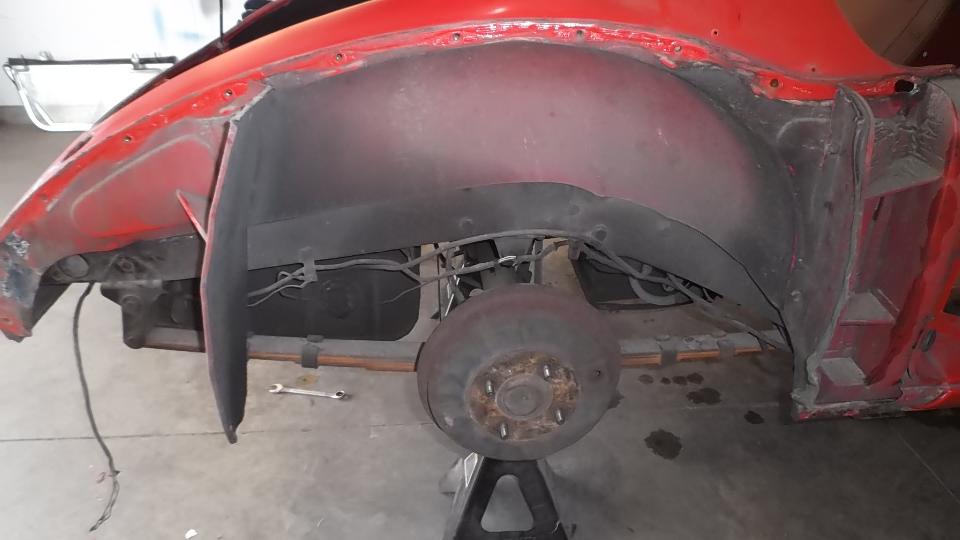
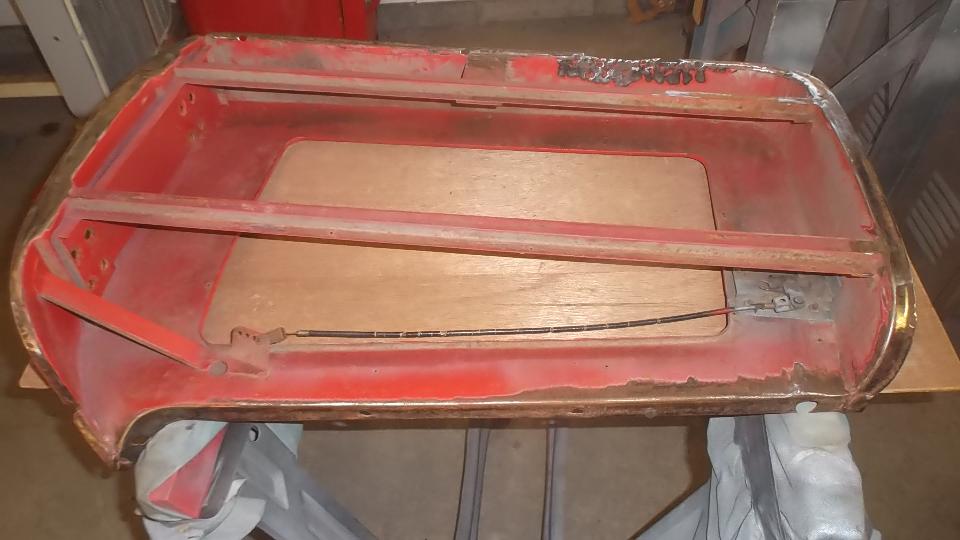
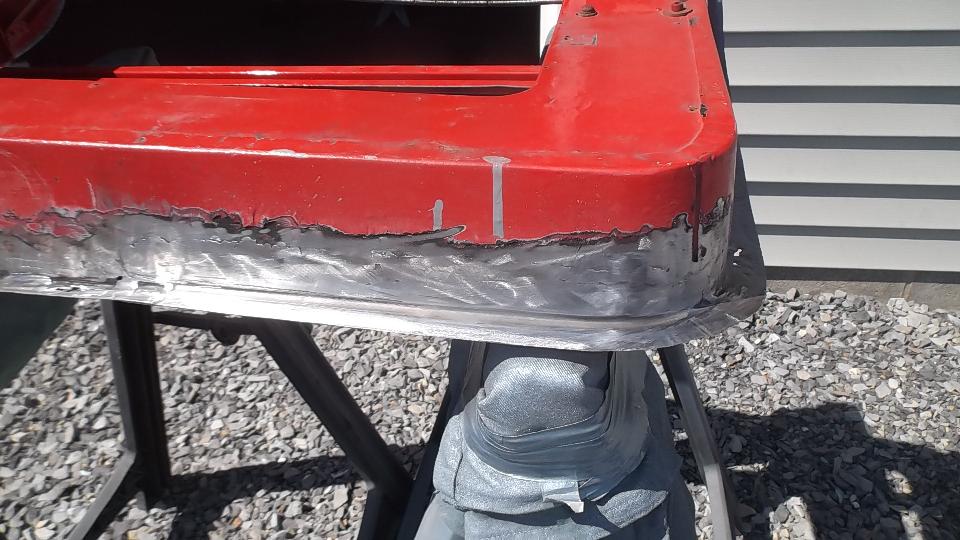
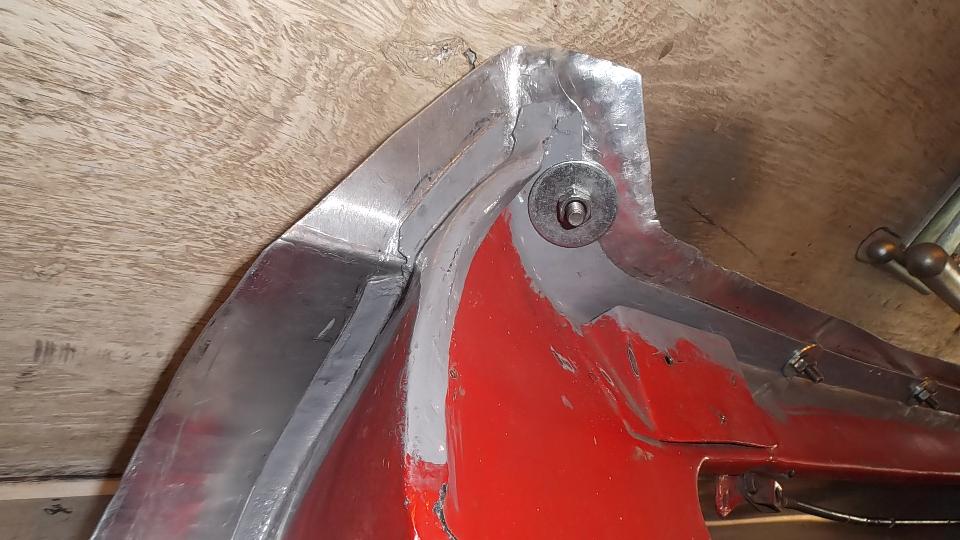
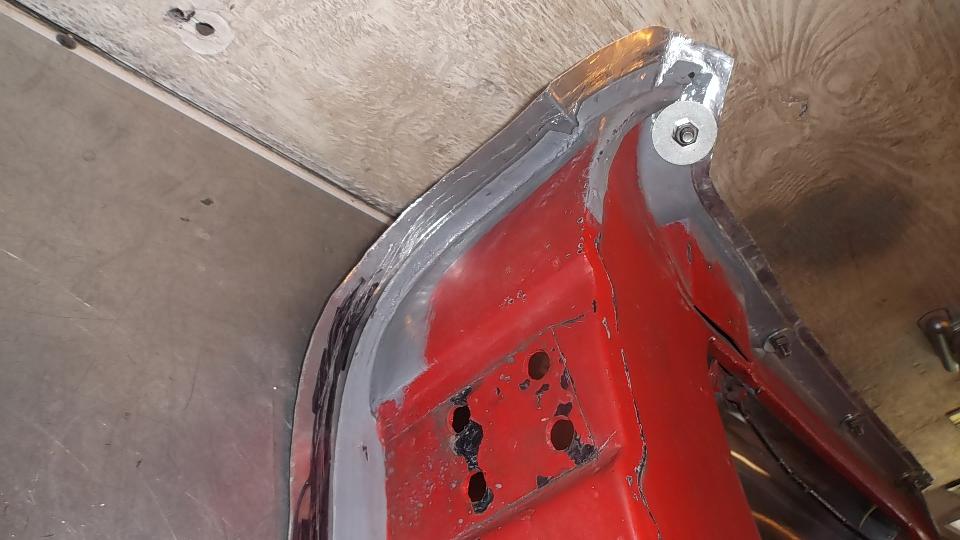
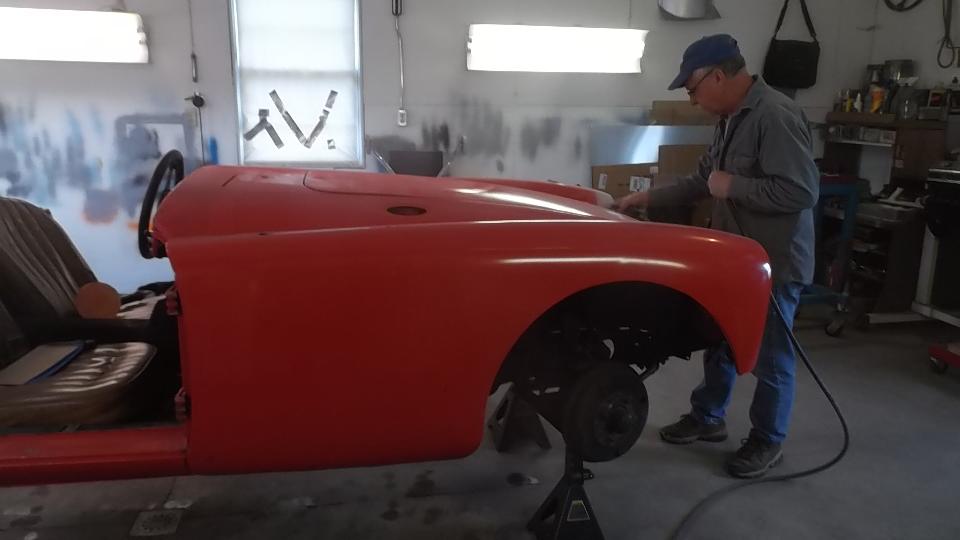
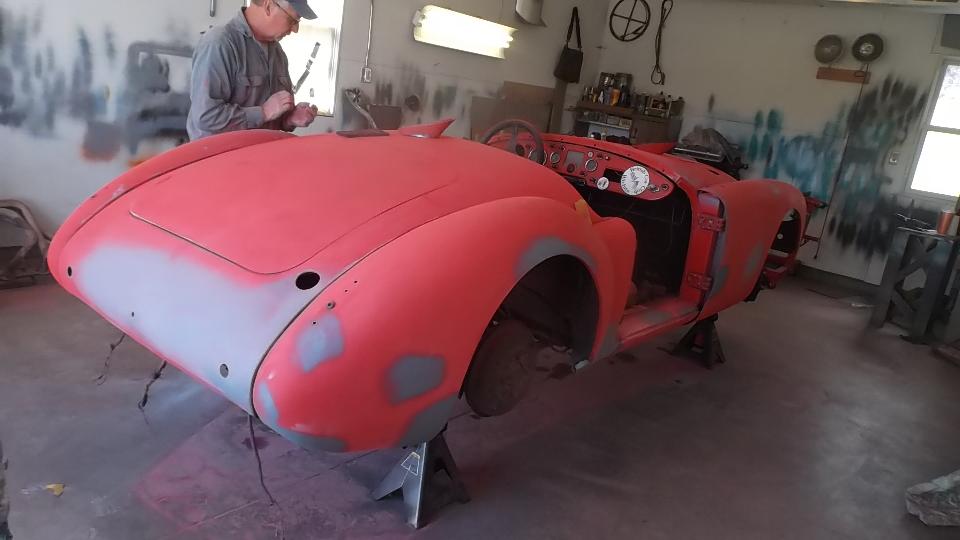
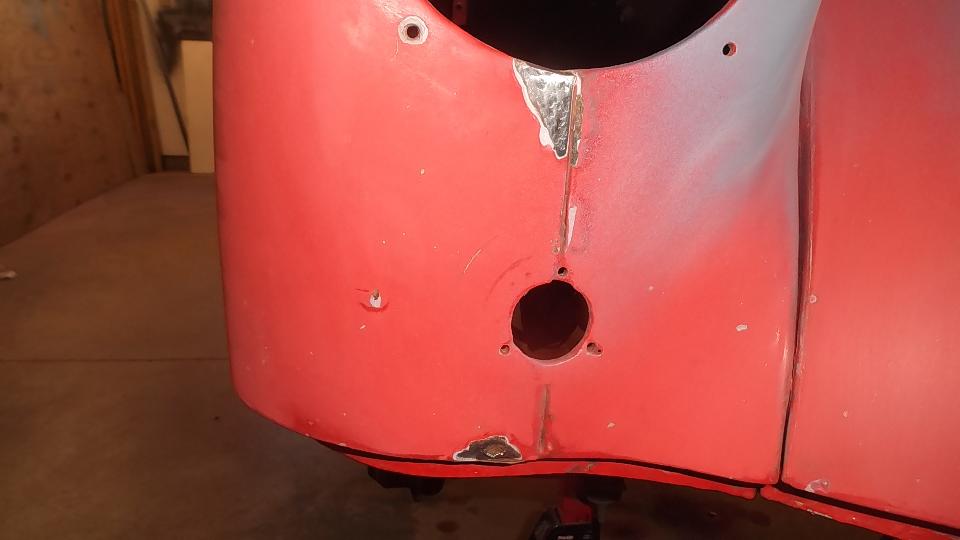
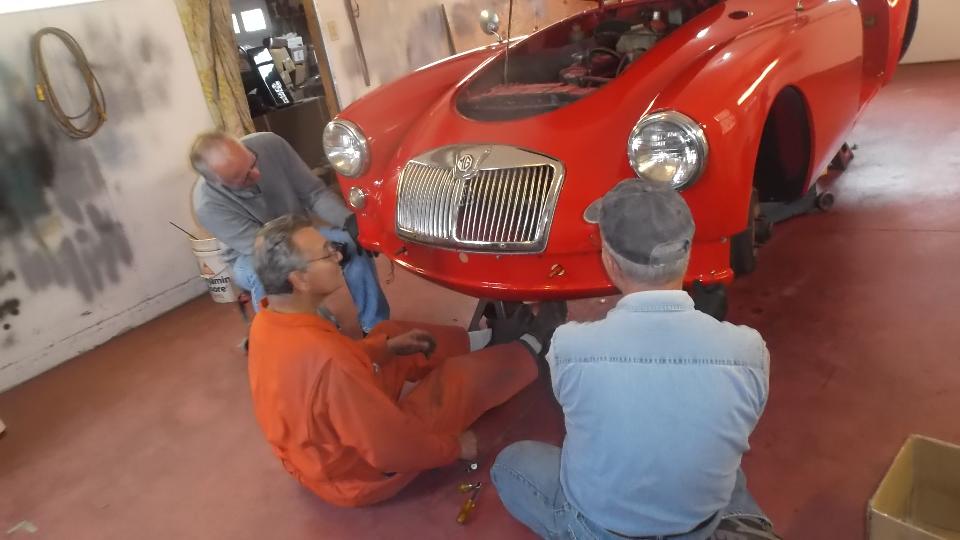
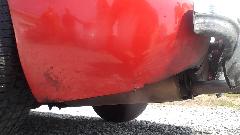
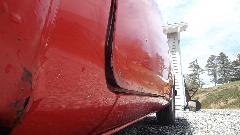
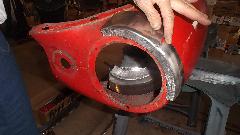
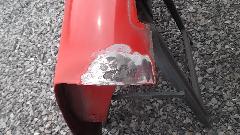
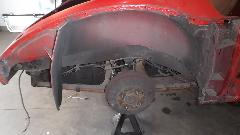
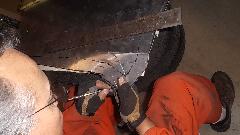
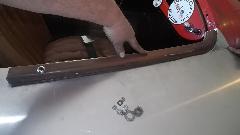
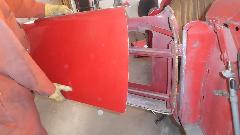
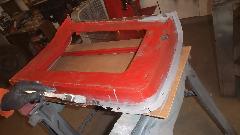
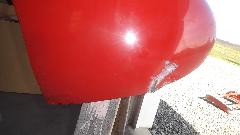
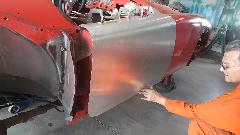
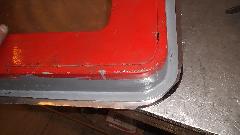
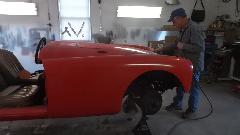
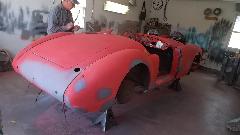
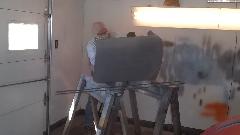
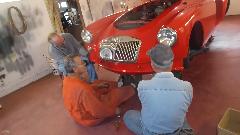
Slept in a bit but up by 10-am, late morning brunch, couple of phone calls to summon friends, and head for the workshop. Friends arrive shortly. Dick Bussler and Bill Bussler on the left, Dave Cappa in the middle, and Dave Strickler on the right. My MGA gets a quick mop down before we start working on it, revealing the real reason we are here. These four blokes have volunteered to help fix the rust (long story) on the left front fender (among other things) and repaint the car.

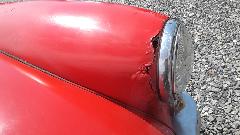
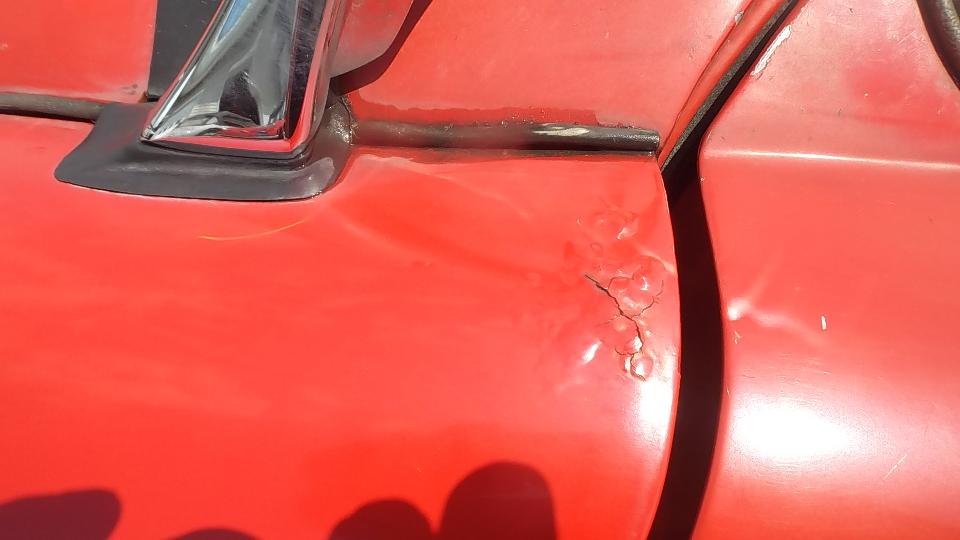
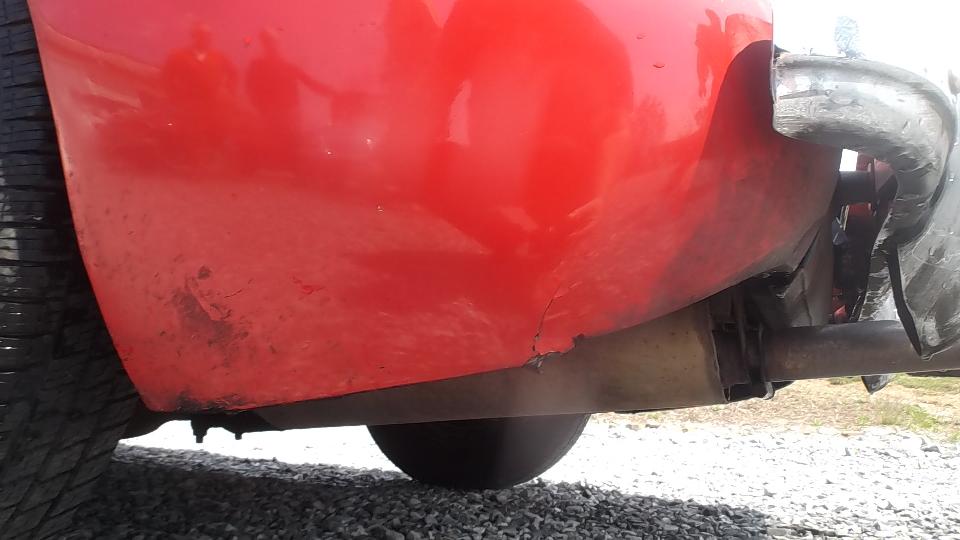
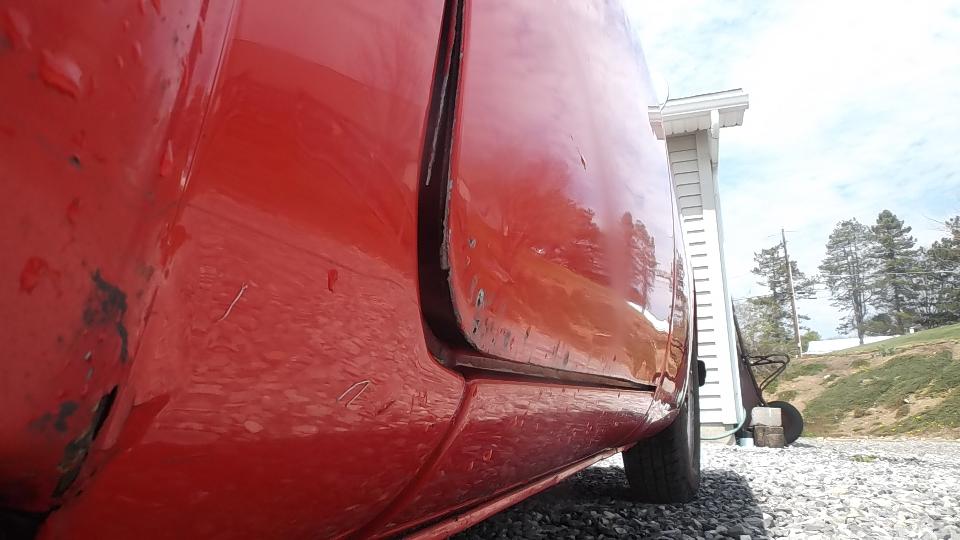
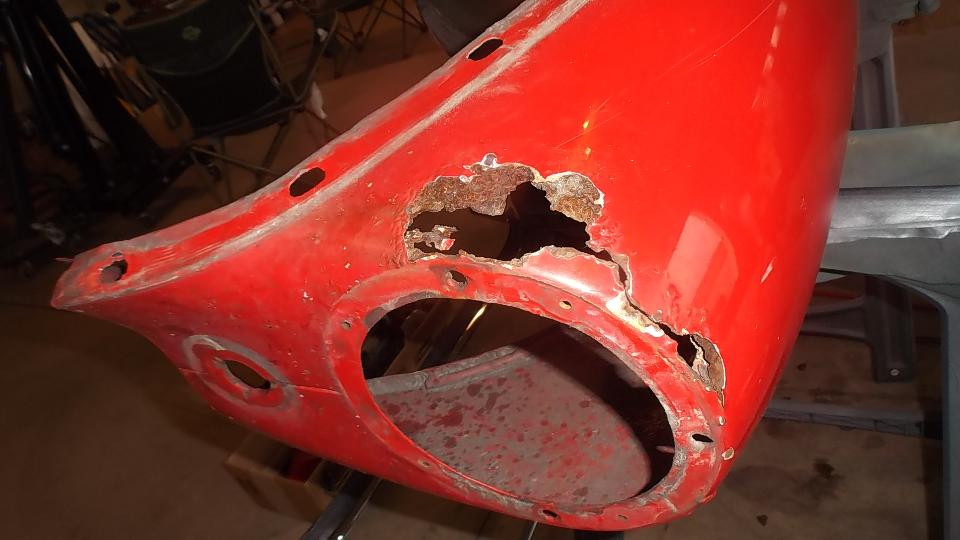
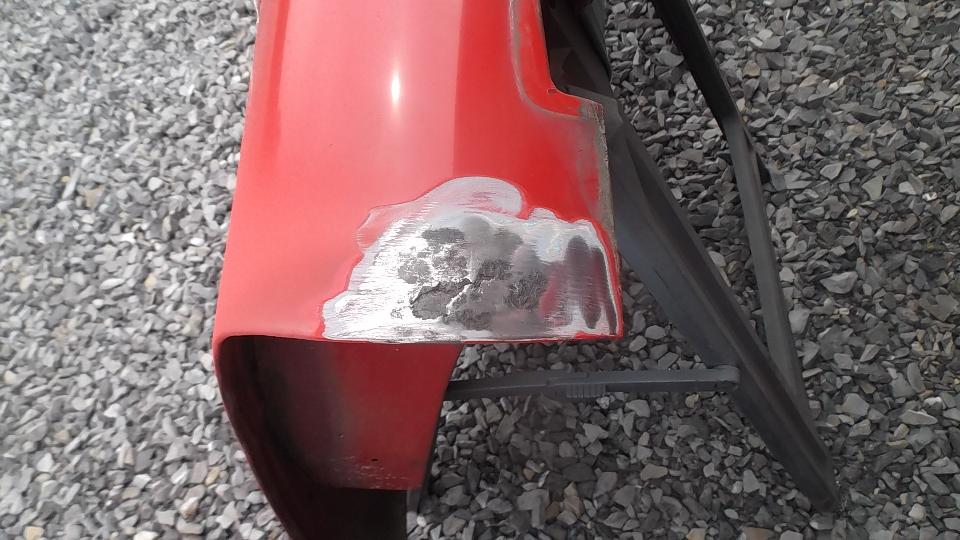
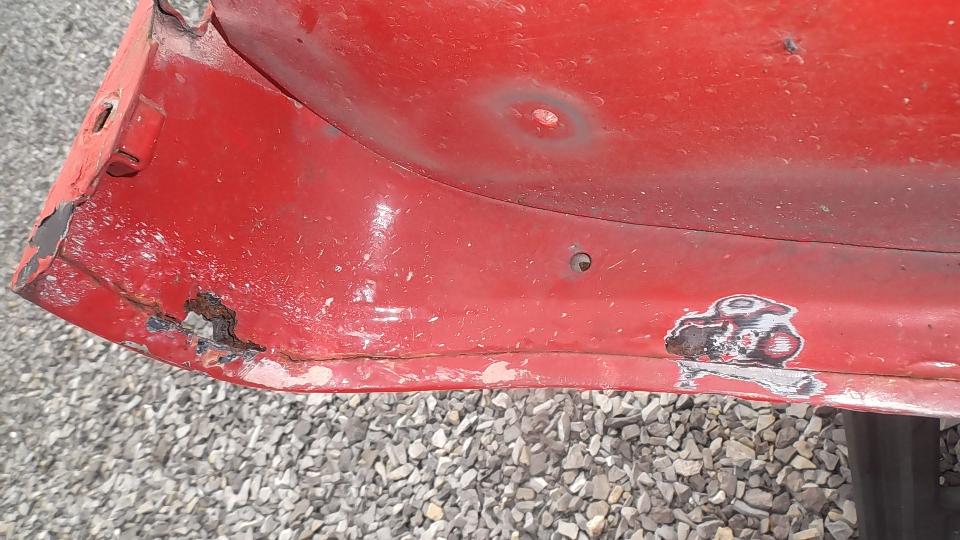
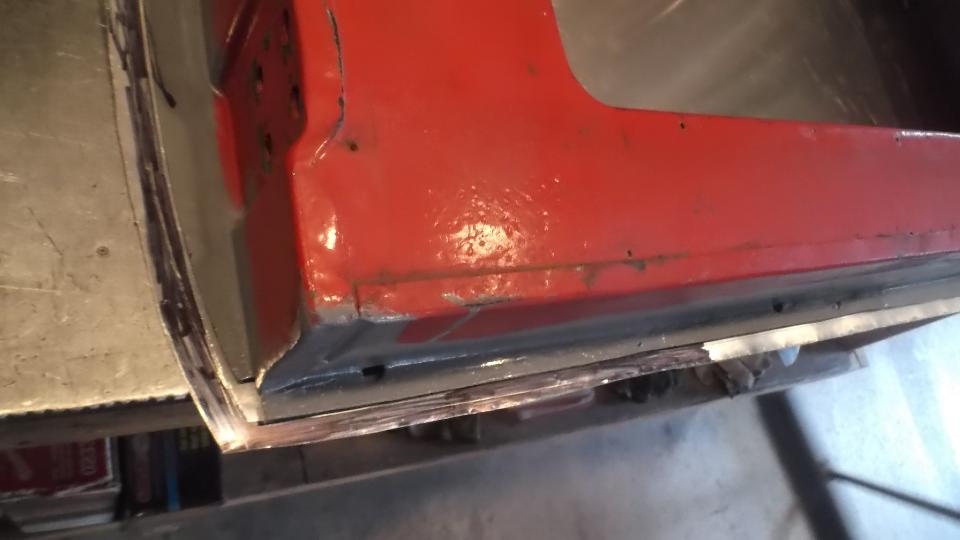
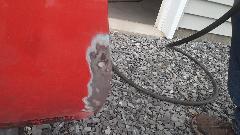
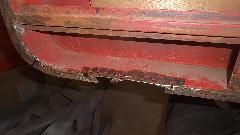
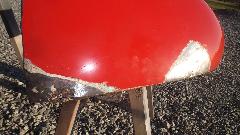
A bit of rust popping through on top rear of LF fender at a fold over joint that could never be painted inside. A bit of damage at bottom of LR fender as a result of running over a parking curb on a dark and stormy night. Passenger side door skin coming loose where the fold over flange has fractured.
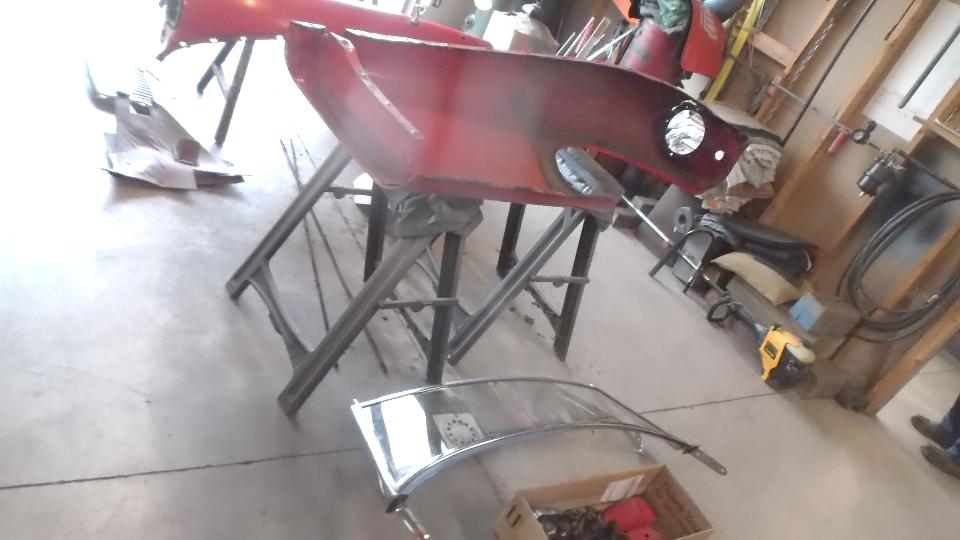
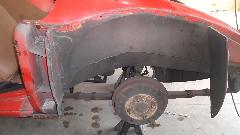
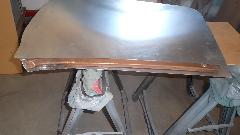
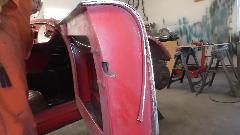
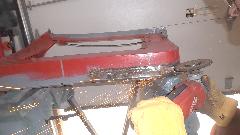
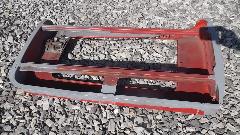
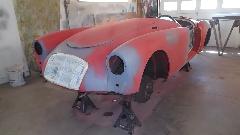
Before day's end the car was substantially disassembled.

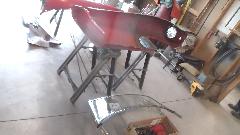


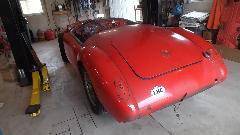

Still under its own power, chugging on over to the other workshop bay (very loud with no exhaust system).

A couple of fiddles with possible rust repair pieces.
After dinner and chat until 9-pm, I had some quality WiFi time to catch up with all of the photos and notes for the past few days. Finished by 2-am this time. Whoo-hoo!
Friday, April 22, 2016
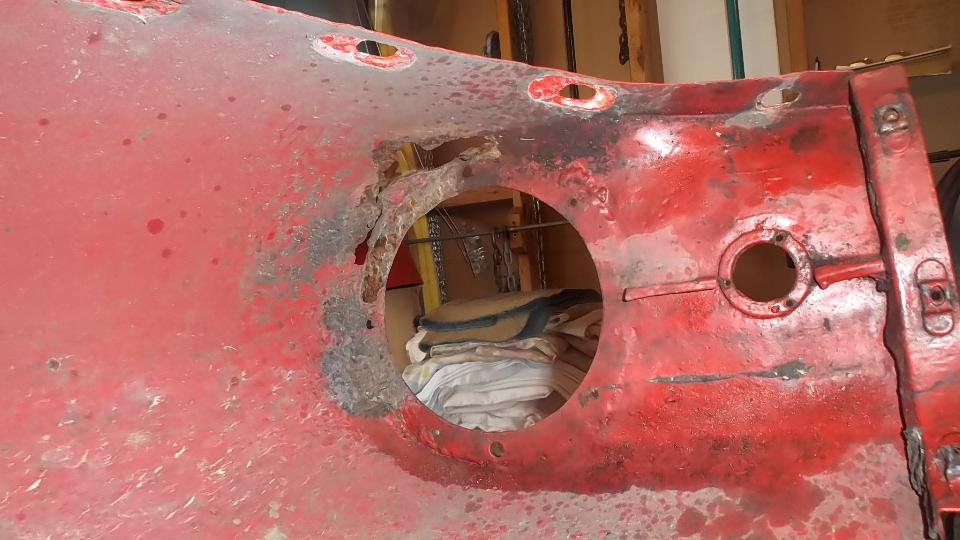
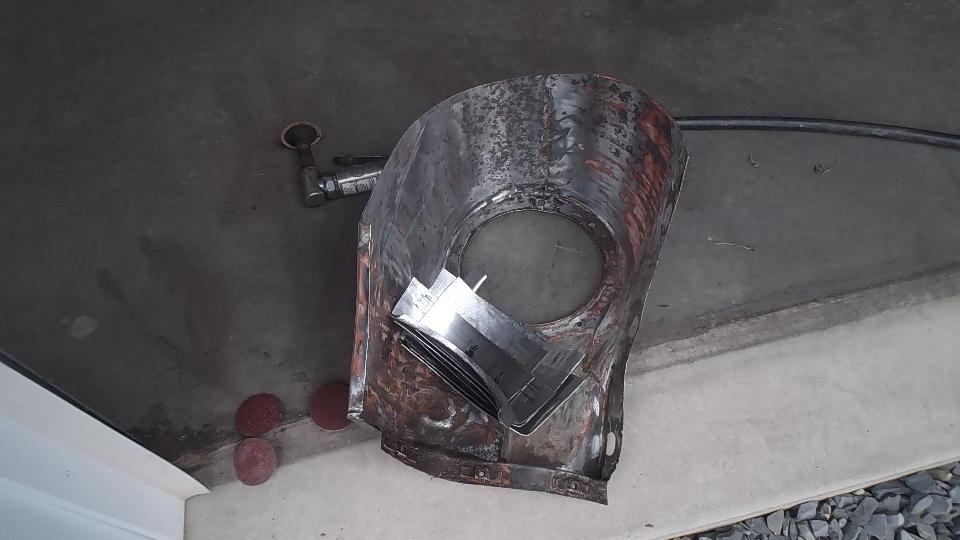
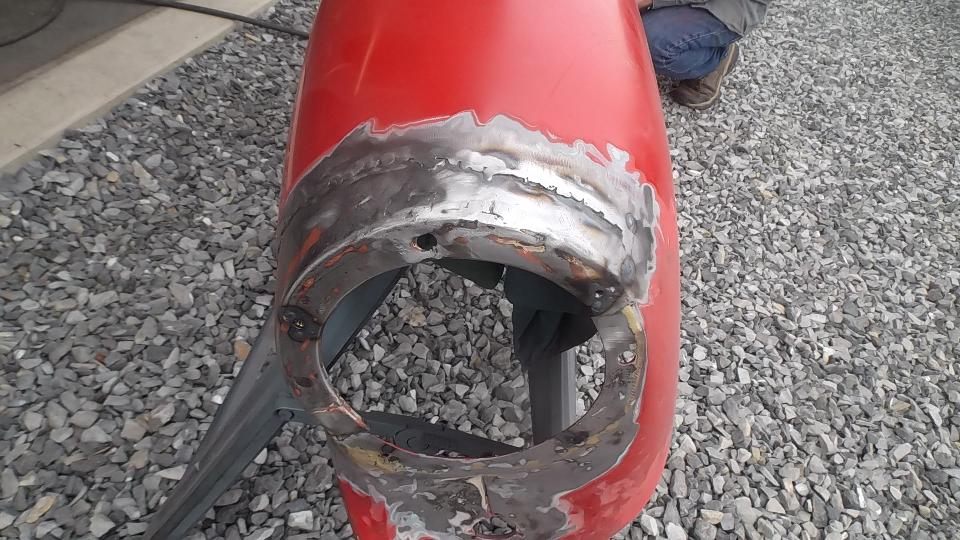
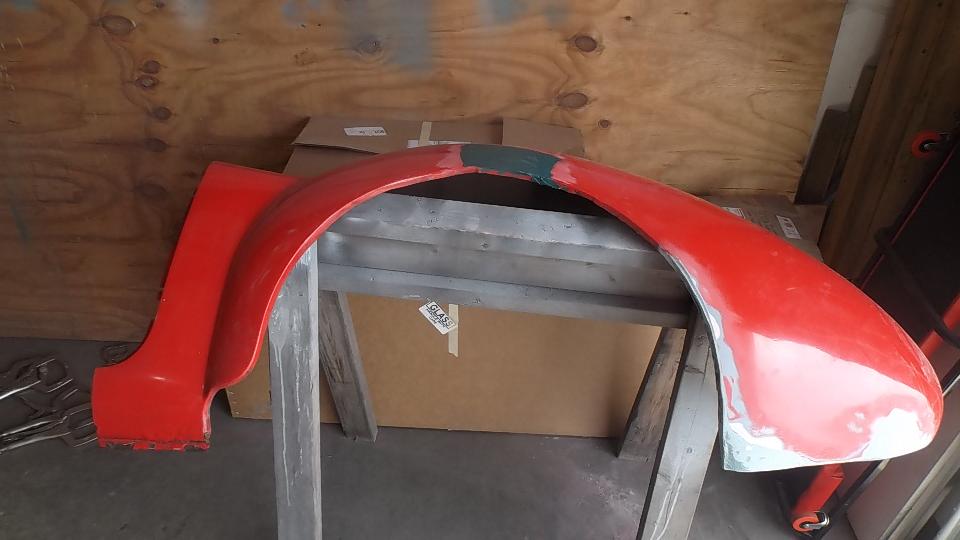
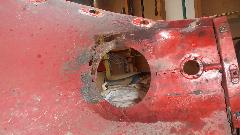
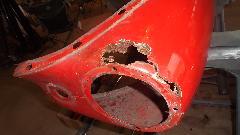
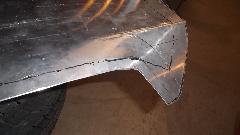
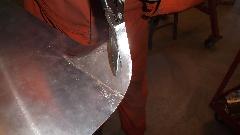
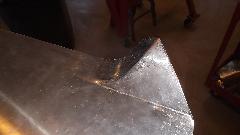
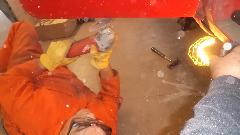
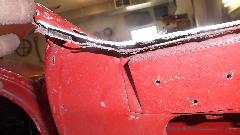
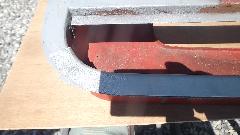
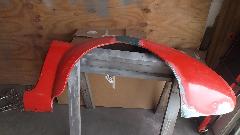
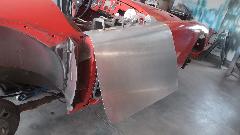
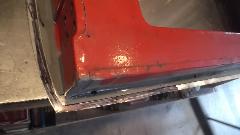
Getting into some serious cut and weld and metal forming today. After cutting away rusted metal in the LF fender, the piece of donor fender from Francois Gay in Saint-Jean-Sur-Richelieu, QC, Canada is looking more appealing. Let's try a section.
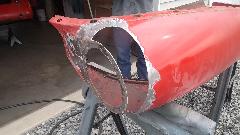


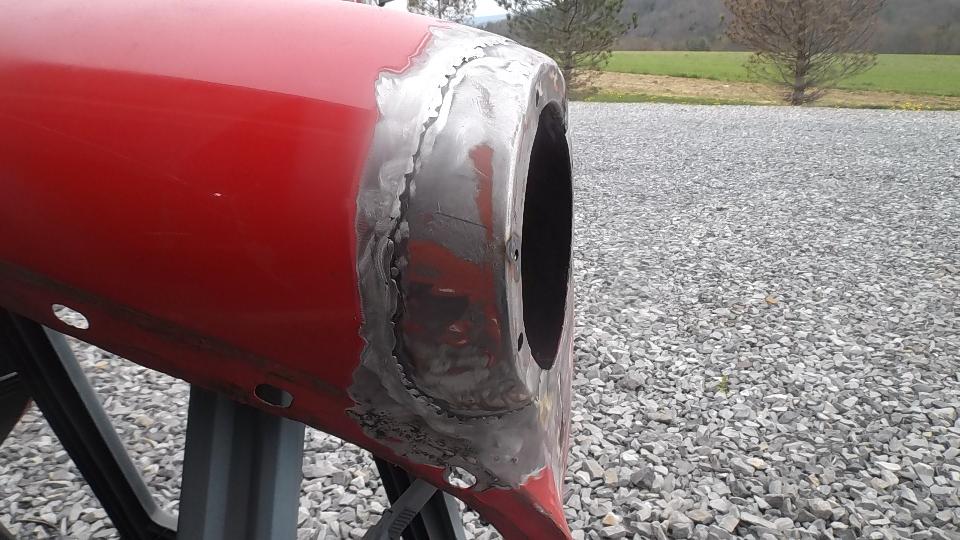
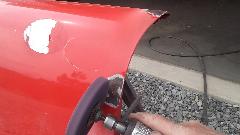
That's coming along fairly well, rust gone, new metal in, needing finishing work. Then a few break-outs along the rear edge of the same fender, buff out most of the rust there, and set this aside for the day.
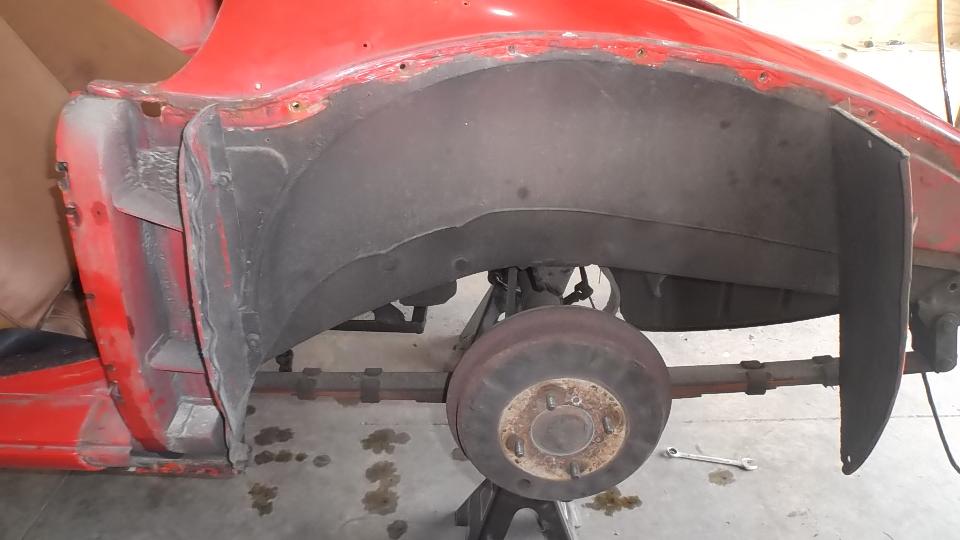
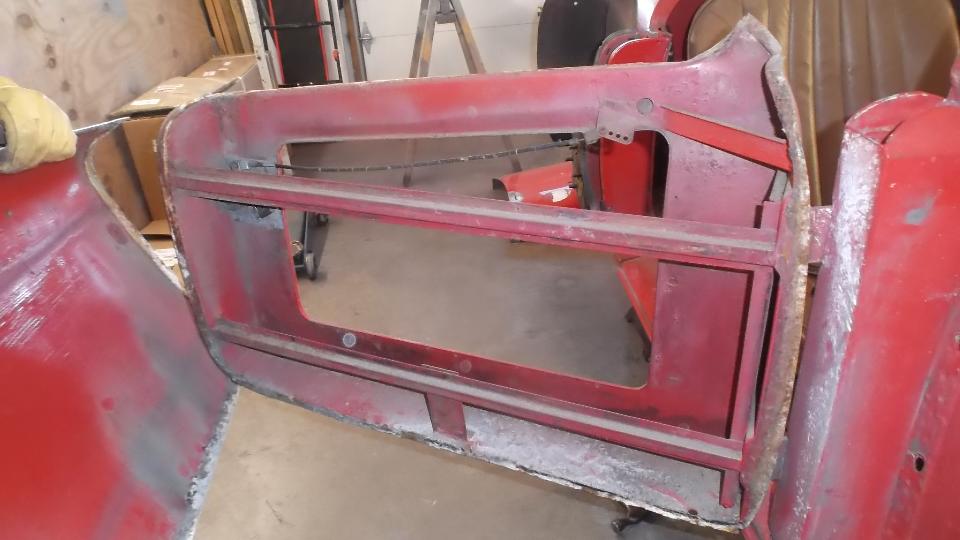
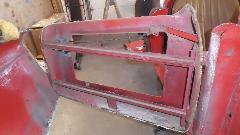
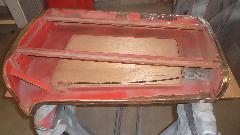
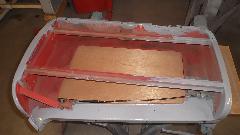
Removed rear fenders, all inner kick panels and door pockets, and cockpit trim rails. Fought with the small screws in the shutface panels, but larger bolts came out okay. That is not black paint on the inner fender, just eight years and 117,000 miles accumulaton of road grime.

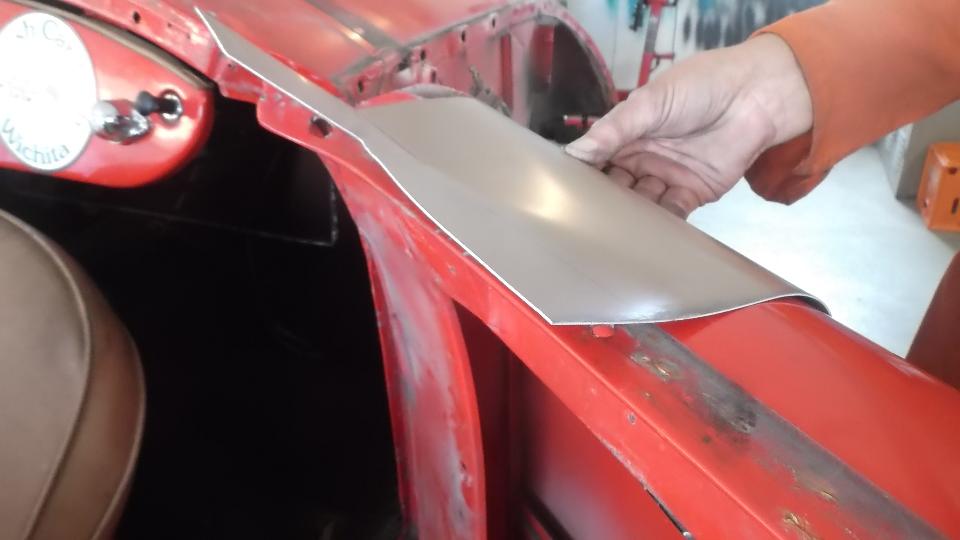
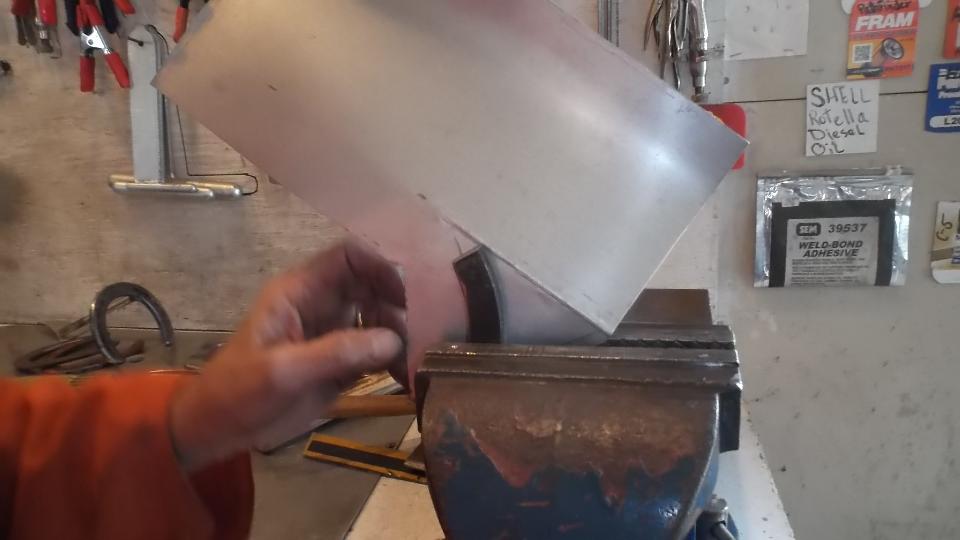
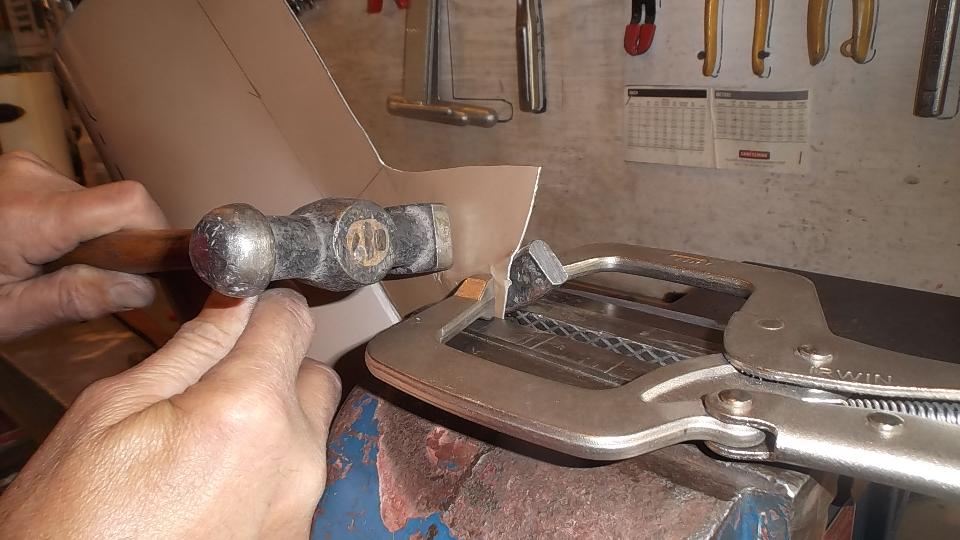
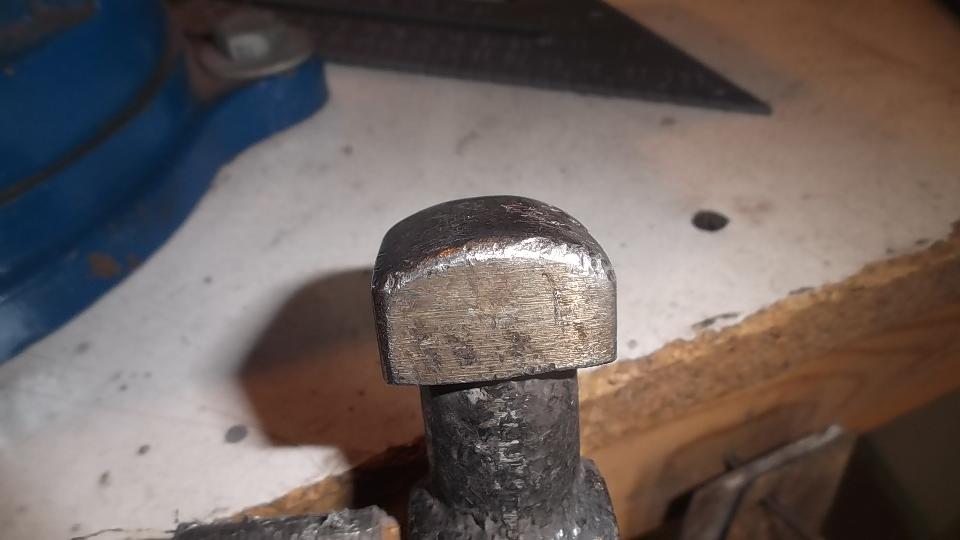
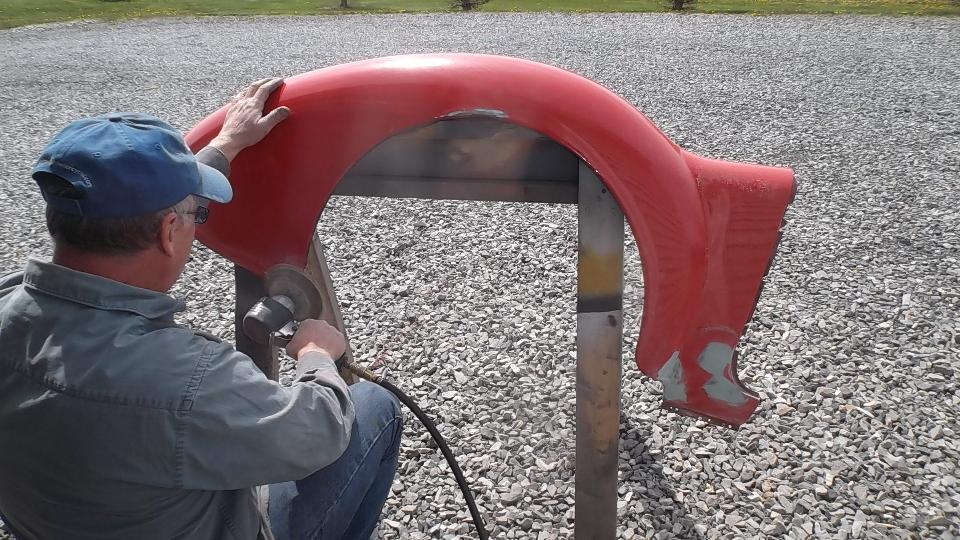
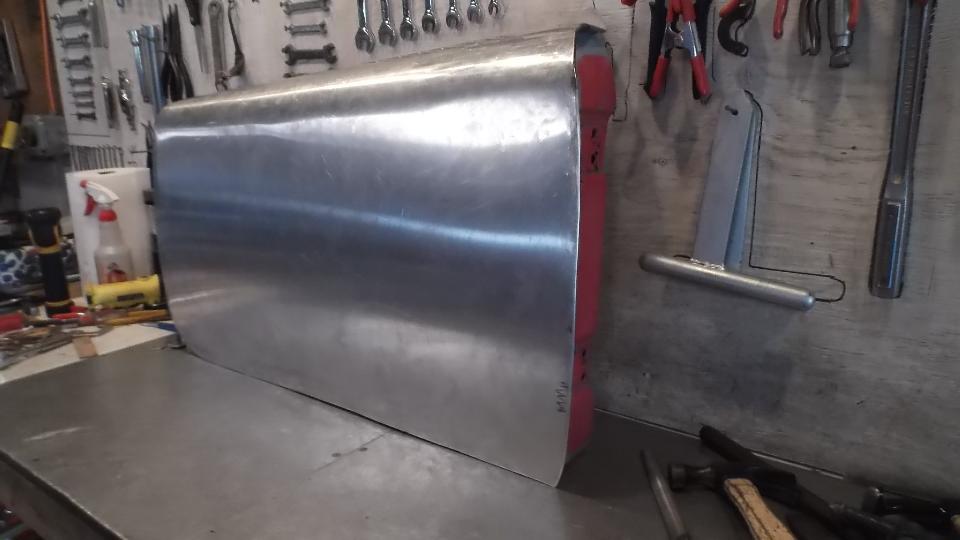
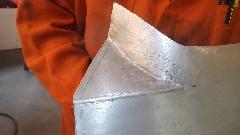
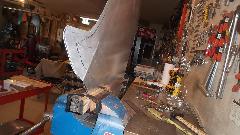
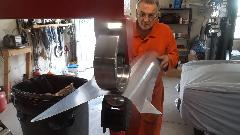
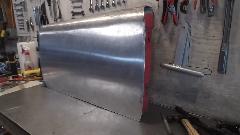
Then some artistic work rolling, folding, and hammer stretching a piece of aluminum as a practice piece with intension of making a new door skin.
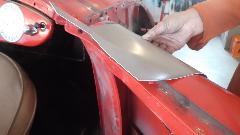
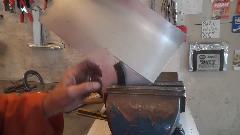
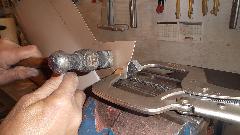
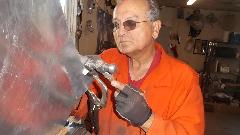
Notice use of the rounded cross pien hammer used to "stretch" the metal in one direction only by hammering it progressively thinner. Dave Cappa is also a bit of an artist using the English Wheel while I get to be the student.


Saturday, April 23, 2016
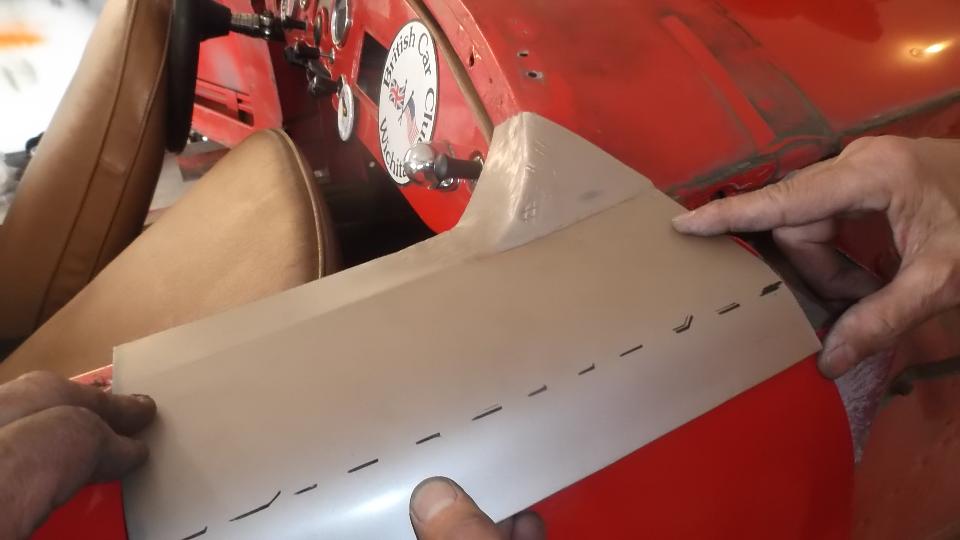
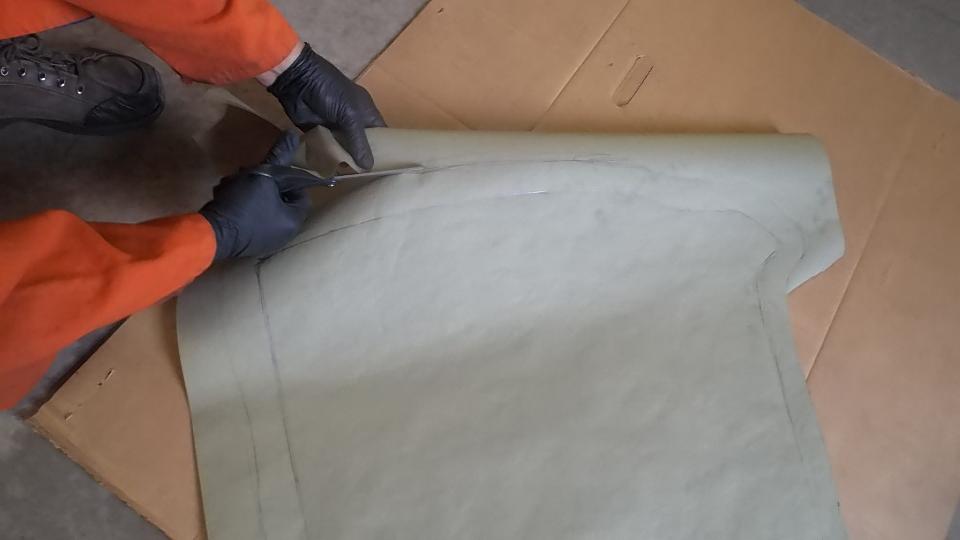
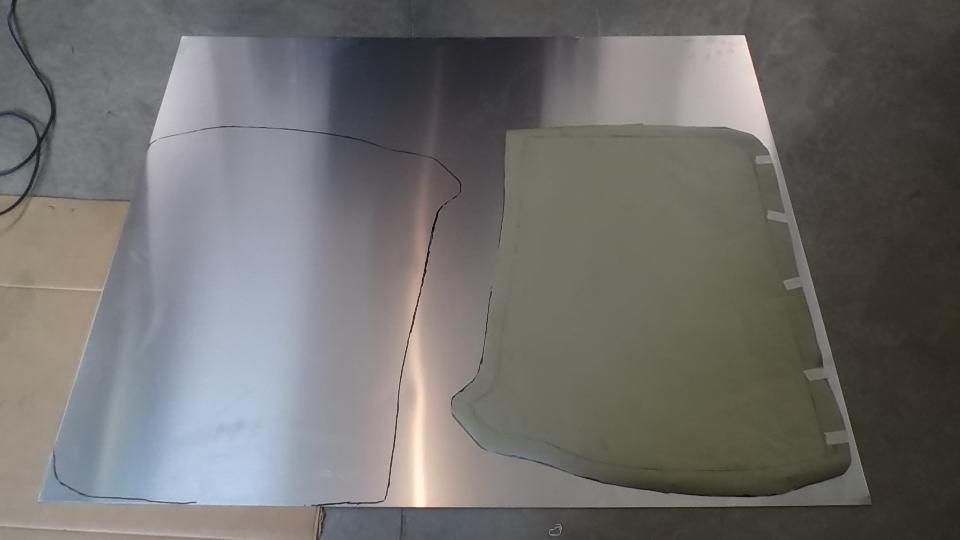
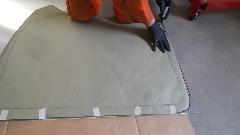
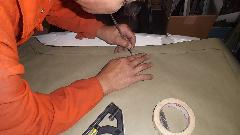
Enough playing around with the big boy toys and practicing. Now we know we can make a panel the proper shape by forming it from flat sheet, so it is time to do it for real. We place the door on a paper sheet and trace around the edges to make a paper template. Being somewhat difficult to trace around the protruding top corner, we leave a generous margin in this area. Then draw another perimeter line with 1-1/2-inch margin all around, and cut it out with scissors. And clean the door to be easier to work with (and so tape may stick to it).
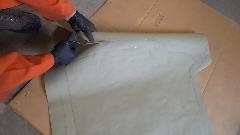

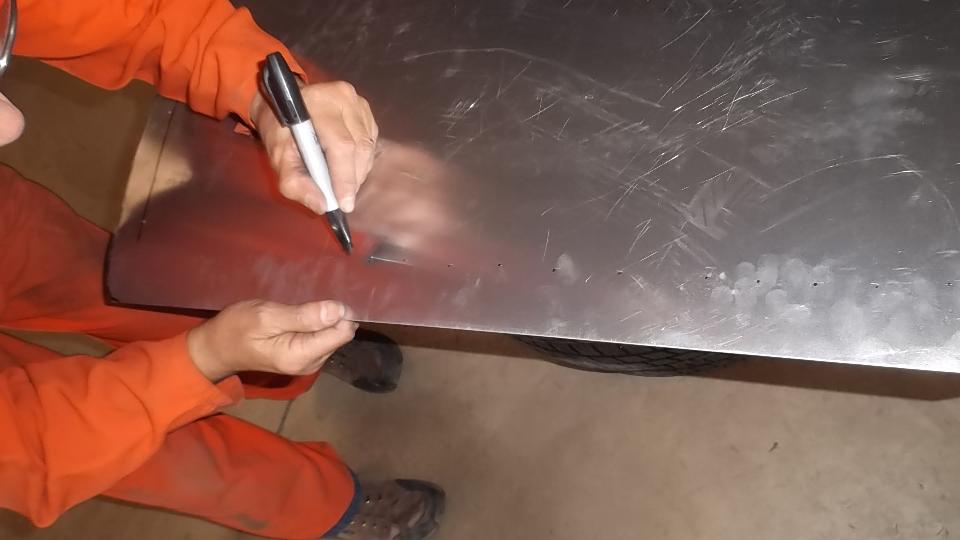
Tape the paper template at bottom of door, and wrap it securely around the outside surface. Then trace around the door again to have a more accurate perimeter line on the template. Align the paper on the new aluminum sheet, tape it down, and trace around the edge. That will be the cutting line for the rough blank before forming.
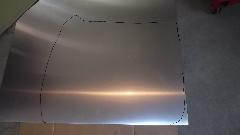
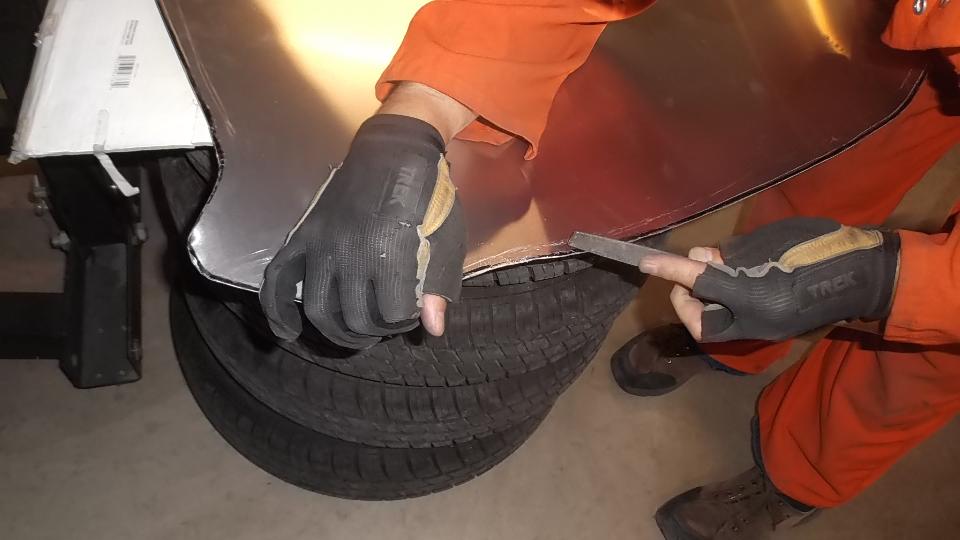
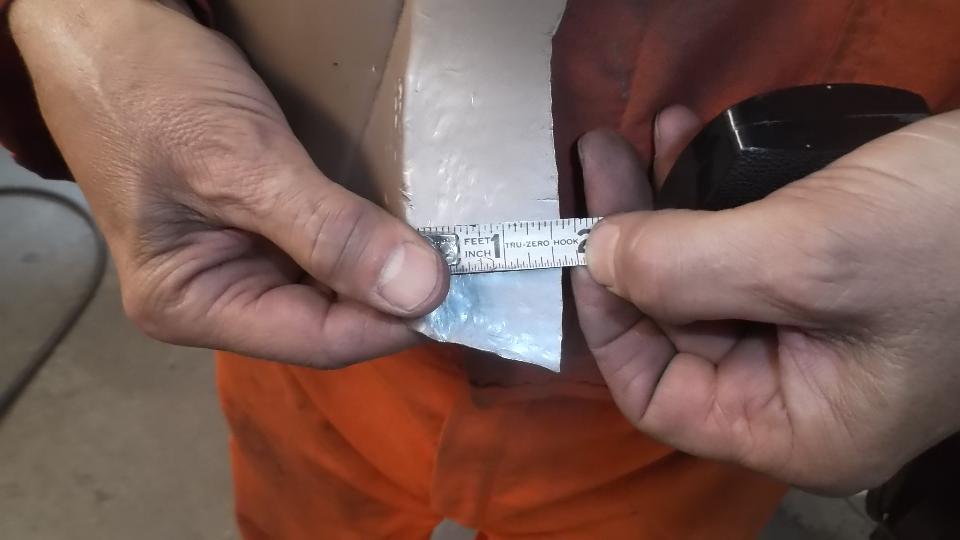
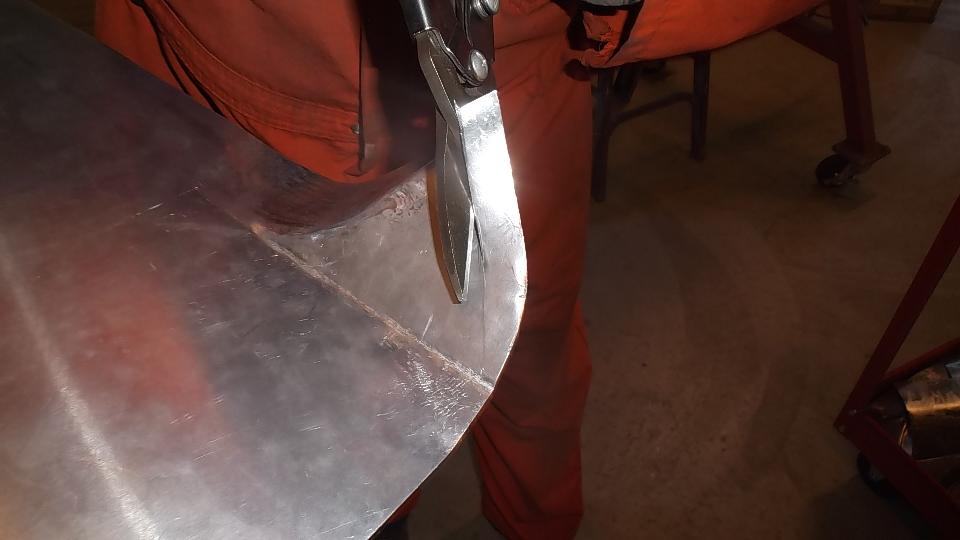
Sheet size required for one door skin is 36-inches long by 24-inches tall (with plenty of margin space). Cutting goes quickly with the power scissors. This tool cuts a quarter inch wide ribbon, leaving the surrounding sheet nearly flat. File the edges lightly to remove any burrs for safer handling of the cut sheet.
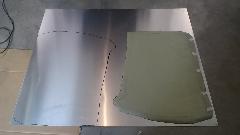
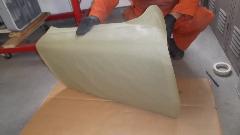
Measure everything carefully, and repeat as necessary during process, so we don't screw anything up to make scrap. We start at the top pointed corner and repeat all of the hammer forming processes as done previously in practice, learning to handle the much larger sheet as required.
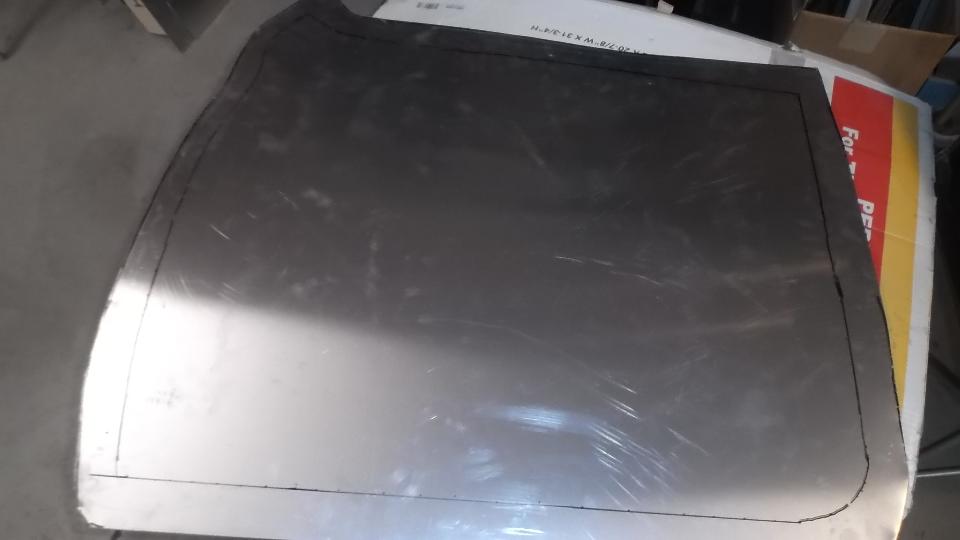
Reapply the paper template in alignment with the crease in the top corner. Scribe through the paper marking the door perimeter line on the metal. Then remove the paper and connect the marks to draw the door profile on the alloy sheet stock. This is mostly for reference at this point, not necessarily the final bend line for flanges.

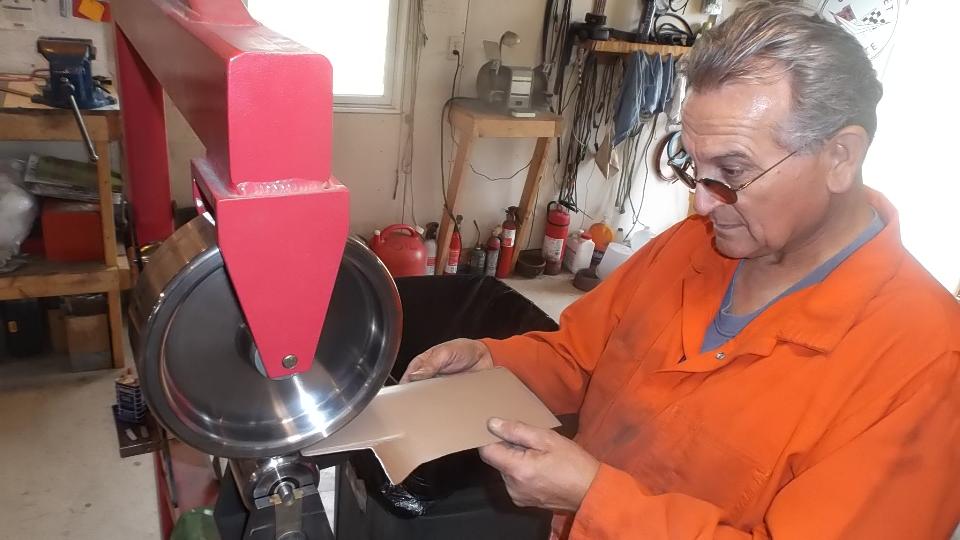
During the forming process the sheet is brought to the car many times for fitting reference. When it is close to the final shape, the edges around the top corner formation can be trimmed closer to the finished size.
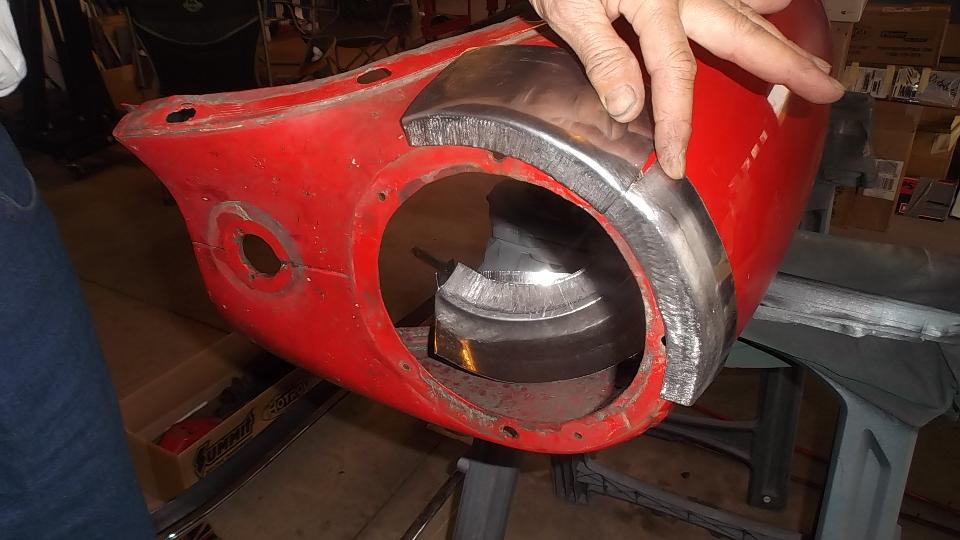
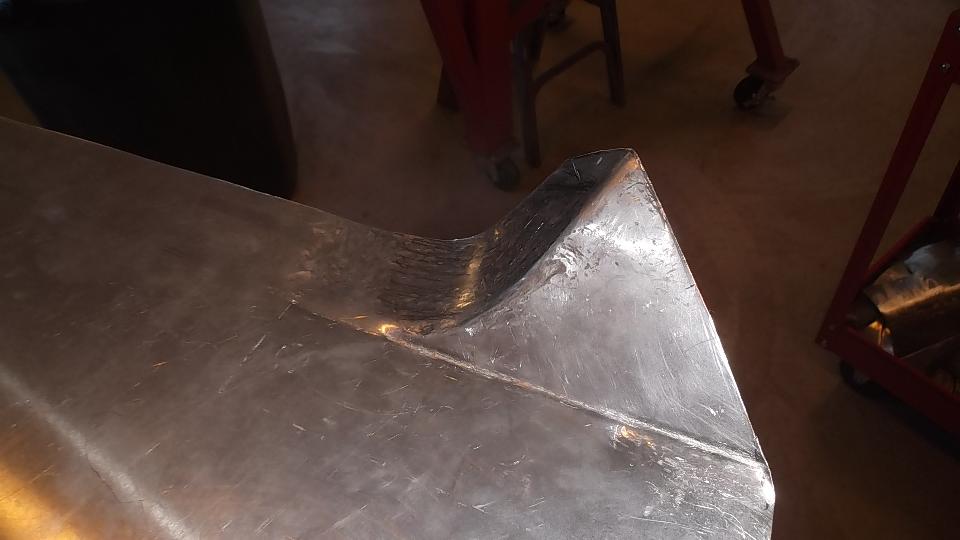
We have a pair of curved metal brackets that are regularly clamped in place to guide forming of the radius at the top corner. Most of the forming is done with the rounded cross peen hammer and dolly.

When the sheet metal is hammered against the dolly, the metal is made thinner, which forces it to elongate (stretch). This process is used to turn the flange in, and keep on stretching it until the valley is formed at an angle to the outside surface. The English Wheel is occasionally used to flatten out the hammer marks and help with the stretching process. When the profile is close to the final shape, more metal can be trimmed to leave just enough flange where it will later be folded over and wrapped around the edge of the steel door skeleton.
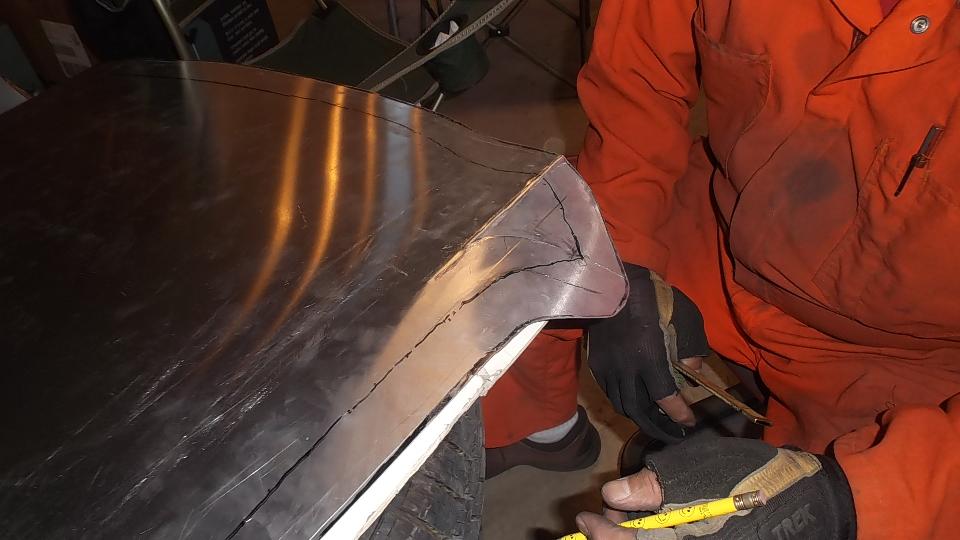
Getting to the final shape, the inside radius of the curve was hammered gently down against the door until there was no gap underneath. In other words, we were using the original door shell as a forming buck. Expect some minor adjustment to be needed later to compensate for the metal thickness after the original door skin is removed. Then we drilled holes in the new alloy sheet for clearance for the trim roll securing hardware, and planted the trim piece on the new partially formed door skin for reference. I dunno about you, but I'm pretty impressed.
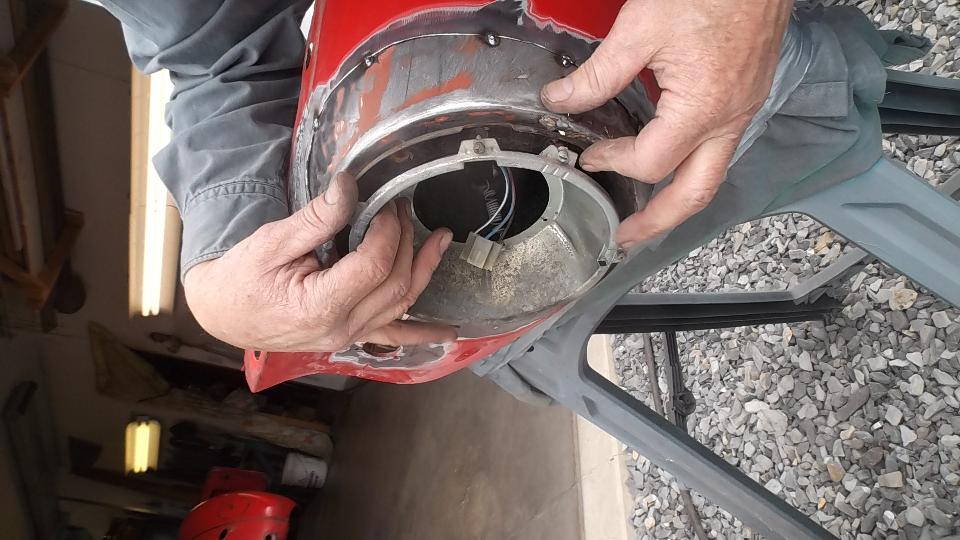
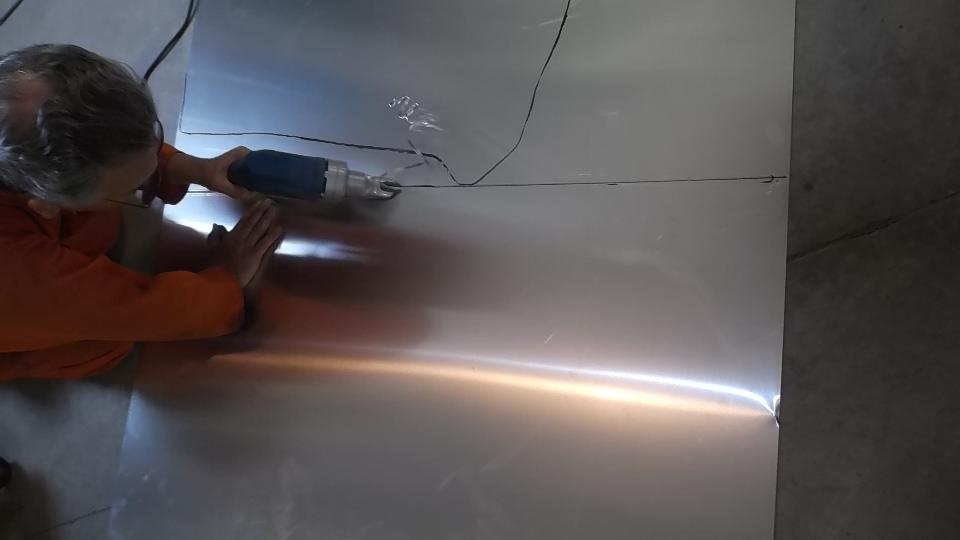
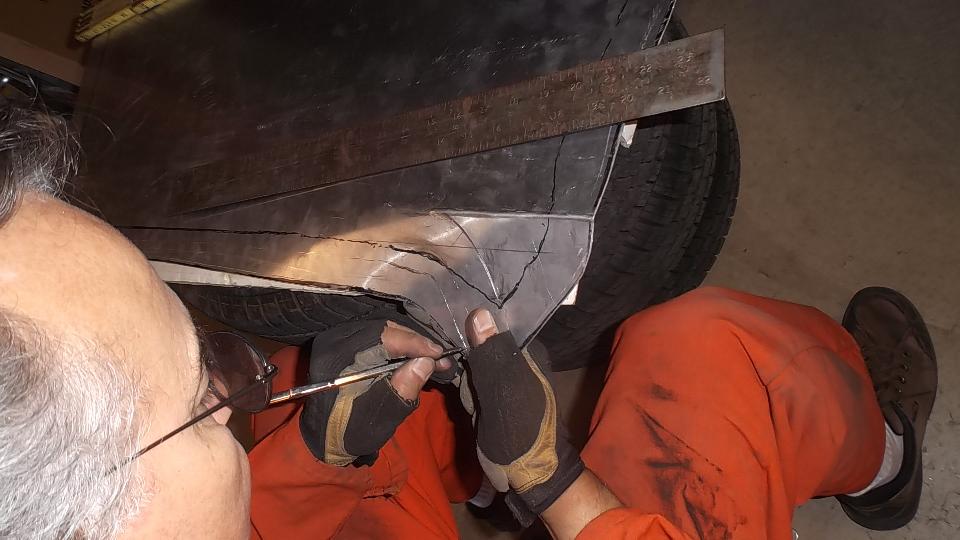
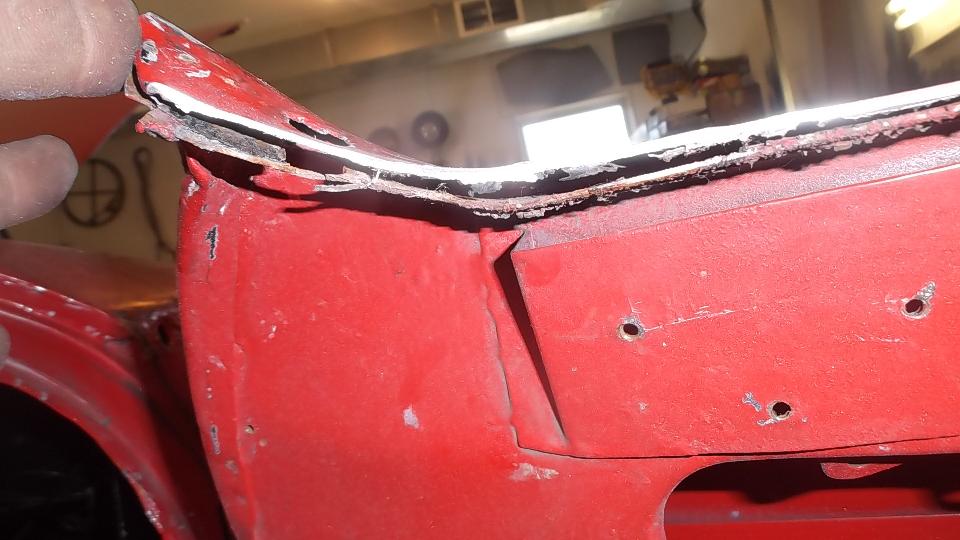
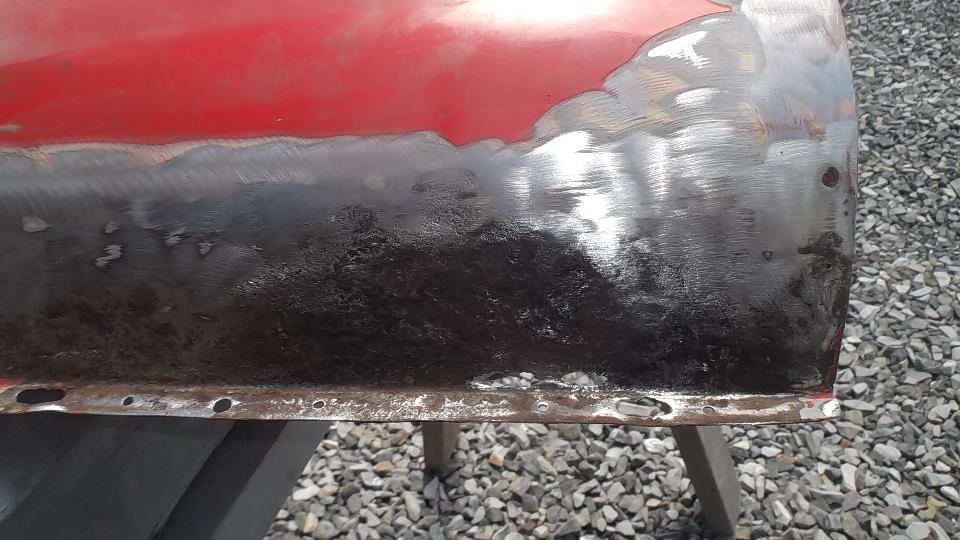
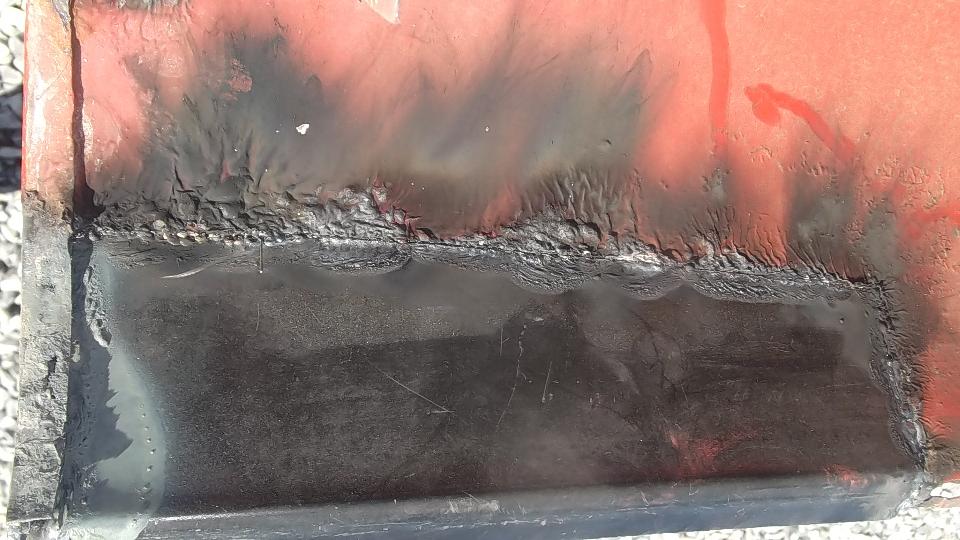
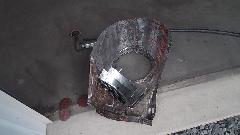
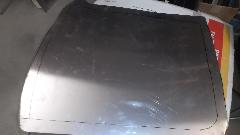
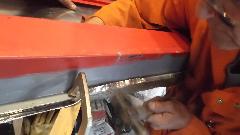
Then it was time to remove the original door skin. Simple process, just grid through the folded edge of the door skin until you see a hair line crack, and the folded flange can be pulled off. Some people may successfully un-bend the flanges by repeatedly annealing the metal as it is being pulled up so it wouldn't break. This one already had some broken flanges, and we were not trying to save the original door skin, so it was much quicker to remove the flanges.
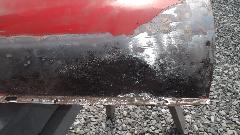
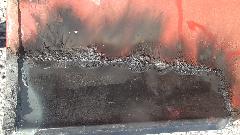
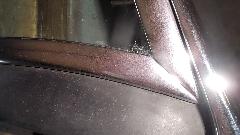
Interesting to see the original door skin lift off without a ripple in it. Also a bit off shock to see the amount of corrosion in the joint between the dissimilar metals.
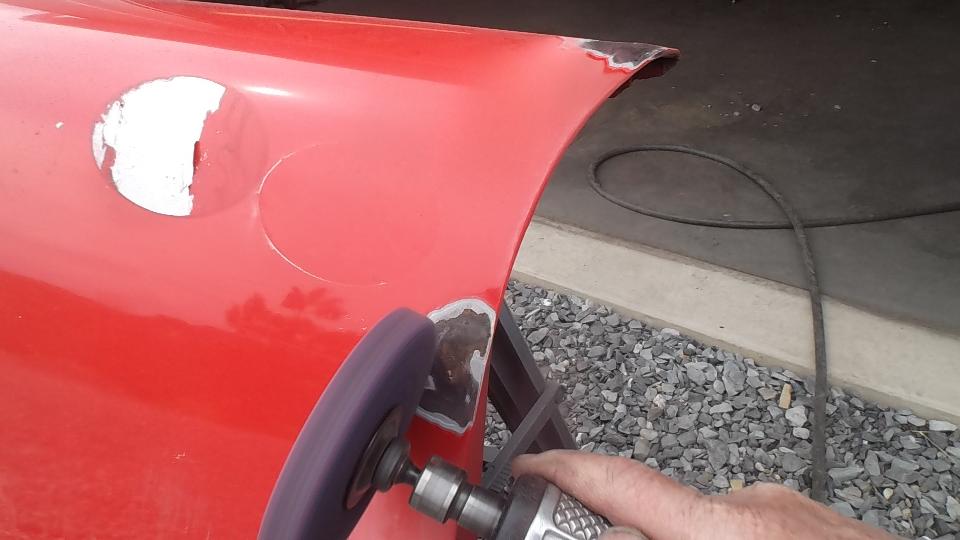
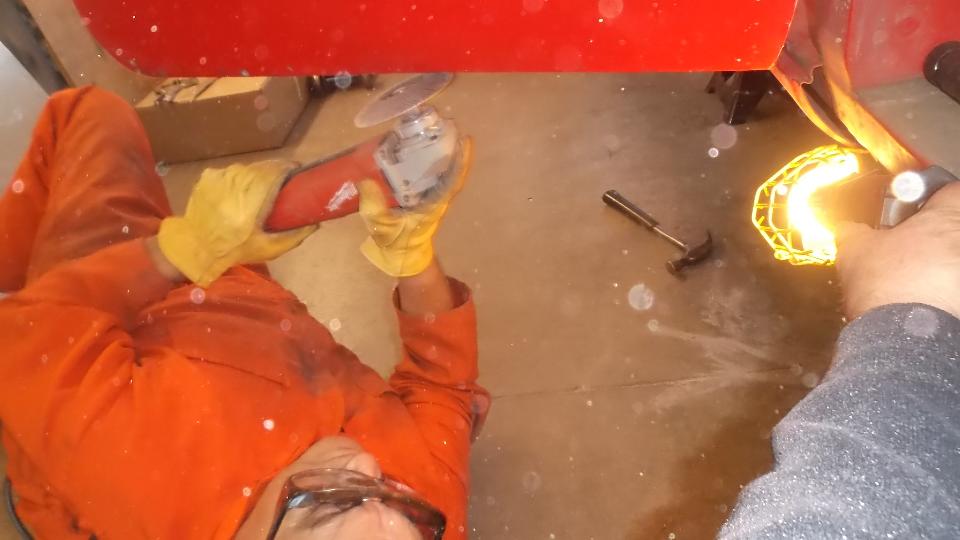
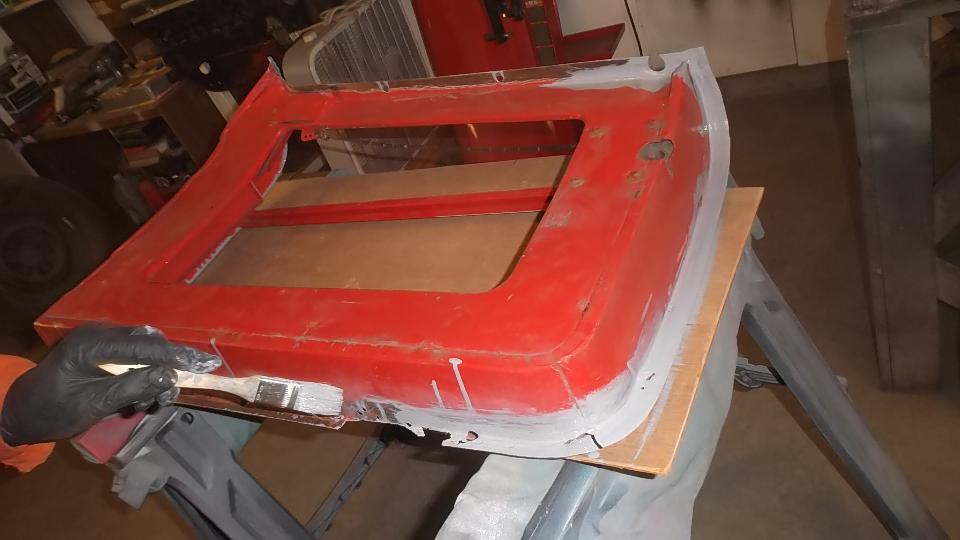
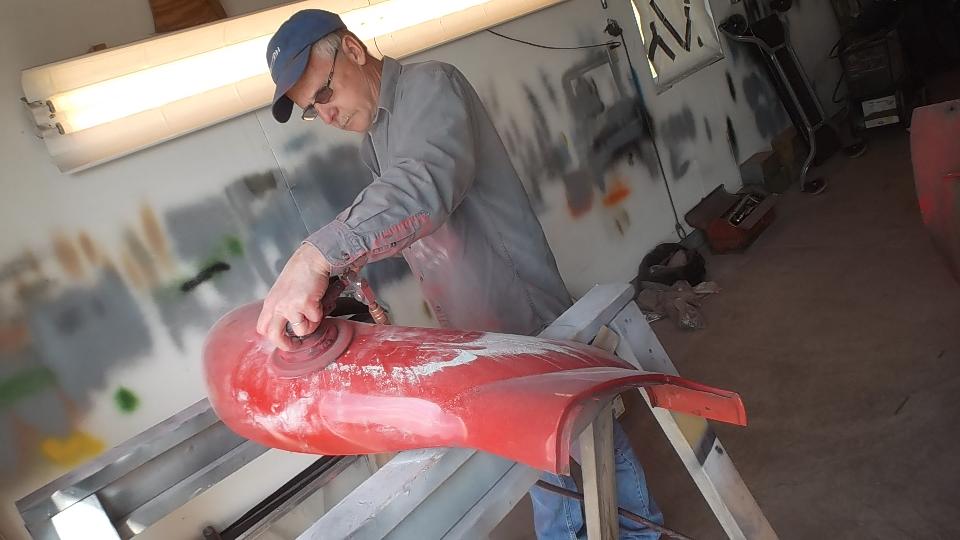
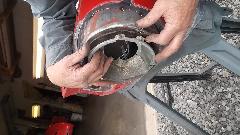
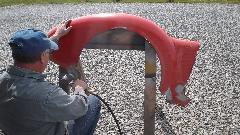
 A flat sanding flap wheel on a 4-inch angle grinder makes short work of cleaning up the corrosion. A bit of metal replacement will be required along the bottom edge before reassembly. For now it gets a quick coat of epoxy etching primer before the day is done.
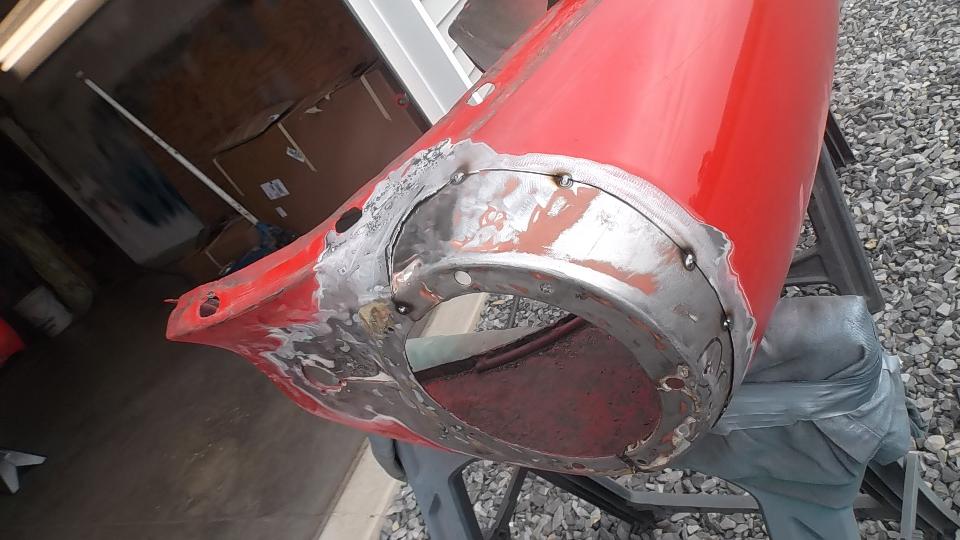
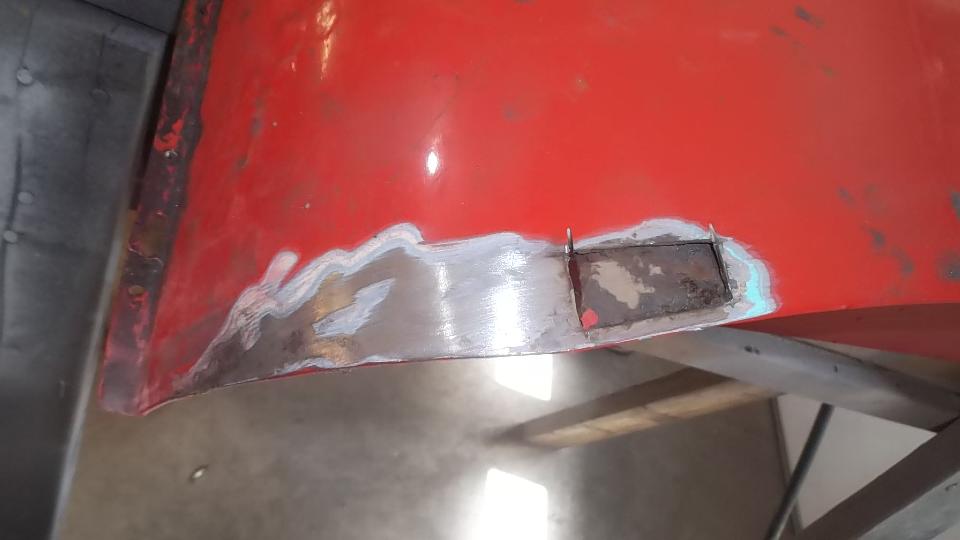
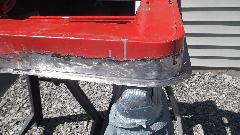
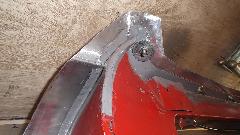
Meanwhile on the other side of the shop Dick Bussler has been busy repairing rust in the left front fender. A few small spots had a new bit of metal tacked into the outer skin. One area at the bottom with a bit too much "Swiss cheese" received a larger replacement patch.

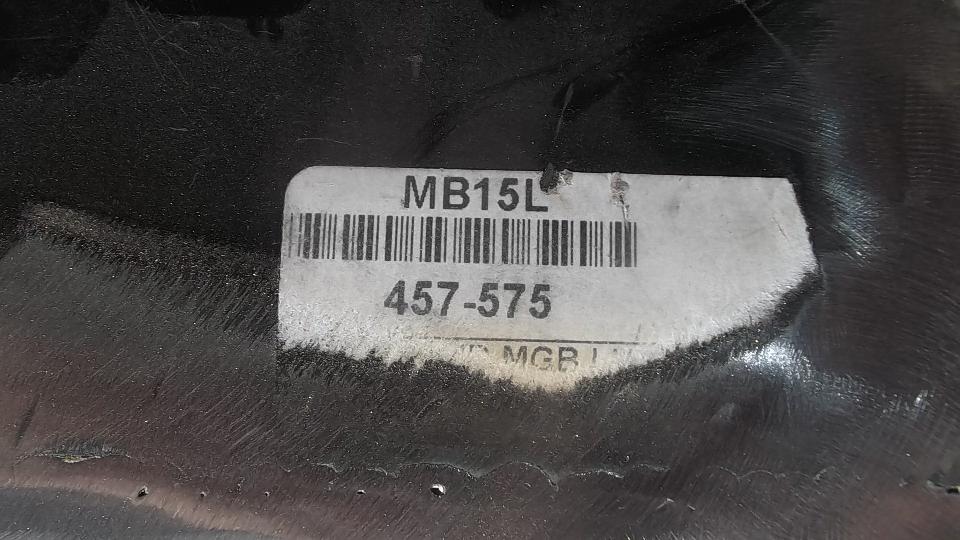
Interesting to see the replacement patch was a piece cut from an MGB quarter panel repair section. I swear this MGA is gradually morphing into an MGB. There was a bent flange on the new part that was too narrow, so it was flattened and re-bent with larger flange before trimming and welding into place. At day's end this fender was getting a bit of smoothing over with Duraglas at the weld zones.
Sunday, April 24, 2016
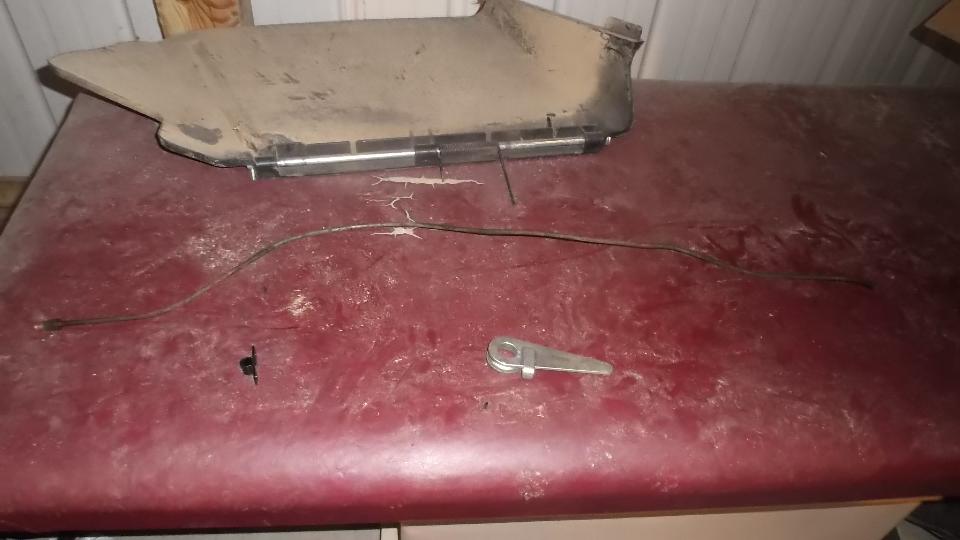
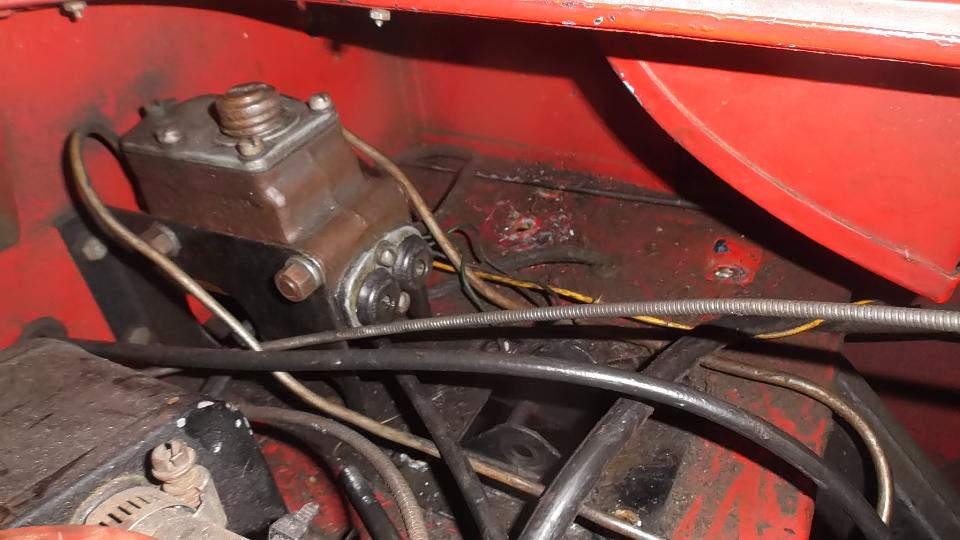
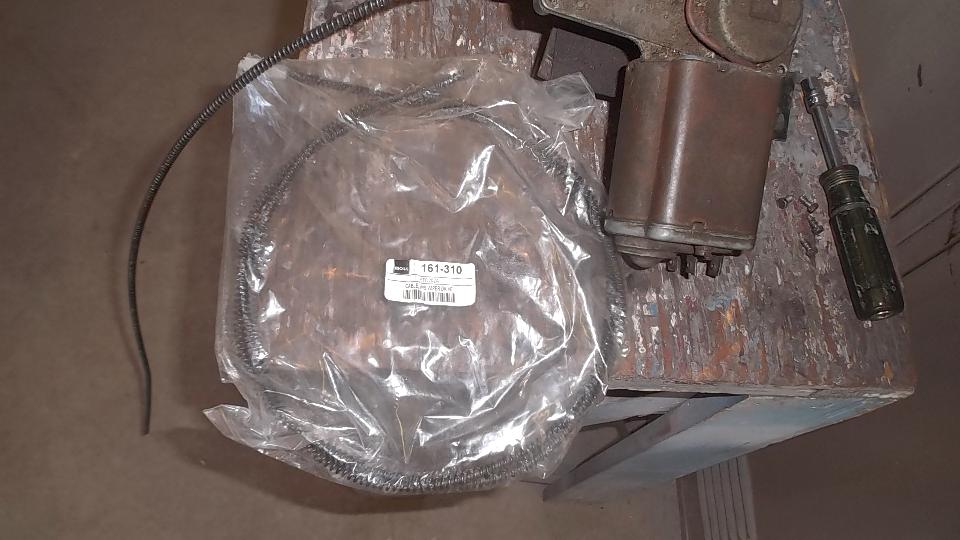
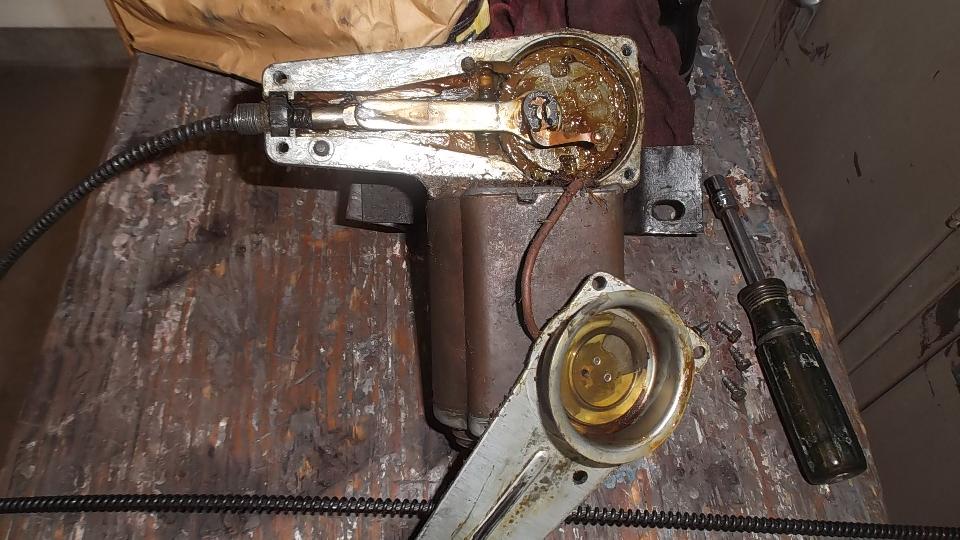
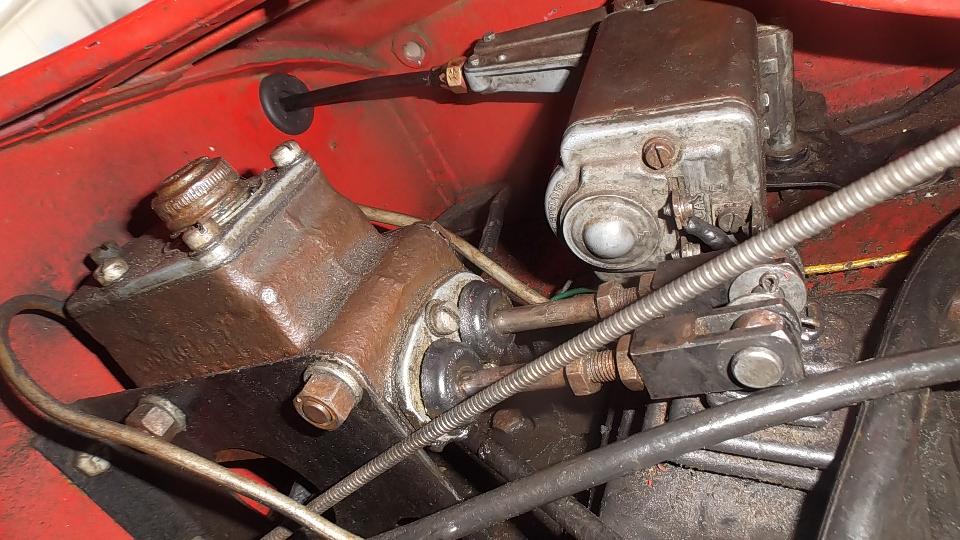
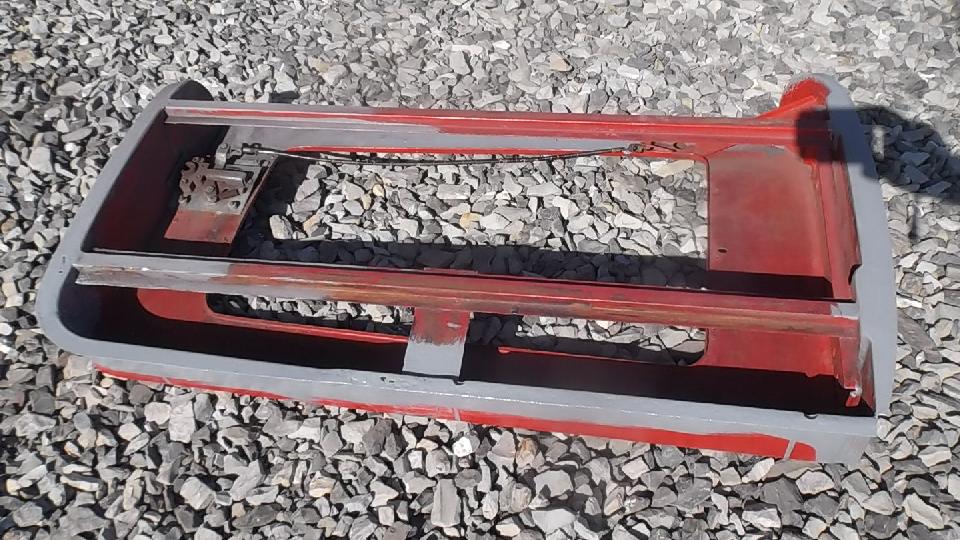
 A bit of mechanical work to be done today, since the car is somewhat disassembled. The screenwiper wheel boxes have to be removed to paint the body. I have new wheel boxes, intended to stop water leak during heavy rain. I also have a new drive cable, intended to reduce backlash in the wiper drive (due to loose cable outer wire winding I suppose). Replacing wheel boxes is tough enough with the dash and wiring in place. Replacing the drive cable also requires removal of the wiper motor. Note that on left hand drive cars you have to remove master cylinder pushrods, pedal excluder and pedals to clear enough space to pull out the wiper motor.
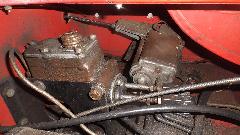

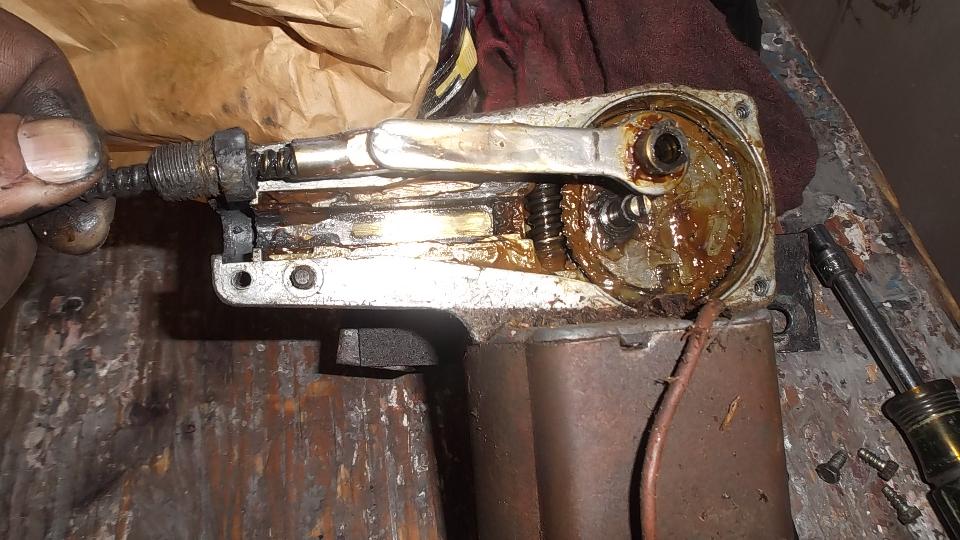
To remove the drive cable, first remove the gearbox cover, then a snap ring, parking commutator copper brush contact, connecting rod, and then the cable security fitting.

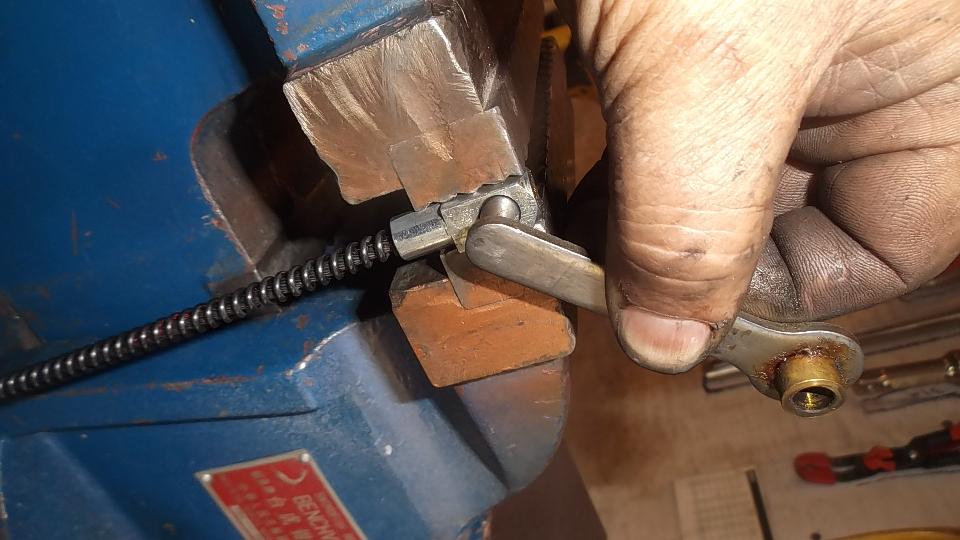
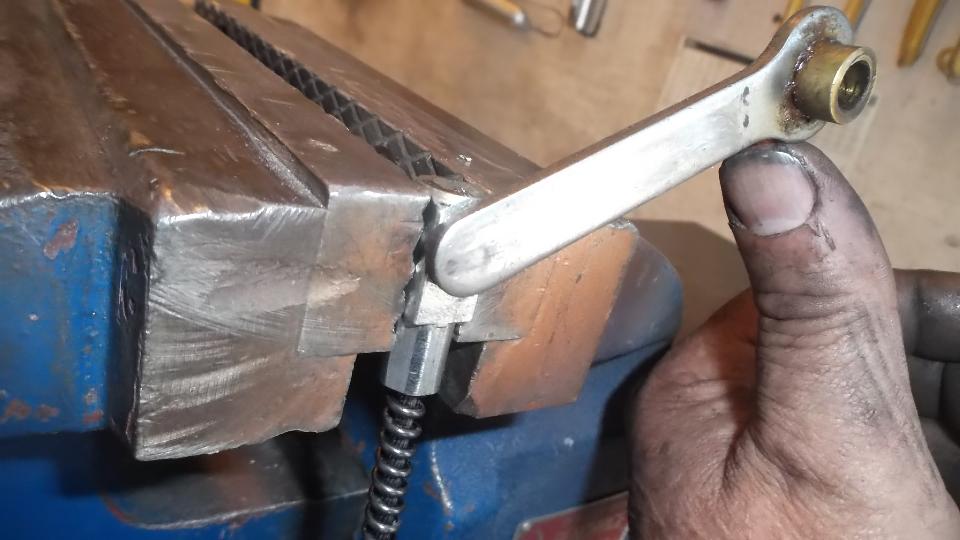
For the driven end fitting on the cable, the new one had too small hole so the connecting rod could not be assembled. Interference was only a couple thousandths of an inch, and a 9/32-inch drill made short work of that. With a little more knuckle busting the wiper motor was soon reassembled and reinstalled, and the pedal assembly and pushrods were back in place. The new wheel boxes will wait until after the body repaint.

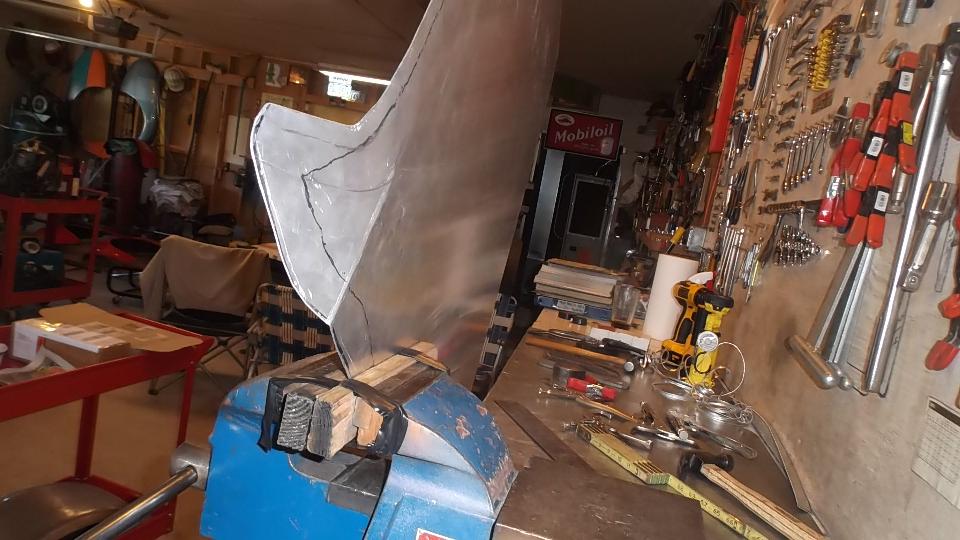
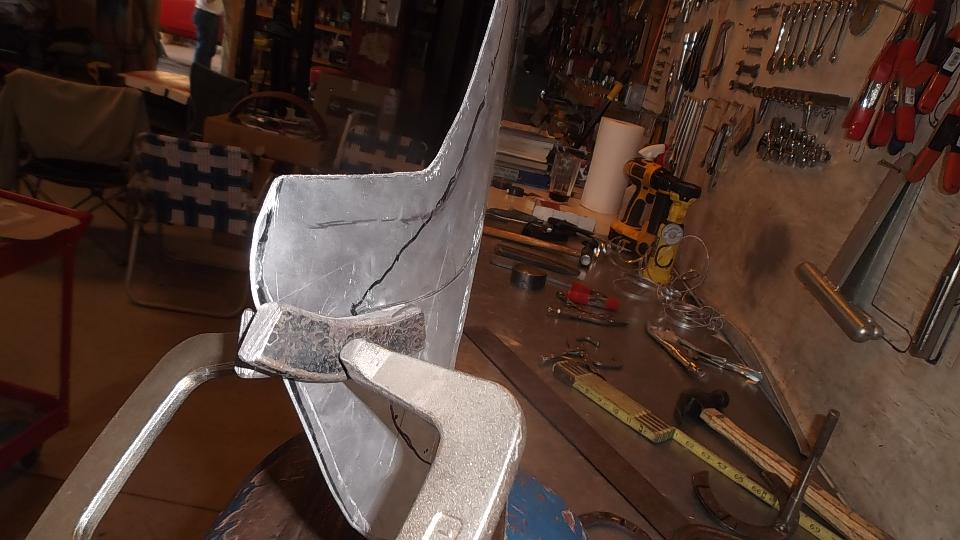
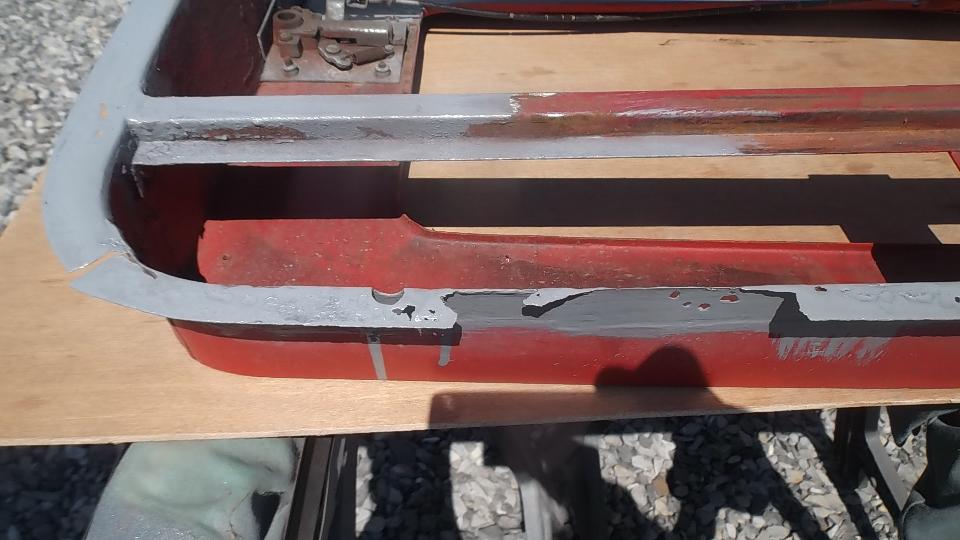
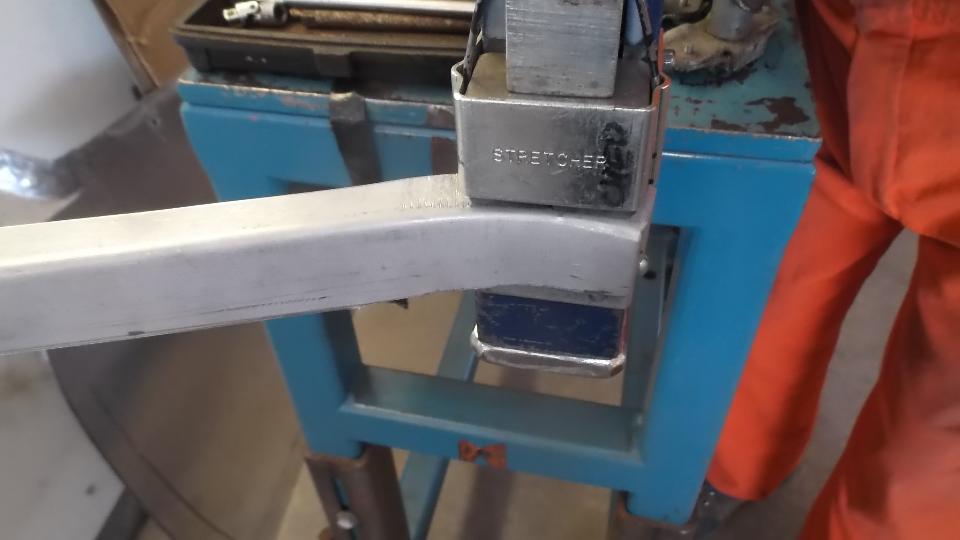
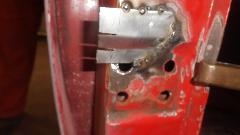
Meanwhile, Dave Cappa was working on the right side door shell, a bit of metal replacement. Use shear and press brake to form an angle piece from 18-gauge steel. Use the shrinker/stretcher to stretch one leg of the piece to make a curved end, and shortly there is a repair piece to fit.
Trim the door shell to accept the new piece, then a bit of MIG welding and some grinding, and the door shell is ready for some epoxy primer.
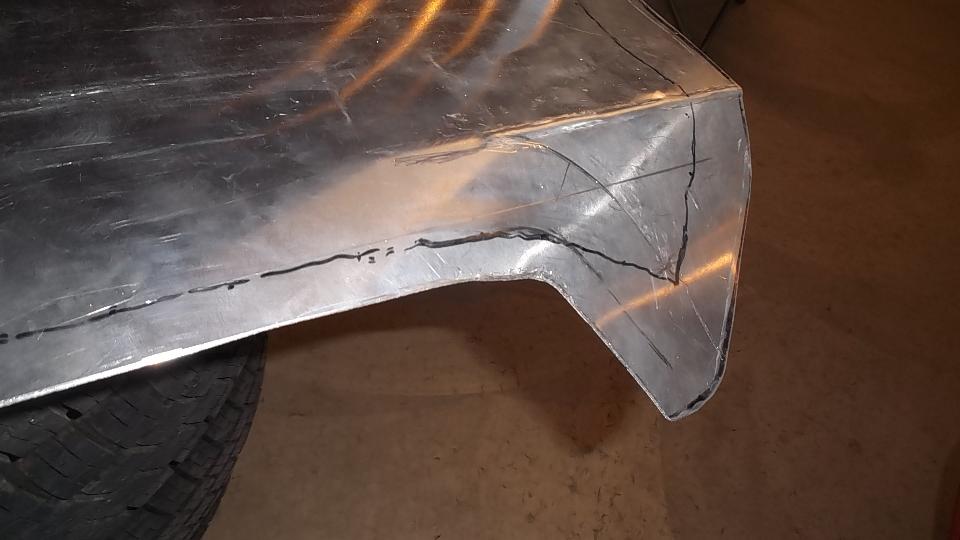
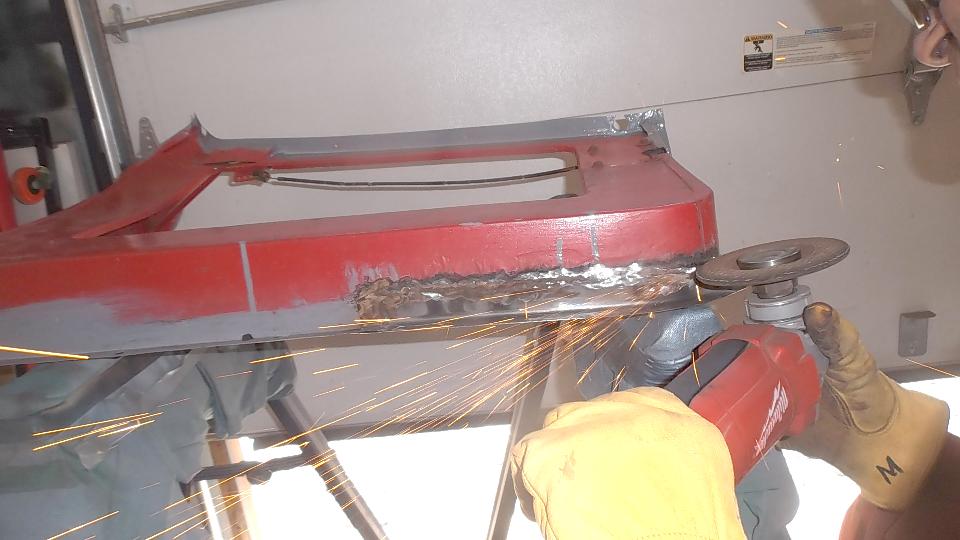
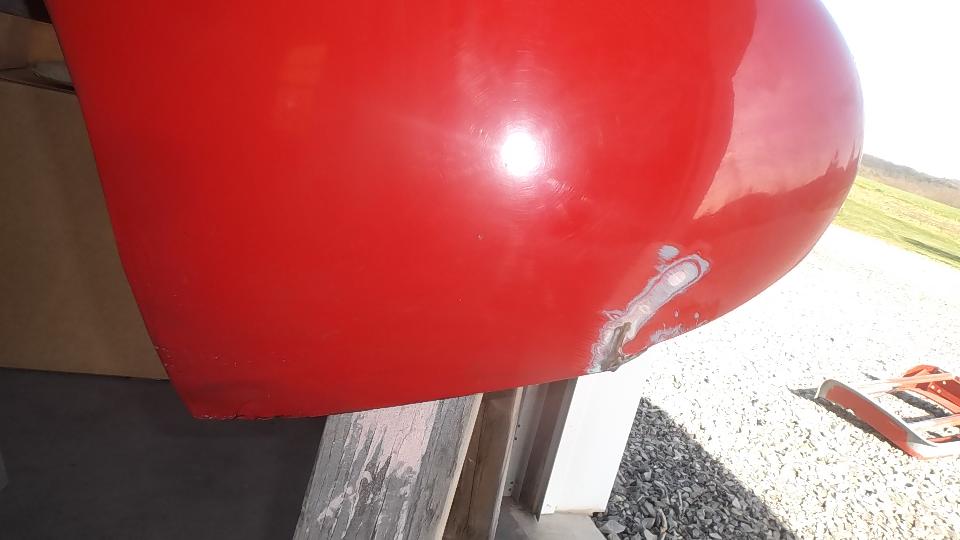
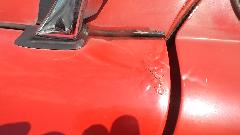
We knew the LR fender had a small bite on the bottom from running over a parking curb. This required a bit of hammer and dolly work, and a little weld to delete a crack. While Dave was doing this he found another problem hiding under a bit of filler, where the bracket to attach to the rear splash guard had a less than desirable weld needing some touch up.

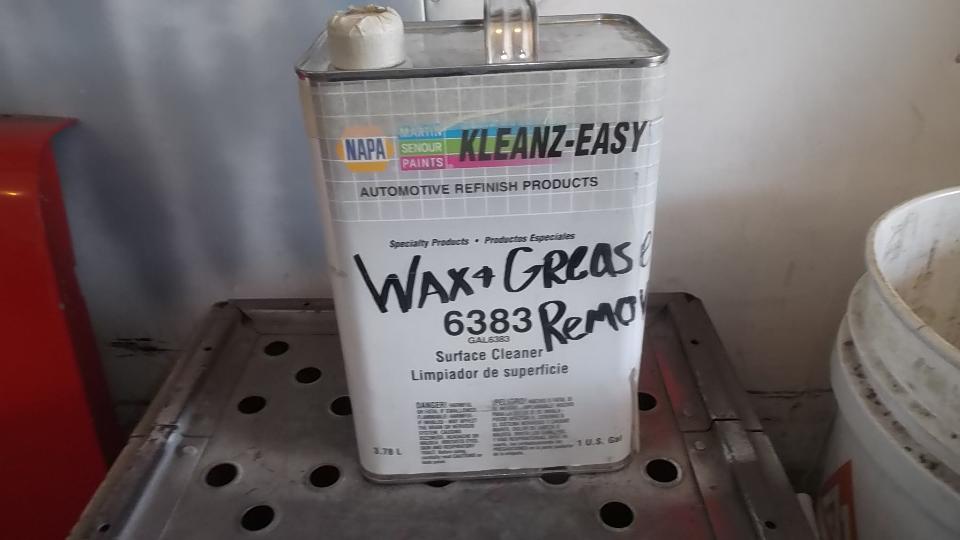
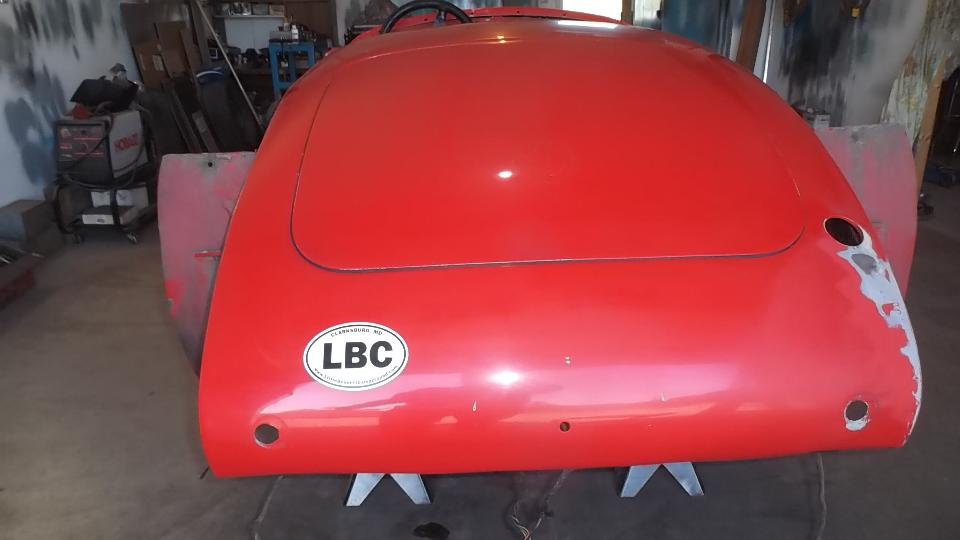
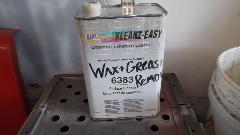
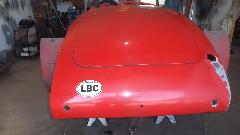
By this time I was busy cleaning dirt, grease and wax off of the main body shell, getting ready for sanding. Yes, the LBC sticker has to go. Lots more cleaner and scrubbing on the door posts and rocker panels.
Monday, April 25, 2016
To get the day started, one of the Busler brothers was working on the rear fenders. That was the last I saw of him today, as I got preoccupied with something else.
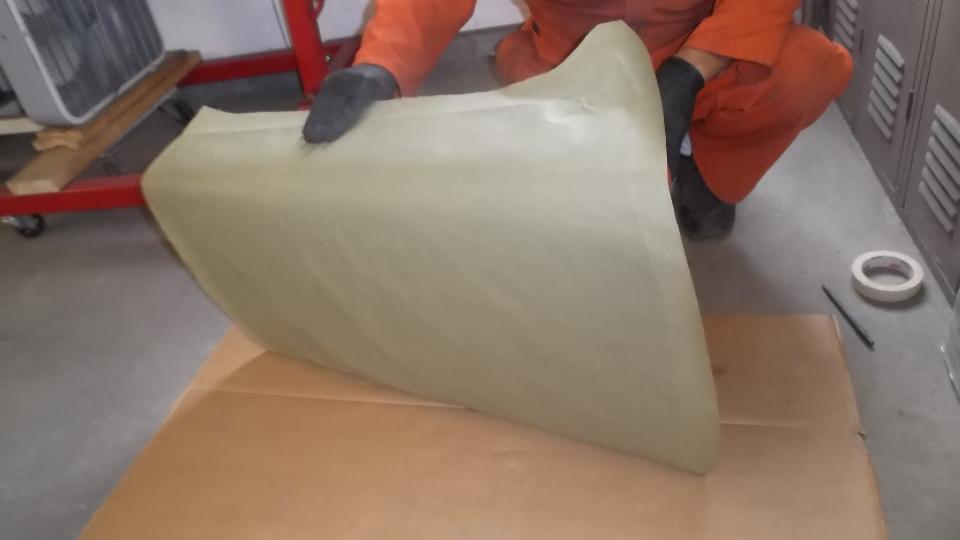
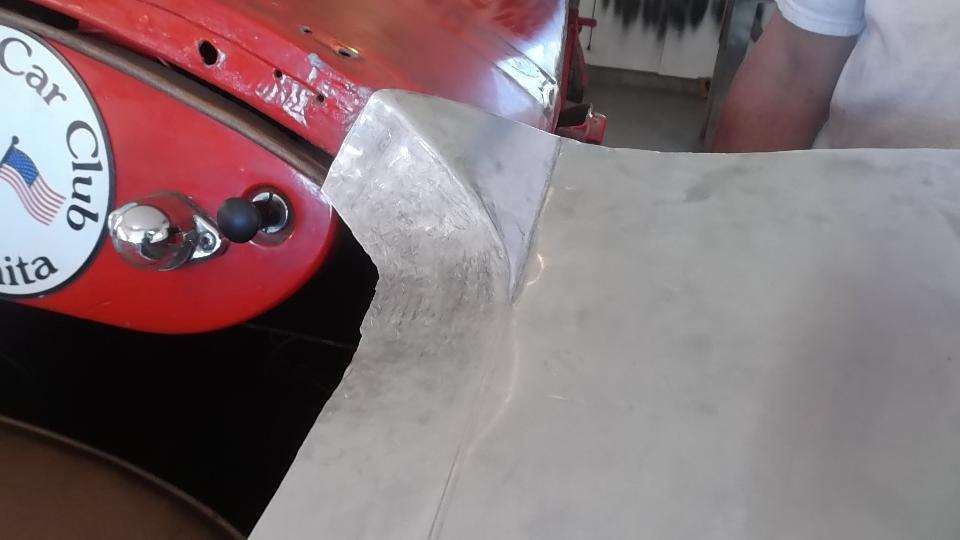
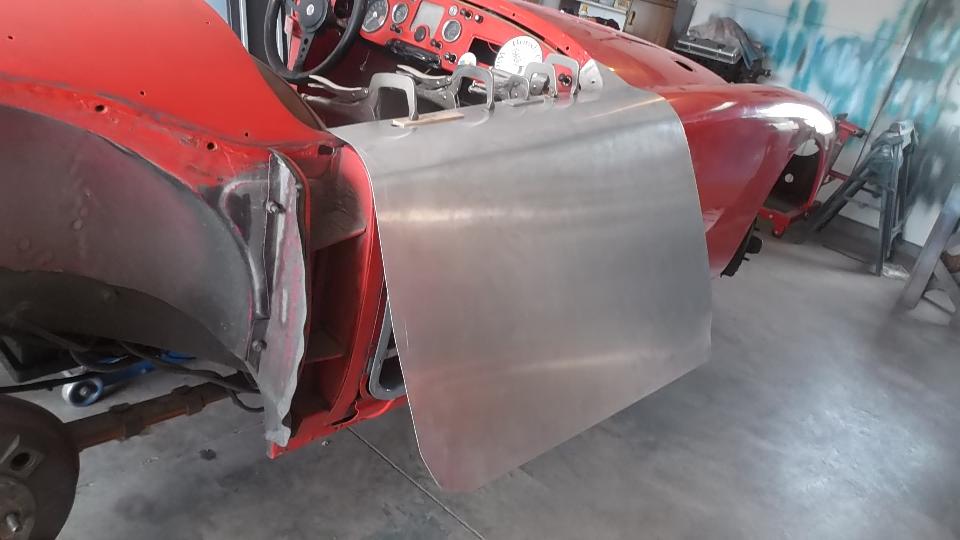
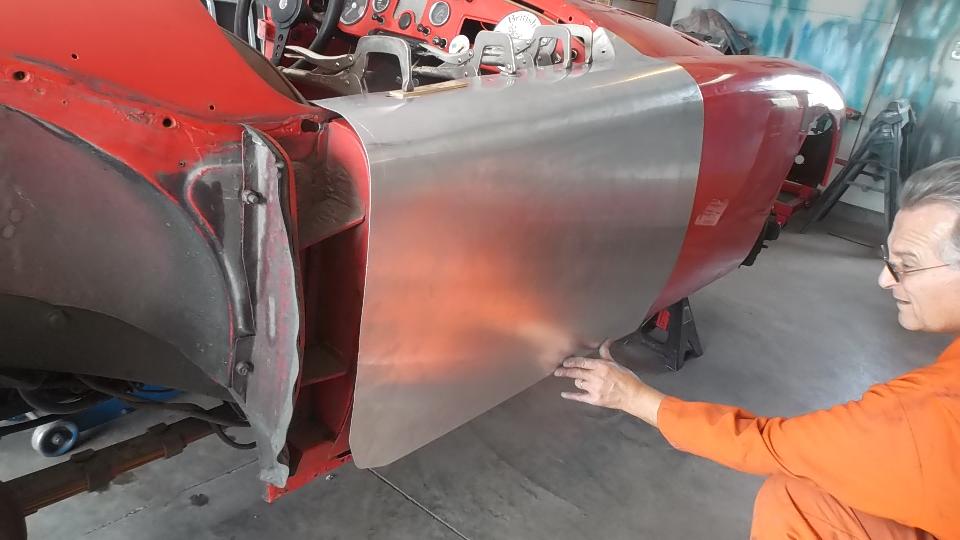
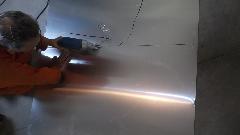
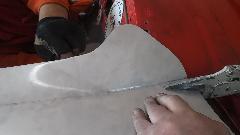
Having spent most of Saturday making a door skin, today we get to finish forming it and attach it to the door. We began by curling it around a plastic pipe to roughly form the top shoulder curve. Notice the new skin has extra material around the edges, as we weren't sure of the absolute final position yet. Adjusting the door shell outward at the hinges, we positioned the shell flush with the front fender. Then we could clamp the skin on top of the door an fit it over the shoulder and down the side. There were several trips to the car to check fit as the forming progressed (slowly). The English Wheel was used to create a slight crown in the top shoulder near the front, continuing the mild curve of the front fender.
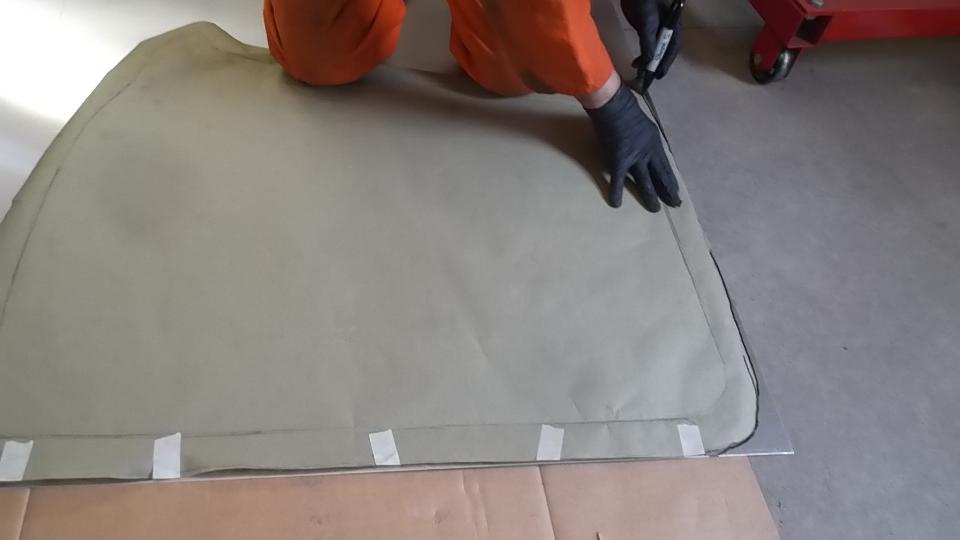
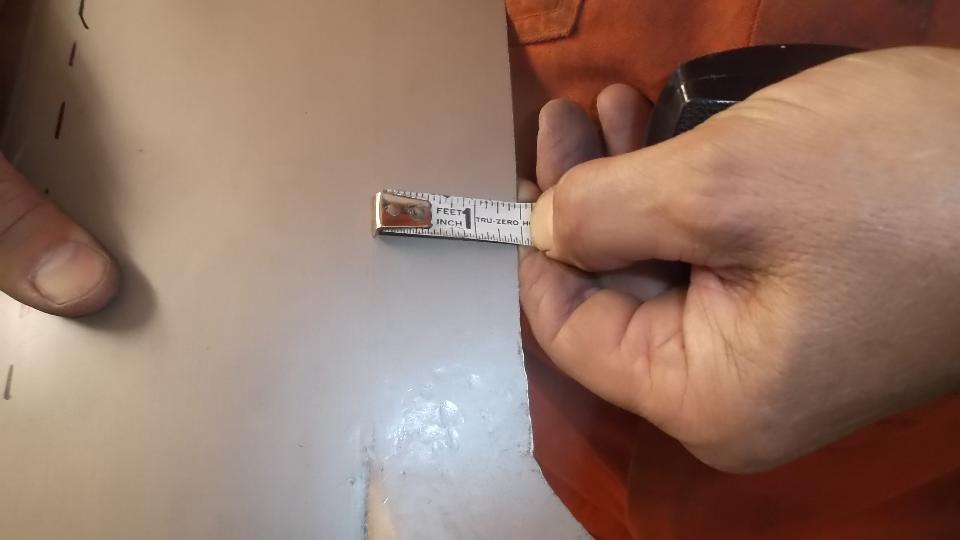
Once the top edge and shoulder fit to our satisfaction and the side was fitting quite well, the first guesstimate position line was washed off. Bolts with large flat washers were installed on the top edge to secure the skin so it could no longer move. Then a line was scribed on inside of the skin around the shell where the fold-over bend needed to be formed. Dividers were used to measure and scribe an offset line for width of the flange that would be rolled over. Excess material was then trimmed from the edge of the skin to leave the final size before rolling the flange.

Here are a few shots of position of the trimmed margin.

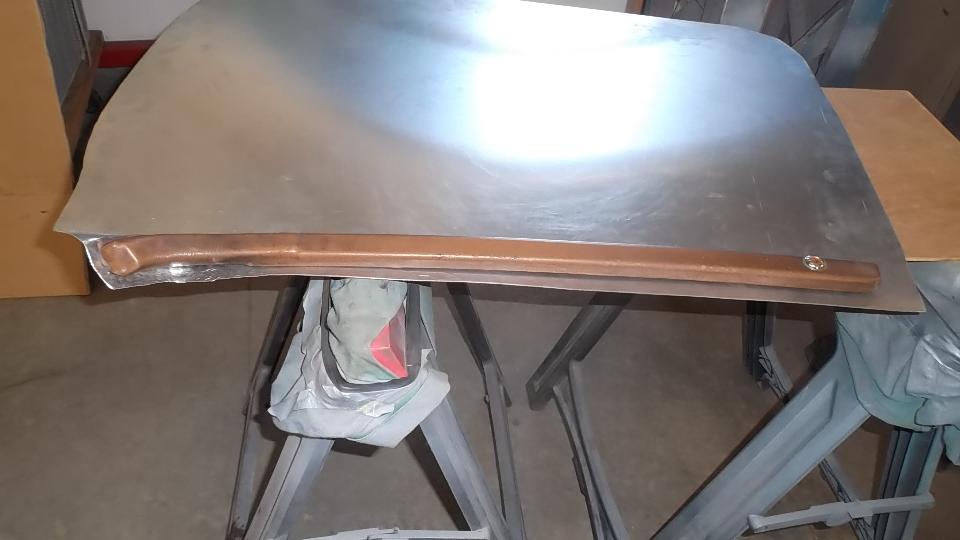
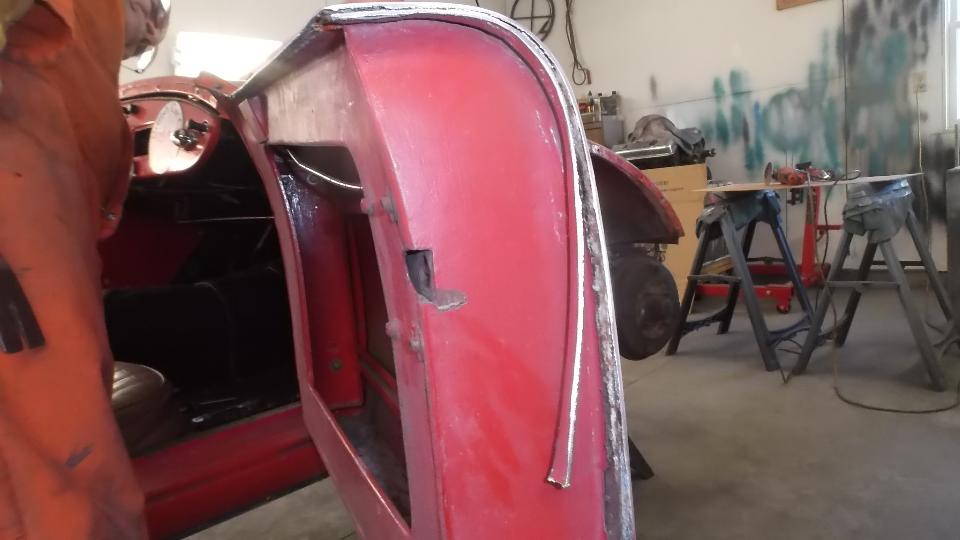
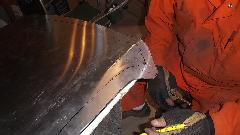
 Finally came the rather laborious process of tipping up the flange by hammer forming, rolling it over and banging it down flat for a tight crimp on the edges of the door shell. In the end we have a (nearly) new door.
Dave has been making steel panels for some time, but this is the first time he has worked aluminum sheet. Conclusion is not much difference, except that it is easier to put an unwanted kink or crease and scratches in the softer alloy. This was a step up the learning curve where I got to touch the English Wheel and get a better idea how it works and what it can do. I am amazed at how easy it is to push the sheet through the wheels by hand, and how much forming it can do in short order.
 Overall we have spent roughly a day practicing on a couple of small sheets, then a day forming the full size door skin, and another day final forming and attaching it to the door shell. If a panel was available commercially (which it is), one would be nuts to spend this much time making one from scratch. In this case it was the learning experience that was important. Also the fact that this panel fits, because we made it fit while creating it. With commercial panels perhaps one size does not fit all and may require some unknown amount of fettling to make it fit. The commercial copy of the door skin is $240, so you can do the time/benefit comparison, and if you do more panels perhaps you can save some money through sweat equity. Overall we have spent roughly a day practicing on a couple of small sheets, then a day forming the full size door skin, and another day final forming and attaching it to the door shell. If a panel was available commercially (which it is), one would be nuts to spend this much time making one from scratch. In this case it was the learning experience that was important. Also the fact that this panel fits, because we made it fit while creating it. With commercial panels perhaps one size does not fit all and may require some unknown amount of fettling to make it fit. The commercial copy of the door skin is $240, so you can do the time/benefit comparison, and if you do more panels perhaps you can save some money through sweat equity.
Tuesday, April 26, 2016
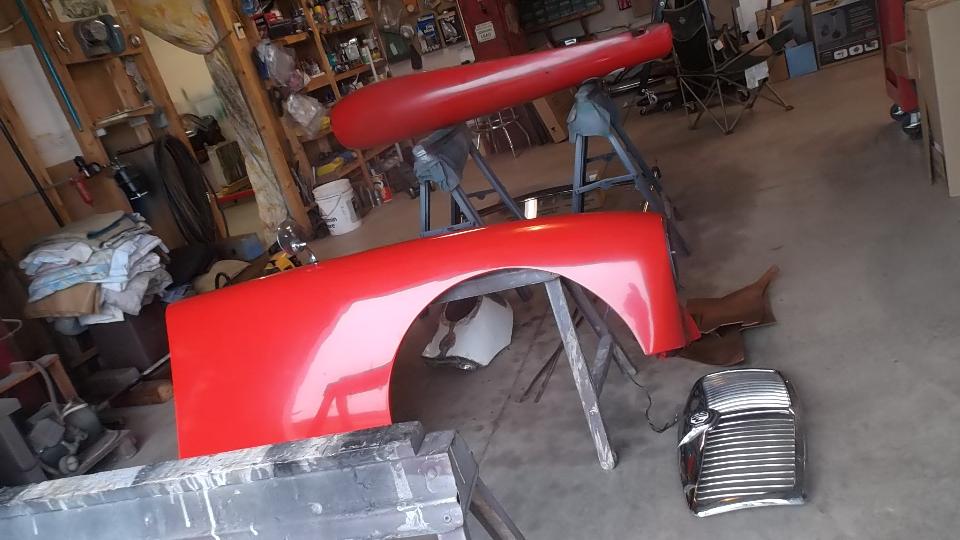
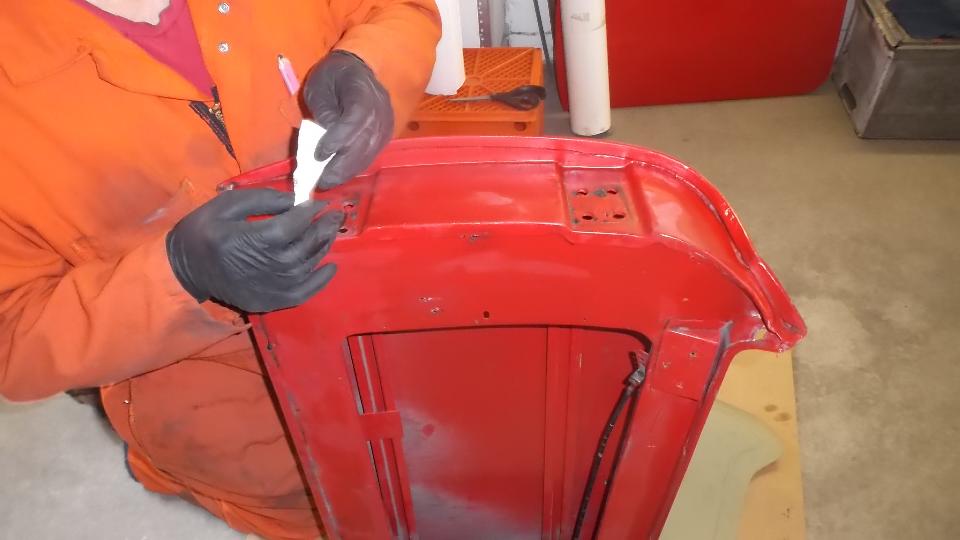
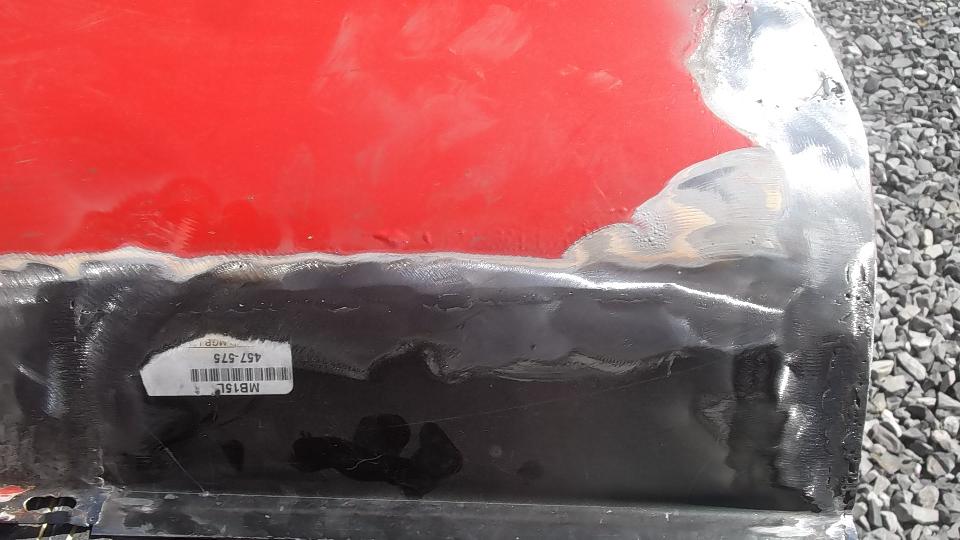
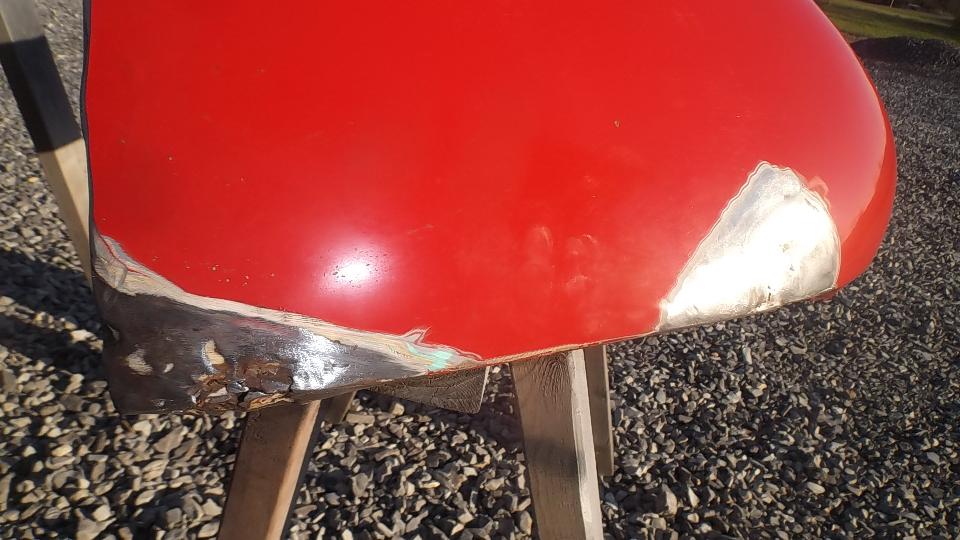
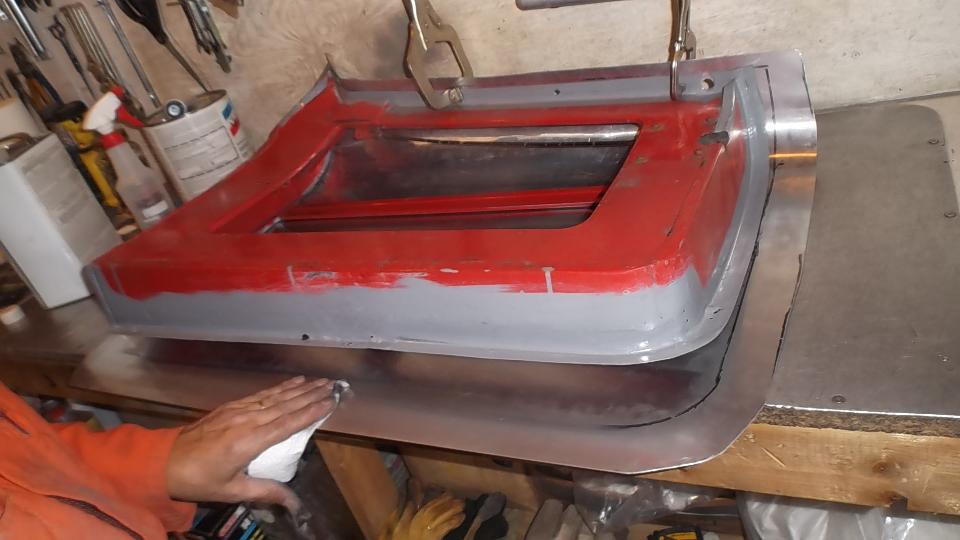
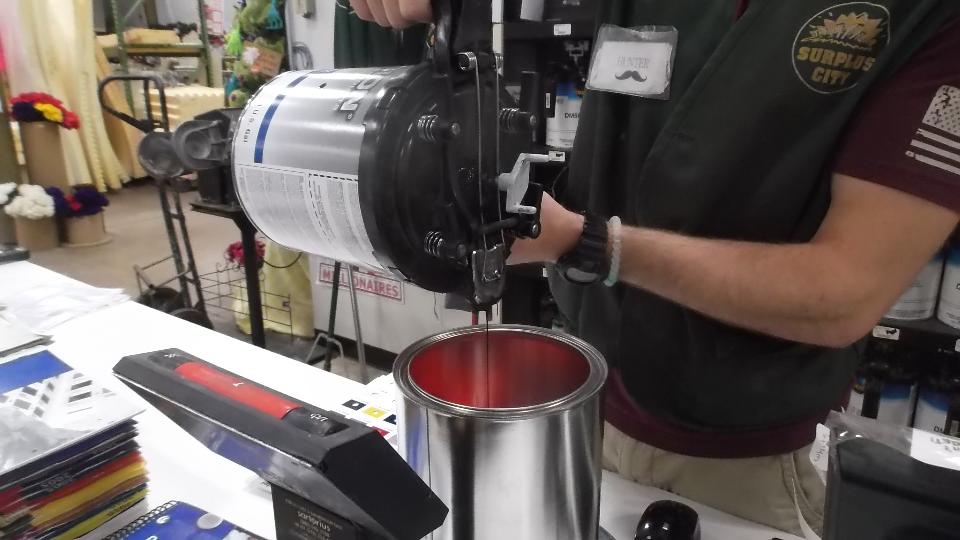
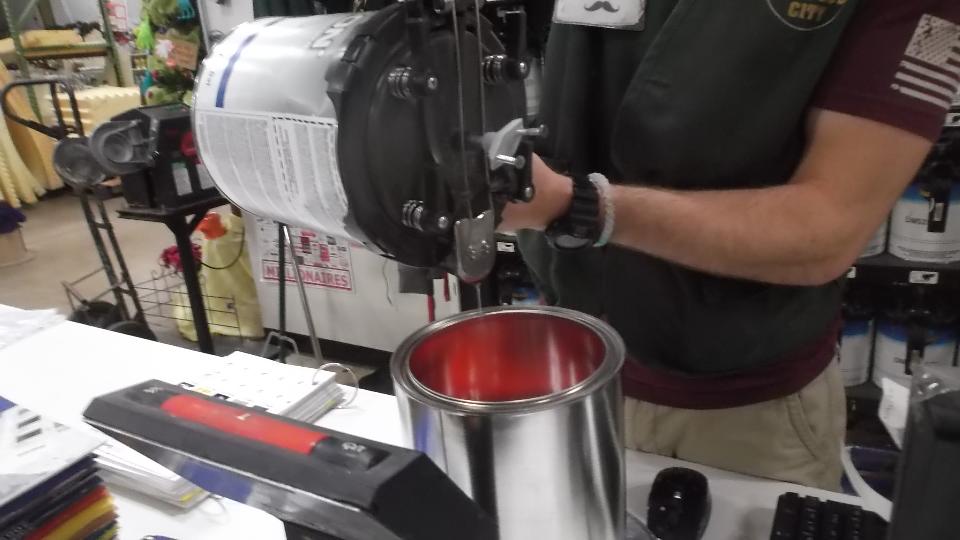
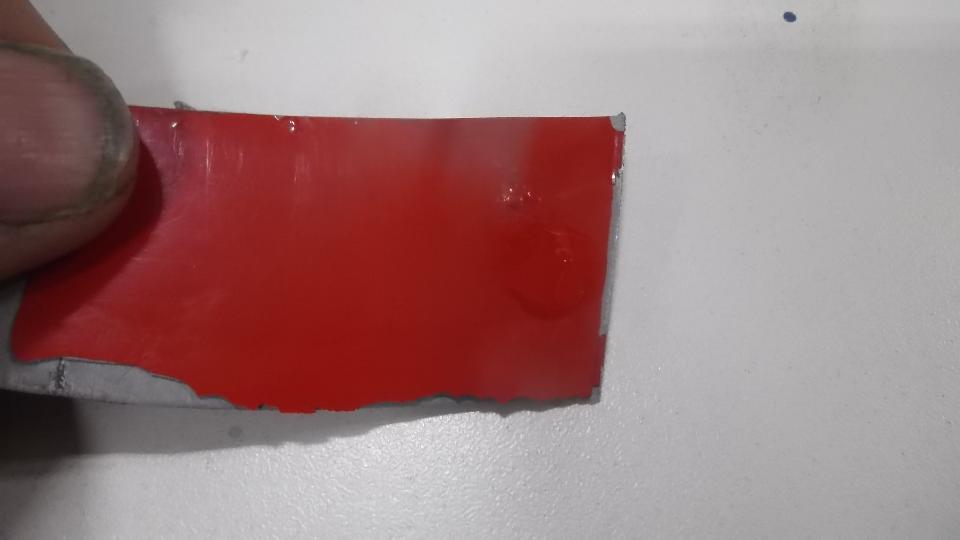
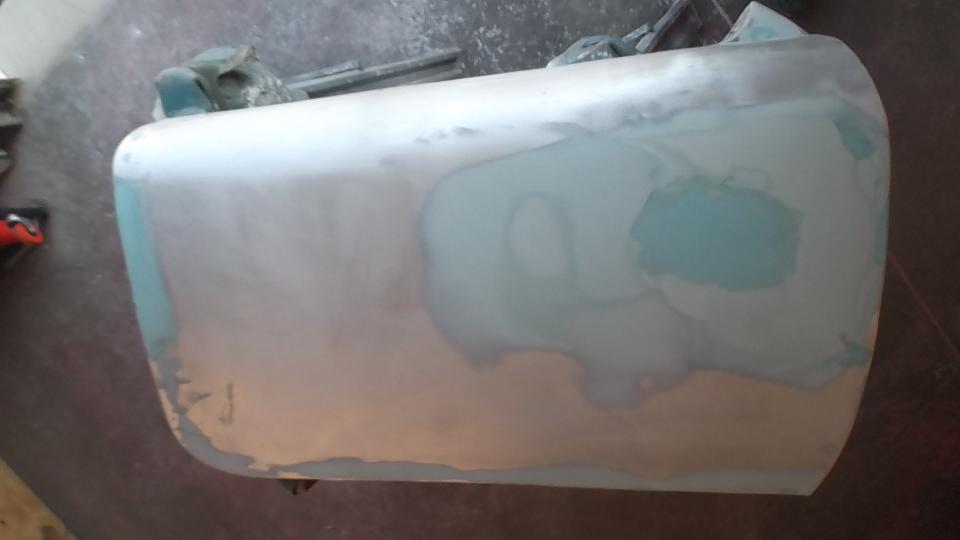
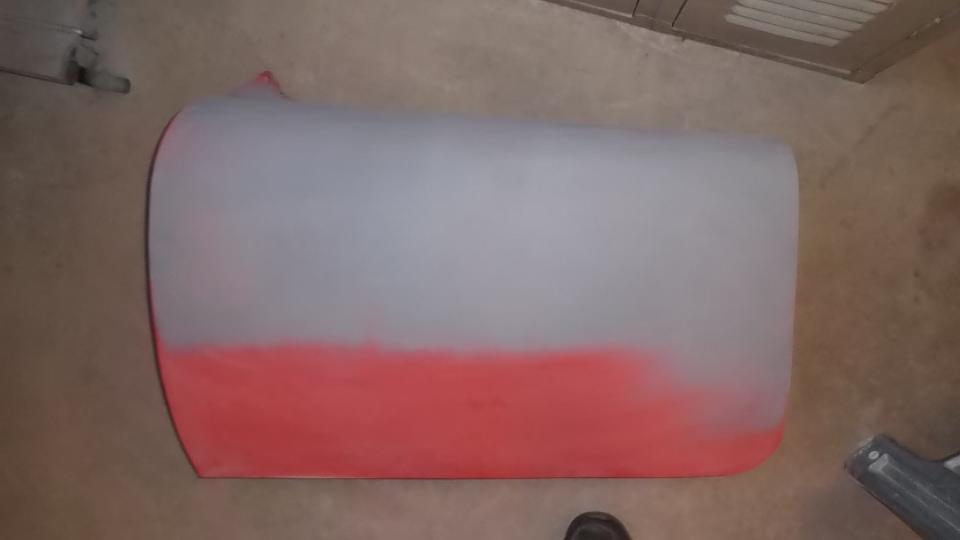
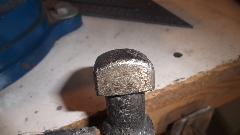
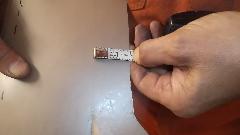
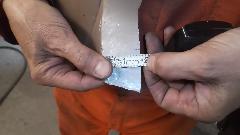
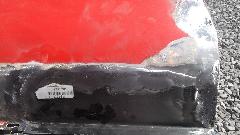
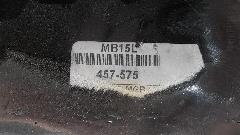
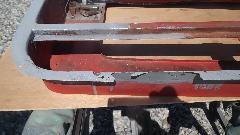
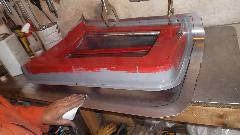
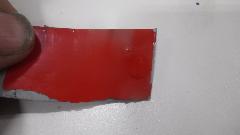
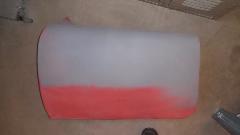
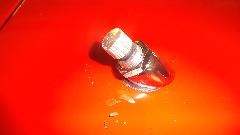
Buying paint this morning. This paint store did not have all of the ingredients to mix the exact color for which I had several paint codes. So we took along a bit of metal from the old door skin as a color sample. Mind you this is eight year old paint faded darker with time. We used the sample to compare with several paint books to find something very close, after which they mixed the color we had chosen.
How many colors do you mix to basic red paint stock make Orient Red (or something equivalent)? Try Red, White, Black, and Clear? I don't recall what the clear stuff was. On the original sample part below the paint dot at right end of the part is the new paint sample. Near as I can tell, it is a dead on match to the eight year old faded paint (not as light as the original color would have been when new). Then back to the shop for cleaning and sanding and spot priming in preparation for painting.
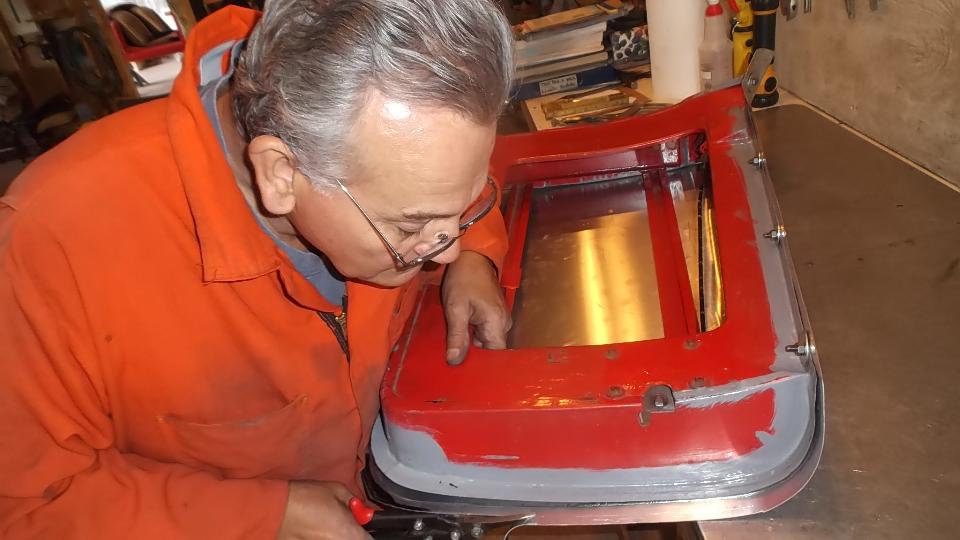
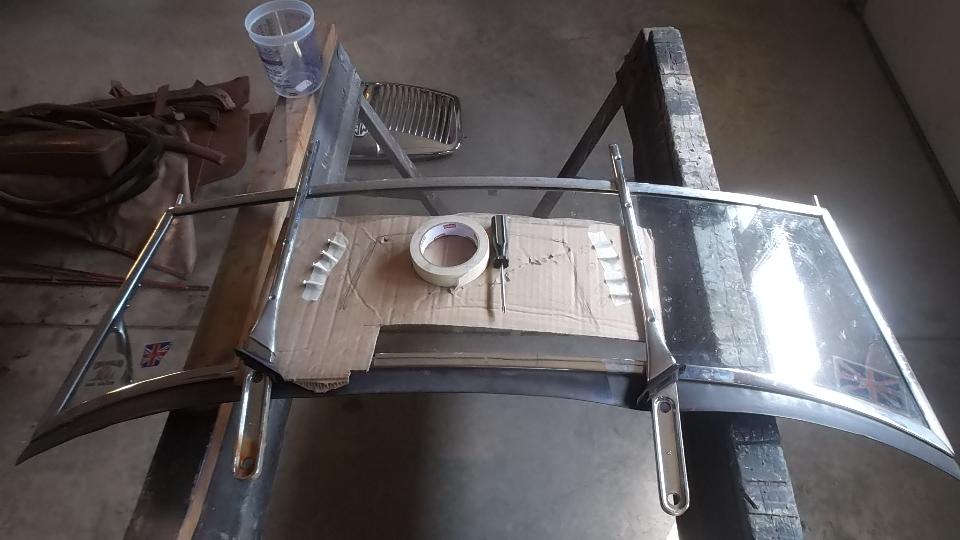
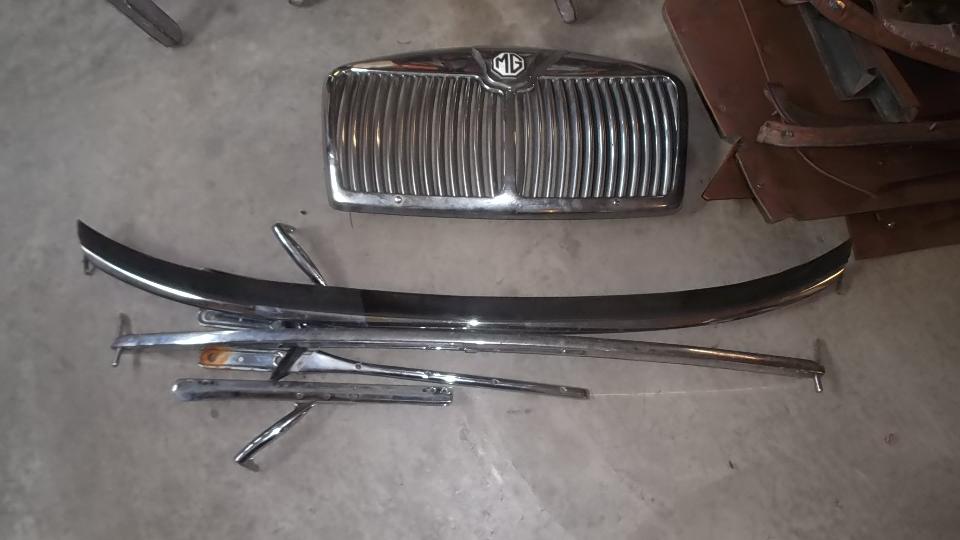
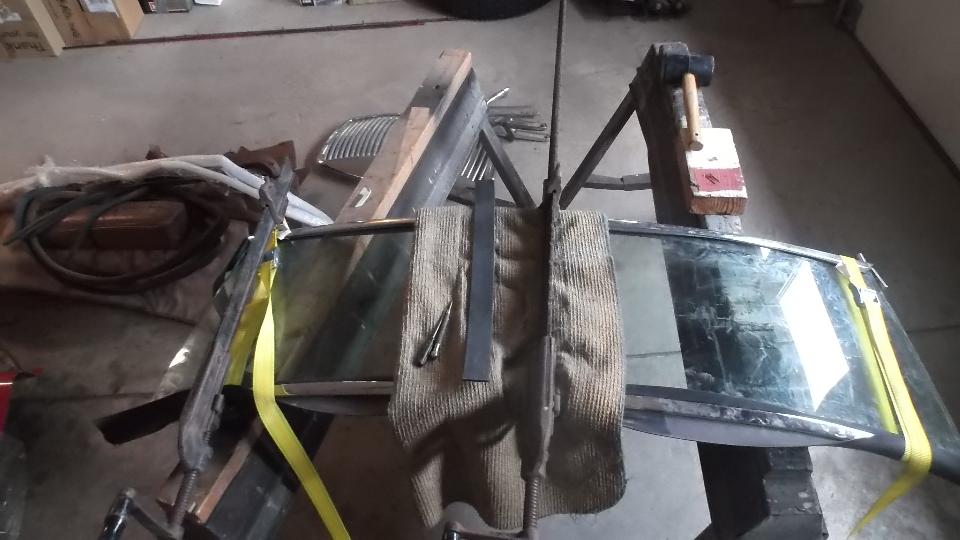
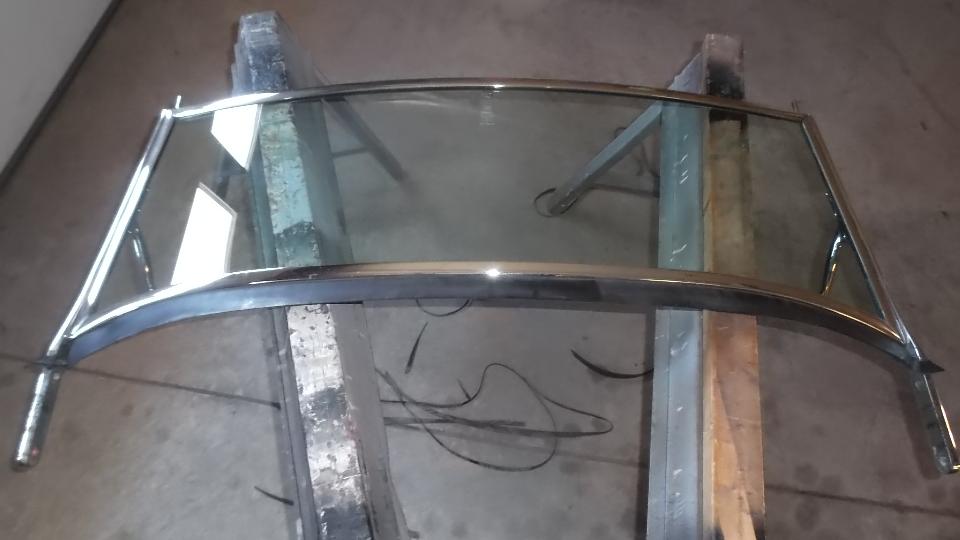
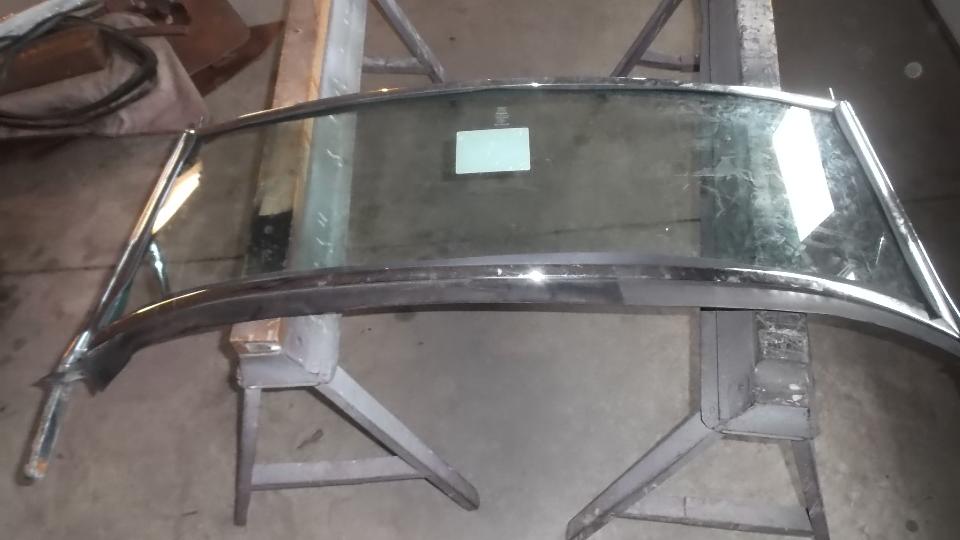
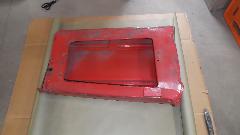
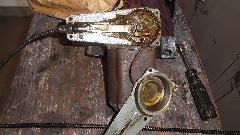
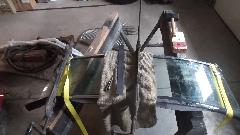
 While Dave and Dick were prepping the car body (and I was staying away on request), I was into replacing glass in the MGA windscreen assembly. Done this a few times before, last time 14 years earlier, so I was hoping it would go well. For starters, all of the screws came out without much problem, as I stuck every screw on a map to be returned to the original locations.
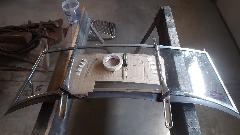
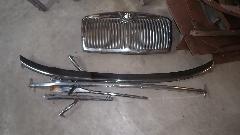
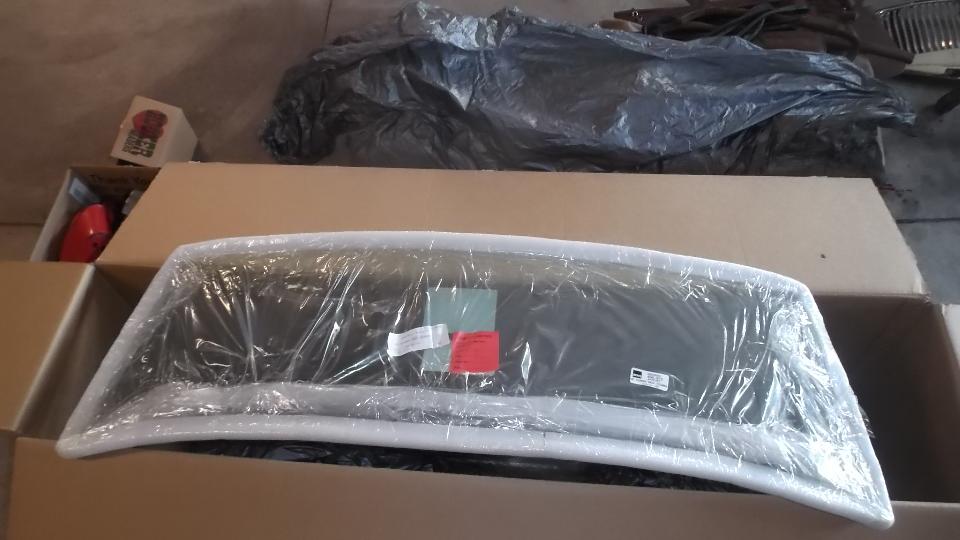
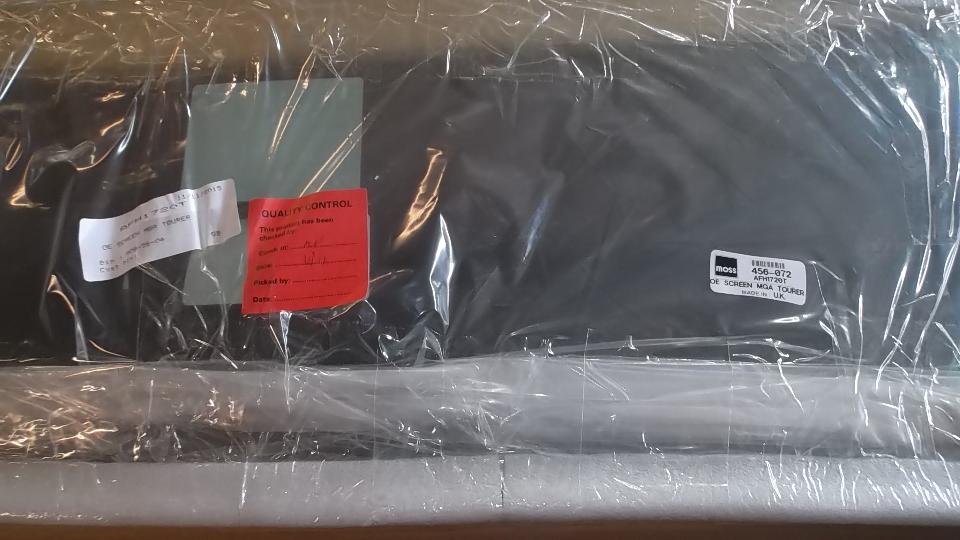
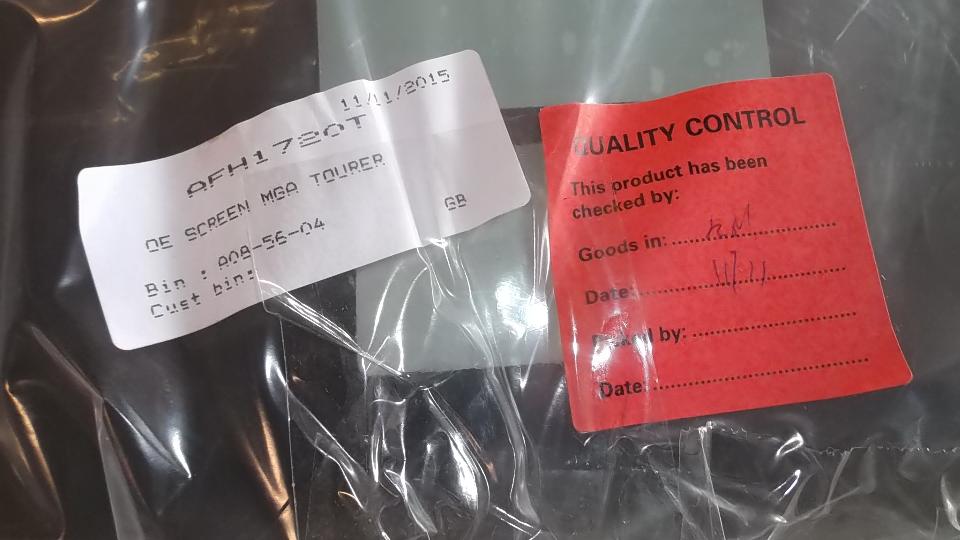
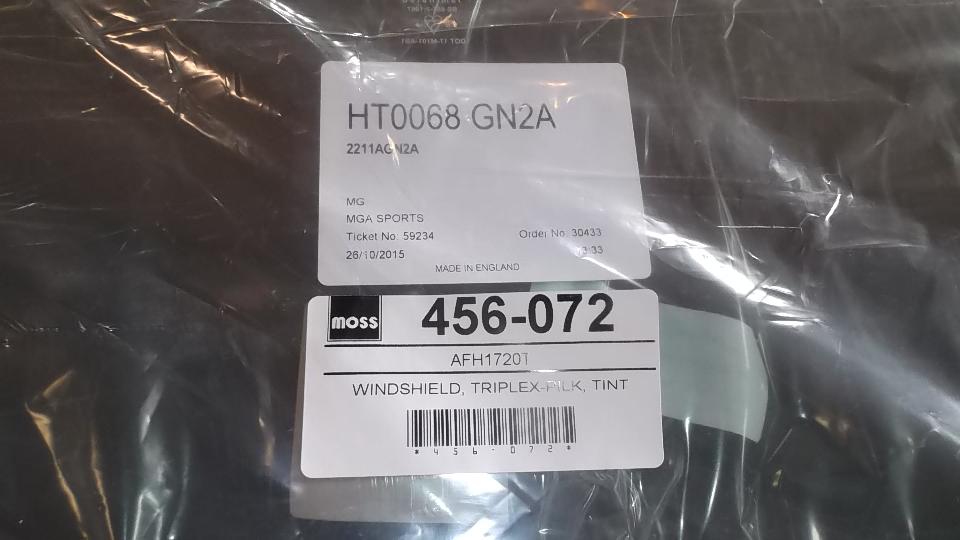
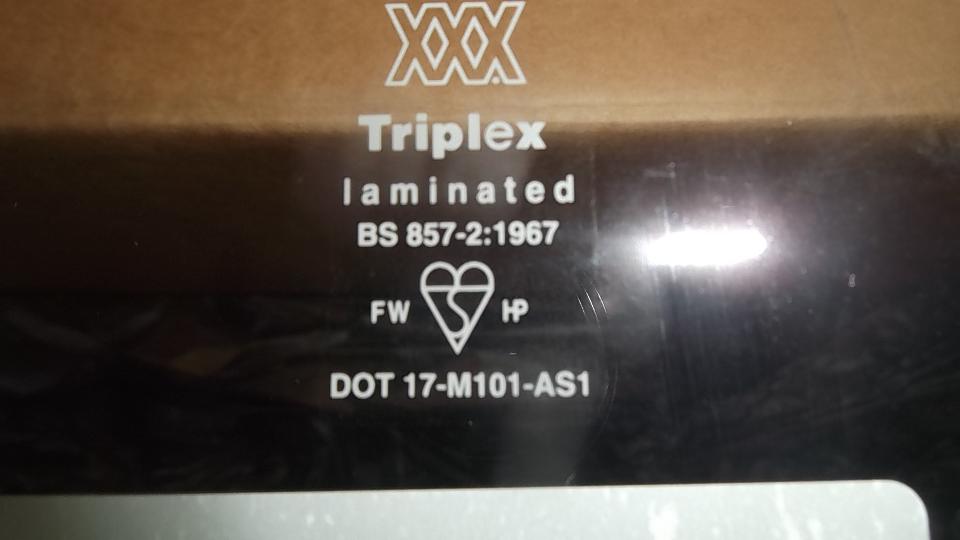
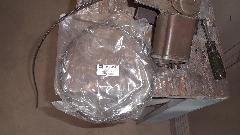
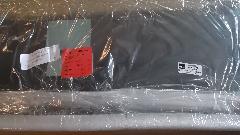
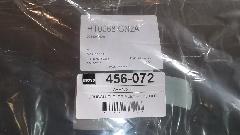
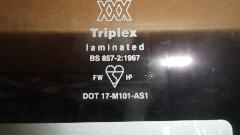
Fingers crossed, feeling like Christmas morning as I was opening the big box with the new glass. I was a little suspicious as the box appeared to have been opened and resealed before. The glass appeared to be well packaged.
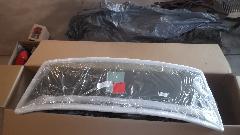
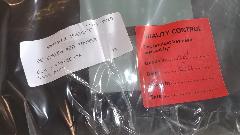
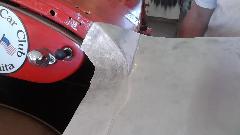
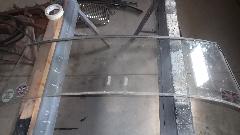
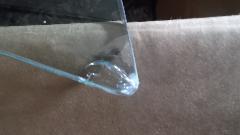
After total undressing there was found one chip in the outside layer only at bottom left corner (driver side for LHD car). I decided we will accept it and install it on a provisional basis, sending photo and note to the supplier. This is not a show car, so I don't mind the chip that will like show a little after installation, as long as it holds up physically for long term. Since my car makes a lot of miles, this may be a good test to see if such a defect will survive long term use.
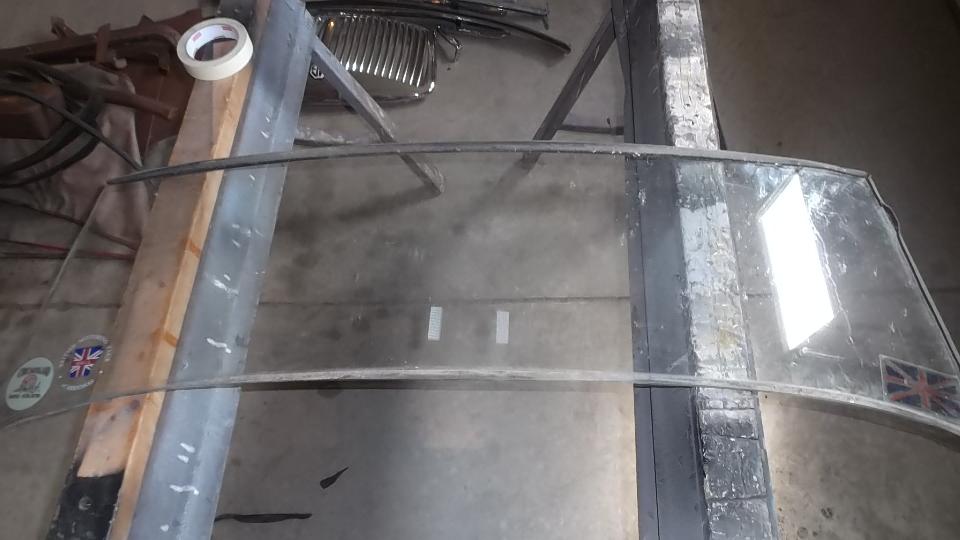
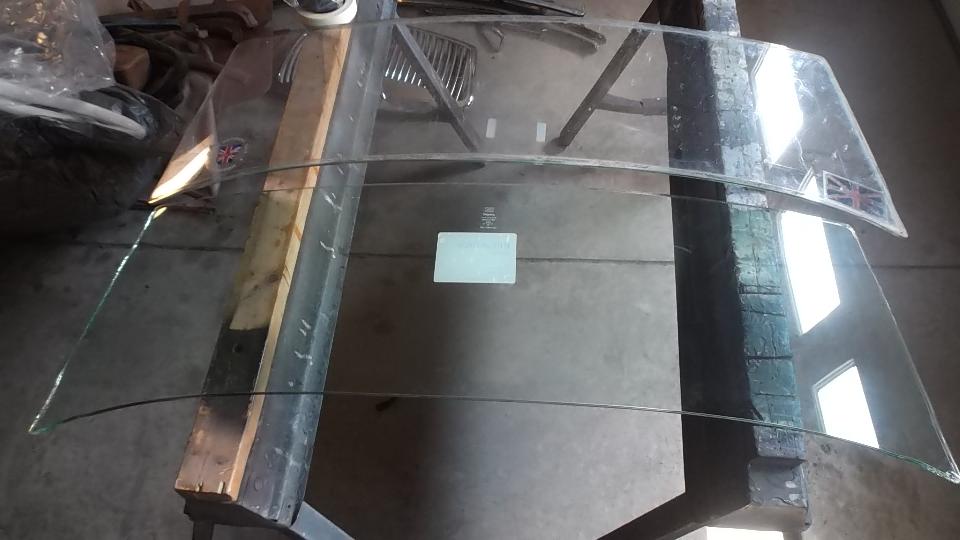
Goodbye car club stickers, and hello clear clean glass. After the standard struggle, the assembly was back together again (I make it sound simple, huh)? I didn't have to replace the lower rubber flange seal this time.
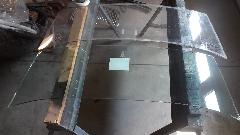
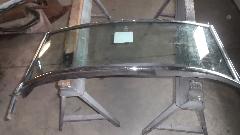
 After trimming the packing rubber and cleaning the assembly, there is that pesky little chip in the lower corner of the glass. Time will tell.
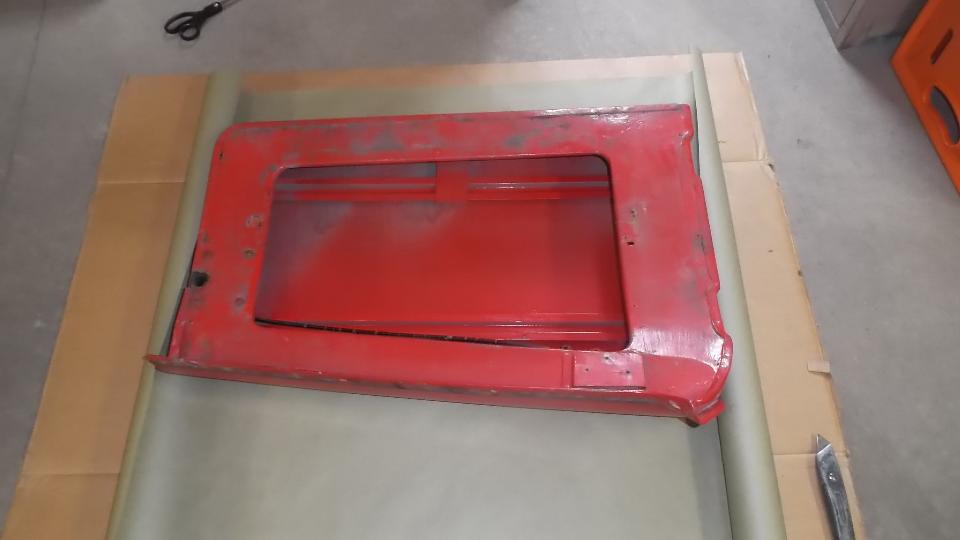
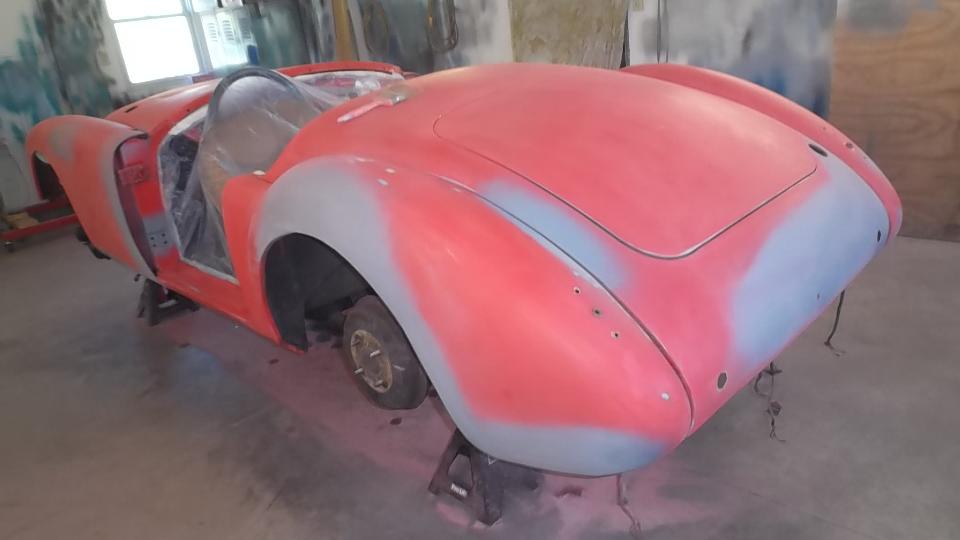
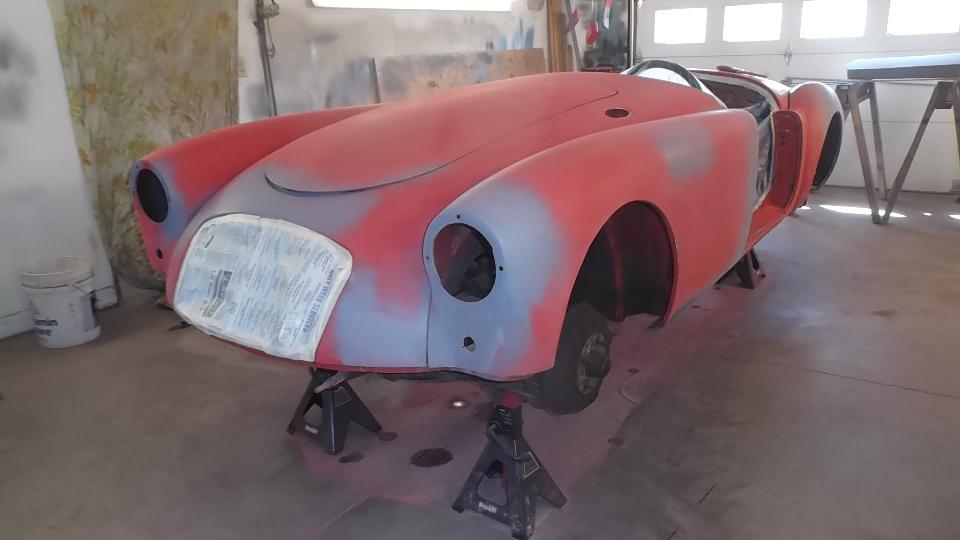
Meanwhile, sanding, priming an prep work was going gung-ho. At right below is the new skin on the right side door.

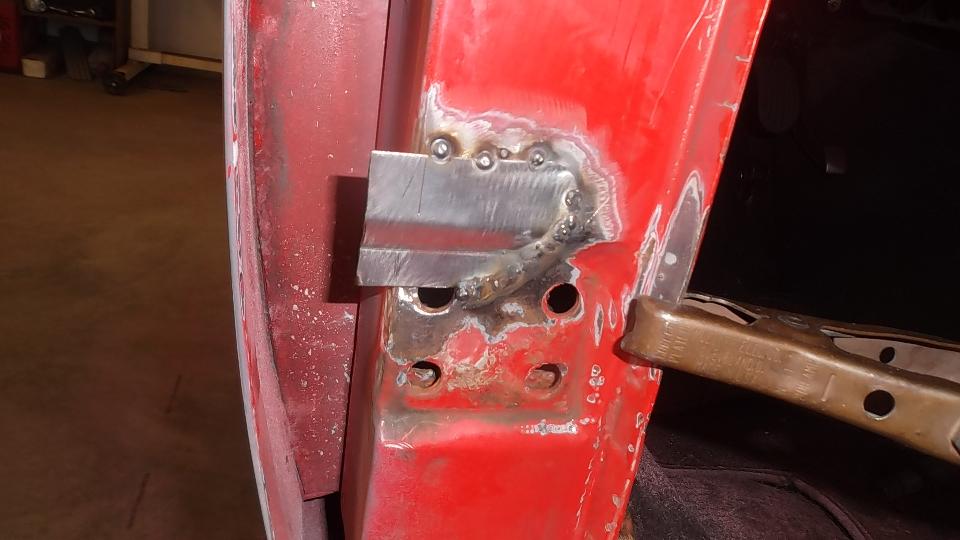
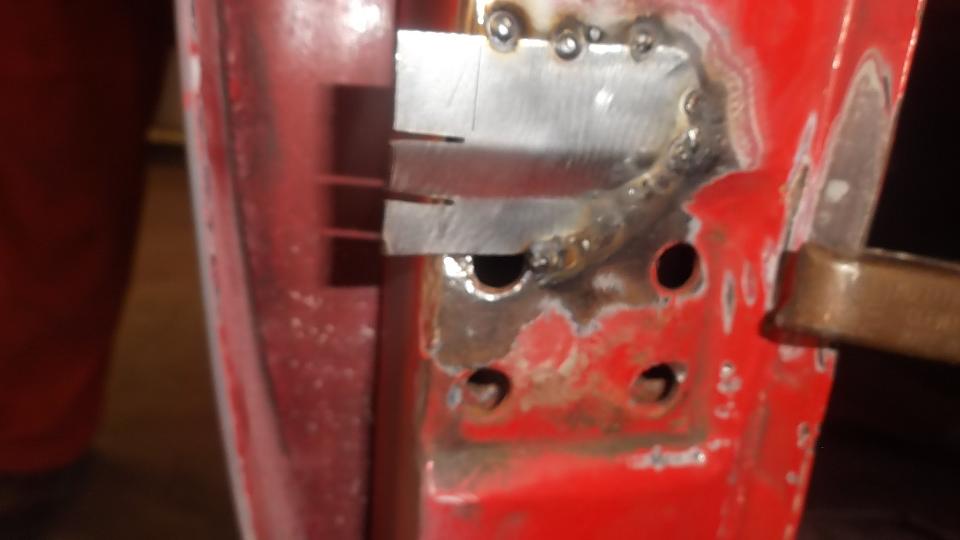
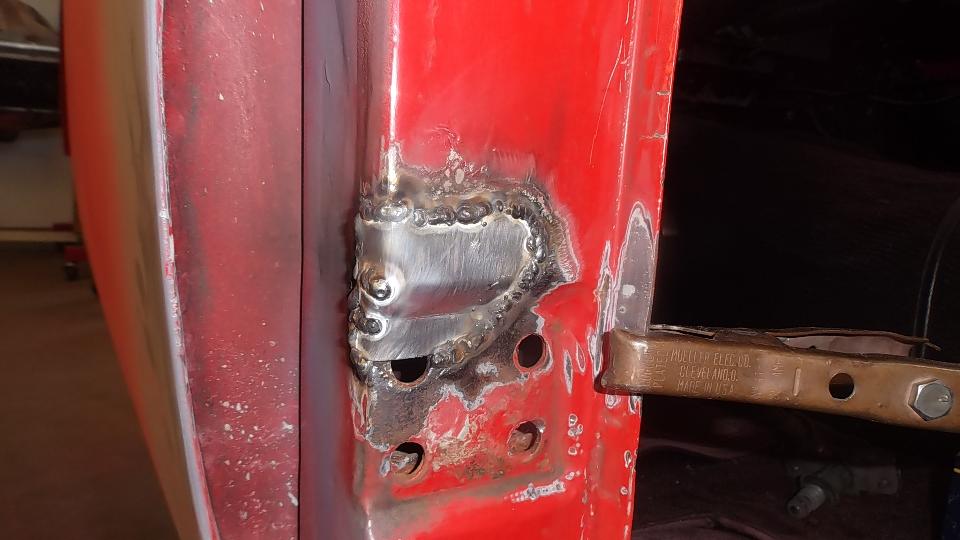
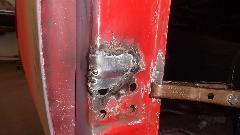
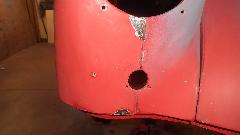
Then there was one more small rust repair (always another one of those somewhere) in an unusual location. This one required drilling out one door hinge screw, plus welding, grinding, drilling and re-threading the tapping plate. After grinding the new patch, this one will be good to go. Would you believe red paint tomorrow?

Wednesday, April 27, 2016
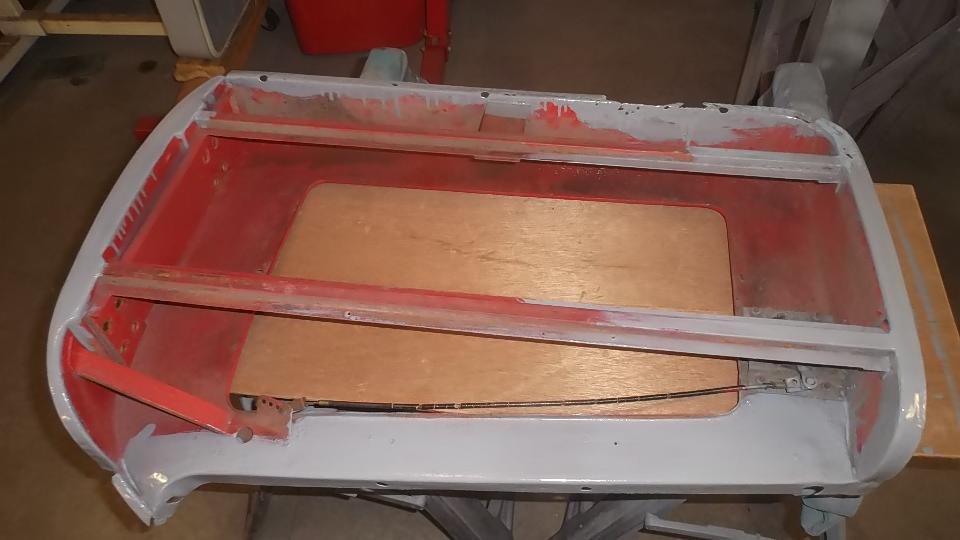
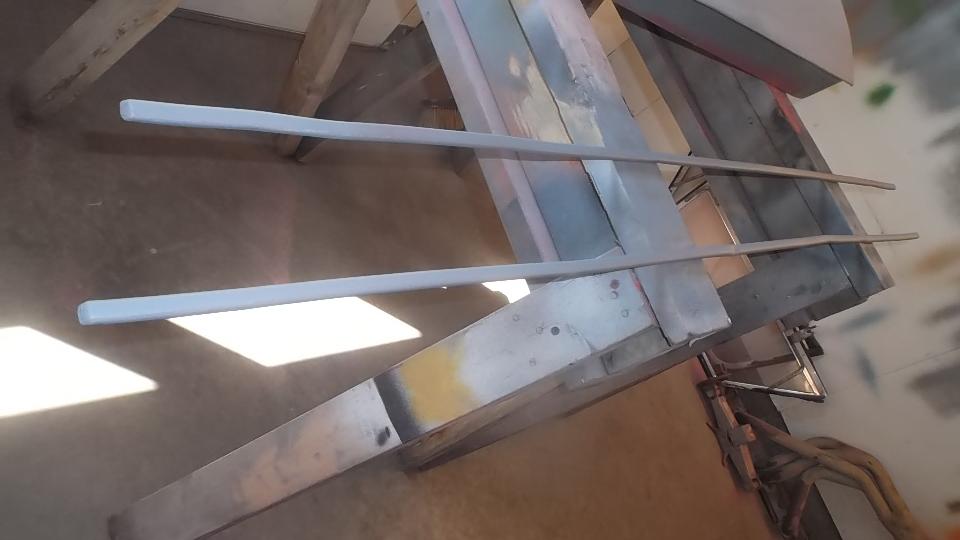
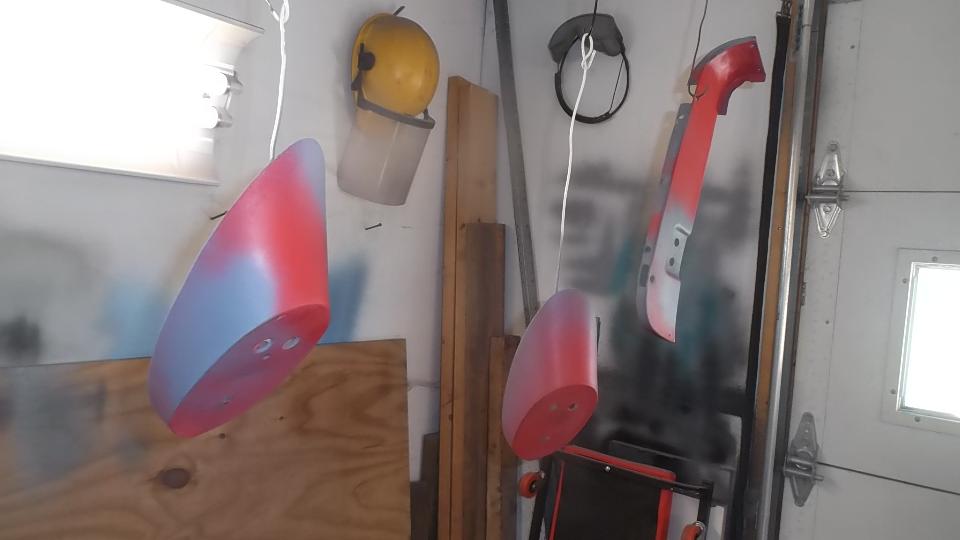
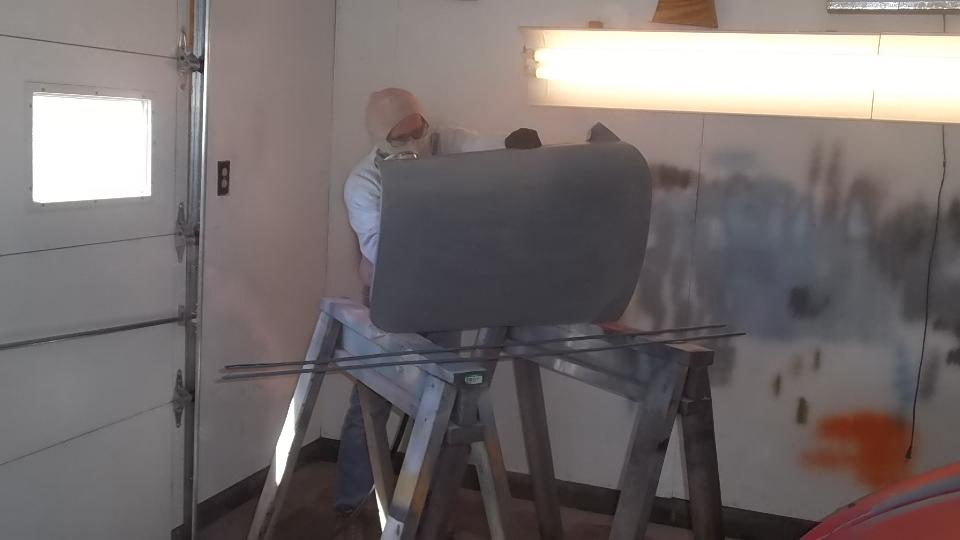
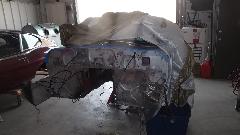
YES!!! Paint day is here! Morning effort to clean and prep the lower body trim strips. Loose parts laid out and hung up for access. Masking paper and plastic taped up.


One last buffing of some paint chips and surface rust (it has to end now). Quick dry primer, please.
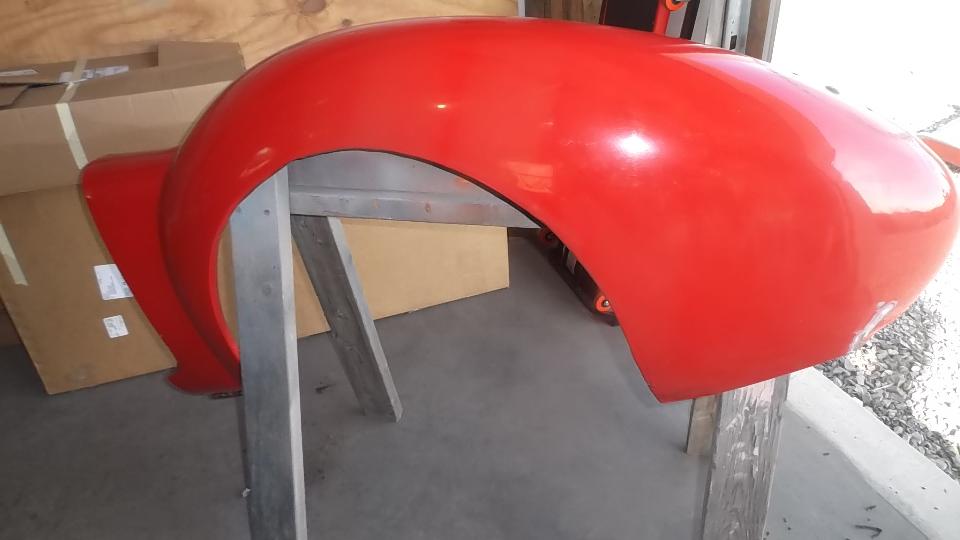
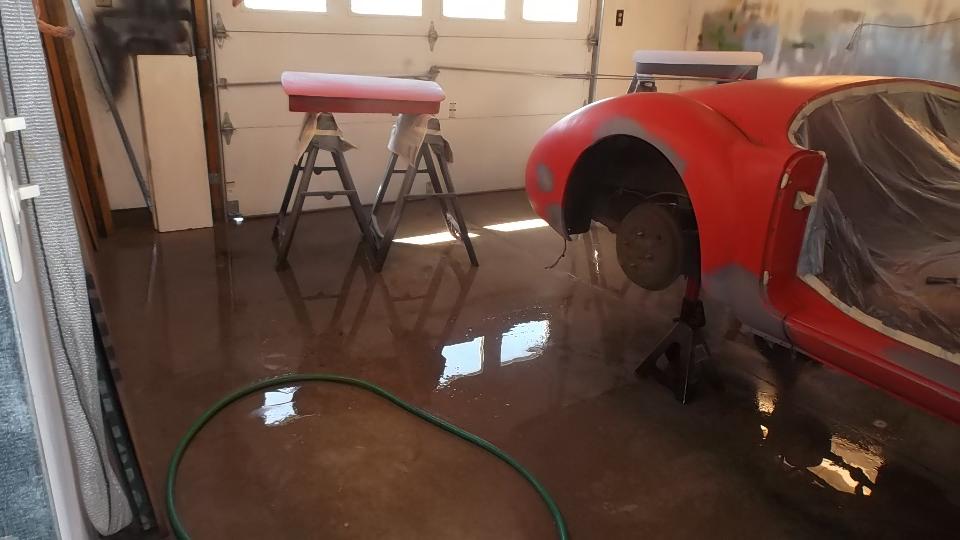
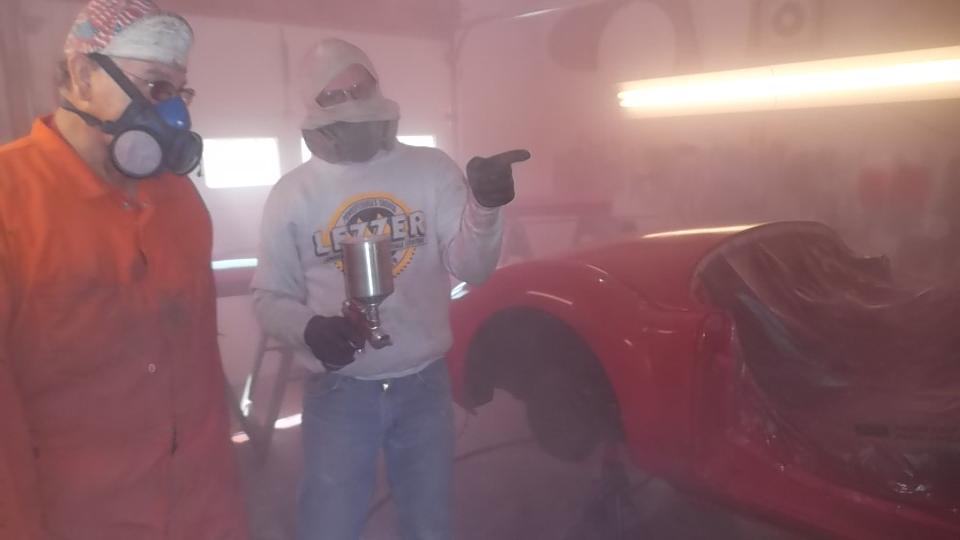
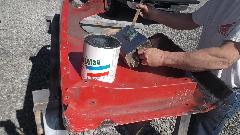
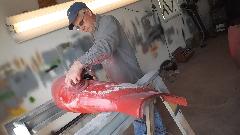
Mixing paint. Wetting down the floor after lots of sweeping. First paint applied inside of that new door skin.
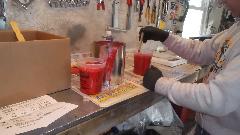
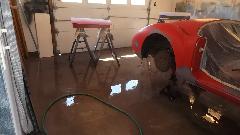
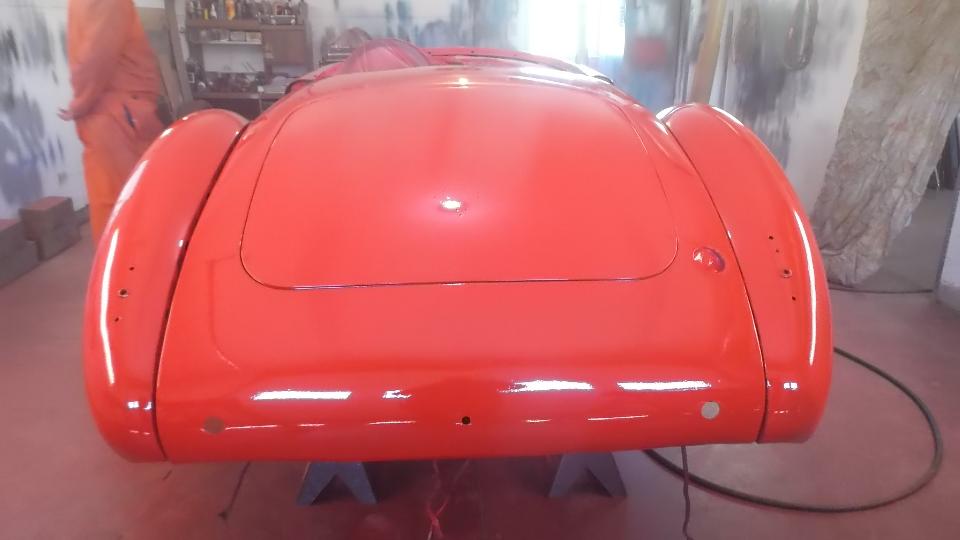
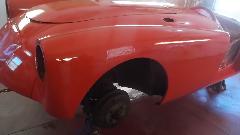
The consultants thinking maybe a stronger exhaust fan might be good. But eventually everything is red again.
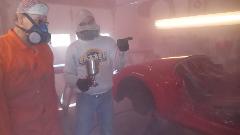

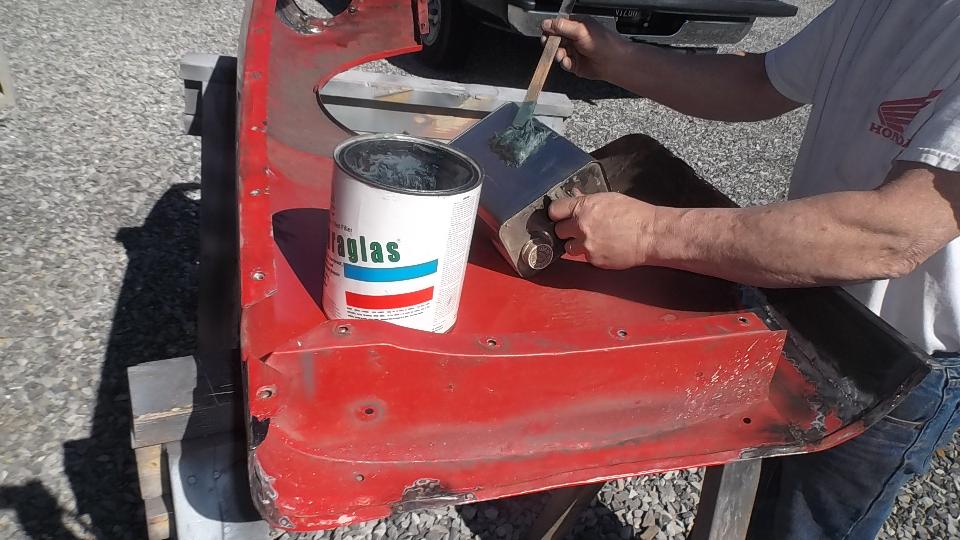
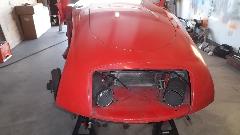
Then it was time for equipment clean up, and get out of the breathing apparatus and out of the shop for a mid afternoon lunch break. Later in the evening we were cleaning and sanding and painting the Fiberglas front valance panel, and the radio blanking plate (which had erroneously been black for the past 30 years. Of course there were a few smiles at day's end.
Thursday, April 28, 2016
Moving fast. Time has been a blur. Catching up with photos and notes three days in arrears, trying to remember what was done three days ago. Photos help. Today's issue was a sudden change of schedule, so the car
 has to be reassembled today all in one day. Time for a reality check. Call in some friends and have at it.
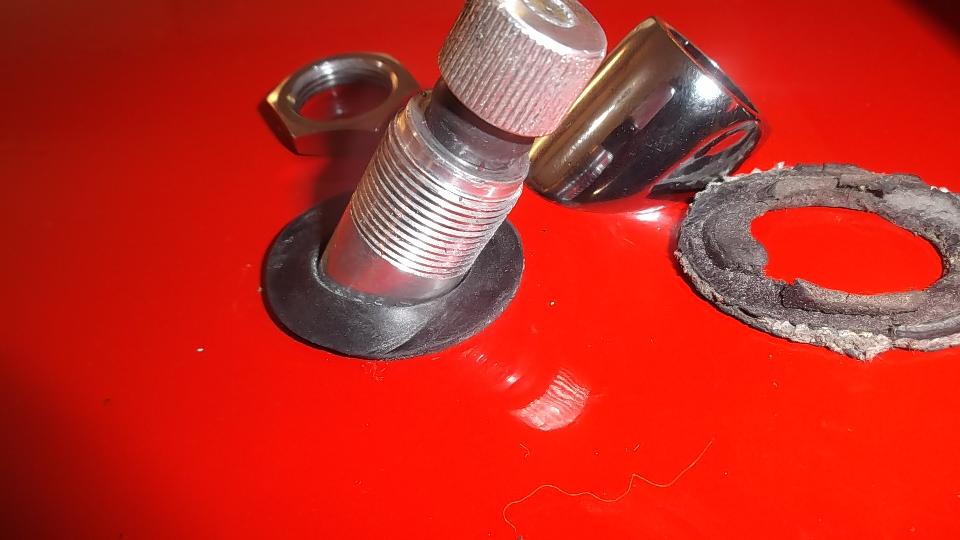
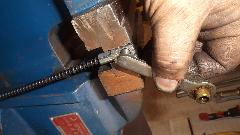
Having installed the new wiper drive cable on Sunday, I get to install the new wheelboxes today. Rubber gaskets supplied with new screenwiper wheelboxes are entirely the wrong shape, not to be used, because the gasket does not reach the front edge of the chrome bush. The only viable solution at hand was to re-use the old gaskets.

The Moss MGA parts catalog has a part number for the MGA wiper drive cable. The Moss MGB parts catalog
 has the same part number for the MGB wiper drive cable, plus a note to say it needs to be trimmed to the proper length. Well, ditto for MGA, as I had to trim off at least a foot and a half. With the rush and other confusion I managed to install the right side wheelbox upside down so the spindle rotates wrong direction. Bummer, but no time left to fix it, so leave the wiper arm off and run with only the driver side wiper for now.
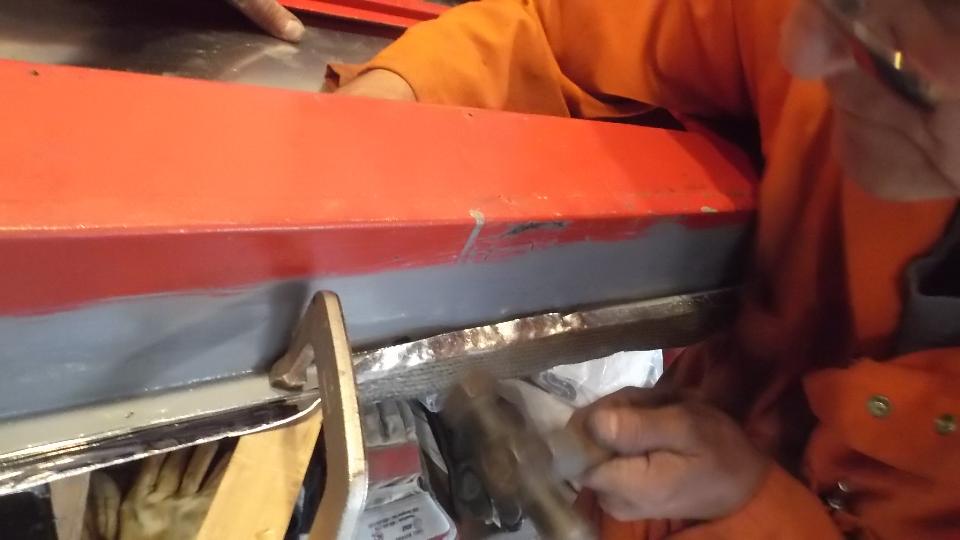
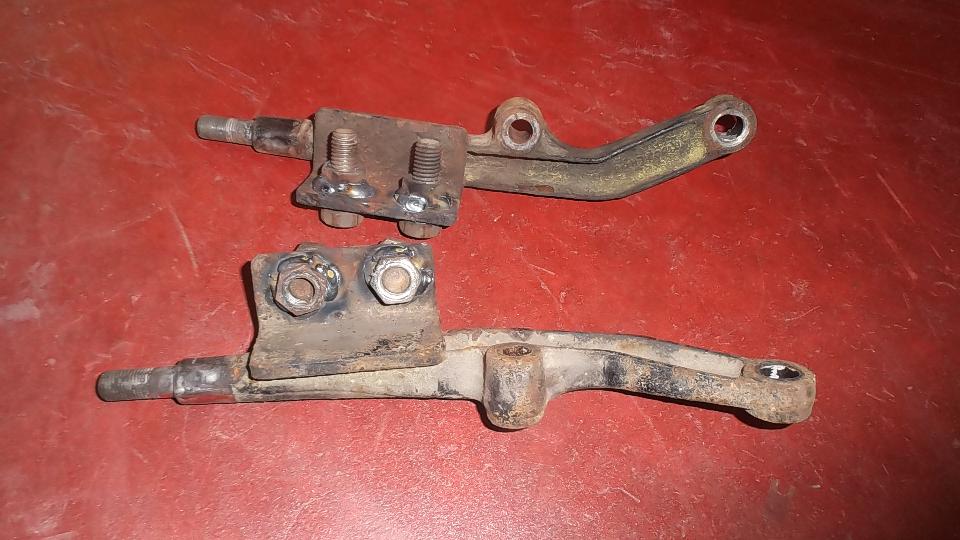
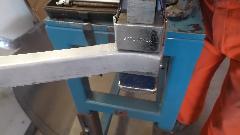
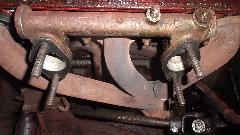
 In spite of the rush (or maybe because of the rush), Dick Bussler contrived what appears to be a time saver for installation of the trailer hitch. He welded the hex nuts to top side of angle irons where the hitch cross bar bolts to the bumper support irons, saving a lot of fiddling for not having to use a wrench on the top side where it was difficult to reach.
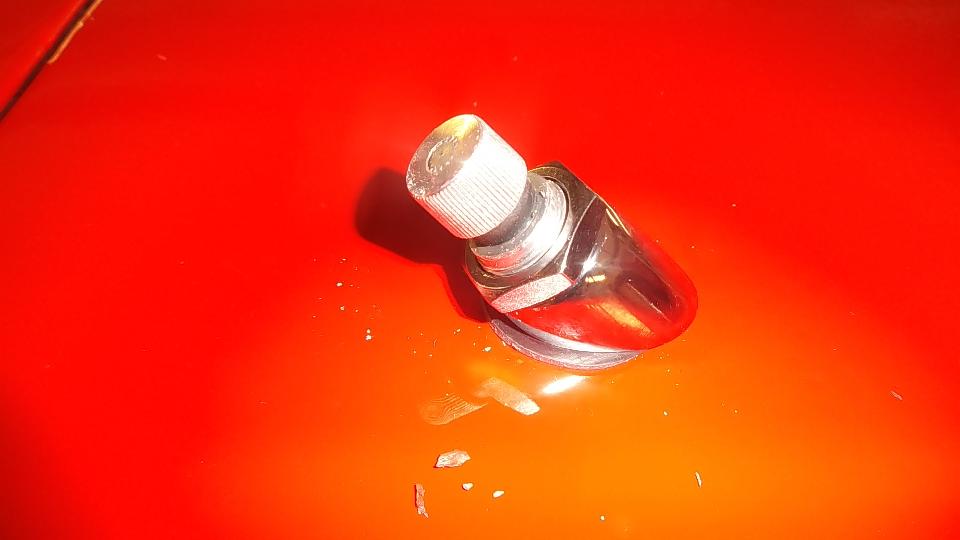
 Then three guys spent what must have been a lot longer than expected for installing all new screws in the front valance panel. Captive floating nuts had to have paint tapped out of the threads, and a couple of them were ultimately cut out and replaced with flat washers and hex nuts. The front wings also did not have piping installed yet, so it was a tricky maneuver by the time it all came together by day's end.
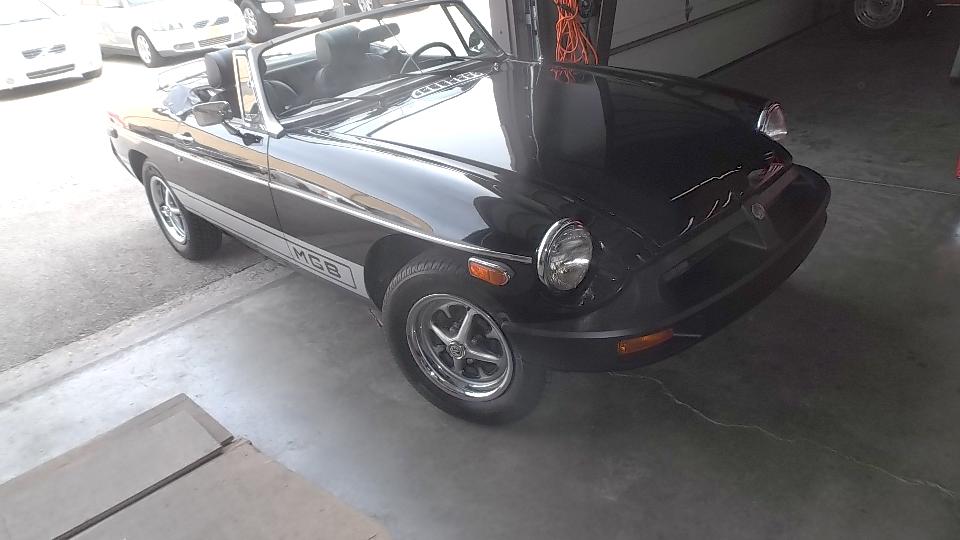
I was busy installing cockpit trim rails and reconnecting lighting wires and debugging a ground wire that was omitted from a body bolt to get the headlights working, then installing the convertible top. I recon the rest of the crew installed everything on the outside that was red or chrome. At the last minute (so to speak) the brackets for side curtains were installed so the car could be somewhat weather tight on a rainy day, and the car was at least roadable. All of the door pockets and kick panels (with about a hundred trim screws) and the door seals ended up in the trailer for future reference. But we were indeed off and running with just one day assembly time.
We took a stop in Williamsport, PA for a WiFI break, then heeded out. By the small hours of the morning we were nearly 200 miles farther south, having left Pennsylvania, crossed Delaware on I-81 near Hagerstown, also crossed West Virginia near Martinsburg, and just entered Virginia before stopping for the night.
Friday, April 29, 2016
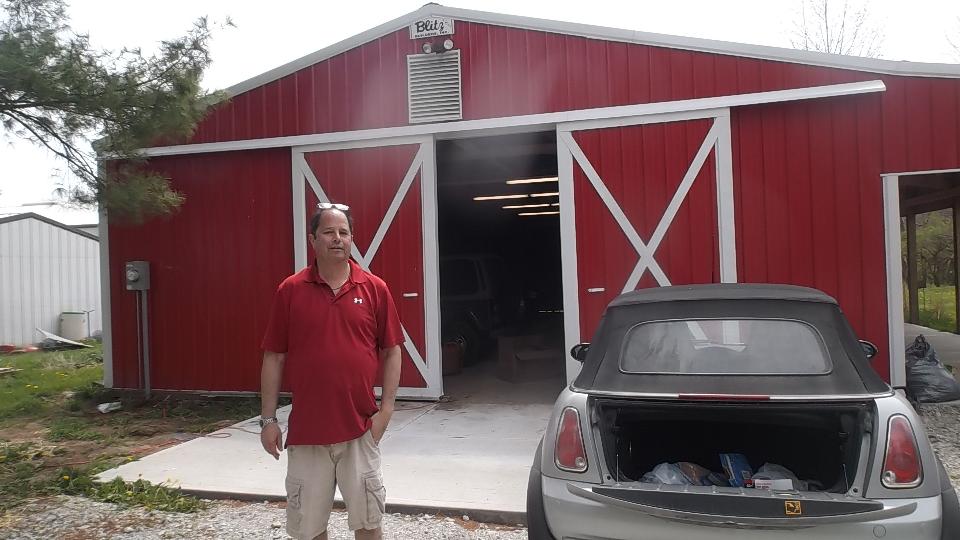
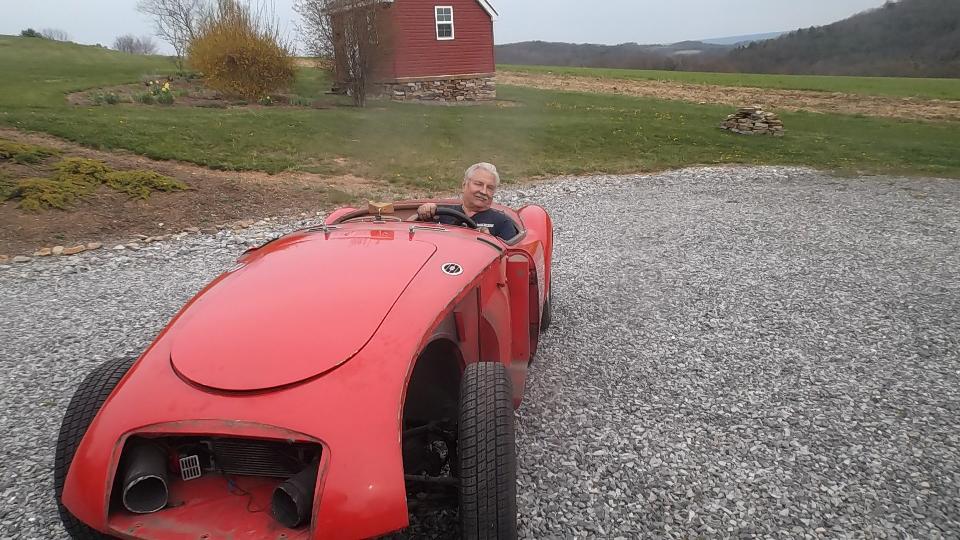
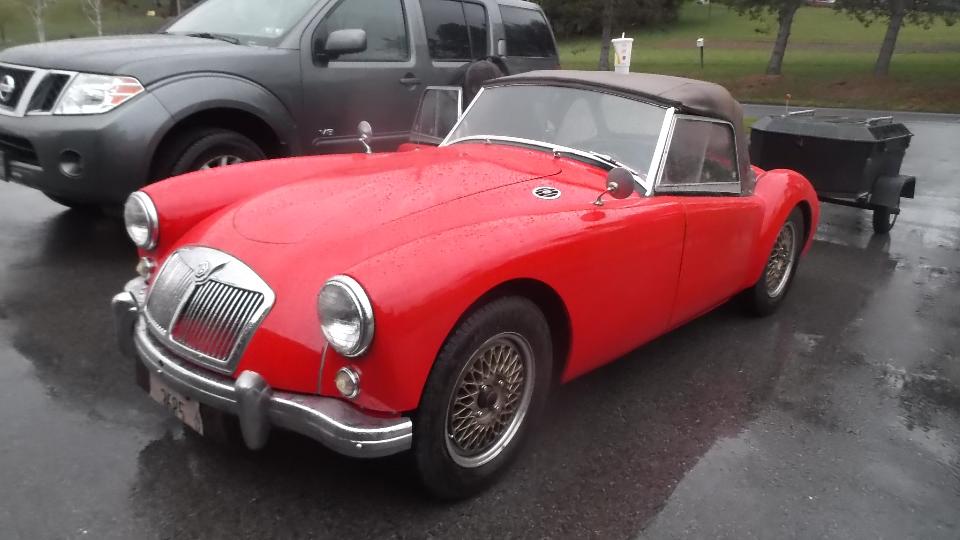
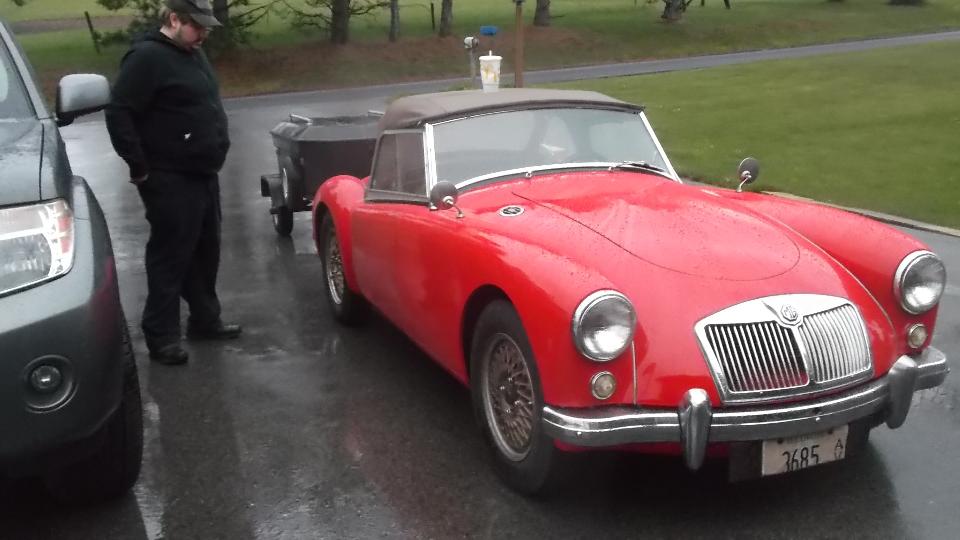
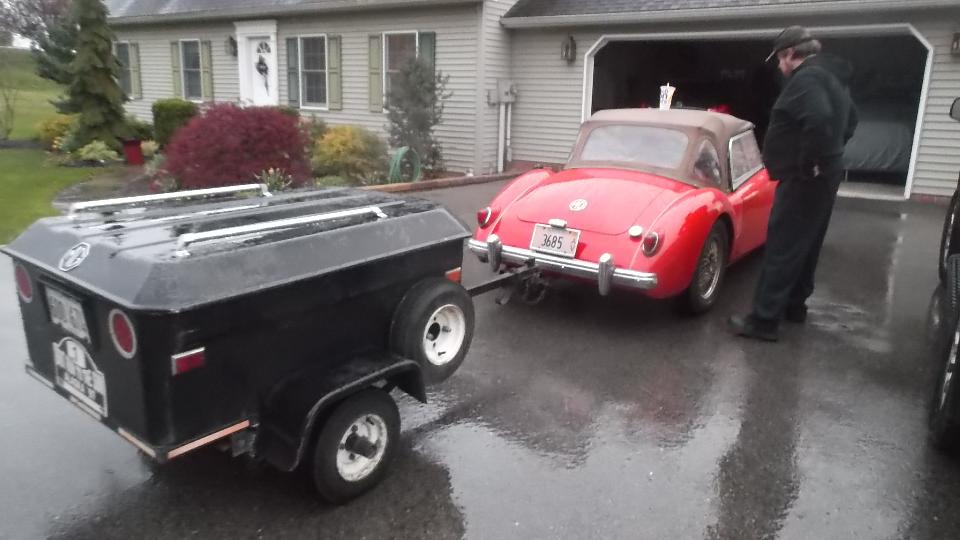
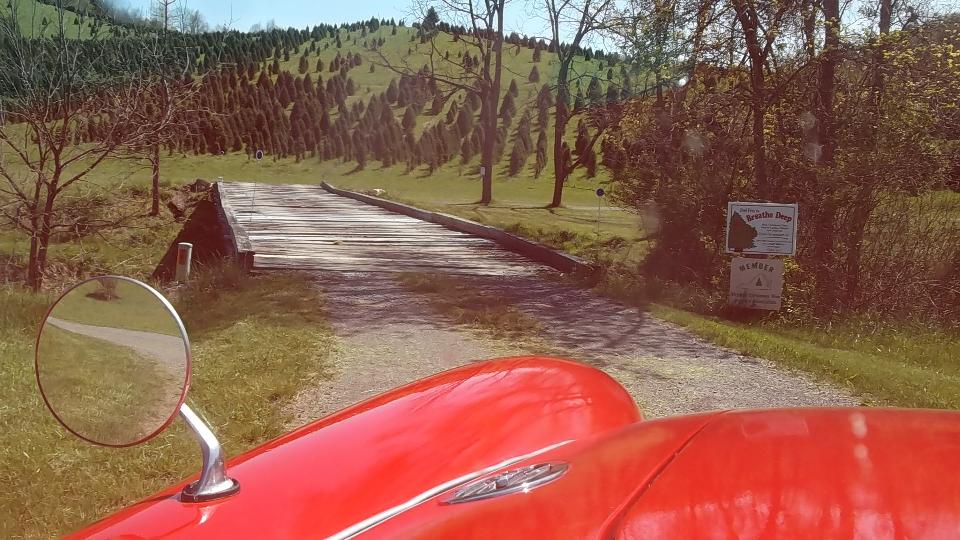
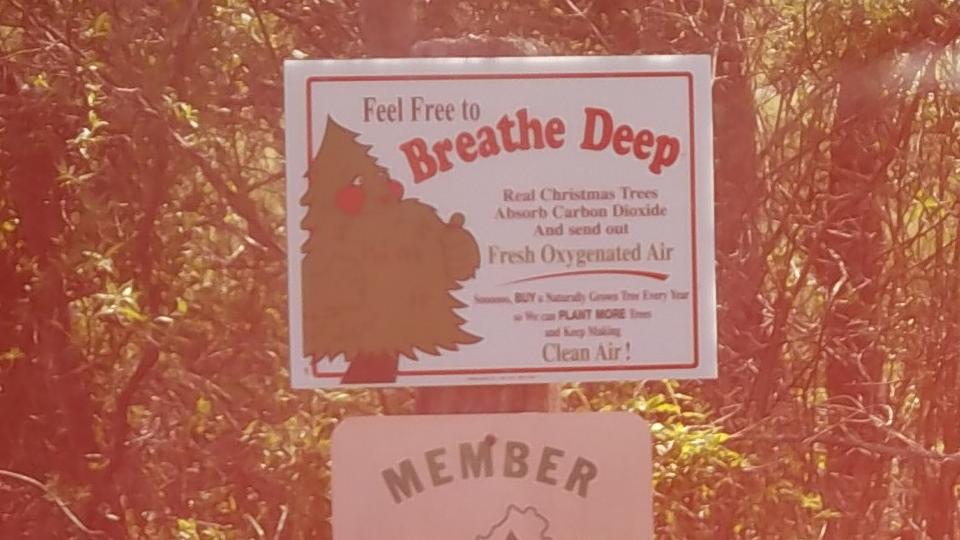
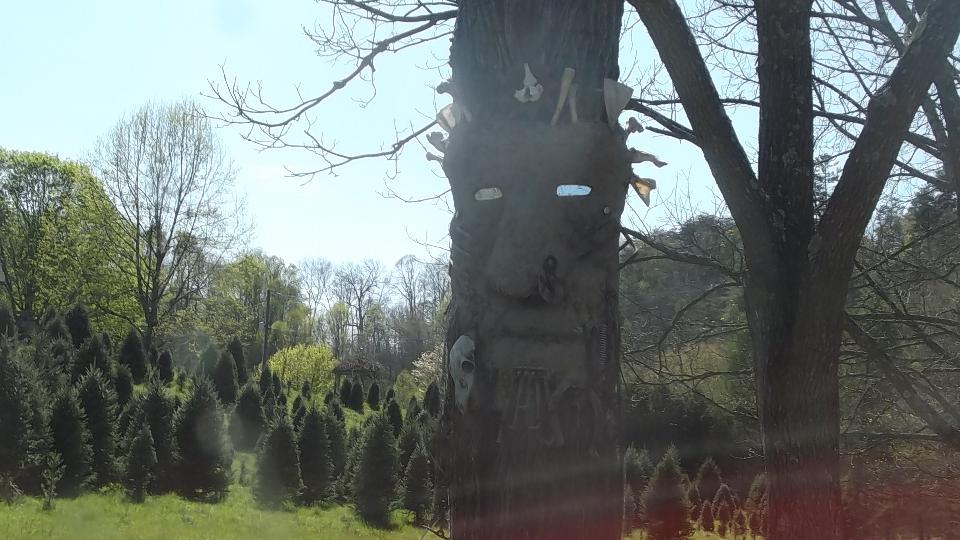
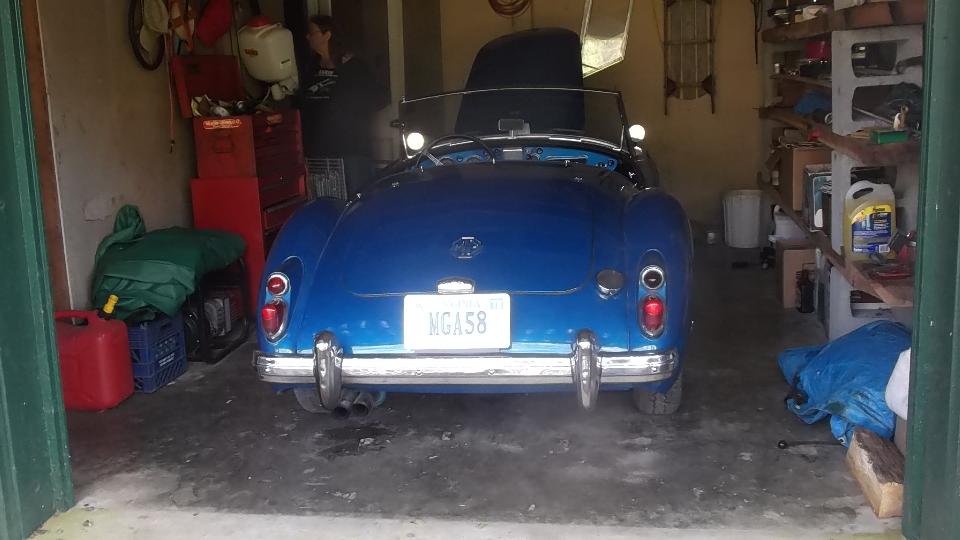
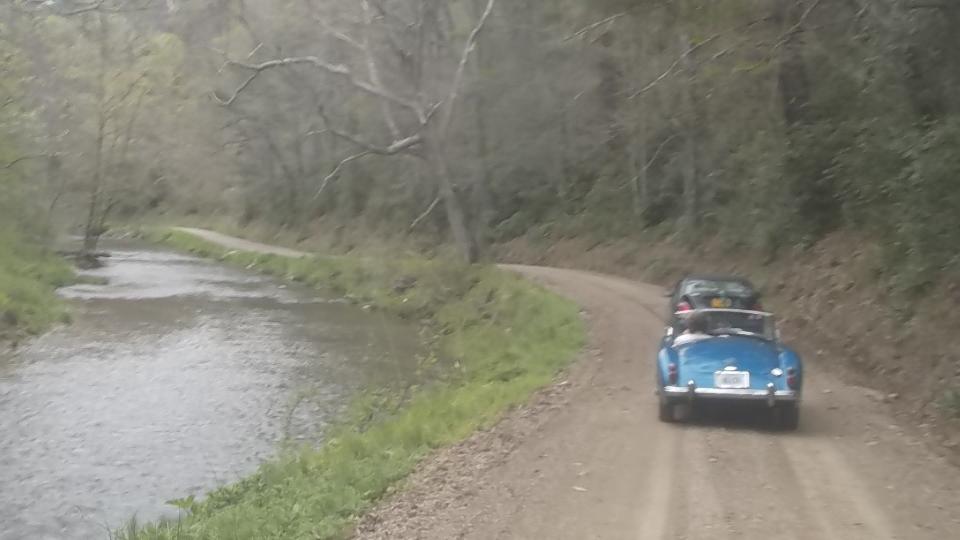
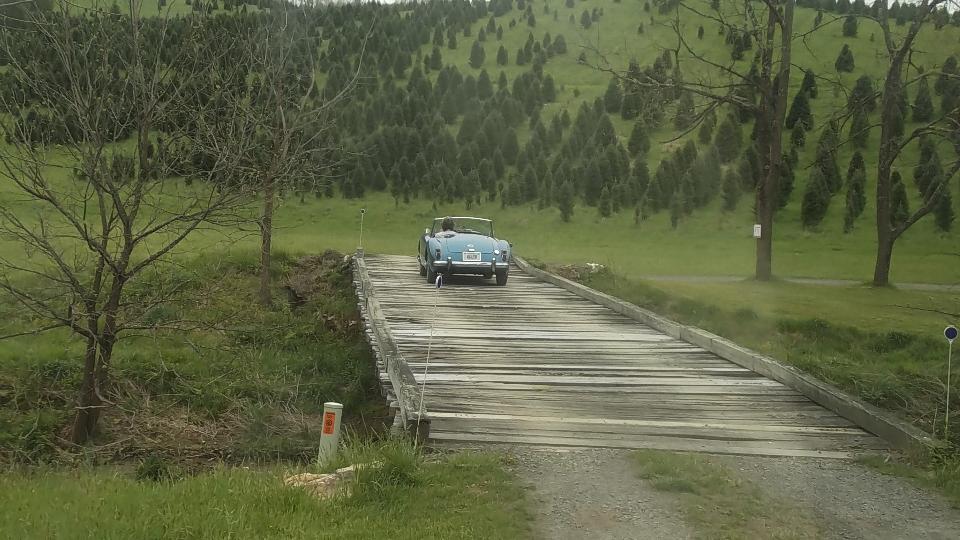
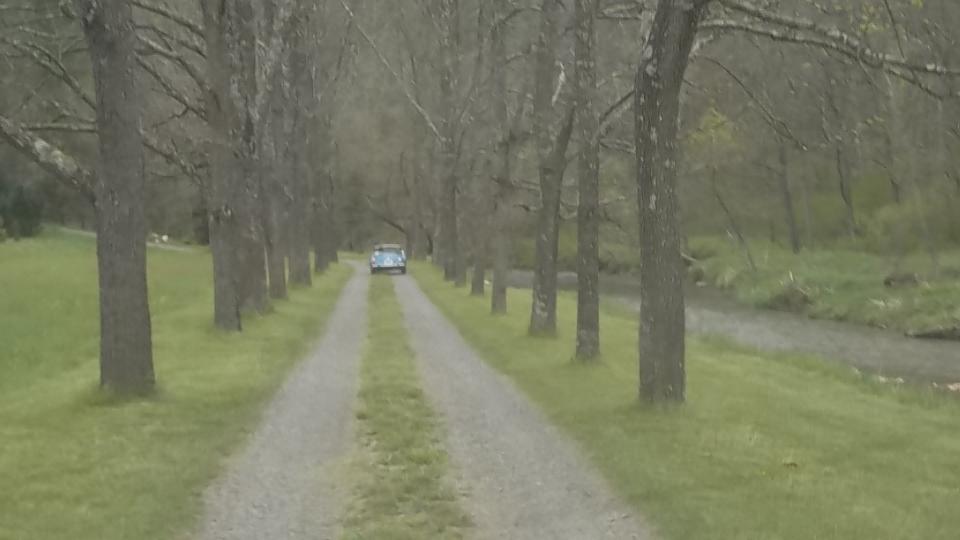
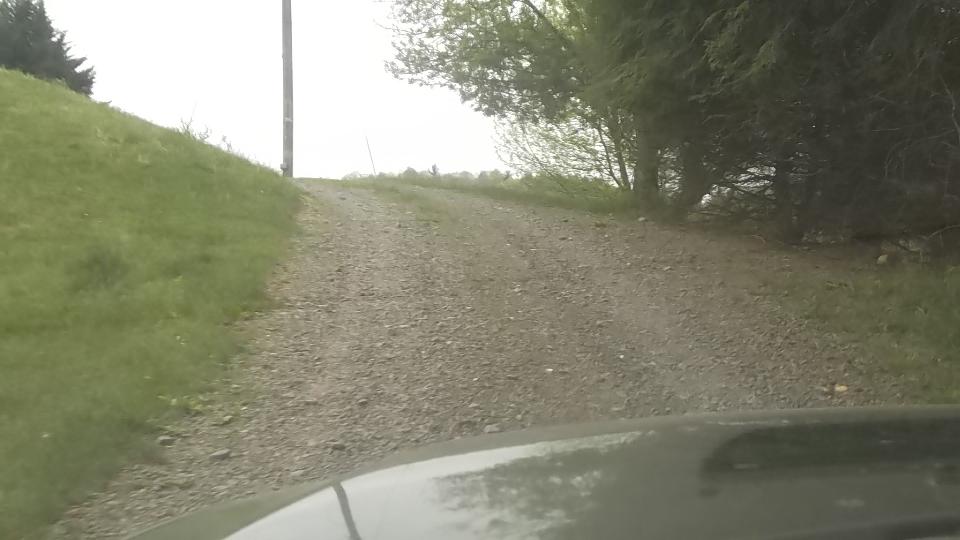
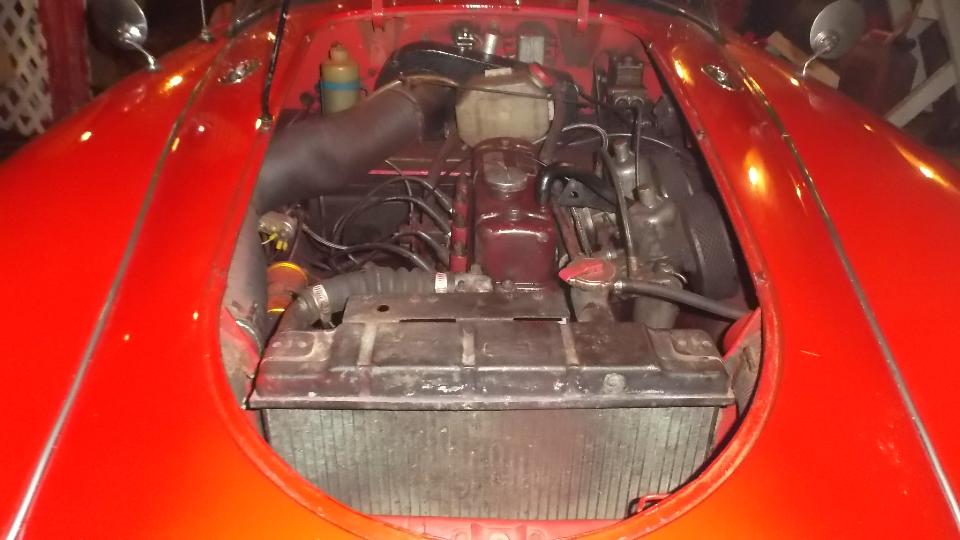
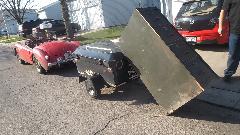
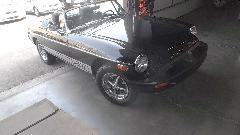
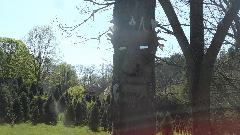
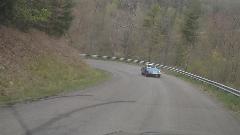
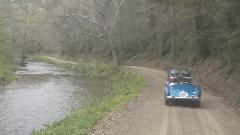
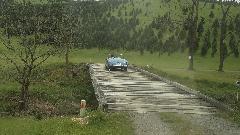
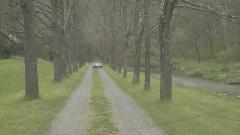
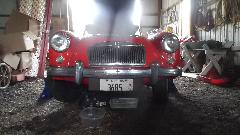
We must have slept well, as one hour farther along we were in Harrisonburg, VA for lunch and another WiFI session. By 1-pm on down I-81 again, and by 4-pm we were in rural Hillsville, Virgina, nearly 450 miles from last evening's departure from Pennsylvania. We were here to visit Billy Cornette who has a 1958 MGA 1500. He also has a very quiet 75-acre valley in the mountains where he grows Christmas trees. Getting there was a bit of a challenge with winding tarmac roads in the hills followed by half a mile of narrow and twisty gravel road, followed by a twin track winding driveway over a wooden bridge and through a tree lined lane and up a steep grade where the MGA had a challenge to tow the trailer up in 1st gear. But of course we made it up.

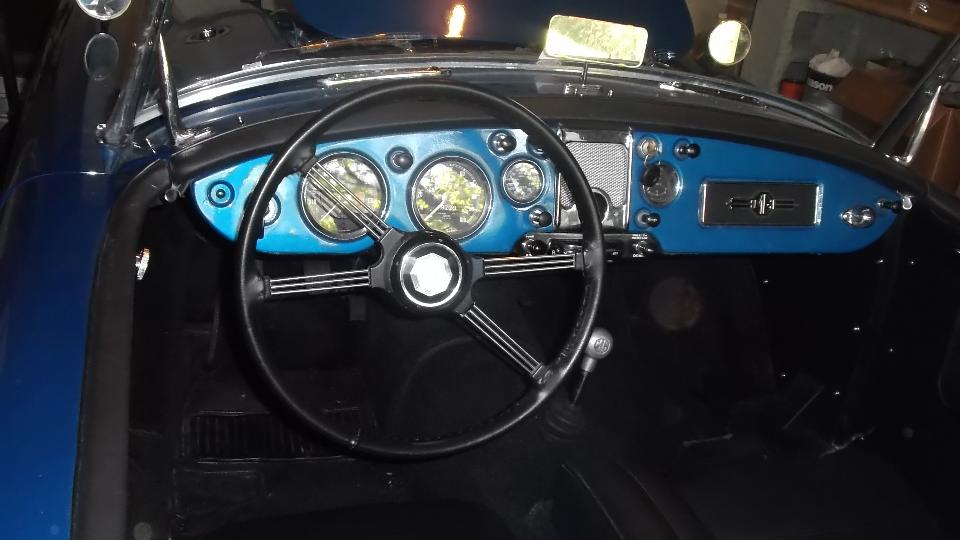
Billy has many years past driven this car a lot, but then it sat idle for about 20 years. Quite recently it was made to run again (marginally), then was somewhat restored, followed by engine overhaul. Apparently it was only driven about 100 miles since the restoration work, with some difficulty at that, and now not running again.
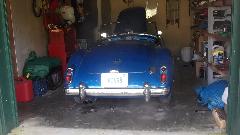
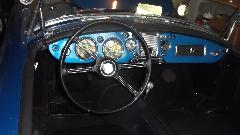
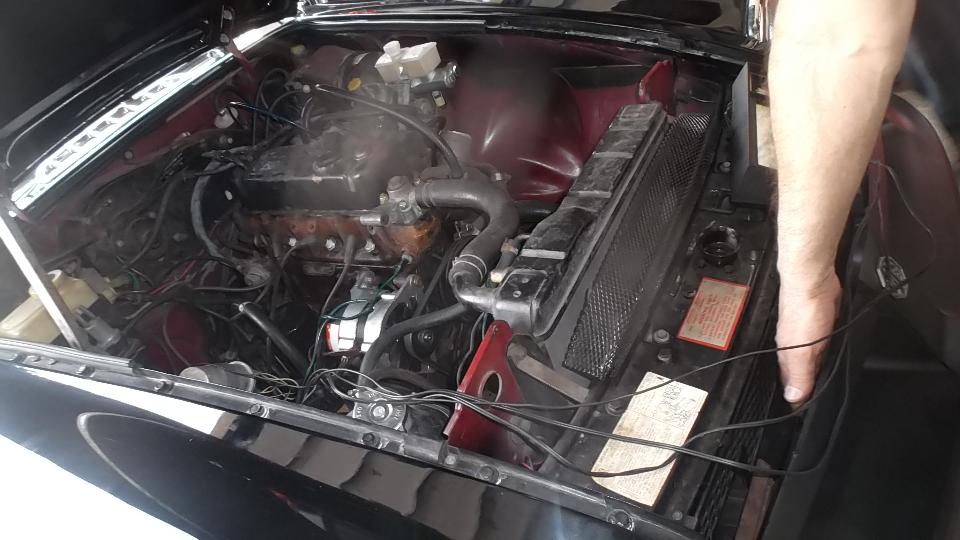
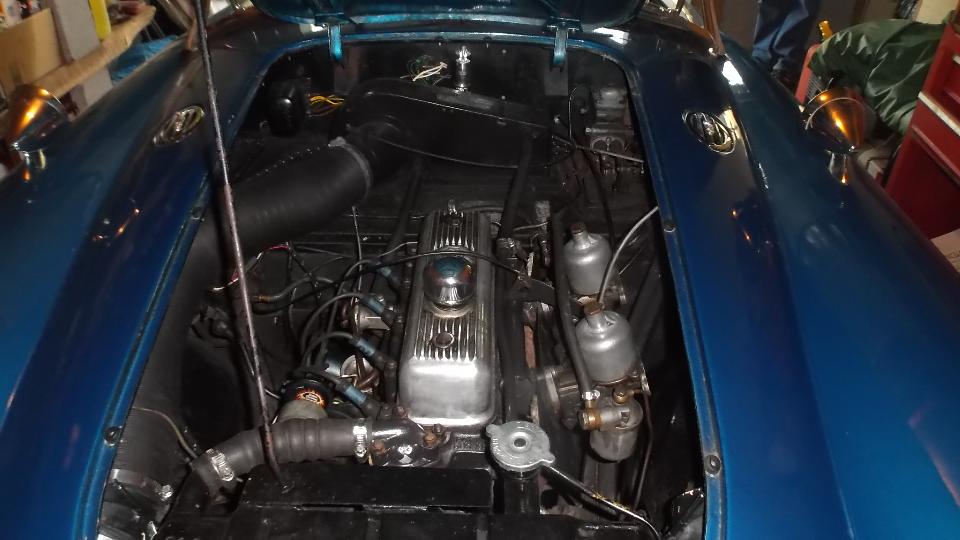
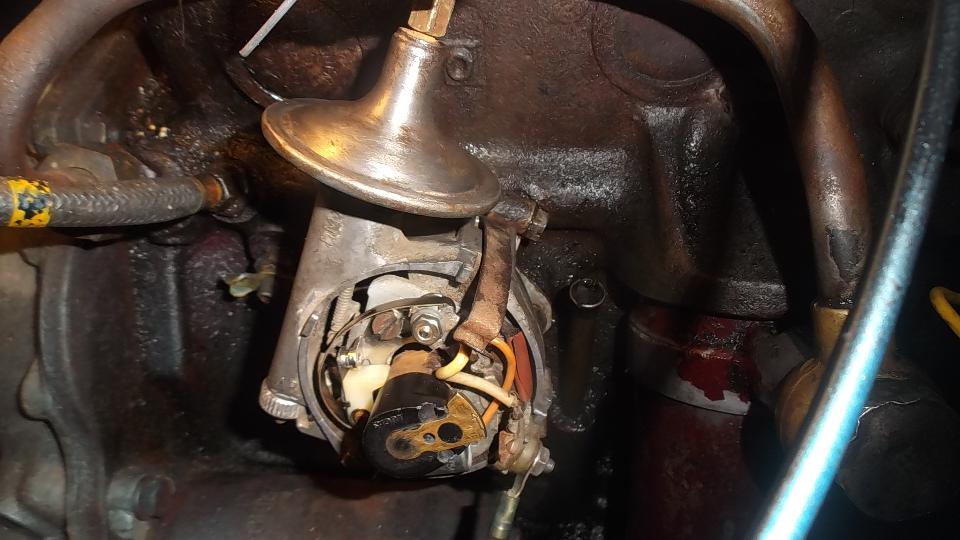
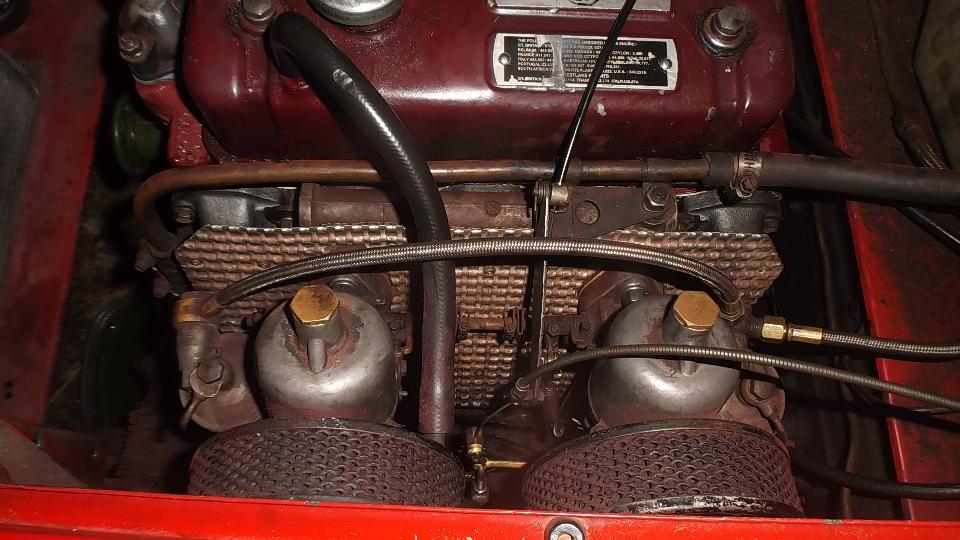
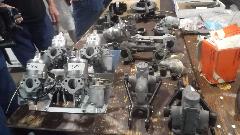
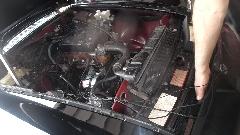
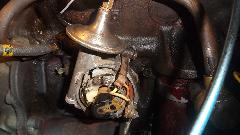
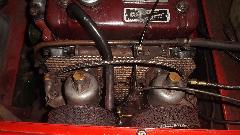
First diagnostic was an extremely weak spark on one cylinder only. Ignition coil was a Pertronics Flamethrower with 1.5 ohm resistance (big mistake). Removing distributor cap revealed points not opening, and badly worn rubbing block on the points. A quick points adjustment got it running in short order, but it was running very rich and dribbling fuel from both carburetors with jets stuck (full choke), and the distributor was cocked about 45 degrees clockwise. So the carbs were removed for disassembly, inspection, cleaning, adjustments to center the jets, and reassembly. Distributor drive gear was realigned to position the distributor in upright position. Sometime after dark the engine was purring and begging for a test drive, but maybe tomorrow by daylight.
To top off the evening, a trip to town to pick up Pizza, and some educational MG chat past midnight. When the hosts turned in, I got to go to work (you know how that goes).
Saturday, April 30, 2016
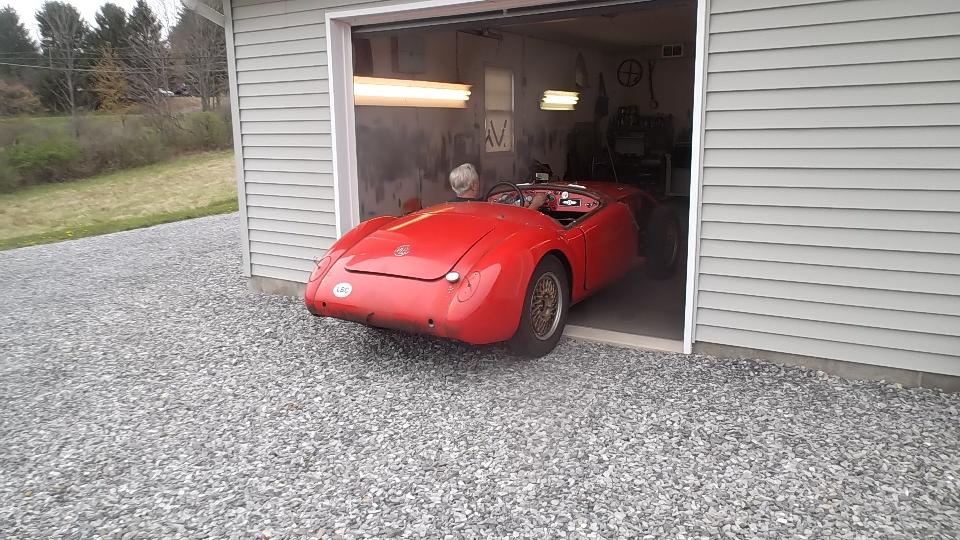
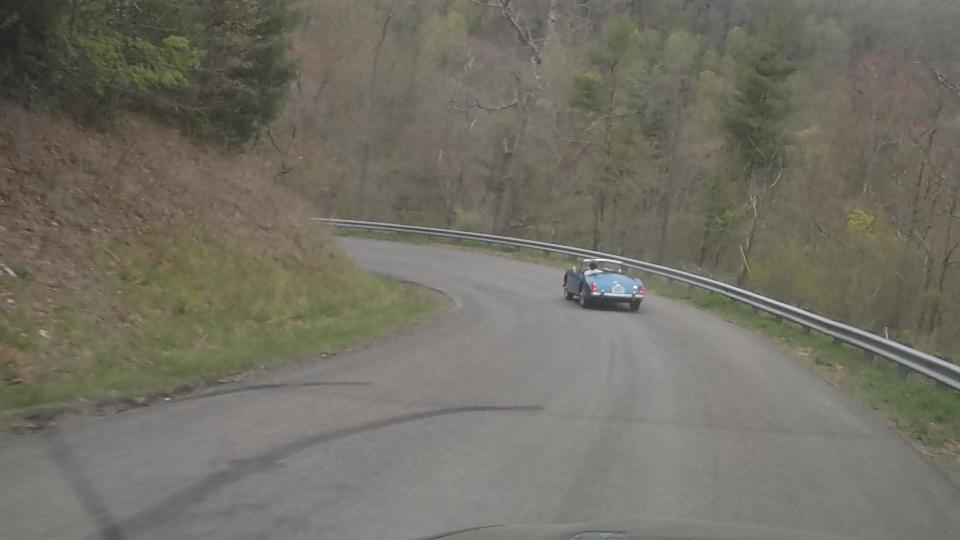
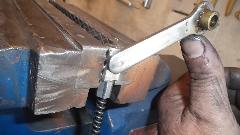
Ah, so I finally got to sleep in a bit this morning while Billy took his MGA for a test drive. I was up and just checking email when he walked in to announce the MG was dead on the road in need of rescue, and he had hitched a ride home. So off we went a few miles up some hills and twisties (carrying my traveling tool box). Sure enough the MGA had no spark and the points were closed up again in only five miles of driving. Rubbing foot was melted, and points were out of adjustment range.
A little twist back of the stationary contact with pliers gave it some points gap, enough to fire it up and drive it home. Got to love these diminishing roads. Then Billy was off to town (in his pick-em-up truck) to buy a new 3-ohm ignition coil. New coil installed, and another new set of points had it purring again, but no time for another drive, as the hosts had other plans for the evening.
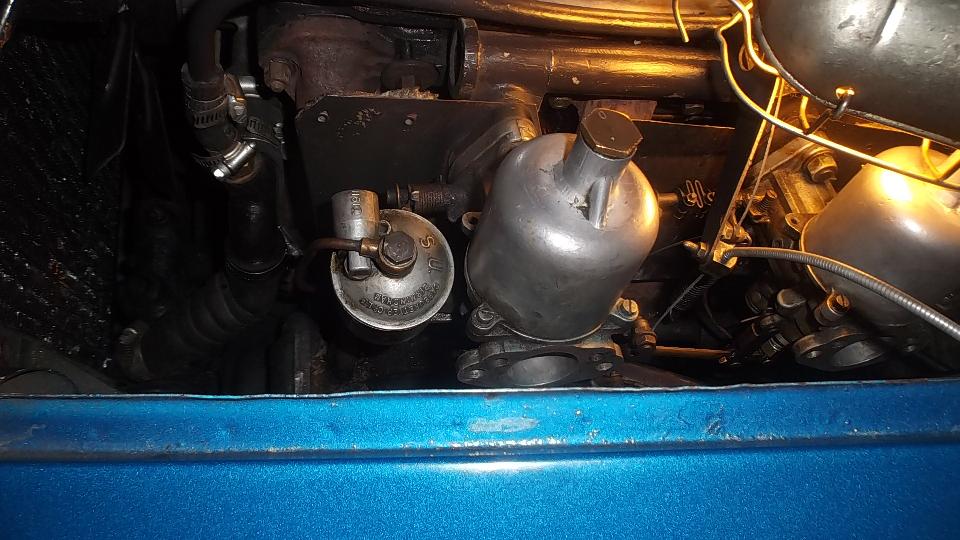
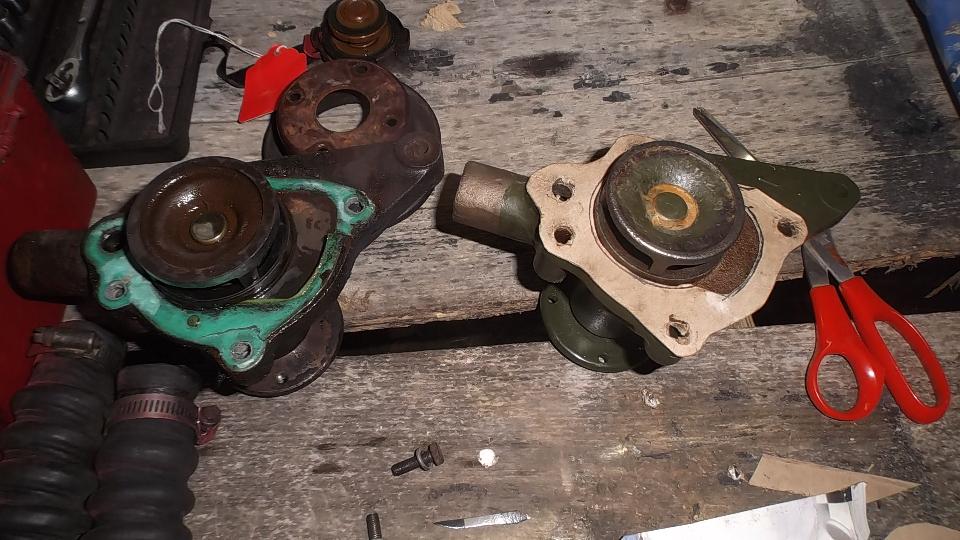
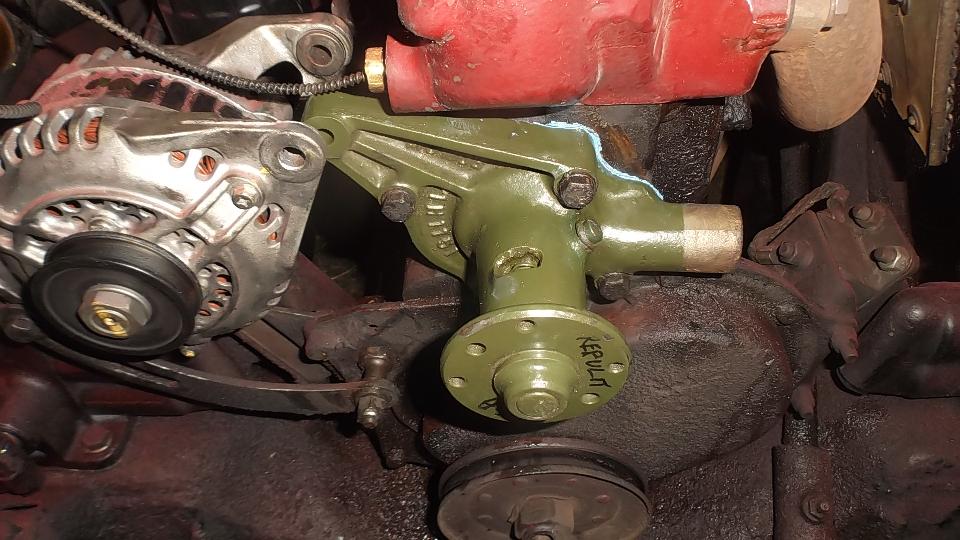
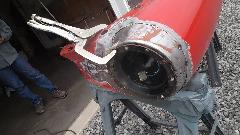
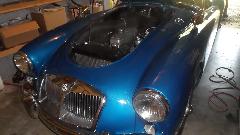
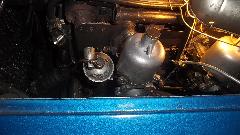
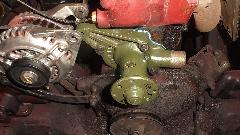
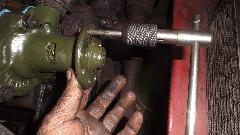
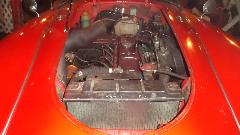
Ah, but the day was not done yet. As the hosts ran off for their evening appointment I grabbed navigator and we headed for the barn to do some maintenance on my MGA. Drain the radiator and yank it out to R&R the water pump. I was sure I had a couple of water pump gaskets in the trailer, but couldn't find them when needed, so I made a gasket. An hour later when looking for something else I found three water pump gaskets in my stash.
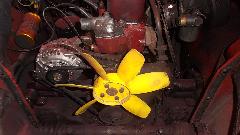
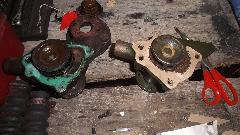
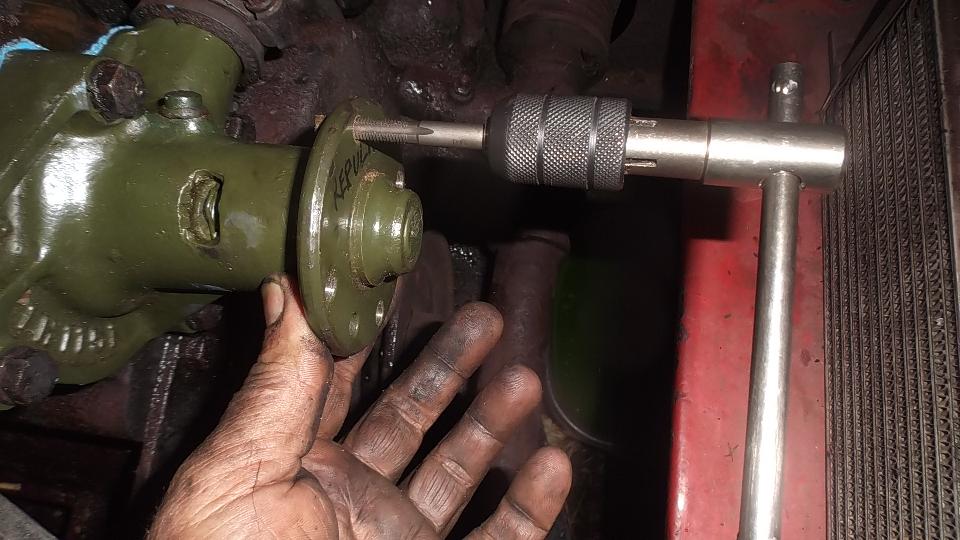
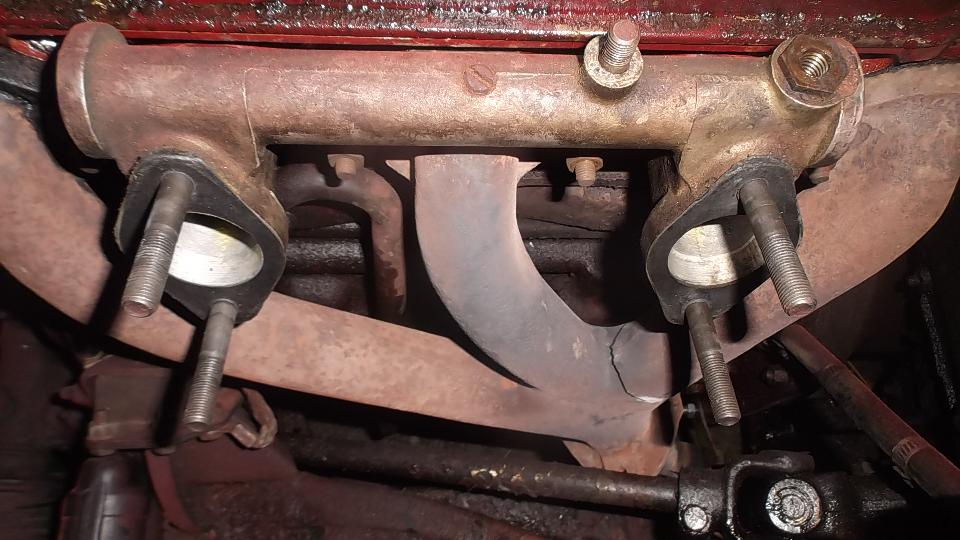
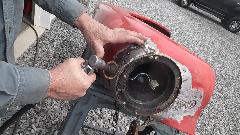
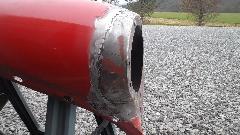
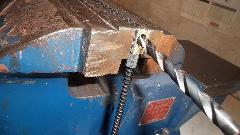
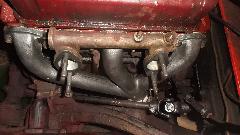
When the water pump was installed I had to clean paint out of the threads before attaching the pulley and fan. Then we were after the broken exhaust manifold, jack up to disconnect the bottom flange joint, remove carburetors and manifolds. This must be at least the fourth exhaust manifold failed on my car, all broken in the same place, and twice in the past two years.
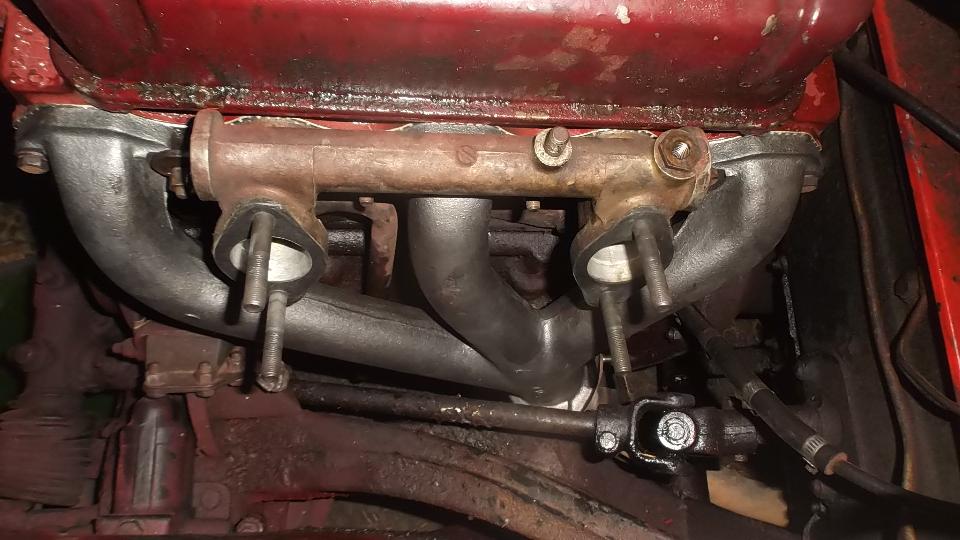
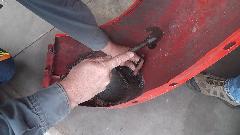
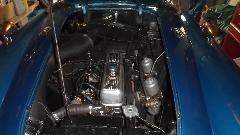
Having lost confidence in 50 year old heat cycled castings, I opted to buy a new one this time to see if it might last longer. Transfer threaded studs from bottom of old manifold to the new one, easy peasy since the studs were new last September. Shove it all back together in short order, and fire it up. Nice to banish the rattle and chuff-chuff in one swat. All quiet under the bonnet now.
Closing on 10-pm we ran the MG into town for a test drive and late night carry out munchies, after which MG chat ran until midnight again. And then I got to go to work to bring you the photos and notes, catching up with three days worth by 5-am.
|