The MGA With An Attitude
AIR CONDITIONING For MGA #3 - AT-201D
With Supercharger
On Jan 24, 2023, Bruce Huddleston from Kailua, HI, USA wrote:
"If anyone is wondering if it is possible to put air conditioning in a MGA using generic components the answer is yes, even if the MGA has a supercharger.
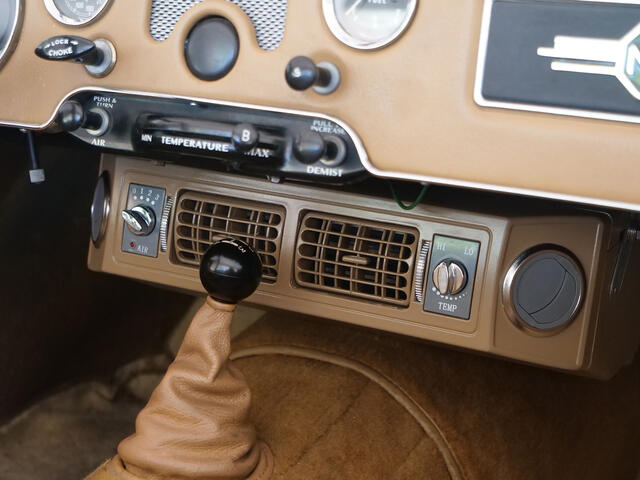
 The heart of the system is the evaporator. $98 with shipping from Amazon! It is necessary to paint the evaporator to match the interior using a paint that is compatible with plastic. The only electrical output from the evaporator is the compressor clutch signal which is routed to the binary switch. A photo of the evaporator is presented below. The heart of the system is the evaporator. $98 with shipping from Amazon! It is necessary to paint the evaporator to match the interior using a paint that is compatible with plastic. The only electrical output from the evaporator is the compressor clutch signal which is routed to the binary switch. A photo of the evaporator is presented below.
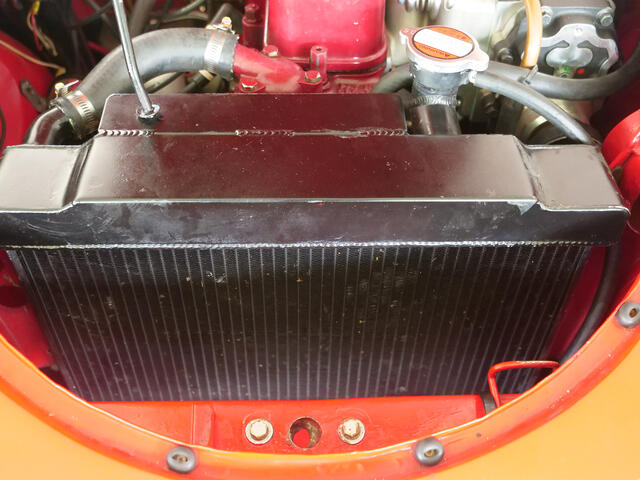
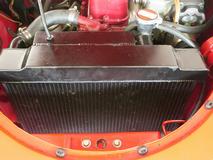
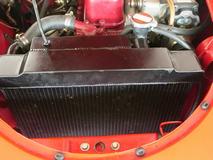
A photograph of the radiator is presented below.
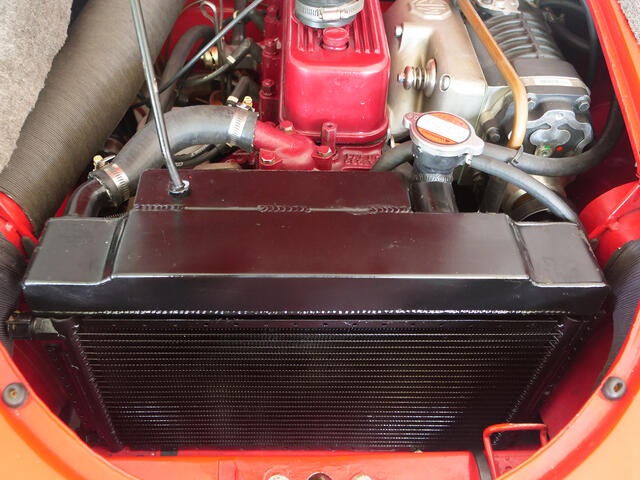
A generic 10 x 18 condenser is an exact match for a Moss aluminum MGA radiator. The fit is so tight that it is possible to use the radiator to clamp the evaporator in place. The condenser sits on top of a stock radiator packing. A photograph of the condenser is presented below.
The next projects is installing a Hayden 10" pusher fan.
I am still waiting for the Sanden SD7H15 compressor and the hose set.
I purchased a set of chrome bumper MGB mounting brackets from Nostalgic. Mounting the compressor should not be a problem, because it goes where the alternator used to be. The alternator may not fit, in which case I plan to go with a generator profile alternator.
I plan to trim the radiator inlet and to install a 90 degree bend that will be coupled to a 32 mm Revotec fan controller. The coolant line will then make a second 90 degree turn to connect to a coolant outlet elbow from a rubber bumper MGB. It will be necessary to make cuts in the radiator fan shield and to lift the shield to allow the coolant line to clear the water pump fan. -- Bruce

Evaporator
Radiator.
Condenser
"Today I was able to install the compressor and the alternator.
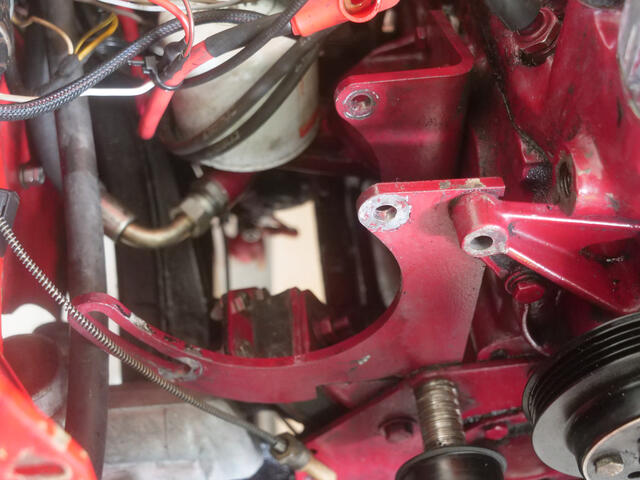
The brackets provided by Nostalgic Air are well engineered. You can adjust the position of both the compressor and the alternator. It is necessary to trim the front bracket and the passenger side engine mount bracket to address a clearance issue. A photo of the brackets is presented below.
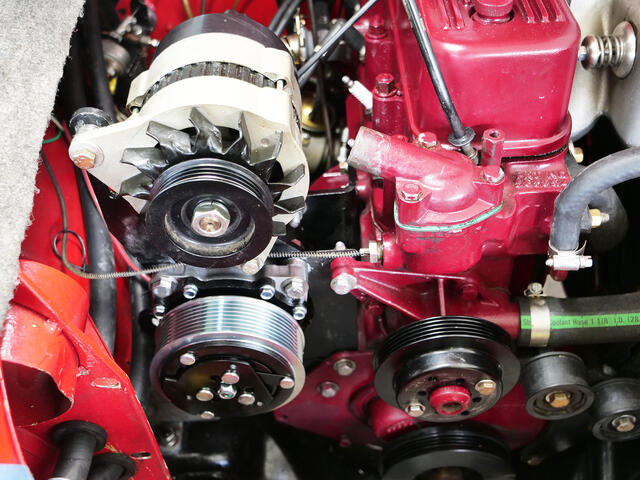
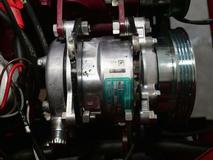
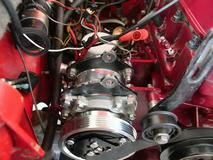
It is necessary to adjust the position of the compressor to line up with the crankshaft pulley. A photograph of the final arrangement of the brackets and washers is presented below.
| |
Compressor Brackets
|
On Feb 9, 2023 Bruce Huddleston wrote:
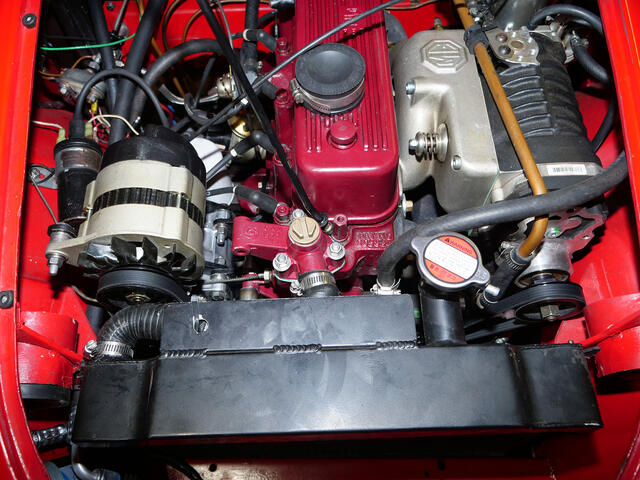
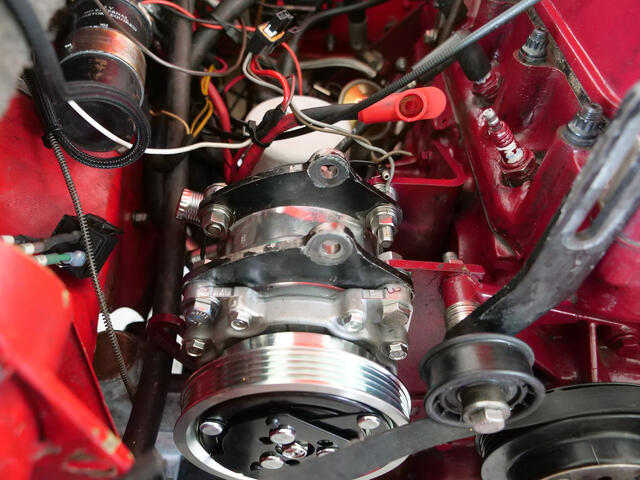
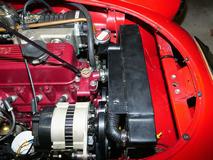
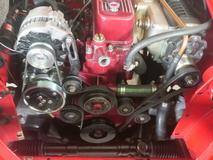
"The final arrangement of the compressor and alternator is presented below. The alternator clears the hood as long as the alternator is not in the full up position. The water outlet elbow is being replaced with a late model MGB elbow that goes (almost) straight out of the block.
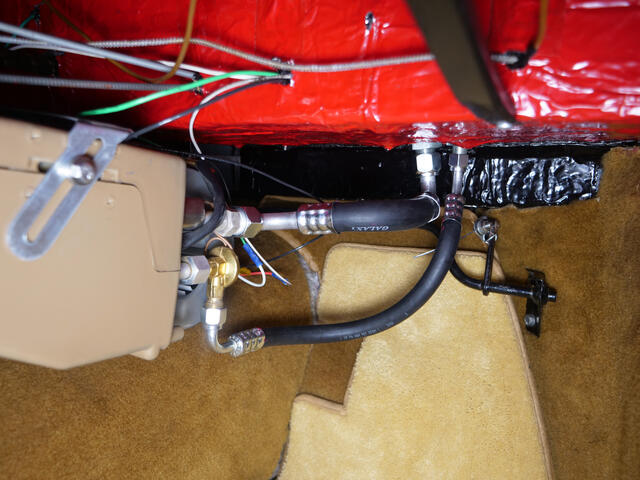
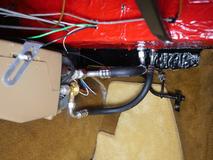
The lines for the evaporator are easy to get at, as presented below.
Overall the project has gone very well. The biggest remaining challenge is to get a ribbed belt that is the proper length. It may be necessary to install a tensioner and an idler pulley or two". --Bruce

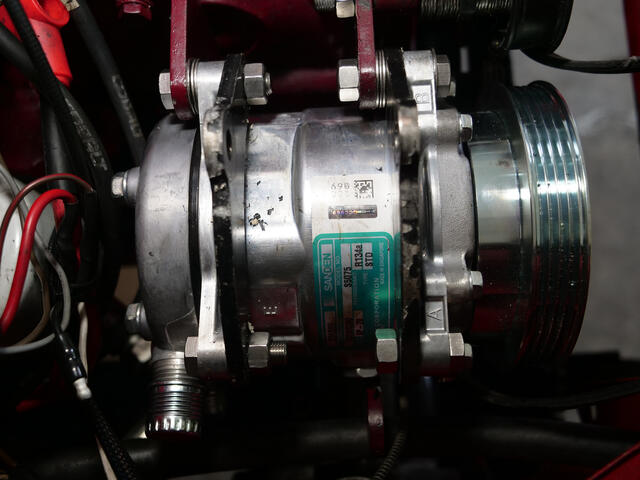
Compressor mounting detail
Compressor and alternator
Evaporator inlet and outlet
On Feb 10, 2023, Gary Lock in Gold Coast, Australia wrote:
"The kit I got from Old Air came with a tensioner". -- Gary
On Feb 11, 2023, Bruce Huddleston wrote:
"It turns out that the alternator bracket allows for easy and effective tensioning of the belt. It is a much better arrangement than the Moss tensioner.
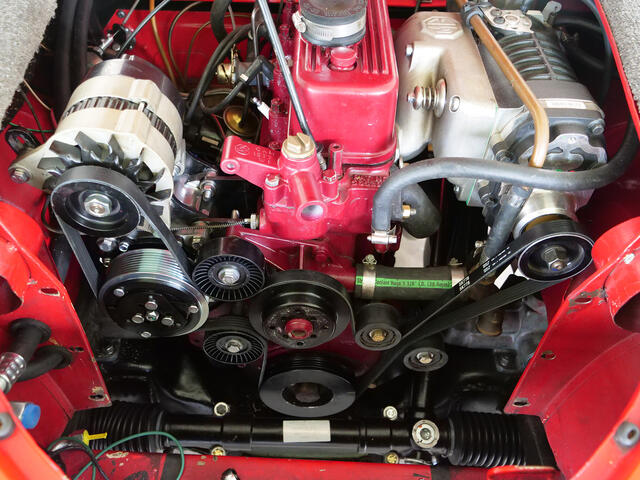
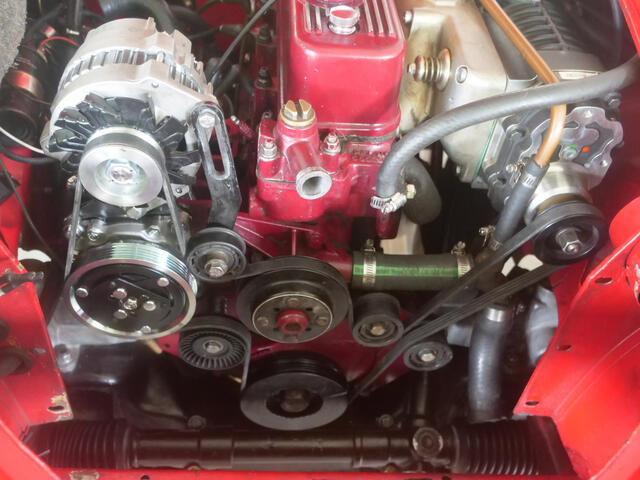
Everything is on one belt. Because of the length of the belt I had to purchase a five rib belt and to trim it down to four ribs". -- Bruce
I put in two idlers I bought at NAPA in order to have proper contact between the belt and the A/C compressor, the alternator, and the water pump and to get the belt length right. The clearance between the second idler and the compressor is 1/8th of an inch. That's close.
It turns out that if the compressor is lowered to full stop on the lower bracket the alternator does not hit the hood even if it is in the full up position. Interference between the hood and the alternator was my biggest concern about the entire project". -- Bruce
On Feb 12, 2023, Bruce Huddleston wrote:
| |

Serpentine belt
|
"A tensioner has a spring in it and it takes at least two bolts to hold it in place. The spring provides the correct amount of belt tension and the pulley rotates slightly as the belt stretches. It is self-adjusting.
An idler is just a pulley on an axle and it takes a one bolt to hold it in place.
A photograph of the serpentine belt. I am amazed that I could buy the two idler pulleys and serpentine belt at NAPA and the necessary bearings and spacers to fit everything together at the local hardware store". -- Bruce
On Feb 13, 2023 Randy Brown in Queen Creek, AZ, USA wrote:
 "Almost true.
A tensioner pulley is an idler pulley that adjusts to provide belt tension.
The tensioner can be manually adjustable.
The tensioner does not have to be self adjusting.
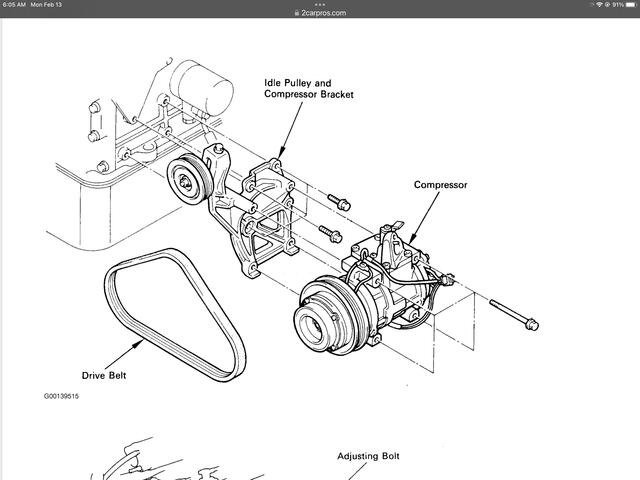
This picture shows the three common pulleys.
The crank or drive pulley.
The air conditioner or driven pulley.
And an idler pulley.
In this case the idler pulley is also a manually adjusted tensioner pulley. --Randy
On Feb 15, 2023, Bruce Huddleston wrote:
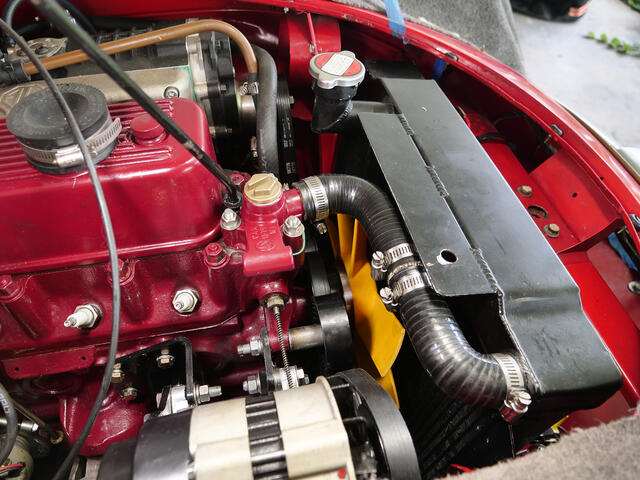
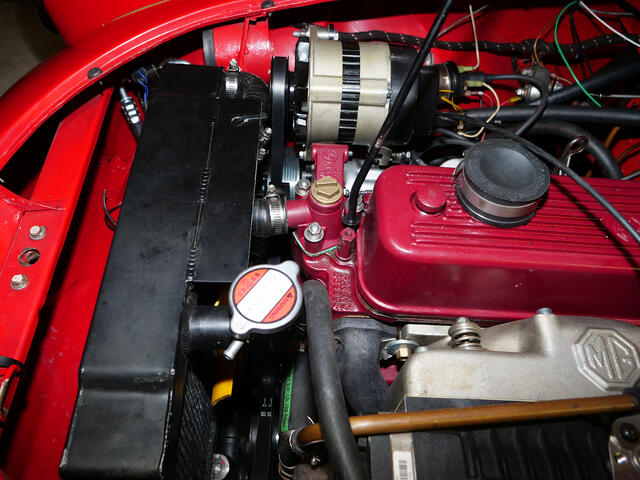
"The upper radiator hose was a real challenge. The space between the alternator and the radiator outlet is just large enough to fit a 90 degree silicone hose. The best way to cut the hose to length is to put a hose clamp on the hose, align it, tighten it, and use it as a guide for the utility knife. A miter saw does not work very well to get a precise cut.
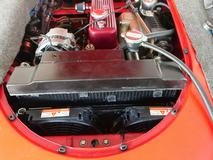
A photograph of the upper radiator hose is presented below. The radiator is sitting on the radiator duct floor. I still have to install a Revotec fan controller.
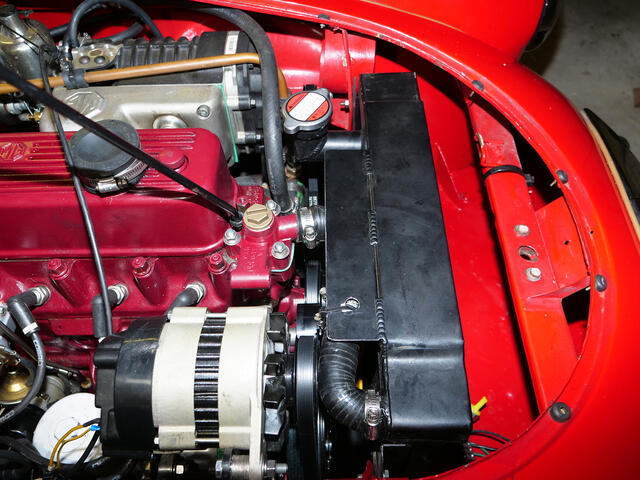
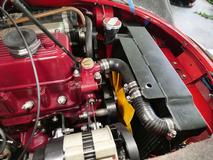
The front, left side, and right side views of the A/C setup with the radiator in place are presented below.
I still have to hook up some hoses and some wiring, but these are minor projects in comparison to installing the compressor and the upper radiator hose.
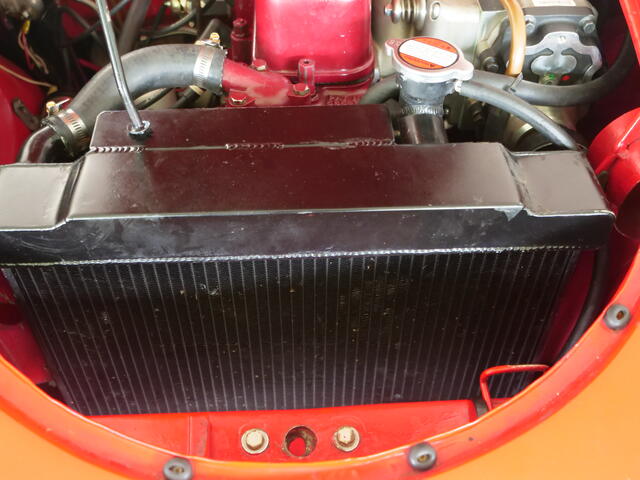
The top of the radiator fill pipe is at the same level as the top of the upper radiator tank.
The A/C system was purchased from numerous vendors. The only parts that I bought from Nostalgic were the brackets. The brackets are very well engineered. They are made out of 1/4" steel plate, so they are quite rigid. The layout is pretty amazing, because the alternator/compressor assembly rotates on two parallel axes, so you can put it exactly where you want it.
You cannot use the condenser/dryer assembly provided by Nostalgic because it will not fit in an MGA. The condenser is a generic 10 x 18 condenser. I may have to install a second condenser if the system pressure is too high. The compressor is a generic Sanden SD7H15 compressor from Amazon. The evaporator is a generic universal unit from Amazon. I purchased the hose set and dryer from Vintage Air via Amazon. The trinary switch is generic from Amazon. The radiator hoses were provided by Pegasus. The idler pulleys were provided by NAPA.
I plan to talk to Nostalgic about providing an A/C kit for an MGA, or at least a set of directions.
The fresh air duct fits. I had to put a small divot in it to clear the alternator.
There is enough room for a 12" Hayden fan in front of the condenser. The fan sits on the radiator duct floor and is attached to the condenser with RTV silicone. I plan to leave the existing fan in place.
In order to improve the cooling capacity of the condenser and radiator I:
1. Removed the oil cooler - the oil pressure is fine without an oil cooler. 30 psi at 900 rpm at 190 F.
2. Removed the fresh air inlet ducts - the right side is blocked by the dryer. The difference in temperature of the carburetor cooling air with and without the inlet duct on the left side is minor. The float bowl on a supercharged MG engine is far away from the exhaust manifold in comparison to a carbureted MG engine.
| |
Upper radiator hose
|
3. Changed from a slatted grille to a wire mesh grille - the slatted grille is bad news from a radiator duct airflow perspective. The air has to make two 45 degree turns, and the radiator cooling air inlet area is relatively small. The mesh grille is very effective at maximizing airflow and I think that it looks better than the slat grille. Jaguar puts mesh grilles on supercharged engines, so if it is good enough for Jaguar it is good enough for me....
So far the performance of the cooling system is spectacular. The real test for the cooling system will be on a 90 degree day in traffic with the A/C on". -- Bruce


Radiator Front View
Radiator left side view
Radiator right side view
On Feb 16, 2023, Bruce Huddleston wrote:
"I was able to fit the Revotec fan controller without any problems.
| |
Revotec fan controller
|
It turned out that there was interference between the hood support bracket and the alternator. Fortunately it was easy to move the hood support and the rear hood support bracket to the driver side of the vehicle. I bent the front bracket, and it can be un-bent if it is ever necessary. I am in the process of installing another idler pulley in order to be able to compensate for the pending switch to a smaller pulley for the blower.
I have to order a few more hose fittings to complete the A/C installation. There is no rush, since it is quite cool right now and there is no need for A/C. Getting the serpentine belt dialed in was the major challenge for the entire project. For some reason the alternator was making a strange noise that sounded like a bearing that was failing, but "magic" TC-11 got rid of the problem. The alternator is only six months old so an actual bearing failure was unlikely. There was also a fairly long bolt that had dropped on to the frame which made an intermittent noise, so it was hard to track down. -- Bruce
On Nov 13, 2023, Bruce Huddleston wrote:
"What seemed like a fairly simple project turned out to be much more comprehensive than I expected.
In order to operate the two radiator cooling fans and the two condenser cooling fans I had to put in two 640 CC six volt batteries, a 100 amp alternator, a separate battery power fuse block and a separate ignition power fuse block.
A boost gauge and a wideband air/fuel meter took the mystery out of tuning the carburetor.
The idle is smoother with the vacuum advance disabled.
The timing advance is 15 degrees at 1,000 rpm.
The Sanden SD7H15 recommended by Nostalgic AC Parts may work for a supercharged MGB but it does not work in a supercharged MGA. The number of V-grooves and the belt tension required to drive the SD7H15 are much too high.
A Sanden SD5H09 works very well in an MGA with a 10" x 18" condenser and two 10" condenser cooling fans.
Was it worth the time and effort? Absolutely positively. The AC completely changes the driving experience. In an MGA you may look cool, but if it is above 80 F you are definitely not cool. Sitting in traffic in the hot sun is miserable.
With AC, instead of hot air coming out of the footwell I have cool air coming out of the footwell. I can feel it when the MGA is going 60, and I can really feel it when the MGA is stationary.
With the four cooling fans I can sit in traffic indefinitely without overheating.
It is easy to use the choke cable to adjust the idle speed slightly when the AC is on. With the AC on the idle speed drops from 1,000 rpm to 800 rpm, which is a little low.
The AC consumes 5,4 HP, which is barely discernible for a ~130 HP supercharged engine.
The coolant temperature is ten degrees F higher when the AC is on. The coolant temperature ranges from 180 F to 205 F at slow speed and in traffic. The coolant temperature is 190 F with the puller fans off at highway speeds.
A ten minute 3 degree slope raises the coolant temperature to 220 F with the AC on.
I have a supercharger camshaft from Basil Adams and the idle was a little lumpy. The extra load of the compressor and the alternator driving four fans makes the idle a lot smoother. The low speed cruise is silky smooth.
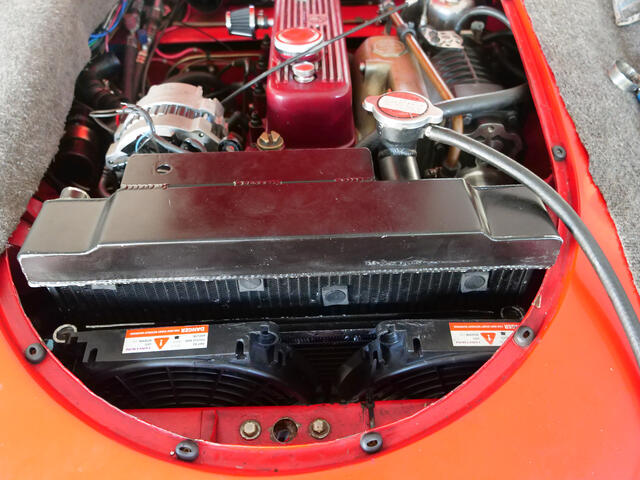
The condenser is an amazing fit, as presented below. The condenser supports the weight of the radiator and is flush with the radiator tank. It looks amazingly stock to me.
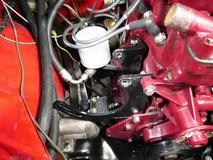
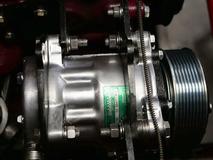
The most important components of the project are the two compressor brackets.
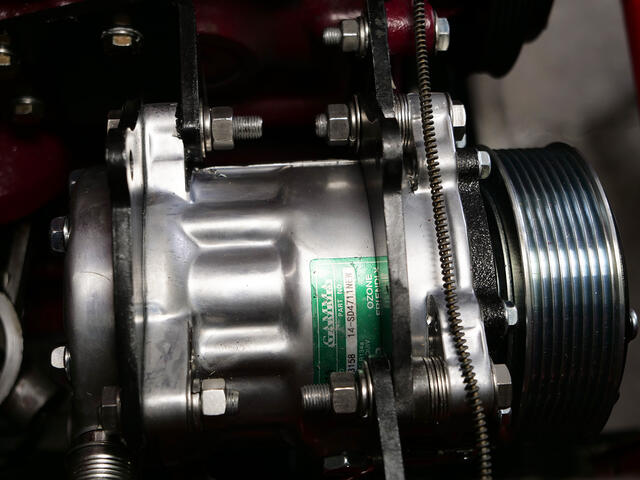
The compressor is an actual Sanden, not a knock off (Gamma).
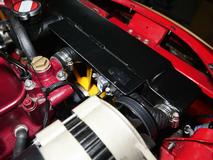
The alternator brackets are presented below.
The final arrangement of the components is presented below.
The condenser is presented below.
The two pusher cooler fans are presented below. The condenser is not in place in this photo.

|