The MGA With An Attitude
INPUT PINION SEALS for the Steering Rack, rubber -- SR-201B
 On Mar 1, 2018, Jeff Sienkiewicz in New Milford, CT, USA wrote:
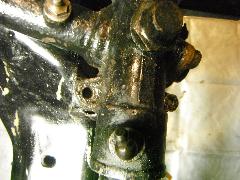
"With the engine out of the car and front bumper delete, my task was to replace the seals in the steering rack column as it had been spewing a lot of grease and making a mess. The goal was to do the job in situ.
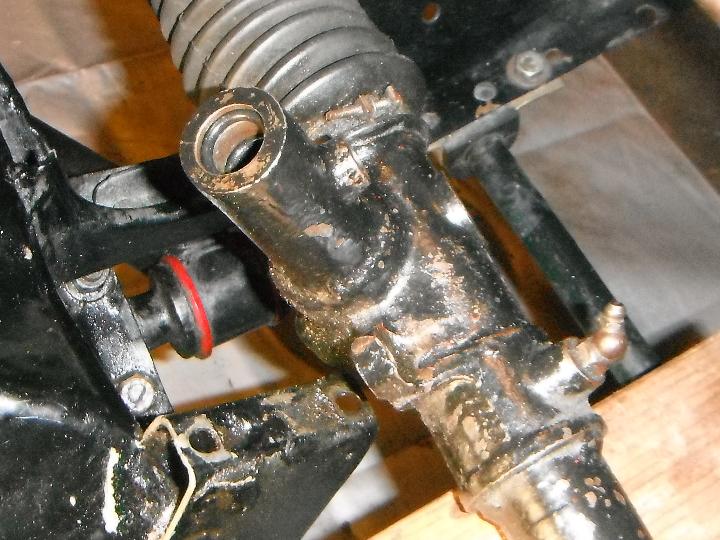
 I started by removing the front valance. Then I put witness marks up at the universal joint so I could realign correctly. The top of the steering column is splined, and on the back side, there is a groove cut in for where the tightening bolt fits. This grove and the bolt will need to align when the steering column is reassembled. From the rack & pinion assembly, I removed the front cap and the top cap. Then I removed the 4 bolts holding the steering rack to the frame. I was able to pull the steering column rod forward and out of the unit. I started by removing the front valance. Then I put witness marks up at the universal joint so I could realign correctly. The top of the steering column is splined, and on the back side, there is a groove cut in for where the tightening bolt fits. This grove and the bolt will need to align when the steering column is reassembled. From the rack & pinion assembly, I removed the front cap and the top cap. Then I removed the 4 bolts holding the steering rack to the frame. I was able to pull the steering column rod forward and out of the unit.
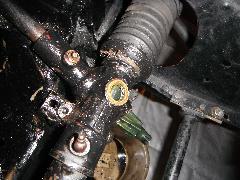
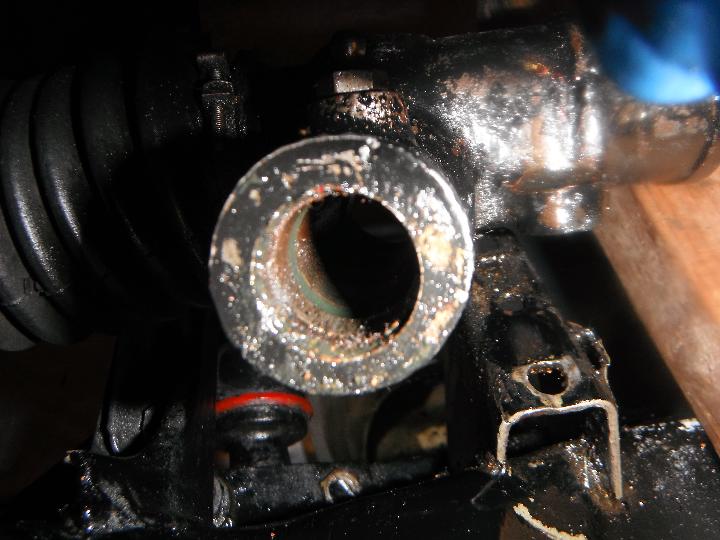
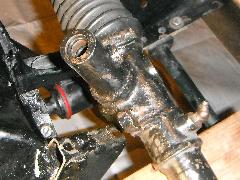
 Once the steering column rod was removed, I could spin the rack housing upward about 90 degrees and could easily access the end for the seal replacement. At first, I didnt even see a seal to remove. But probing with a hooked dental device, I found the outer felt seal about 3/8 wide and 1/8 deep. The inner seal was missing.
Although I had some felt seals, I decided to use neoprene O-rings. I started with O-rings with the following dimensions: ID 3/4" OD 1" Section 1/8". I couldnt get the inner seal to fit and eventually snipped off about 3/8 to achieve a butt joint. I was able to fit the outer seal without difficulty. I did have tremendous difficulty reinserting the steering rod and sliding it all the way to the universal joint. The seals were so tight that I could barely spin the shaft with two hands. Even with the steering wheel, turning was quite tight.
 I decided to pull apart and I removed the inner O-ring. Partially reassembled, the steering felt nice and light, much like my original feel. But lacking the confidence that this was a long term solution, I pulled it apart a second time. This time I inserted an inner seal that had the following dimensions: ID 19mm, OD 24mm and section 2.5 mm. Used the original outer seal. Went together fairly easily.
On reassembly, the steering is stiff compared to my original, but not nearly as stiff as with the larger inner seal. Decided to leave it this way for now. If I find it too stiff in competition, Ill eliminate the inner seal altogether and just use the outer seal. Ultimately, I think the best solution would be to find appropriately sized square cut O-rings to use a seals".
Note from Barney:
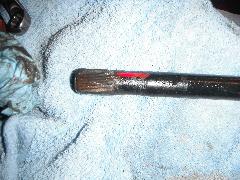
From the prior page you may note that there was originally only one felt seal, and the second groove is for grease distribution. Stiff steering is definitely a no-no. You would be fighting the steering all the way down the road, darting left and right, never being able to keep it tracking straight. Install the steering wheel and give it a test turn. You should be able to turn the wheel with one finger at the outer rim. If you find any more drag that you should fix it before you even try to drive the car. O-rings are very good seals, as long as the shaft is smooth enough. One rubber seal in the outer groove should serve well. If it feels stiff, I'd recommend removing the inner O-ring.
I knew the inboard seal was tighter, and I suspected the second groove may have less depth, but have never actually measured the gland dimensions. If someone has a rack disassembled, and can figure out how to measure the groove width and depth, I would appreciate having the information. That would allow selection of the proper rubber O-ring(s).
|