The MGA With An Attitude
TIMING COVER and GASKET, R&R In Situ - TC-303T
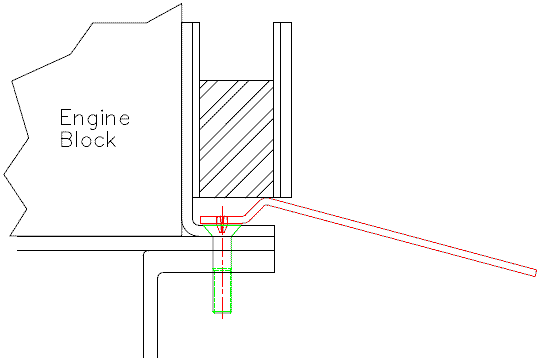
When removing the timing chain cover on the MGA Twin Cam there is a problem that makes the task very difficult.
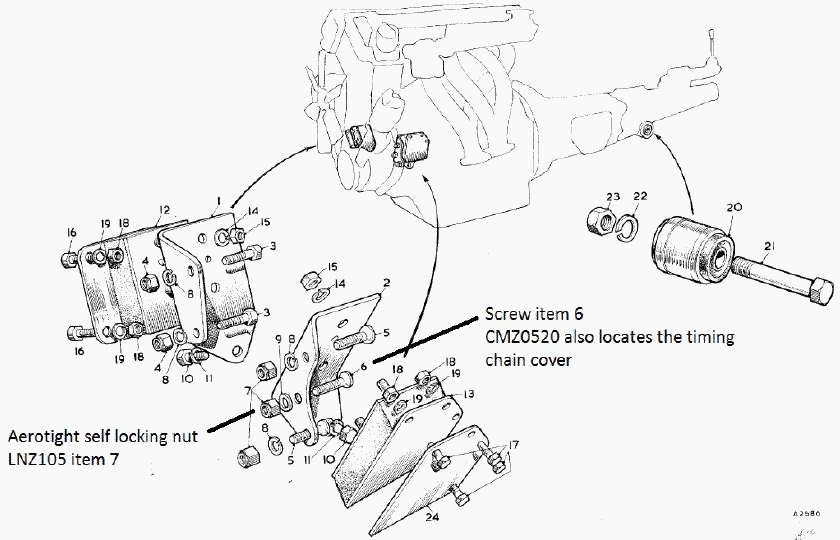
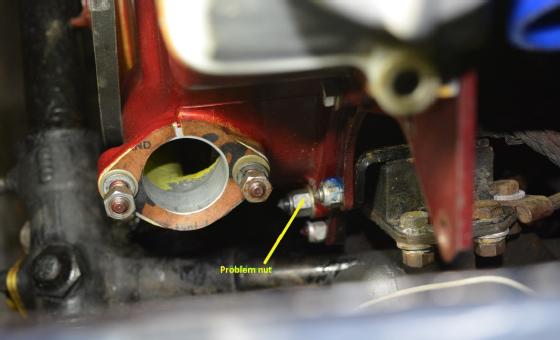
One of the locating screws is a recessed Philips head screw CMZ0520. This screw passes through the left side engine mount bracket, the engine front cover, and then through the timing chain cover. When attempting to undo the Aerotight type nut LNZ105, the self locking action tends to keep turning the screw making nearly impossible to remove the nut. The head of the screw is recessed and inaccessible.
If the engine is out of the car this screw may be removed and modified by cutting a slot in the end of the screw so it can be held by a screwdriver when later removing the nut with the engine in the car.
If the engine is in the car the screw can be removed and modified by jacking up the engine and removing the engine mount, and then the screw.

Please do not ask why this is not a PosiDriv screw, because I don't know (even though it seems like it should be).
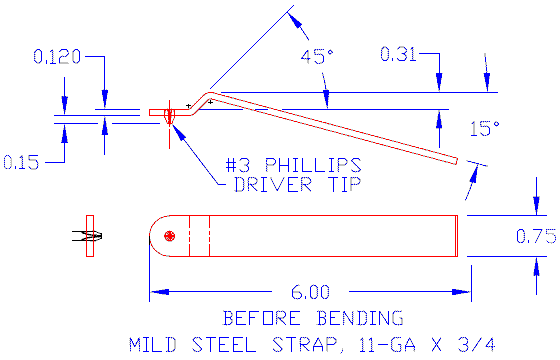
I have an idea for a special tool that may be easier than slotting the tip end of the screw. I suggest welding the tip end of a Phillips screw driver onto a flat bar to use as a wrench, something like this:
On 5/23/2020, Mick Anderson wrote:
"Removing the timing chain cover is no big deal. I and many others have done it multiple times, mainly to change the endless chain or the dampers. Quite a few procedures but none are really difficult, just takes time.
 Mainly remove the radiator, water pump and distributor drive shaft, uncouple steering column u-joint and move the rack forward, remove front pulley. All this is in the Workshop Manual. The only difficulty is that damn screw. It needs slotted on the thread end. When removing the timing chain cover you must be able to have clearance to move the cover forward to clear the dowel pins. The cover is doweled mainly for good distributor drive gear alignment. Mainly remove the radiator, water pump and distributor drive shaft, uncouple steering column u-joint and move the rack forward, remove front pulley. All this is in the Workshop Manual. The only difficulty is that damn screw. It needs slotted on the thread end. When removing the timing chain cover you must be able to have clearance to move the cover forward to clear the dowel pins. The cover is doweled mainly for good distributor drive gear alignment.
I would not take the engine out to remove the cover, that is difficult. Normally the wide sump will not clear the chassis engine mounts And if you tilt the engine further the camshaft covers hit the heater shelf. A very extreme tilt can do it but getting to line up with the gearbox shaft is a problem.
I remove the sump first, which itself is not easy. All cars I have worked on have the five holes in the front cross member to access the front bolts. I have a cut down wrench to access the side bolts. Remove the oil pump, then with the pistons half way down the bores the engine comes out almost level.
Putting it back, the most difficult task is fitting the lower radiator hose. I fit the hose to the water pump inlet extension first. Apply a bit of rubber grease to the radiator bottom outlet. Fit the outlet into the hose at the same time as you lower the radiator. It helps if you have already fitted both clips loosely to the hose first. One member who has a Gold Seal (factory overhauled) engine says that it came from the factory with the screw slotted. It looks like an undocumented modification". -- Mick
|