The MGA With An Attitude
REMOVING A RUSTED BOLT -- UT-102
Rule #1: When removing a rusted bolt, DON'T BREAK IT, because if you do, you may go directly to Removing a broken bolt.
Rule #2: If the fastener still has a serviceable head on it, DON'T BUGGER IT UP. If you do, your tool will quickly change from a screwdriver or wrench to a ViceGrip. When working with Pozidriv screws (many of those on the MG), do use the proper Pozidriv driver bit, not a Phillips driver (which may cam out and ruin the slot).
Rule #3: Use lots of penetrating oil, and lots of patience. The best penetrating oil is 50/50 acetone and ATF (Automatic Transmission Fluid). The more you can soak the thing in penetrating oil the better chance it has of coming loose instead of breaking. If it's not stuck too bad, you might get away with a single application of penetrating oil, a short wait, and maybe it could come loose (fat chance). If the part holding the rusted fastener is small, you might toss the whole part in a tub of penetrating oil for a day or two (also rare). Otherwise you apply the penetrating oil maybe 2 or 3 times daily for anywhere from a day to a week, depending on how long it takes, and how much patience you have. Also do try to apply the penetrant to the area of the threads. Oiling the head of a bolt doesn't do much for loosening the threads.
After some waiting time, get a good gripping tool on the screw, and give it a jolly good try, while keenly observing rules 1 & 2.
Turn the bolt (or nut) only slightly at first. If it starts to bind up more, then reverse rotation, tighten it up a bit, reverse again, and try loosening it again. While you're turning it back and forth, apply more penetrating oil. Once the thread breaks loose it has a better opportunity to absorb the penetrant deeper into the threads. If or when you decide that you need a rest and the fastener needs more soaking time, try to turn it to a midpoint of least resistance where it will have more clearance in the threads before applying more penetrant.
The amount of time and patience you allow for this chore may be directly proportional to the value of the part you are trying to save, or to the amount of time it might take to repair the part if you bugger it up. Here's a good example. Many years ago the captive nuts in the body of my MGA which hold the screws to secure the rag top folding frame were damaged. These fasteners are hidden inside of the box section of the door striker post, so the repair required some cutting and welding to get inside the post to repair or replace the fasteners.
Twelve years later I had the same problem again when the same screws could not be removed (second restoration). These are flat head screws, so it's not easy to cut them off, and I ended up using a ball grinder with a Dremel tool to grind out the entire screw head to remove the top frame (3 screws each side). This time it was more cut and weld to R&R a small section of the inner panel holding the captive nuts. This time I welded in a 5/16 inch thick steel plate with tapped holes (so the captive float nuts cannot be torn loose inside). Not wanting to ever have to do that again, for reassembly I used hardened steel machine screws with hex socket heads, and applied generous amounts of anti-seize compound.
Another four years later I wanted to replace the interior kick panels (to remove and recover the rear corner cockpit trim rail), which required removal of the top frame, and again these screws were very stubborn. But this time with hardened screws, and a good Allen wrench, I opted to apply lots of patience and penetrating oil to remove the screws and avoid another round of cut and weld. This required two 20 minute sweat sessions daily for four days, but I did finally get them all out without damaging the threads. This time it went back together with stainless steel screws and more anti-seize, and I hope I don't have to do it again any time soon.
Addendum November 2007:
As fate would have it, I got to remove the top frame again four years later while replacing body sills. This time the screws came out on the first try with only a little fuss. Three cheers for stainless screws and anti-seize.
The next method of removing a rusted bolt involves heat. This requires that the bolt still have a serviceable head on it, or at least enough of the shank exposed to get a grip on it with a large ViceGrip. It also requires the part you are trying to save is not going to be particularly susceptible to heat damage. Do not do this with an engine block or bearing cap or cylinder head, unless you are prepared to do some finish machining on the part to clean it up after it might be warped from the excess heat. Aluminum parts are also subject to easy warping or even melting faster than you might expect, so special care would need to be used there.
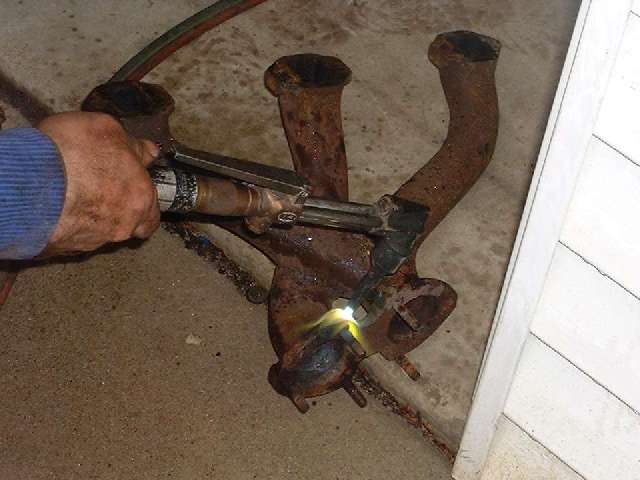
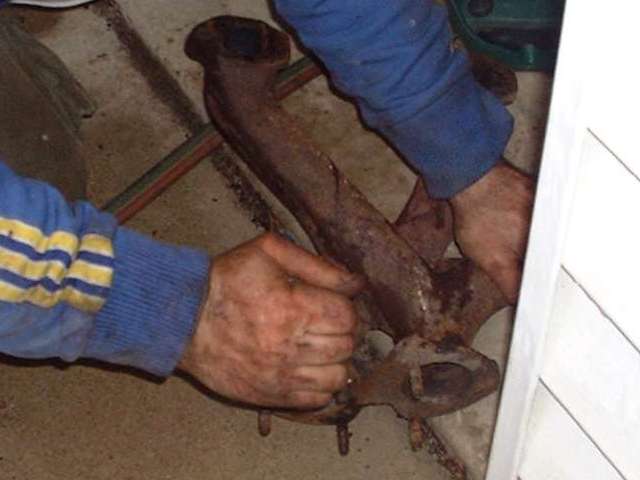
An exhaust manifold is a prime candidate for this method. One of the most common patients is a broken stud on the bottom end of the manifold where the exhaust pipe will connect. This also requires a LOT of heat, so forget about even trying to use a propane torch. An acetylene torch is the best heat source. A MAPP gas torch may suffice if the parent part is not too heavy. And as with any gas torch work, heavy leather gloves are in order, and maybe also a long sleeve shirt and dark goggles.

You need to heat the parent metal, and try not to heat the stud any more than necessary. This does two things. Heat will expand the parent metal part to encourage it to loosen its grip on the bolt or stud. It will also cause some thermal stress in the parts due to irregular expansion of the material that tends to break the bond in the thread. The procedure is to heat the part around the stud until the metal just begins to glow dull red. Then grip the stud with the ViceGrip and unscrew it.
Heat as small a spot as is practical (without local melting of the metal), and then unscrew that stud immediately before the part has a chance to cool down. This may take some torque, and it may be a squeaky fight to get it unscrewed, but again, don't get in too big a rush and break the stud. If it's tough getting started, try turning the stud back and forth just a little to break the bond before unscrewing it. If it comes part way out and then gets tight again, stop and take the time to apply more heat. And when you're finished, do NOT throw the part in cold water for quick cooling. A cast iron exhaust manifold might well break into several pieces from thermal shock if dosed with water. Just set it down and let it air cool slowly. If you do this a few times you should find that it is quite successful in most cases.
Another common candidate for heat is floorboard screws during restoration work. These screws are often rusted into the captive nuts in rusted floorboard support rails. You can use a hole saw to cut around the screws and finishing washers to remove the boards, then ViceGrips to break away the remaining wood and smash the washer. Heat the captive nut with a torch, and unscrew the bolt with ViceGrip or large pliers. This works on broken fender bolts as well, but try not to overheat the body sheet metal.
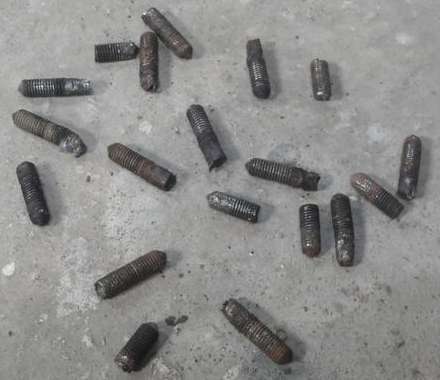
Photo of removed floorboard screws from Neil McGurk in Cumbria, UK, who reports 100% success on the first try, and not as difficult as first thought.
|