The MGA With An Attitude
Intermittent Wipers Tech -- ET-210 - Pg 7 of 9
Take a moment to get your perspective here. Depending on which way you look from under the dash you may want to rotate the picture for a better view. This is looking upward to the center of the car from the right side footwell. The heater control is attached to the bottom edge of the dash on the left of the picture, The two black bars running left to right are the angle braces running from the bottom edge of the dash to the heater shelf (bulkhead). I have the new wiper control module tie-wrapped onto the top of the left brace with the wires extending forward toward the bulkhead and immediately turning back toward the dash, and then upward to the ceiling. To the right side of the picture you can see a white in-line fuse holder with bright red wires. At the far right you can see a butt splice connecting the fuse holder to one of the blue wires from the module.
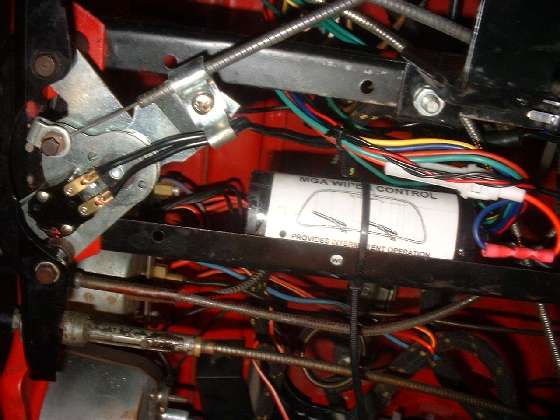
This control module requires two separate power supplies, one switched on/of by the ignition switch, and the other always live. The switched (and fused) supply will be tapped from a green wire on the back of the fuel gauge (so I don't have to run wires into the engine bay). This is the same circuit (and fuse) that originally supplied the wiper motor. The only always-live fuse in the car is the 25/50 amp slow blow fuse that powers the horn. As I didn't deem it prudent to connect this module and the wiper motor to a 50 amp circuit, I have installed the "optional" in-line fuse here, and the unswitched supply will be tapped from the input side of the ignition switch (also not going into the engine bay). If you are ordering a ready built control unit for the MGA, the in-line fuse may be supplied with the unit. The same may apply for the early MGB, or for any other car which may be lacking a low current fuse for the always live power. Ask the supplier to be sure. After the installation was finished, this wire bundle was tie-wrapped to the top of the right hand dash brace. But be sure to keep the fuse holder accessible.
In case you were wondering about the flat strap bracket in the upper right corner of the picture, attached to the right hand dash brace with a single bolt and hex nut, that's part of the framework for the navigator's desk.
|