The MGA With An Attitude
DISTRIBUTOR CAP SCREWS - Incorrect Design -- FT-045
This is an interesting problem that may not catch you today but might come back to haunt you later. It may result in a dead car on the roadside in the future, or a broken distributor cap while you are trying to install a new one.
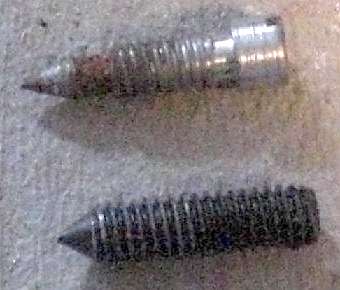
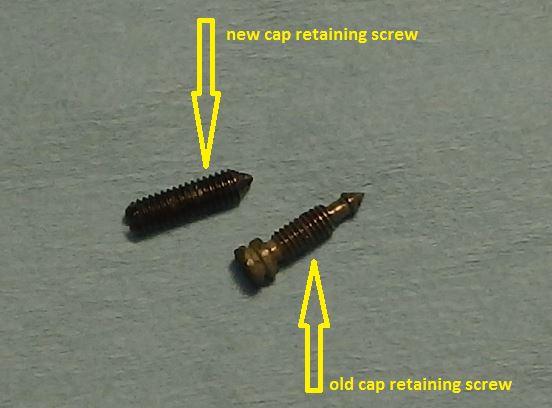
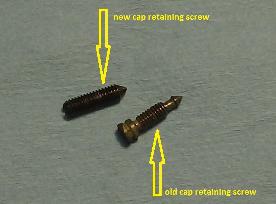
The first screw in this photo is the original design. Notice three key features.
1.) Sharp point.
2.) Straight shank after the point before threads.
3.) Broad shoulder under the screw head.
This design allows the screw to pierce the HT wire insulation, penetrate to a known fixed depth making electrical contact with the wire core, and expand the wire insulation to make a water tight seal between the insulation and the cap. Finally the shoulder under the screw head will land on a fixed surface in the cap stopping the screw at the proper depth to prevent contact between the screw tip and the underlying plastic part of the cap.
The second screw in the picture comes from a recent Lucas "brand name" OEM source distributor cap. This screw appears to be a standard cone point set screw. Problems with this part exactly mirror the intended features of the original design part.
1.) Blunt tip and fatter screw have trouble piercing the HT wire insulation.
2.) Given sufficient torque to pierce the wire, the fat screw shank will expand the insulation more than intended. This might fracture the cap from excess pressure. It might break the internal conductor of the HT wire.
3.) The only thing to stop forward progress of the screw will be the screw tip hitting the underlying plastic of the cap. Standard practice is to keep turning the screw until it hits something with significant resistance to know it has bottomed out. Since this fatter and more blunt screw will be harder to turn, it is likely that the force applied when the point hits bottom may crack the distributor cap, or may cause the start of a fracture that may occur later to leave the car with no spark at some most inconvenient moment.
If I knew this funny screw was in a distributor cap, I would not install it on my car. Likely the only way to keep this part out of the market is to know the source and refuse to buy it. If there are no sales the maker could be compelled to correct the design. Unfortunately this problem exists in the Lucas brand distributor cap. This may be a case where a cheaper reproduction aftermarket part could be better than the current OEM part.
If you buy a new side entry distributor cap you can remove one of the screws for inspection before installing the part in you car. If it has these blunt nose set screws, and you intend to use it in your car, I suggest a bit of fiddling during assembly. Before inserting the HT wires in the cap, run the screw down until it will contact the underlying plastic on the far side of the hole. Then count turns as you back the screw out enough to clear the hole. Insert the HT wire to full depth. Then count turns while you tighten the screw, and stop one turn short of the prior count, before the screw tip hits bottom.
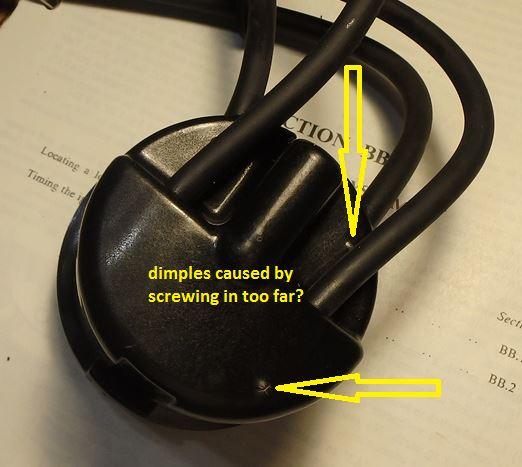
Addendum June 28, 2019:
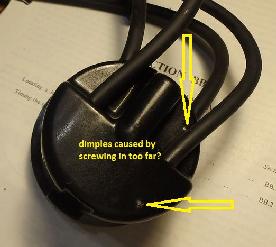
On 6/28/2019, Bruce at colba.net wrote:
 "I recently bought a side entry cap and did not pay attention to the screws for the HT leads. I overtighted these screws, waiting for a 'certain resistance' just as your tech page calls up and actually damaged the cap. I successfully dimpled the top of the cap! Yikes! Picture attached. Perhaps ham-fisted? but certainly poor screw design. Needless to say the cap is rendered unusable. "I recently bought a side entry cap and did not pay attention to the screws for the HT leads. I overtighted these screws, waiting for a 'certain resistance' just as your tech page calls up and actually damaged the cap. I successfully dimpled the top of the cap! Yikes! Picture attached. Perhaps ham-fisted? but certainly poor screw design. Needless to say the cap is rendered unusable.
"Curiously the OE Lucas type screws with the shoulder, from an old cap I have lying about, do thread into this new brass terminal cap. So if the original cap simply needs renewal, swapping the screws will/may be a solution to some owners". -- Bruce
|