The MGA With An Attitude
FRONT SHOCK STUDS Base Plate Replacement - FR-106
On March 25, 2012, Del Rawlins in Anchorage, Alaska, USA wrote:
 Back when I was a teenager (this would have been around '91-'92), Dad and I had the engine out of the 1500, and were swapping in a spare. I noticed that the forward mounting studs and nuts for the right front lever shock were larger than the rest, so I asked him about it. He told me a story about how he was driving down the road, when all of a sudden, the MGA decided to make an immediate and hard right turn on its own, which he was unable to stop. He spun a loop into the parking lot of a tavern, and miraculously didn't hit anything. Upon examination, he discovered that the studs for the right front shock absorber had pulled out of the frame. Back when I was a teenager (this would have been around '91-'92), Dad and I had the engine out of the 1500, and were swapping in a spare. I noticed that the forward mounting studs and nuts for the right front lever shock were larger than the rest, so I asked him about it. He told me a story about how he was driving down the road, when all of a sudden, the MGA decided to make an immediate and hard right turn on its own, which he was unable to stop. He spun a loop into the parking lot of a tavern, and miraculously didn't hit anything. Upon examination, he discovered that the studs for the right front shock absorber had pulled out of the frame.
He went into the tavern and used their phone to call my grandfather for help. Grandpa eventually showed up with a drill and other tools, and they ran an extension cord into the tavern for power. They repaired the car on the spot, and Dad drove it home that night. He said he never had reason to revisit the repaired area after that. This would have taken place sometime during the mid 60's. So at the time he was telling me about it, the repair had been good for around 25 years of semi-regular use (I last driven the car in 1999).
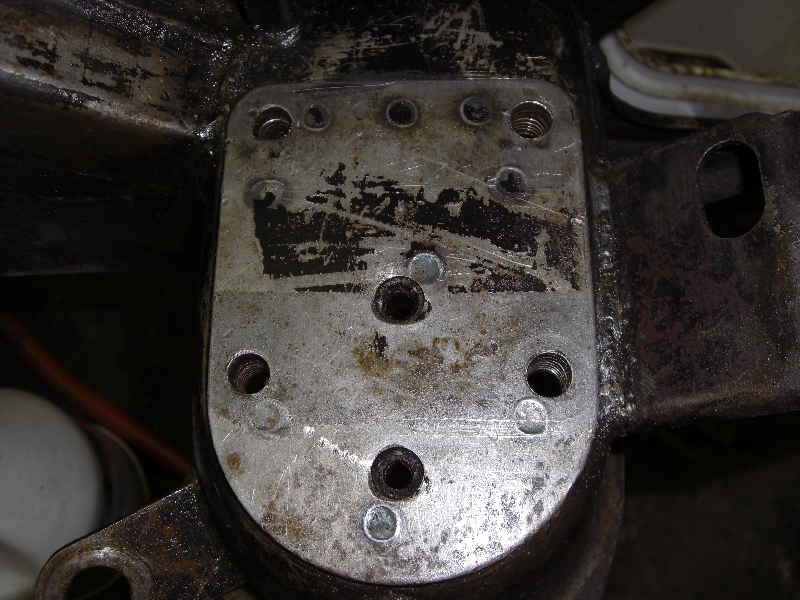
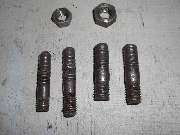
So, what I have, is the standard holes for 3/8" studs in the aft two locations, and oversize holes for 7/16" studs in the forward positions. And of course, a shock absorber with two holes drilled oversize. Here are some pictures... You can't really see the threads in the holes that well, but they are kind of ugly, and not exactly straight. As a matter of fact, they look a lot like they were threaded with hand tools, at night, by flashlight, in the parking lot of a tavern, by a couple of guys who were in a real hurry to get it done and get out of there".
So, now I have some decisions to make about what to do. The easiest answer would be to just put it back together the way it is with the oversize studs. But, I'm probably never going to have it stripped down to the bare frame again, or be able to turn it upside down, so I'll never again have the opportunity to make it right if I don't do it now. At least not as easily. And I'm not at all enamored of options such as welding up the holes, re-drilling, and re-tapping. It's possible I could get a machine shop to make and install some special threaded inserts for the front. Not sure if the rears (the normal sized holes) were Helicoiled, or what. The threads are pretty deep down in there and it's kind of hard to tell. And I want to make a repair that I can really trust, and that I won't have any reservations about, so what I really want to do is replace the tapped plate entirely, if it can be done.
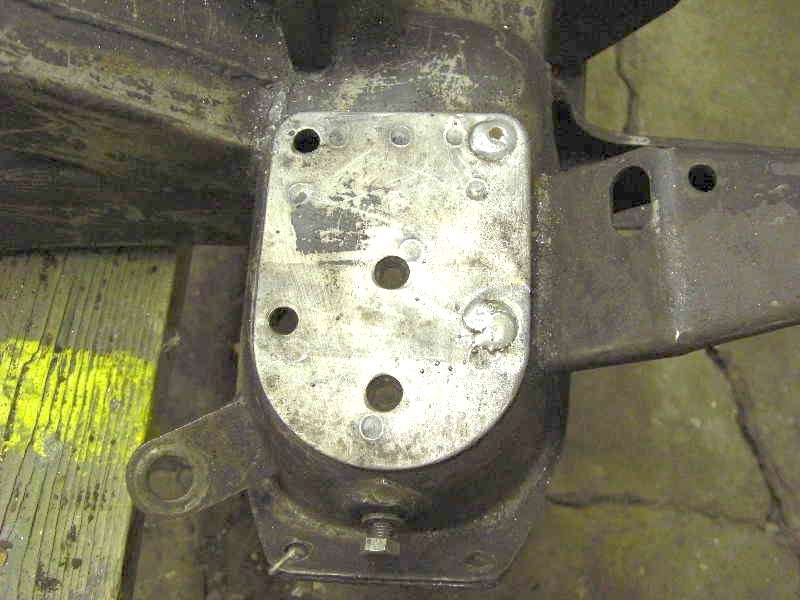
From what I can tell, it looks like that area is a sandwich of three different layers of steel. There is the stamped front cross member section, and on top of that is resistance spot welded another layer of metal that the shock mounts on top of. And underneath the cross member, where the springs rest, is a thicker tapped plate that has the actual threaded holes in it. So, the holes for the studs go in for a ways before they hit the actual threads.
I'm pretty sure I can get in there with the frame inverted, and remove the welds for the tapping plate, using an air angle grinder with a cut-off wheel. And I'm also pretty sure that I have another front cross member that I can dissect to get a replacement tapping plate. My brother and I bought a parts car a few years back; the frame was very badly rusted so I eventually cut it up and only saved a few sections that I thought might be useful. If I still have it, it's currently buried under about 5 feet of snow in my back yard. Otherwise, it shouldn't be all that difficult to fabricate my own replacement plate if I have to.
I was just wondering if anybody else had any thoughts or suggestions, and whether anyone has heard of the shock mounts failing in this manner before? My dad was certain that the car had been raced before he bought it in '63, and he was never exactly easy on it, so it lived a pretty hard life. The swivel pin and one of the lower control arms on the other side were bent also, so it must have taken a hit or two. Also, the oversize holes in the shock absorber body itself are not an issue because I have extra shocks that I can have overhauled instead of the altered one.
On May 04, 2012, Del Rawlins wrote:
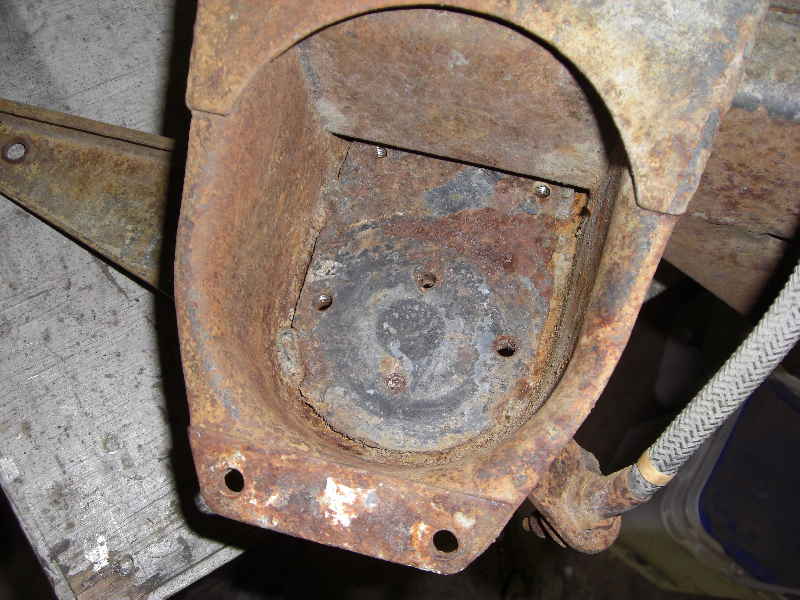
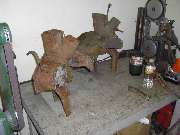
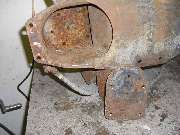
Since this is MG restoration and not MG repair, I'm having a go at making it like it was when it left the factory. The only real way to accomplish that, is to remove the tapped plate from the cross member, and replace it with one that isn't stripped out. As of a couple weeks ago, the snow in my backyard melted enough so that I could retrieve the donor cross member. When I scrapped the frame, I cut off anything with useful looking bracketry and saved it, which turns out to have been among my better decisions. Here is the cross member in all of its rusty glory:
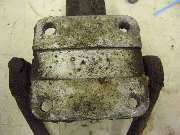
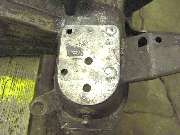
Here is the plate that needs to be removed. Note the 4 short welds holding it in place. There is a fifth weld on the back edge that is not accessible. These are not structural welds; they are only there to hold the plate in place until the shock is installed, at which time the studs bear the load of holding the sandwich together.
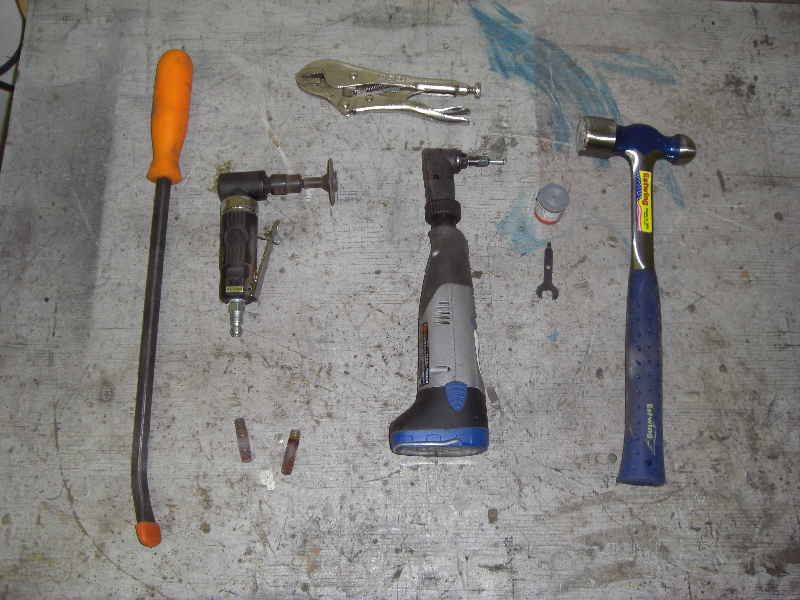
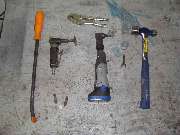
Cutting the welds. I was able to get the outer welds with the air grinder, but I had to finish the inboard welds with a Dremel tool with an angle drive due to not enough clearance. I could have done it all with the Dremel, but it would have taken longer, and if I'd had a shorter mandrel for the air tool it could have done the whole thing too. I was able to do it without doing any significant damage to the cross member (the cut off wheels barely marked it in a few places), so I now know that I can repeat the same process on my frame to remove the damaged plate. The purpose of this exercise was twofold; to obtain an undamaged plate, and to verify the process. Otherwise it would be back to the inserts.
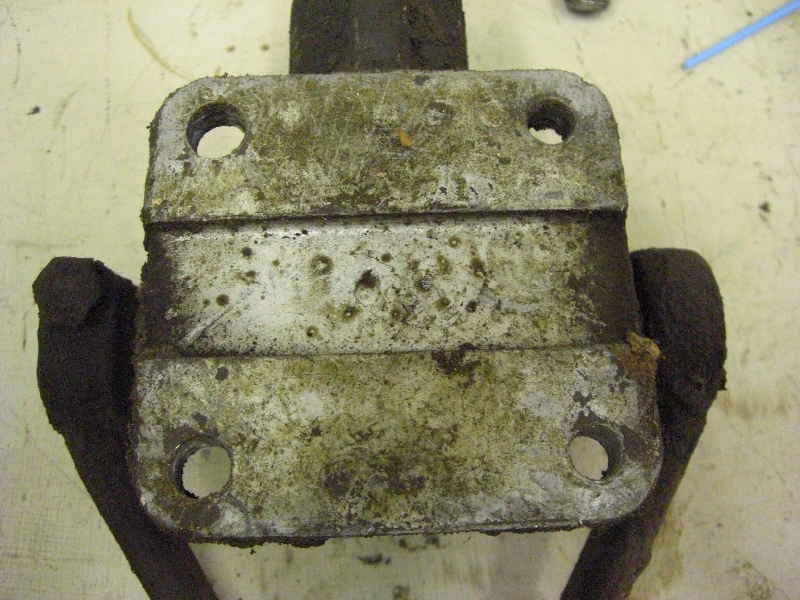
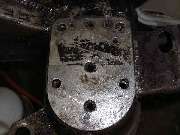
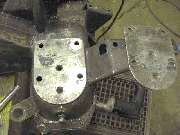
Next picture (below) is the plate removed from the cross member. I threaded a couple of used studs back into the holes and smacked them with a hammer in order to break what was left of the welds after grinding. After removing the studs, I threaded a regular bolt into one of the outboard holes from the bottom, and got under it with a pry bar and pried the end of the plate up, and then knocked it back down with the hammer. Did that a couple of times, and the 5th weld that was not accessible with the grinder gave way. It (like the others) wasn't much of a weld, and the cross member will never miss it once the repair is done.
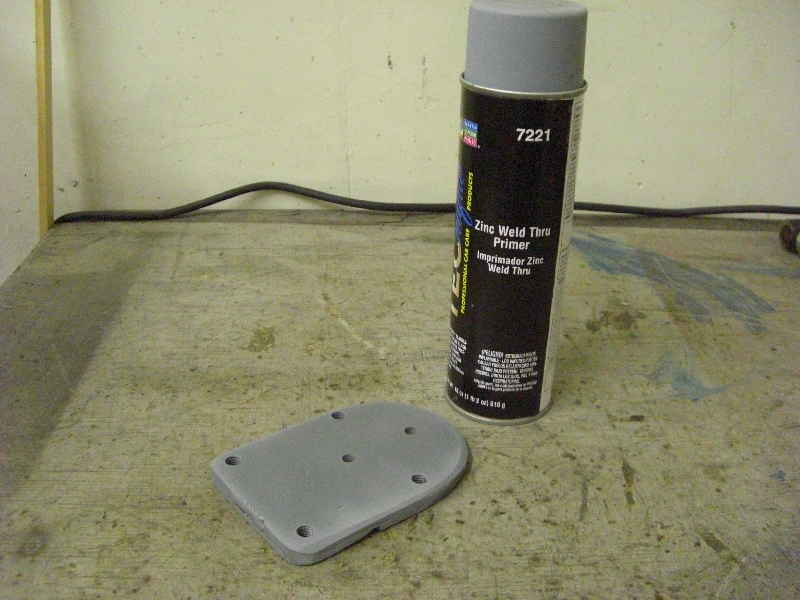
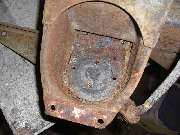
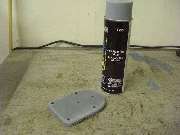
Here is the plate deburred, media blasted, threads chased, and primed with weld-through primer on the side facing the cross member (only):
Next step is to repeat the extraction process on my frame. Now that I know I can do it without messing up the cross member, I wouldn't necessarily have needed a donor frame, since it would be simple enough to make a new piece out of plate stock.
I've also been mulling over an idea in my head for restoring the holes in the shock mounting surface (upper plate of the sandwich). Welding up the holes will be simple enough, and if I can remove that plate from the donor cross member, I should be able to use it as a drilling guide to make sure the holes are properly located. Then the tapped plate can be bolted in place, and the actual welding should be anti-climactic.
On June 16, 2012, Del Rawlins wrote:
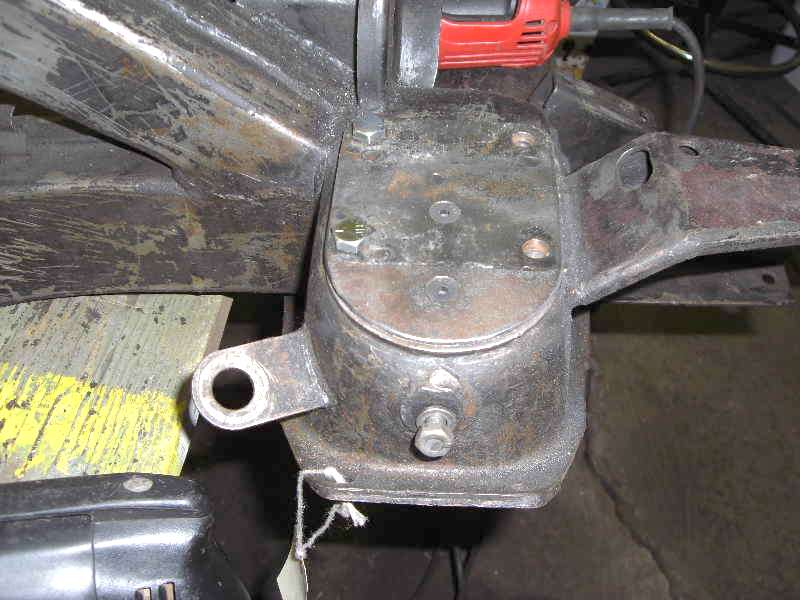
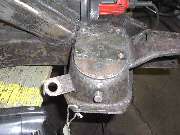
Update. Turned my frame over, so I could access the damaged plate from underneath. Removal was essentially the same as with the donor cross member, ultimately successful, and then I took a cold chisel to the remains of the 5th weld that is back under the frame rail so it won't interfere with installation of the donor plate.
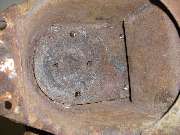
Welded the front two holes that were boogered by tapping oversize up on the bottom, and ground them flat. We turned the frame right side up again. Ground a little and then finished welding them up some more to make sure they were relatively free of voids. When it's done there will be little to no evidence of the repair other than these pictures:
Next, the welds were ground smooth, to prepare for re-drilling. For a drill guide, I hacked the upper portion of the donor cross member apart where I took the plate from, and trimmed everything off but the two remaining layers of the shock mount pad. I bolted this to the frame using the 4 remaining bolt locations (2 aft shock mount holes plus the upper spring retainer holes), and re-drilled the holes using a freshly re-sharpened 3/8" high speed drill bit. People sometimes assume it's going to be trouble drilling through MIG weld bead, but a sharp bit, constant pressure, and appropriate speed go a long way towards minimizing drama.
And here is the almost finished shock mount. About all that really remains is to turn the frame back over yet again, and weld the good plate in.
|