The MGA With An Attitude
CARPET LAYING -- INT-101 - (Page 5 of 6)
Tunnel:
 Addendum, June 2, 2022:
When fitting carpet and padding on the tunnel, keep in mind that the shift cover on top of the tunnel needs to be removed to R&R the gearbox. I cut the padding around the perimeter edge of the shift cover, and glue all of the padding in place, but trim it around the screws for access when you need to remove the screws and cover. The center tunnel carpet piece needs to be removed for access to the tunnel cover to R&R the gearbox for service, so leave this piece of carpet loose. It tucks under the back edge of front tunnel carpet. I put a piece of fuel hose under that carpet edge to hold the space when gluing down the front carpet section. Then remove the hose to leave the space to tuck the center carpet under the edge of the front carpet. I leave the bottom flanges on the center carpet section so it can be stapled to the floor boards for security. Easy to pull the staples up to R&R the tunnel center carpet.
|
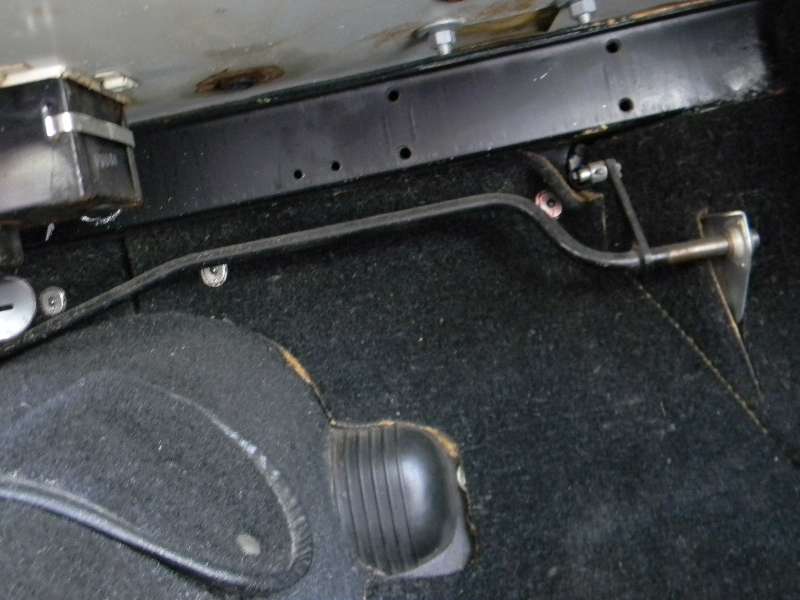
After the side rails do the center tunnel. This is done in three pieces, and you should start at the back. The first piece goes over the narrow section of the tunnel between the seats. It has to fit in behind the handbrake handle at the pivot point, and gets trimmed to fit around the ratchet mechanism. It should be folded upwards a bit at the front edge on top to be tucked inside of the center carpet section where it wraps around behind the shifter. This folded flap will overlap the screwed edge of the sheet metal shifter cover. Do not glue the carpet down on top of this cover, because the cover should be removable in order to R&R the gearbox later. Do not glue any of the tunnel carpet in place until you have it all cut to fit and laid in place together.
From here forward my last carpet kit from Moss has padding included for this area (but the kit 12 years earlier did not have any padding). Cut the padding to fit first, and go ahead and glue that in place, all the way from the shifter to the front bulkhead. Where the steel shifter cover is secured to the tunnel with 8 screws, trim out the padding in that area so it can be removed later, but save the cut out piece and use it as a loose insert. Glue the rest of the padding down, but do not glue the insert to the shifter cover. Later the insert will be held in place by the carpet lying on top of it.
Next fit up the center carpet piece that drops over the shift lever. You should not need to open up the center hole any more than as-shipped, but you should be able to push it down and pull up on the rubber shift boot until the boot comes through the hole and the carpet snuggles in underneath the lowest convolution of the rubber boot. In the end this one piece of carpeting should probably not be glued down, because it needs to be removed to R&R the gearbox. Pulling up a piece of glued down carpeting is pretty much guaranteed to destroy it. Mine is still just lying in place with the forward piece of carpeting holding the front edge down. Occasionally it gets kicked loose and I have to tuck it back in again, but not very often.
This center tunnel carpet piece has a binding along the back edge where it will be exposed lying on top of the rear carpet piece. Keep in mind that it may move around a bit over time, especially when the rubber boot moves when shifting gears. Move the selector lever through all of the gears a few times (without holding the carpet down) to get a good idea of where and how much the carpet piece may move. In the end you may opt to trim the front edge of this piece a bit where it goes under the front carpet piece, but don't cut it there until the front piece is fitted. Do trim it along the bottom edges so that it hangs down on the sides to be flush and just touching the floor (or just touching the floor carpet padding if you have installed padding on the floor). Once you have the center carpet piece properly fitted you can glue down the rear section. There should be plenty of overlap at the front edge of the rear section.
Addendum November 2009:
Last time around I left flanges on the bottom edge of this center tunnel section. Once installed I staple the flanges to the floor boards so nothing will ever move. The drop in floor carpet covers these flanges and staples. When you need to R&R the center carpet piece for gearbox maintenance, just pull up the staples and re-staple it when finished.
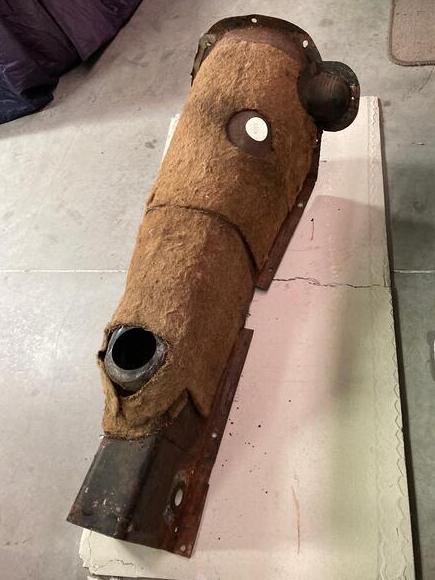
 Starting in January 1959 the MGA was equipped with a gearbox having a higher starter position, which in turn required adding a clearance bump to the high right side of the tunnel, and a corresponding cut-out in the toe board. For this there is a rubber piece called "starter drive cover" which lays over the bump on the tunnel as a scuff plate (similar to the heel plate in the driver side carpet). If this rubber cover is glued to the metal tunnel bump, the tunnel carpet can be trimmed to lay around the rubber part with no need to attempt any compound contour for the carpet. The toe board carpet can then be laid over the front flange on the rubber part and can be trimmed for close fit against the rubber cover. Note that for a right hand drive car the headlight dipper switch will be mounted immediately above this starter drive cover, so the rubber part may be even more important as a scuff guard there.
After the rear and center tunnel carpet pieces are in place (still do not glue the center panel) you can fit the front section. Any padding installed here is best glued in place to prevent it from moving around. High on the right side of the tunnel there is a round hole for access to the gearbox dipstick and oil fill. This hole should be covered with a heavy round rubber plug that is flat on the front surface and having a flange to overlap onto the sheet metal. Cut the padding to clear around this plug, as the rubber plug needs to be removable to check the gear oil, and the plug is nearly as thick above the tunnel as the thickness of the carpeting. The carpeting here should have a large flap type cover secured with a single smooth button snap. The access hole in the carpet under the cover flap is large enough the R&R the rubber plug. Trim the front edge of this carpet section to fit nicely against the front vertical floorboard and the metal bulkhead panel. Trim the bottom edges to just touch the floor on each side. When you are ready to glue this piece in place we get to one of my favorite fitting tricks.
The front tunnel carpet section has a binding along the back edge where it is exposed and lies on top of the center section. As the center section needs to be removed occasionally to R&R the gearbox, some care is needed in fitting the front section. Here I have used a length of 1/4" or 5/16" rubber hose (flex fuel line) as a temporary spacer. I position the hose to lie about 1/2 inch ahead of the rearmost edge of the front carpet section, and then lay the carpet on top of the hose while being glued in place. This provides a nice space under the edge of the front carpet section to allow for R&R of the center carpet section later. The binding on the rear edge of the front section tends to hold that edge down with a slight curl so you won't notice the space underneath. After the front carpet section is glued into place (and the glue is allowed to dry thoroughly) the hose is removed to vacate the space required by the center carpet section. The center section can then be tucked under the edge of the front section whenever required without having to yank and pull at the front piece which could damage that edge.
Turn Page
|