MGA SEATS REBUILD Tech Day - INT-110A
March 20, 2005 - Naperville, Illinois
Page 1 of 2 - Go to Page 2
Photos, notes, and web page courtesy of Barney Gaylord.
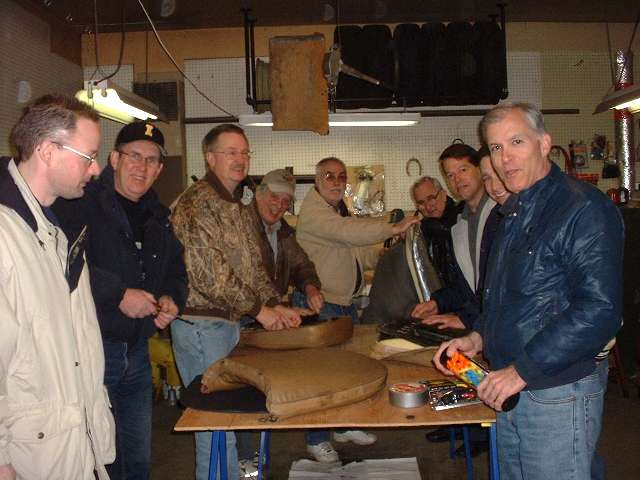
A dozen very enthusiastic members had hands on to finish complete rebuild of two sets of MGA roadster seats. There was also a start on a third set which was completed a few days later. There was one very original (and very tatty) set for reference to see how the materials are arranged inside. The new covers were original style leather and vinyl for two sets and all vinyl for the third set. Original type stuffing of horse hair and felt was used with foam rubber cushions (and a short review of some alternate materials). We also made templates of the bottom cushion base board construction (for those who like to make their own). A dozen more people are now qualified to rebuild MGA seats.
Original Materials and Seat Bottoms (MGA Roadster) - Seat Backs on page 2
Click on small images for larger images.- Larger pics average 30 KB.
 |
 |
 |
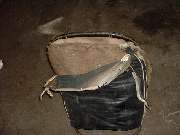 |
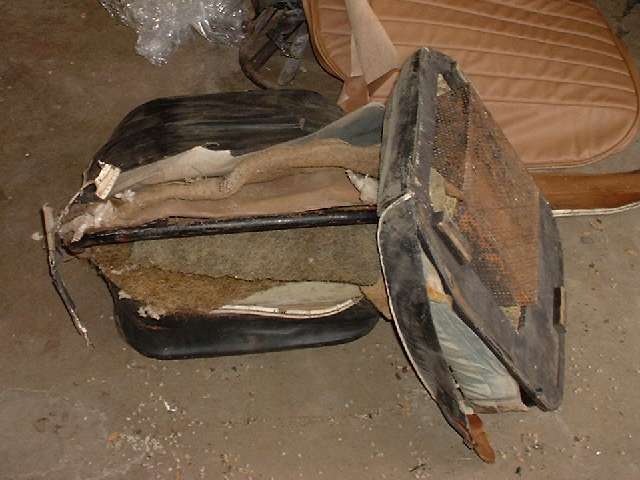
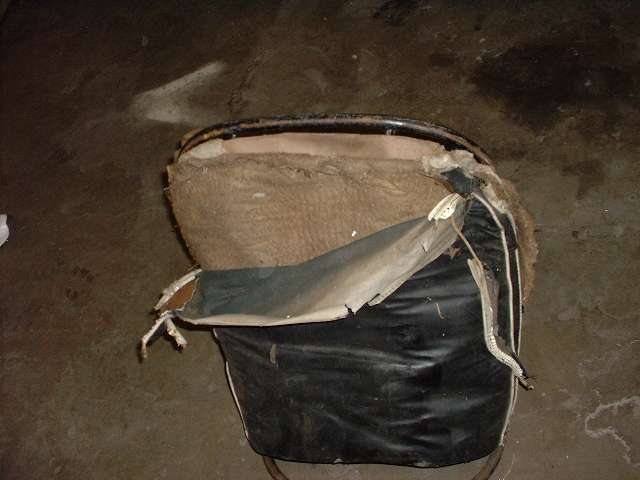
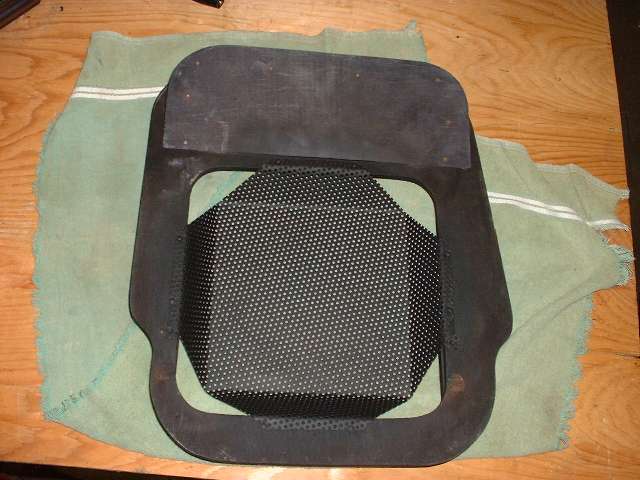
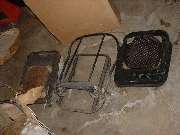
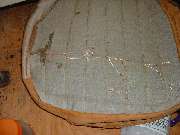
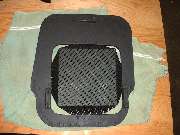
Photos above show the old original roadster seats in tatty condition. They may not seem like much to look at, but they contain a treasure trove of information about original materials and construction. Photo at left shows original type 3/8 inch plywood baseboard and rectangular bottom screen at left and a newer replacement type tapered screen at right. The second picture clearly shows the original type rectangular screen. Photos at right show most of the internal stuffing materials. The start of assembly of the backrest is a piece of dense cardboard wrapped around the back of the frame. The original backboard seems to have not been attached to the frame at all except for being held in place by the rest of the materials. The back was covered by about 1/2 inch of soft felt which was wrapped around the sides of the tube frame to hold the backboard in place. Up top the back cover felt originally had two wide extension strips wrapped over the shoulders of the frame, but otherwise most of the top tube was left uncovered.
The next part to be installed is not visible in these pictures, but the replacement part will be shown later. There is a horsehair pad about an inch thick, 12 inches wide, and 8 inches tall. This is installed inside the back frame at the very bottom. This serves as a lumbar support (lower back). It will span across the two vertical tubes and will hold the bottom part of the main pad forward a bit from the center tubes. This is followed by a 2 inch thick horsehair pad which effectively fills the inside of the frame. The thickness of the main pad extends forward of the side tubing, but will be compressed thinner at the edges when the outer cover is installed.
The outer cover is (originally) leather on the front wear surface and vinyl on the sides and back. The pleated front is padded with about 1/4 inch of soft cotton which is covered inside with a thin cloth to hold it in place. This cover is simply slipped over the rest of the assembly and is stapled to a wood strip screwed to the bottom edge of the tube frame. The bottom cushion cover is similarly made with leather on top, but the sides are not entirely vinyl. Leather is used on the side toward the door and across the front where it is visible and takes the most abuse, and the side next to the tunnel is vinyl. The arm rest is similarly leather on top and vinyl on the sides. The cockpit trim rails also follow this scheme with leather on the side rails and vinyl on the front and rear rails, and the side curtain stowage bag behind the seat will be vinyl. This will be a perpetual challenge for the parts suppliers forever trying to make a close match in appearance between the leather and vinyl materials. There is one picture at end (next page) showing this comparison.
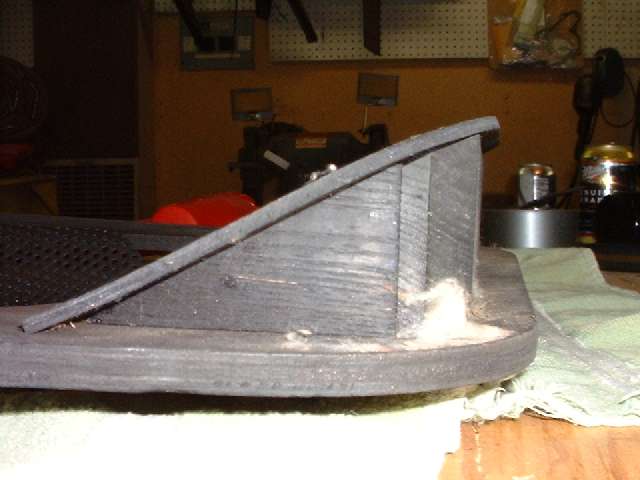
The original bottom cushion is foam rubber molded to the finished contour. It is thick at the front, thinner at the back, has the perimeter contoured to match the shape of the bottom board (handed parts), and the lower portion is rectangular to fill the bottom screen. The bottom board has extra wood pieces (shown later) which form a 30 degree ramp on top ahead of the screened opening. The foam cushion is formed underneath to fit the ramp, making the foam rubber thinner near the front, apparently giving somewhat more firm support under the thighs. The cushion is also contoured on top with the front edge being the highest point, then going through a slight dip half way back from the front, followed by being just slightly crowned over the rest of the surface. (See new cushion photo two rows down at right). Additionally the original cushion had large holes (about the size of chicken eggs) molded into the bottom. End effect of this would be a fairly firm and stable top surface to the cushion but a softer underlayment. This way the cushion would feel firm on top but would have a little more apparent spring to it when sat upon. The current replacement cushions do not have these holes formed in the underside, and they do feel quite stiff to sit on initially (but are still comfortable for a long ride). The original cushion also had a thin cloth cover (second photo above) which is not supplied with current replacement parts. This may be a matter of slightly different modern technology where the foam rubber is more closed cell and slightly tougher on the surface and less likely to flake off in use, so it doesn't seem to need the extra protection of the cloth cover.
|
 |
 |
 |
 |
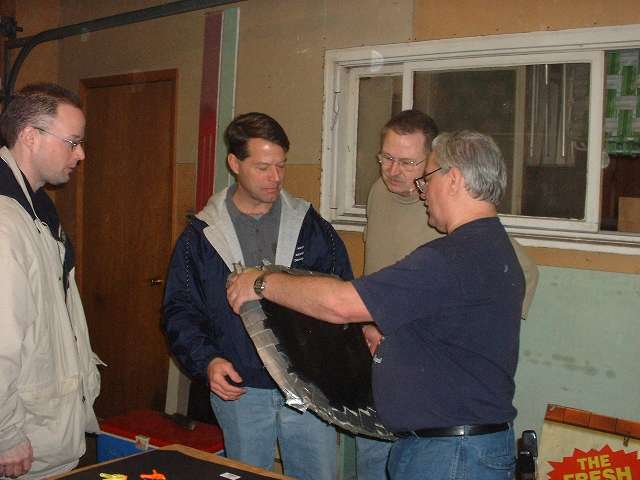
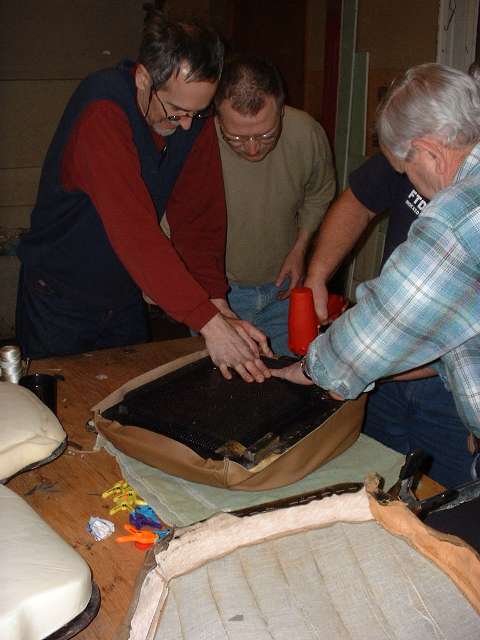
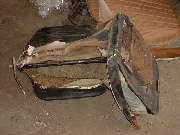
Disassembly is the easy part, being rather fun to destroy things on occasion. We took a few minutes here and there for close inspection to know what was similar or different about the ones from my car which had been rebuilt before in 1986 (not entirely in original fashion). At that time the original back stuffing materials had been lost, and original type replacement parts were not available, so substitute materials were obtained from a local upholstery shop. The backboard was about like original, the replacement back pad was 2 inch thick firm foam rubber, and the existence of any lumbar support pad was unknown at the time, so that part was missing. Not knowing how the backboard was supposed to be attached, it was secured with duct tape, which is still holding up quite well nearly 20 years later. In front of the 2 inch firm foam pad I had installed another 1/2 inch foam rubber sheet with thin cloth facing. This was wrapped around the top and sides to pad the edges of the back frame, and was secured a few inches over the back board using duct tape. The rest of the back board was bare in the back, only covered by vinyl of the outer cover (no padding on the back side). Plywood tack strips on the bottom of the back frame were replaced in 1986 and are still holding up well today. The base boards were recreated in 1986 exactly as original using the original parts as patterns. The original bottom cushions were reinstalled at the time, but were subsequently replaced with new cushions in early 1997 (after about one quarter million miles accumulated service over 40 years time).
The photo at right above is from 1986 after the first restoration (including the original foam cushions). The front face of the backrest drops virtually straight down, rather thin in the center with no lumbar support insert. It is also noticeably puffy around the edges as a result of the wrap around foam rubber. This combination of thin center and thick sides may actually give some improvement in lateral security to the passenger not afforded by the original configuration. Indeed the seats just finished more as original seem to have less lateral support around the back (probably more normal).
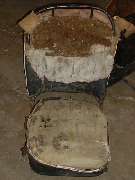
Notice the lateral indent in the bottom cushion cover about 5 inches back from the front. I might have a hard time proving this, but I believe this is original factory style. My original late 1957 seats were like this prior to restoration, as well as the 1956 MGA which I owned in 1968, and I have seen a couple others like this which appeared to be original. The photo second from right above, and another second from left two rows down, show how this is done. A very sharply pointed awl is used to poke a hole through the sewn pleat from underneath right at the stitching line. A heavy string (light cord) is passed through this hole and tied off leaving a foot long tail. Holes are poked down through the foam cushion to meet seven holes drilled in the base board, just aft of the wood ramp and just ahead of the screen flange. The strings are threaded through the cushion and out the bottom board during installation of the cover. After the cover is completely tacked into place the strings are pulled down at the bottom and secured to the base board to form the lateral pleat seen on top. The depression of the cover fabric then roughly matches the molded contour of the foam cushion. Without the strings in place the fabric would otherwise simply stretch like a drum head straight across the molded depression in the cushion without following the valley.
|
 |
 |
 |
 |
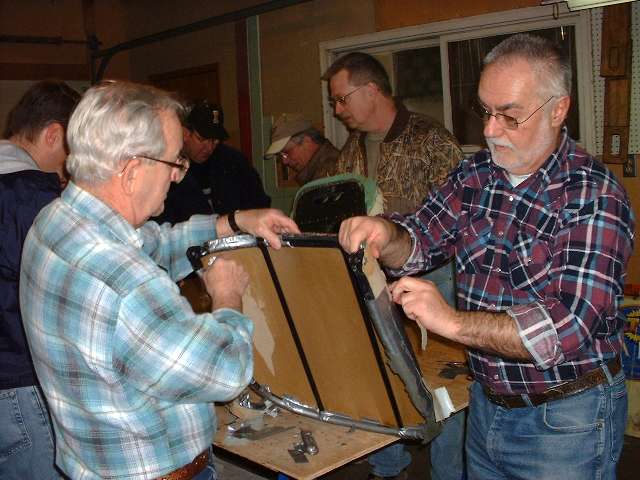
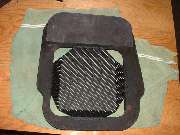
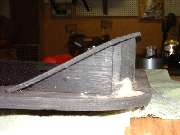
Photos above show a modern replacement base board assembly (left side passenger, or the driver side to us yanks). Notice one side parallel to the outside frame rail, and the other side angled next to the tunnel. The perforated screen (nailed in place here but secured with small wood screws for original parts) is angled on the sides, unlike the original straight sided parts. The ramp board in front is solid where the original had three large vent holes. The base board is also solid in front where the original had a large rectangular hand grip slot inside of the ramp assembly (barely visible in second photo below). The 5 inch wide ramp (nailed in place) is supported by 3/4 inch boards mitered to suit. Three wood cleats on the bottom align the platform within the base frame assembly when installed. The cleats are secured with countersunk machine screws underneath and flush nuts on the top side (slightly rusty as seen here).
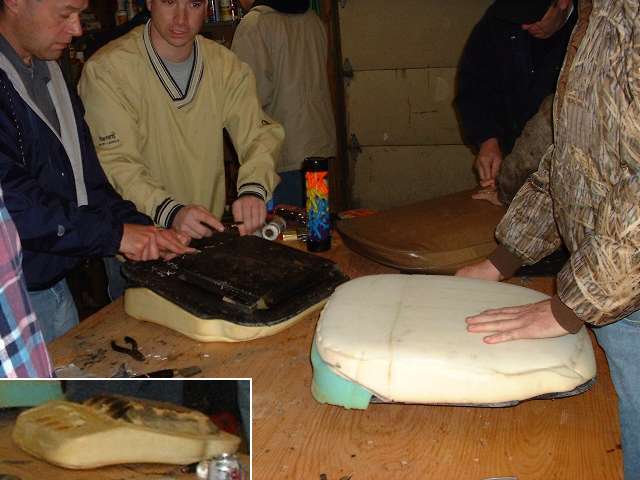
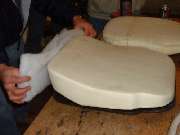
The picture on right above shows a new Moss Motors supplied molded cushion in the foreground, very much like original (except for the absence of vent holes in the bottom). In the background is a slightly used (8 years and 90,000 miles) Victoria British supplied cushion. Notice the significant lack of contouring. One of the guys is test fitting some layers of loose cotton batting to the front edge of the new cushion where it is intended to fill the recess in the front of the ramp, and possibly to cover the bare edge of the wood ramp to avoid a visible ridge after the cover is installed.
|
 |
 |
 |
 |
The photo above left tells a variety of tales (click for larger image). The yellow cushions (upside down) are slightly used Moss Motors molded parts. Notice (corner insert) the angled sides on the bottom extension to match the replacement style screen. The white cushion is the slightly used Victoria British part. These are constructed from two flat pieces of foam rubber glued together, the smaller bottom piece being nestled inside of the vent screen. The tops are cut, not molded, and are slightly angled but nearly flat on the top surface. They are also a bit oversized around the perimeter, same part number for left and right sides, and must be trimmed to fit during installation. In my humble opinion this is a rather poor product, and for a small difference in price I much prefer the handed parts that are molded to the correct shape. Along with the white cushion is a green foam rubber piece in front to pad the front face of the installed cover. The end results of padding or no padding here will be illustrated with the final pictures after completion.
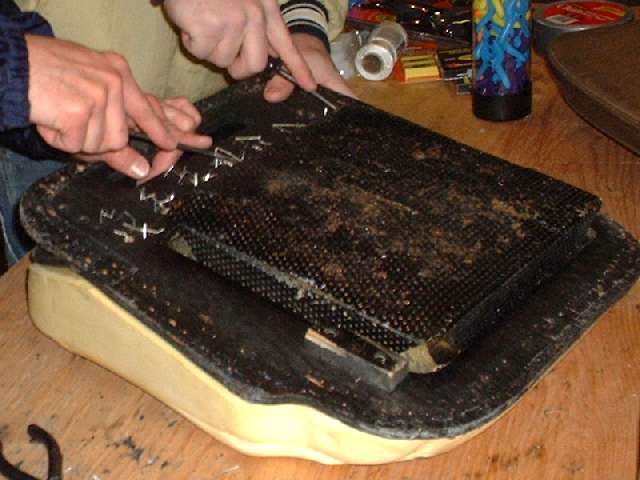
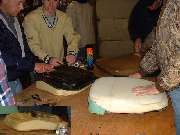
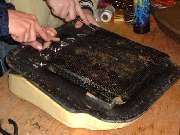
The second picture above has the guys removing staples to release the strings which were used to create the lateral pleat in the seat cover. The 7 small drilled passage holes are just ahead of the screen, with the staples ahead of that. Someone's left hand has a few fingers tucked into the rectangular hand grip and vent slot in the base board. Click for better photo here. The screen is an original straight sided part, still in reasonably good condition after 40+ years (and 340,000 miles) but needing another touch of paint. The accurate replacement 3/8 inch plywood base board is still good after nearly 20 years, 200,000 miles, and two prior cycles of stapling. Give credit here to a good original soaking in Penta wood preservative before a couple of coats of black enamel. The original boards were badly trashed with less time and usage.
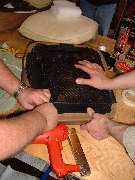
The third and fourth pictures above have extra hands helping to staple the bottom cushion cover in place. I found it best to pull the back edge snug first (secured temporarily with a few staples) in order to have the top front corner of the cover snug up against the front of the cushion. Then stretch slightly and staple across the front being watchful to keep the front face flat. Then stretch tight in the back and staple all across. After front and back are secure, work along the sides being watchful to pull the edges tight but also maintaining clean sides without wrinkles or puckers. Here you may need to R&R a few staples to readjust things before it's finished. In the end you would like to pull the sides down a little extra to attempt to make the top follow the concave contour of the molded cushion.
|
 |
 |
 |
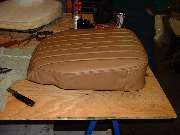 |
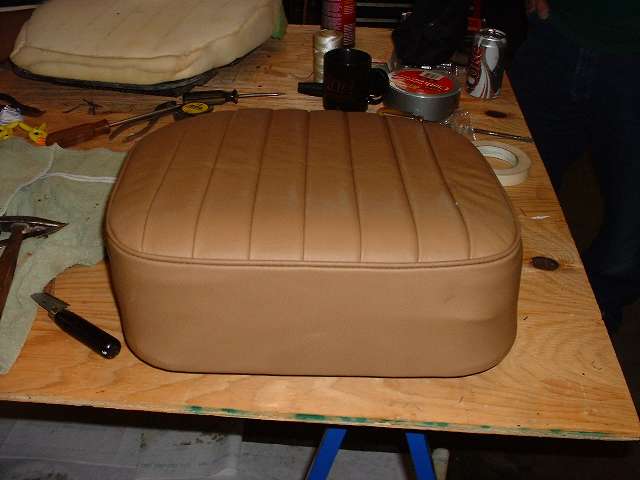
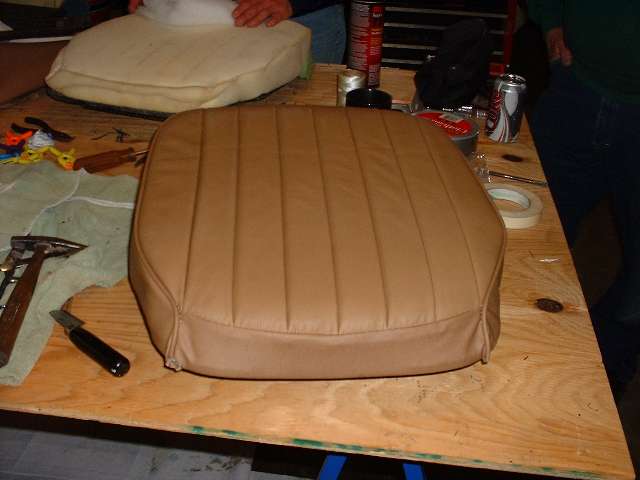
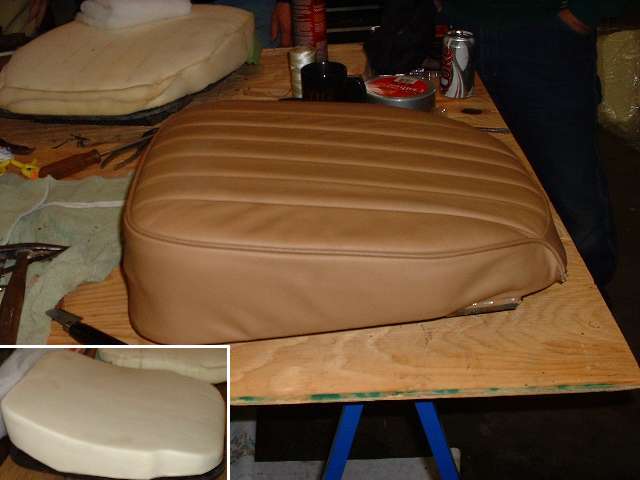
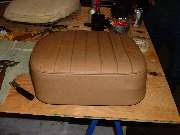
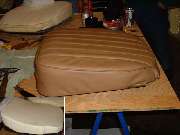
Here we have pictures of all sides of the finished left side seat cushion. First is the front side showing a visible ridge half way up from a corner of the unpadded wood ramp (leather in front). Second is the back edge pulled tight and fairly thin (vinyl on the back panel). Third is the side next to the door showing the attempt to pull the top corner down to conform somewhat to the concave molded cushion, but again not so much as to cause puckers in the side panel (leather on the door side). Last is the tunnel side, again attempting to pull the side down a bit to match the top contour. The vertical seam near the front is the transition from vinyl on this side to the leather used in front (and on the door side).
Notice no lateral crease on top. I will dearly miss that feature, but it was a quick decision at the time to skip that work due to time limits during the club tech session and the desire to finish at least two complete sets of seats in one day. I'm not so much a concours buff, but I do think that lateral pleat is a really sweet looking feature when done right. (Continue to the next page).
MGA Seats Rebuild - Page 1 of 2 - Go on to Page 2
|
|