The MGA With An Attitude
|
| MGAguru.com |
|
MGAguru.com |
The PLEAT in the SEAT - INT-111

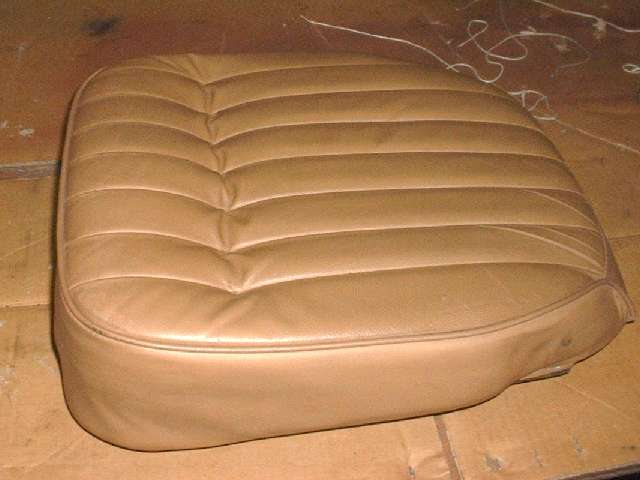
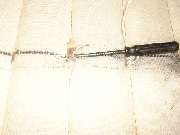
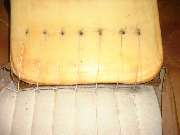
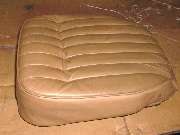
 The large photo here, notice the lateral indent in the bottom cushion cover about 5 inches back from the front. I might have a hard time proving this, but I believe this is original factory style. My original late 1957 seats were like this prior to restoration in 1977, as well as the 1956 MGA which I owned in 1968. I have seen a couple others like this which appeared to be original.
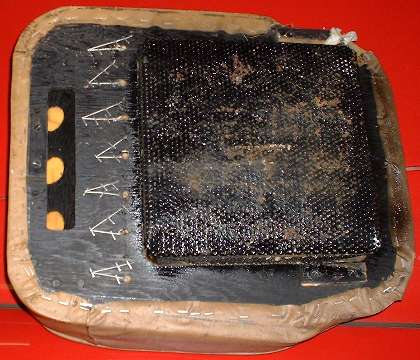
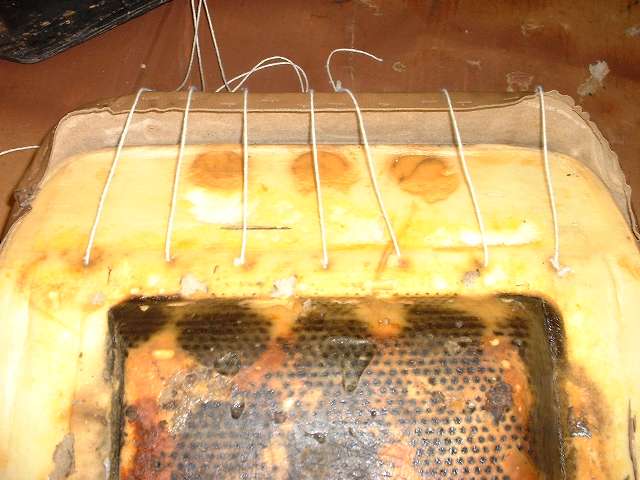
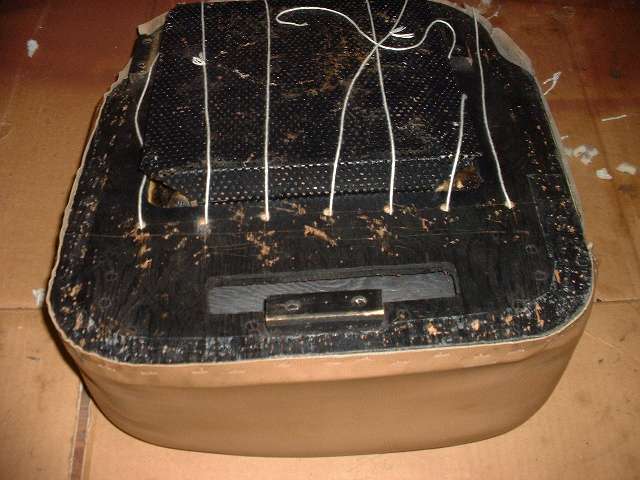
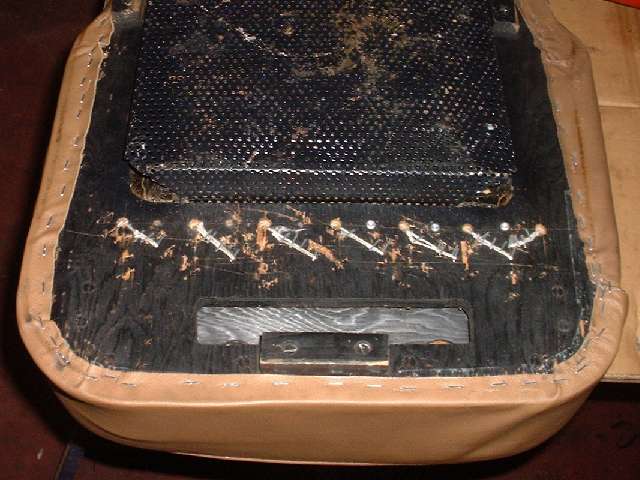
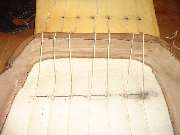
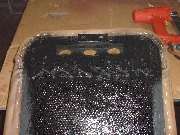
In the smaller photo notice the rectangular slot in the seat base board, three round holes in the angled riser board inside, and seven small holes in a lateral line with strings passing through. These slots and holes are usually not included in current aftermarket replacement parts. You can see the exact configuration of these holes with the cutting drawings in the article INT-202 - Seat Base Construction. Photos and notes below describe how these lateral pleats in the seat cover are formed.
In preparation for installation, the seat base board and screen will be already assembled. The foam cushion should be molded to fit the base board perfectly, with mirror image cushions for left and right seats (angled on the side next to the tunnel). If you have new cushions that are identical "one size fits all", then you need to trim the perimeter of the cushion to match the shape of the seat base.
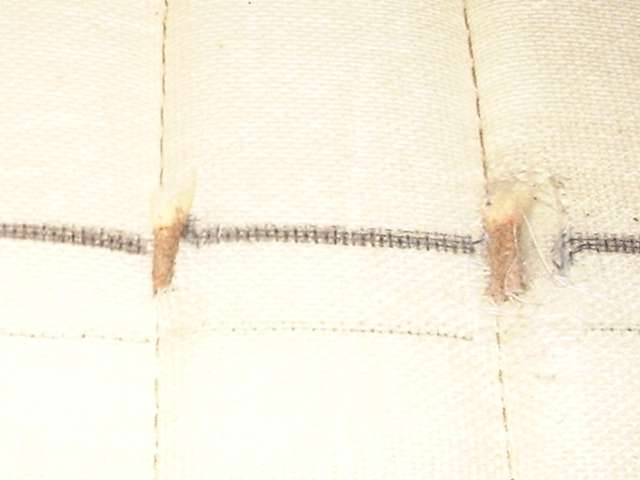
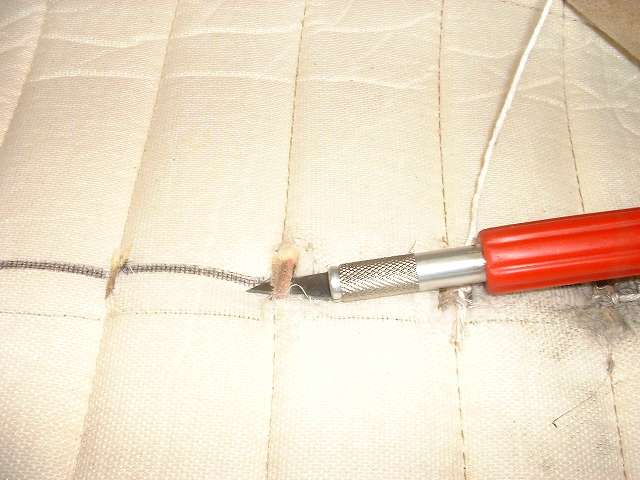
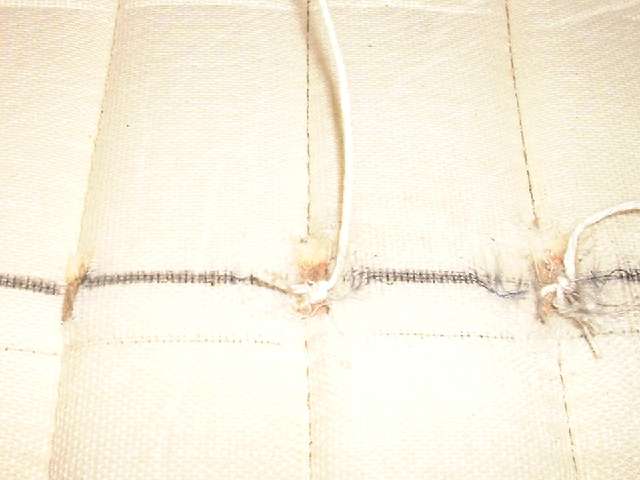
Place the cushion on the base and test cover it with the outer seat cover. Determine where the lateral pleat will fall, and make a matching reference mark on the inside (underside) of the cover. Five inches form the front piping should be spot on. Use a razor knife to cut small openings in the overlying fabric about 3/16 x 1/2 inch straddling the stitching lines to expose the sewn together flanges of the outer cover. Poke a hole or cut a slot through the flanges, being careful not to break the stitching holding the flanges together. Push a heavy string through the hole and tie a square knot to secure it. Cut the string to at least one foot in length (string is cheap so maybe longer is easier). Repeat for all seven pleats.
Add a helpful hint from Bill Ham in Southaven, Mississippi: I have waxed cord attached to the 7 pleats in each cover. Use a curved needle. I went to the Tandy Leather Store and bought a #1201-00 All Purpose Needle Pack. This pack had a number of straight needles and 2 curved needles. Cost $3.49. For waxed cord I bought a 25 yard spool of # 1227-02 for $3.99. Get black, it shows up best against the white under belly of the seat cover. Total cost $8.17 including tax.
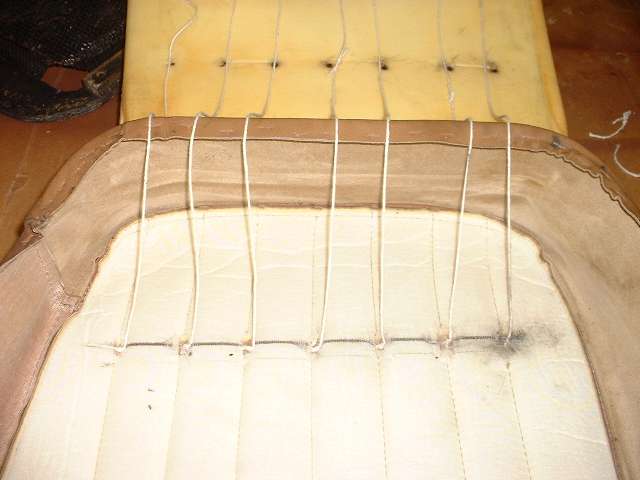
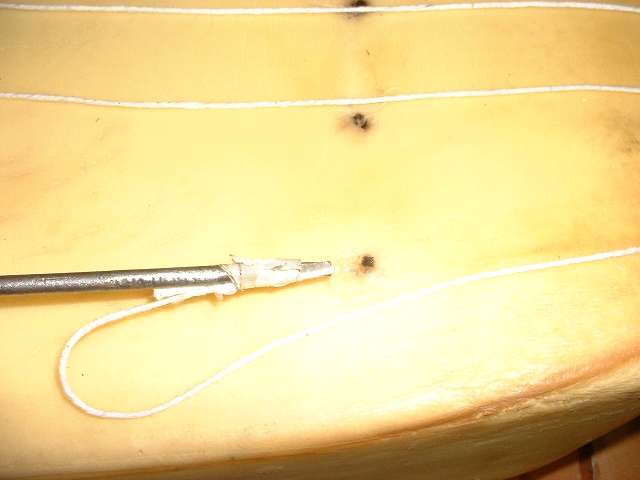
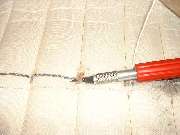
Place the cover securely on the cushion to determine where the knots will fall, and mark those locations on top side of the cushion. Place the cushion on the base board to determine where holes in the board fall, and mark those locations on bottom side of the cushion. Use a long skinny screwdriver to poke holes through the cushion from top to bottom marks. Place loose end of string over tip of screwdriver and tape it in place, then push the string through the matching hole in the cushion. Peel tape off at opposite side, and repeat for all seven strings.
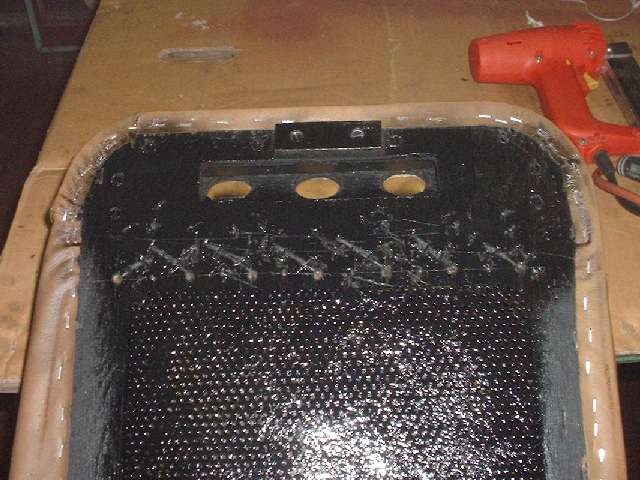
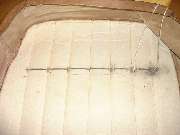
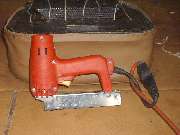
Assemble cover over cushion and pull all the strings snug. Thread the strings through their respective holes in the base board, place the cushion on the board, and pull the strings snug from underneath. Next step is the normal job of pulling the cover down snug and attaching the cover all around the underside of the base board with staples or tacks.
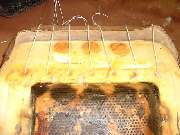
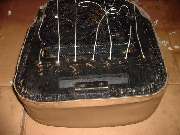
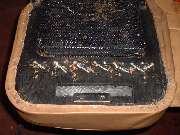
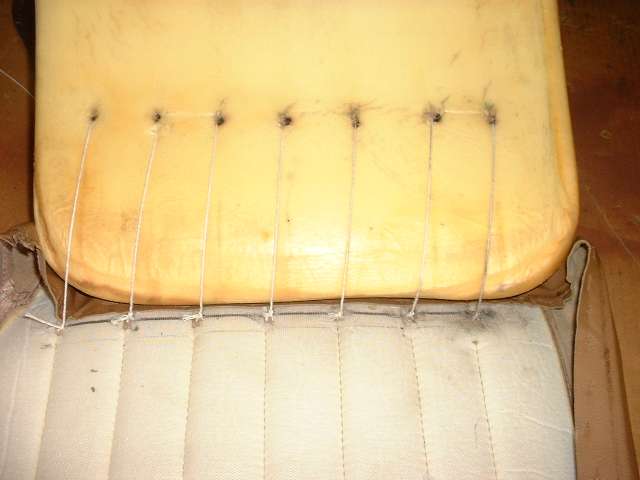
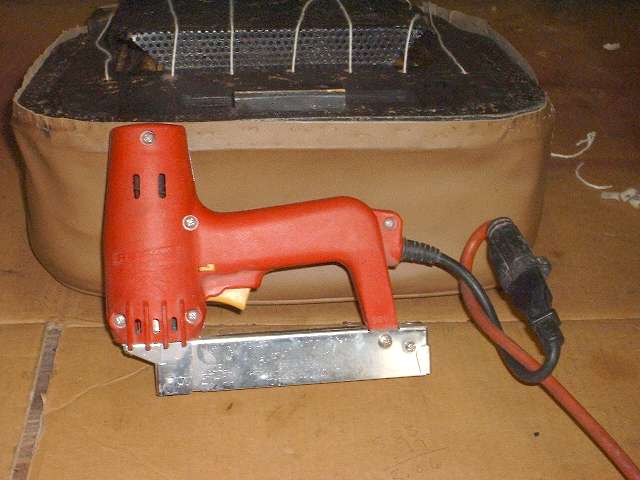
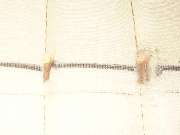
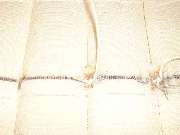
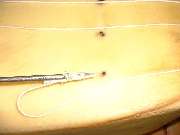
After the cover is completely fastened in place, then pull the strings to form the lateral pleat in the top cover, and attach the strings underneath. During this process I find it convenient to install some small wood screws or carpet tacks left slightly high to serve as binding posts for the string. Pull the strings one by one while pressing gently on the cover at top, determining the final tension and position you want on the strings to produce a pleasing shape for the lateral pleat. Wrap the strings around the screws for temporary holding until you have the final form on top. When you have it all in place where you like, then tack or staple the strings permanently in place underneath. Removing or flattening the binding posts is optional. Photo above right shows the binding screws still in place after final attachment of the strings. Photo below left is after the screws were removed.
 The depression of the cover fabric then follows the molded contour of the foam cushion. Without the strings in place the fabric would just stretch flat across the top. A touch of black paint on the bottom side will camouflage the strings nicely. Not that anyone would ever see it later, but the paint may also help to preserve the string if it might get wet with rain and damp carpet. The strings I installed in 1986 lasted through 18 years and 193,000 miles including one additional R&R of the covers to install new foam buns in 1997. Pictures on this page show a 52 year old screen, 32 year old base board, 13 year old cushion, 4 year old leather and vinyl cover, and new strings.
|