The MGA With An Attitude
|
| MGAguru.com |
|
MGAguru.com |
SEAT BASE CONSTRUCTION, MGA -- INT-202
AFH2606 BASE-SEAT RH -- AFH2607 BASE-SEAT LH -- MGA 55-62
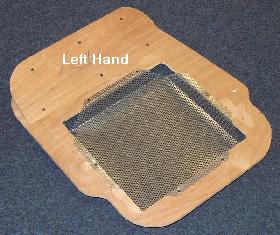
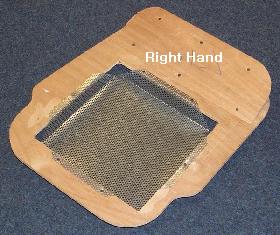
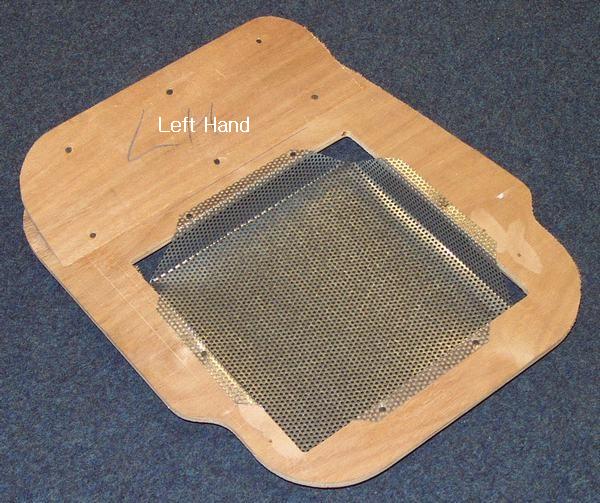
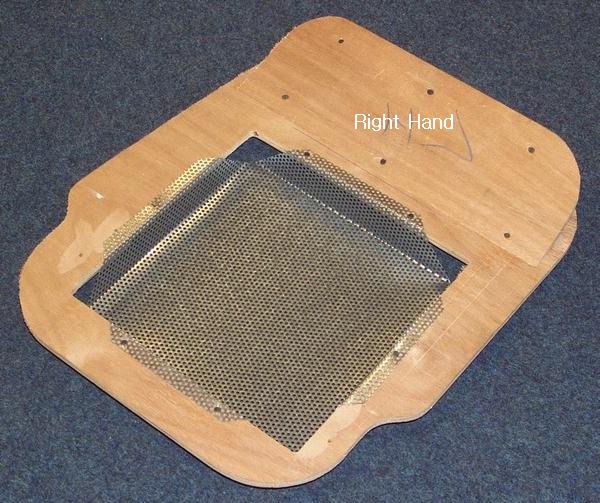
By popular demand, enough information to build your own MGA seat bases. The left hand and right hand parts are mirror image of each other in the base board and ramp board and assembly. The smaller parts are identical for both sides.
 The drawings were done in AutoCAD with output done in high resolution (300 DPI) GIF images placed into PDF files. You will have fast download, no special software required, and the pages are sized and designed for output to standard printer paper size. Click the small images to download the full size PDF pages in high resolution, and print them. Otherwise the full resolution images are twice as wide and four times taller than your video screen (look very good if you zoom in close).
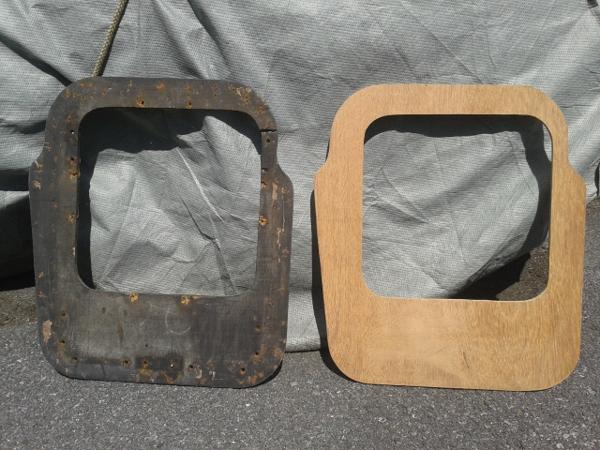
The base board and ramp board are made from 3/8-inch plywood. I recommend minimally 5-ply CCX grade. The "X" is for external grade, as in waterproof glue. "AA" would be furniture grade with flawlessly smooth surfaces both sides. Any "B" surface would be rare, but that would be flawed with knots but still smooth with no holes. The "C" surface is a side where any knots, cracks or other flaws have been cut out and patched with smooth plugs, resulting in a smooth surface. "D" grade is a side with exposed open knots. CDX grade (roof sheeting) would be bottom of the bucket with one patched smooth side and one side with exposed knots.
Front riser and wedge pieces are made from 3/4-inch board. These are secured with flat head wood screws from underneath. The ramp board is attached with skinny panel nails or brads (long narrow staples). Three small alignment blocks underneath are 5/8-inch thick board. The alignment blocks are secured with #10-32UNF T-nuts (catalog page shown below) and #10-32UNF x 1-inch long flat head (countersunk) machine screws (6X each side). You really do need the T-nuts and machine screws here, as this is what keeps your seat cushion in place during enthusiastic driving.
The screen tray originally has significantly small holes with large space in between, which is rather unusual in currently available materials. The screen is for support of the cushion and for breathing. The cushion (not shown here) is made of open cell foam rubber to be soft and compliant. If the cushion had closed cell structure it would not breath, and it would be very firm like sitting on a sports ball. Since the foam rubber breaths when you sit on it, the bottom metal tray is screened for breathing. It doesn't require a lot of air flow capacity, so the holes are small and widely spaced, retaining more than 80% surface area to support the cushion.
I have shown graphic examples to scale of the original perforated sheet metal material and a couple currently available perforation patterns. Using perforated sheet with 30% to 40% open area may sacrifice some of the support for the foam rubber, which might eventually deteriorate and shed rubber dust on the carpet. The original factory issue cushions were notorious for decomposing significantly in the first 20 years, so I suspect there are no longer any of those in serviceable condition. If you would use perforated sheet with more open area you might consider switching from 18-gauge (048") to 16-gauge (0.060") to recover the lost bending strength.
 Service Parts List for all models (other than Competition Deluxe Seats) offer the entire seat cushion assembly as a single service part with no breakdown of the individual pieces shown on this page. Notice the screen drawing shows 90 degree bends, as was original for my car, August 1957 production. I believe there was also a screen with angled sides (using slightly less metal), but no idea of the production date changes. Many commercially available screens today will have the angled sides. This requires matching foam cushion with angles underneath. Otherwise you may need to trim the square bottomed cushion to fit inside of the angled screen.
The screen is secured with #4-40x1/2" flat head wood screws (0.112" diameter), one near the end of each flange (8X each side). These small screws fit nicely through the 0.125" holes. If you use screen with larger holes you might also use larger screws, so the screw head will not fall through the hole. Screws are important. There are times and conditions during normal use manually handling of the cushion assemblies when the screen may be bumped and could loosen staples.
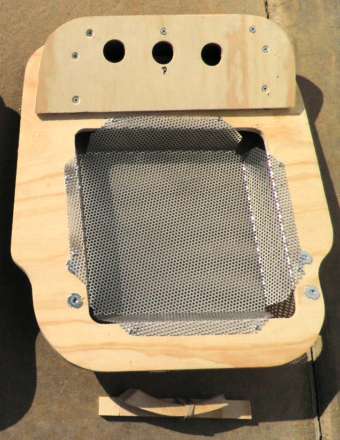
Three large holes in the ramp board and one narrow slot in the base board near front are also for breathing of the cushion. These holes and slot are often left out of modern commercial replacement parts. I don't know if it makes a lot of difference in seating comfort, but it may help with humidity relief in the open car. The slot also makes a nifty hand hold for handling the cushion when removed for carpet service (or when searching for whatever you may have lost underneath).
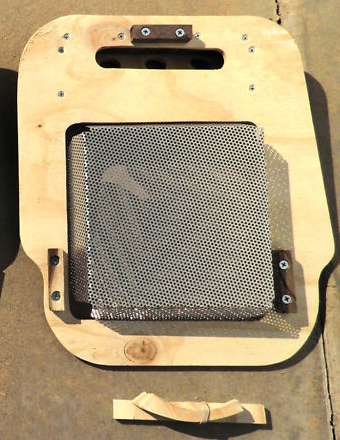
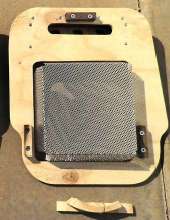
| Seat base Assembled |

RH Top
|
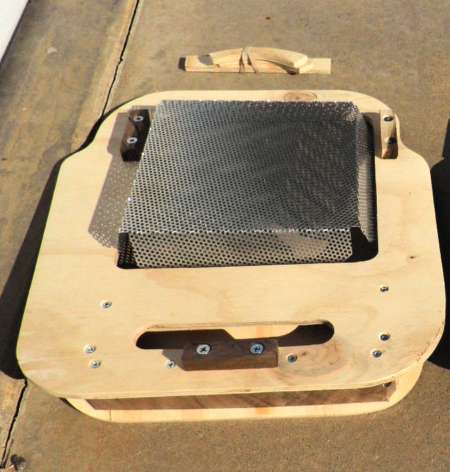
RH Bottom
|
RH Bottom
|
The stack of small plywood strips shown in these pictures is three pieces, two curved and one straight. These will be screwed onto the bottom of the seat back frame to serve as tacking strips for securing the backrest cover.
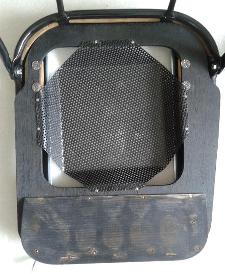
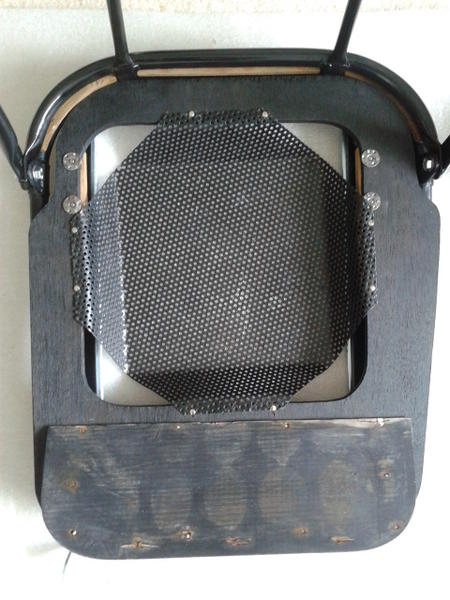
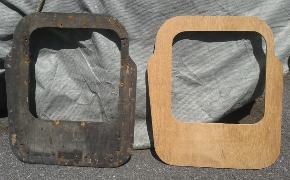
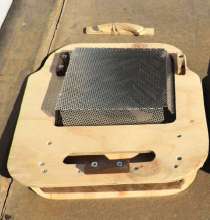
 Photo at left shows the RH seat base nested into the seat frame. Photo at right is the bottom view of the same part. This reproduction part does not have the originl vent holes and slots (but does have the later style tapered screen).
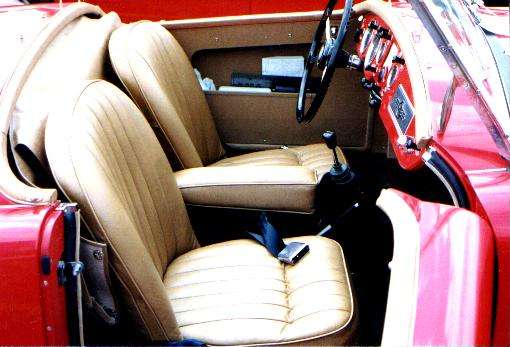
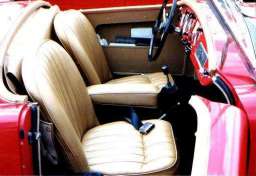 Now for the fun trick. The transverse row of 7 holes in the base board just aft of the ramp board, shown in the drawings but not in the pictures above, are for passage of tie down strings that can create a transverse pull-down pleat in the top side of the leather seat cover, as shown in this picture. Assembling it with the transverse pleat is a bit of extra work (probably a lot easier in mass production). For a detailed photo tour on this process see article INT-111 - The Pleat In The Seat
My seats were in this configuration when I bought the 19 year old car in 1977, looking very original to me at the time (properly clapped out for its age with rotting floorboards and seat base boards). I subsequently restored it the same way, and I happen to like it. Earlier on I owned three MGA in 1968-1969. The second one had been rebuilt with vinyl covers, the third one was a roadster with coupe seats (which I quickly corrected), but the first one (a 1956 model) was just 12 years old, mostly original at the time, and it had these same transverse pleats in the seat cushions. In more recent years I have been trying to verify that at least some early roadsters originated this way from the factory, but so far no one else has stepped forward to verify it. So if you like it, go for it. If you don't like it or don't feel like doing the extra work, forget it, and you may be one with the common crowd (and all the concours judges who have never seen one like this).
|