The MGA With An Attitude
|
| MGAguru.com |
|
MGAguru.com |
MGA Seat Belts - INERTIA REEL #5 -- INT-125E
This article provided by Bill Jeffries
Inertia Reel Seat Belts
 My car being a 1959, had no belts fitted or mounting points. As I want to tour with the car with my wife and I want to give grandchildren a ride now and then, I decided full inertia reel seat belts were a must. My car being a 1959, had no belts fitted or mounting points. As I want to tour with the car with my wife and I want to give grandchildren a ride now and then, I decided full inertia reel seat belts were a must.
Clearly, this raises problems where to mount the reels, interference with folded hood/tonneau cover being the main two. Ive seen a couple of solutions to these where the reel is mounted either on the rear wheel arch within the boot or to the side panel. Both come with problems intrusion into the usable boot space, unsightly brackets, but mainly that the alignment of the shoulder strap is compromised, emerging through the cockpit bulkhead in the wrong position. To overcome this last point a secondary guide is needed to position the belt correctly, which further adds to the points mentioned.
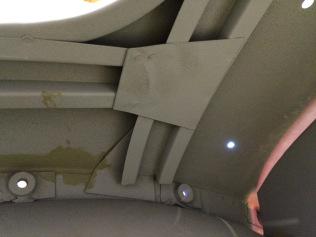
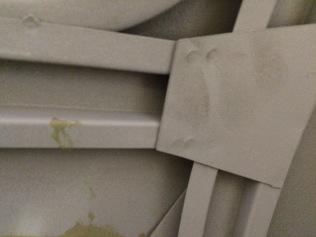
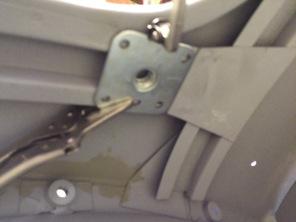
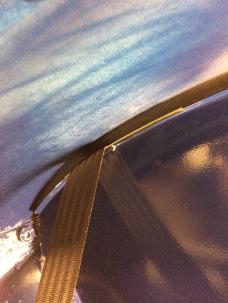
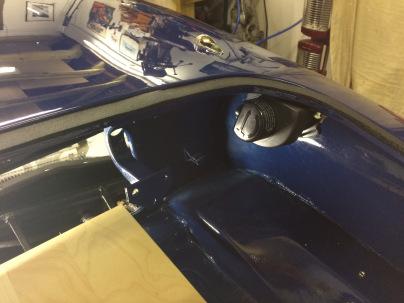
I have come up with a solution, which is relatively simple (if very fiddly) and overcomes the location of the reel problem. Hopefully the photos will give a better idea of how this was achieved, but basically, I utilized the strengthening channel sections, located under the tonneau shelf. These are perfectly positioned to allow the shoulder belt to pass through the bulkhead in the correct alignment and once fitted the reels are solidly and securely mounted.
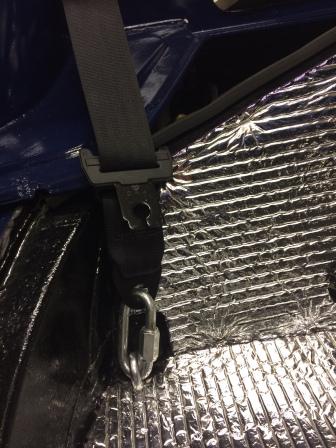
As with other methods Ive seen, the means of overcoming the need to be able to raise and lower the roof is to fit a removable link in the outboard belt anchor point. In my case, Ive used a sturdy removable link.

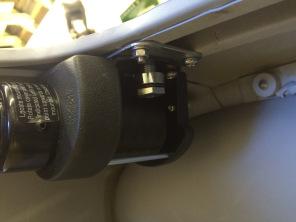
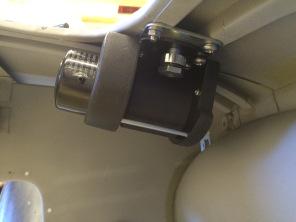
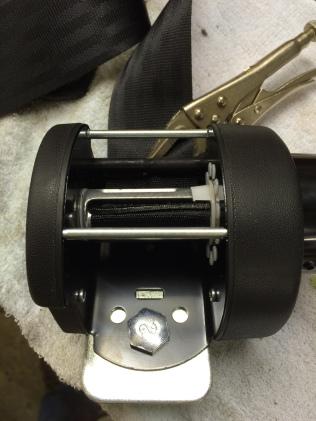

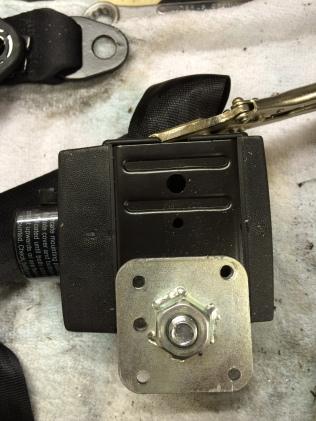
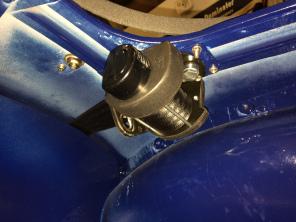
The inertia reel needs to be of the type with an adjustable angle facility, to allow for an inverted location.
The fitting plate with the captive 17mm bolt could be welded into place or, as Ive done drilled and fitted with marine grade stainless machine screws. On each reel, one screw does need to be fitted via a drilled hole in the boot lid channel, but when finished, its covered by the boot lid sealing strip.
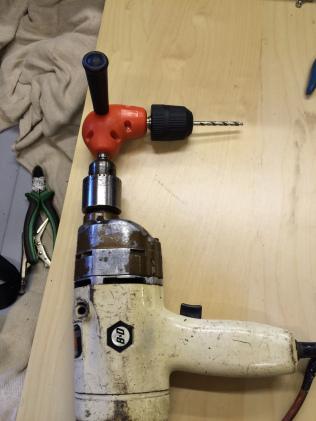
Fitting the bolts is extremely fiddly but not impossible and helped if you have small slender fingers (I dont!). Also the use of a right-angled drill adapter is essential, to accommodate working in a confined space. Welding the plate into place is a far more sensible solution, but despite doing all the welding during my restoration, I still lack the confidence to attack, upside down, an area so close to the body.
Where the belt emerges over the bulkhead wall, Ive covered the area with a strip of thin brass shimming strip, which should be smooth enough for the belt to slide easily and not be chafed. (More photos to follow when complete).
Note from Barney:
As a mechanical engineer I have some reservations about attaching seat belts to sheet metal body parts. It is good that the reinforcing channel is folded and welded along the edge of the boot lid aperture (weather seal and drain channel). Even so, this may not be strong enough for the high stress in a severe frontal collision with very high deceleration rate. My first impression is the first thing to fail would be the bolts pulling out of the sheet metal. It would be better to weldthe base plate to the body channel. I would also like to see an additional layer of flat sheet metal welded across the bottom of the flanges on the body strengthening channel, from the point under the inertia reel attachment most of the way back to the rear of the boot lid aperture. This would double up on metal thickness where the bolts attached as well as considerably strengthening the channel and improving body strength in this now structural area.
For a modern production car the body would be drawn in 3-D in a CAD computer, and a finite element analysis could be run to calculate (better estimate) the strength of the body in this area. For a single installation we kind of guess at the body strength from prior experience. It would be much more assuring if someone would do a structural pull test on this device to see how strong the mounting point might be, with and/or without my recommended added layer of sheet metal.
|