The MGA With An Attitude
Convertible Top Frame MOUNTING POINTS REPAIR - RT-204
This is a common problem on the MGA. The top frame attachment points on the body were originally three square floating cage nuts inside of the door post. They will always rust solid and tear out of the cages on next disassembly. I repaired the floating nuts first time around (1977) by cutting open the back side of the door post and welding it shut when finished. Moss Motors sells a patch piece for that with the floating cage nuts, but you might find yourself doing the repair more than once if you keep the car long enough.
The second time around (1998) I had to use a spherical grinding stone in a hand grinder to remove the heads of the countersunk screws to get the bracket off. Then when I had to do the cut and weld repair (again) I wised up and welded in a 5/16-inch thick steel plate then drilled and tapped the holes for the mounting points. With my most recent body restoration work (2008) I replaced a little sheet metal around this area but left the thick plates in place. One of my better modifications if I do say so myself. I also use stainless steel socket head screws and lots of anti-seize compound.
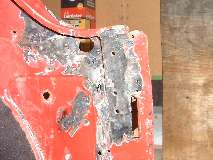
Inside the
door post
|
Right side
|
Left side
|
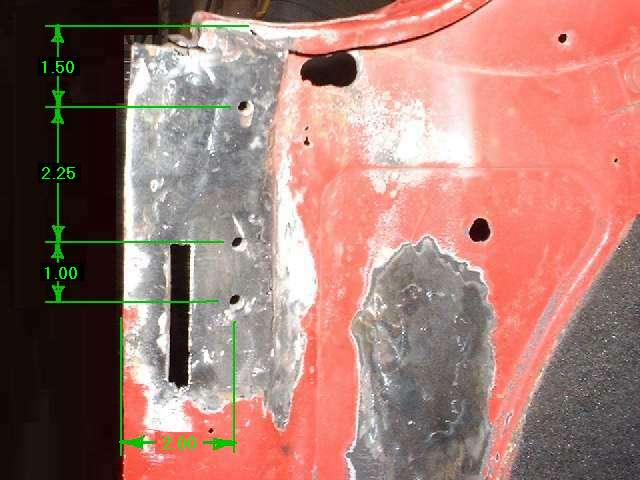
The three holes are in a vertical row 2-inches aft of the front edge of the body flange where the door seal is installed. The top hole is 1-1/2" below the flat top surface where the cockpit trim rail mounts. Next hole is another 2-1/4" down, and the third hole another 1" farther down (roughly). It doesn't hurt if you miss the fore/aft position by 1/4", but the holes should be correct height to position the top frame for good alignment of the rag top to the side curtains and to the trim rail where the twist fasteners will be installed. If you have to miss on the height, make it as much as 1/8" higher, but not lower. When using tapped holes in fixed position for countersunk screws, locate the top hole first, then align/locate the other two holes to match the holes in your top frame mounting bracket. My dimensions between holes are tape measurements, and the true locations may not be exactly in 1/4-inch increments.
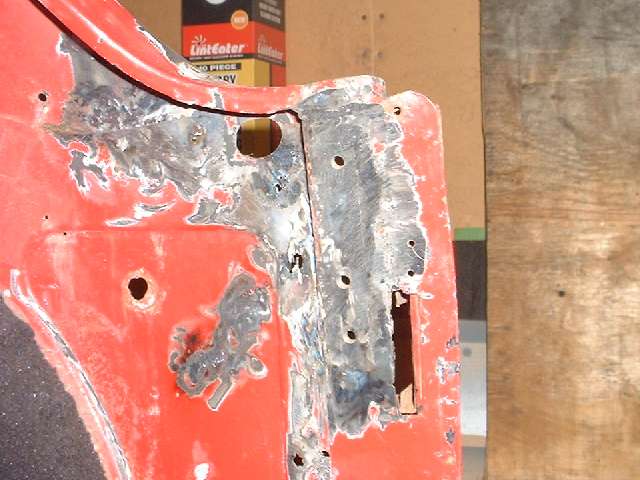
Also note that the inner panel of the post curves inward at the top to end flush with the inner surface of the top body flange. This was originally all part of the inner fender panel stamping with a progressive step in this area near the top. This inner panel should follow the contour of the flange that holds the door seal.
|