The MGA With An Attitude
Body Sill Replacement - RT-606
Outer Sill Box Removal

Since I knew I would replace the entire outside box panel,
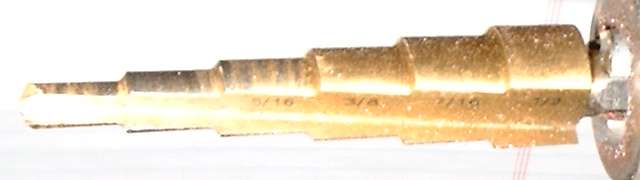
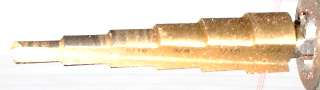 the expedient way to remove it was to drill out spot welds at top and run a Sawzall vertically along the bottom just above the bottom flange. For drilling the spot welds I used one of my new cobalt step drills (3 for $6 at Harbor Freight). That's a sweet tool, small tip for quick drill of the initial hole, small steps to easily enlarge the hole, very wear resistant, and stout so it doesn't break like a small drill bit.
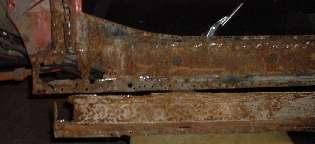
The trick here is figuring out where spot welds might be hiding behind the pillars, and being surprised by location of some gussets inside the box. I sawed a 3-inch section out of the middle of the box under the A-pillar to get around some gussets and search for the last couple of spot welds in the top flange. The photos show two small ViceGrips holding the removed parts together, and the box panel rolled over top flange down so you can see inside. The secret to the last spot welds is they are in the A-pillar flanges, not that hard for access. The A and B pillars were originally assembled first, then spot welded to the full length outer box panel. The inner flat panel was spot welded to the front and rear sections of the body at the vertical lap joints. The last spot welds attach the sill box and pillar assembly to the vertical surfaces all around the flanges. When you know the original sequence of assembly it is easier to figure out where the spot welds are sometimes stacked and hidden.

For the full length outer box there are two end plates with inward flanges on three sides and one outward flange against the vertical panel. There are also four gussets inside the box in line with the front and back faces of the pillars. The gussets have three flanges spot welded to the box. The inboard edge of the gusset stops 1/4-inch shy of the vertical panel with a very short 90 degree stiffener edge. The box panel is equal height across the flanges for full length, but it is tapered being wider at the front and narrower at the back. This makes the gussets and end plates six different sizes. Two gussets under each pillar could be very nearly the same size, but the flanges are right and left handed so they are different parts anyway.
The vertical inboard panel is in three pieces with two offset lap joints. The front piece is originally part of the vertical body panel from the wheel well back. The vertical lap joint is at the back edge of the A-pillar. The rear piece is originally part of the vertical body panel from the wheel well forward. That vertical lap joint starts about 5/8-inch forward of the B-pillar. The center inboard panel runs between the lap joints. With a careful eye you can just see the vertical lap joints in these photos.
Before I remove the vertical panel and cut the bottoms off the front and rear panels, I need to make some drawings and/or templates to fabricate the replacement parts. Good news today is, I think the grapevine has turned up a friend of a friend in the neighborhood who works a fabrication shop and has tons of 18 gauge sheet steel and the large press brake to bend the long box panels. Life just got better, and the project just got cheaper). (16 Dec 07)
|