The MGA With An Attitude
Body Sill Replacement - RT-607
Inner Sill Panel Removal
For those following this adventure in real time, there is an addendum to an earlier page describing the odd shape of the outer sill box panel.
I trust you will appreciate that after this cutting job I took a few minutes to wash some dirt off of the body and frame so you can see the generally good condition of the remaining parts. In particular, the frame and all of the underbody was stripped and painted 30 years ago using Pettit PolyPoxy (before red paint). The body was painted again on the outside (sans fenders and doors) 10 years ago. This inner sill panel removal went quite quickly, after much deliberation about how I wanted to do it. I have also made detail drawings of the parts needing to be replaced.


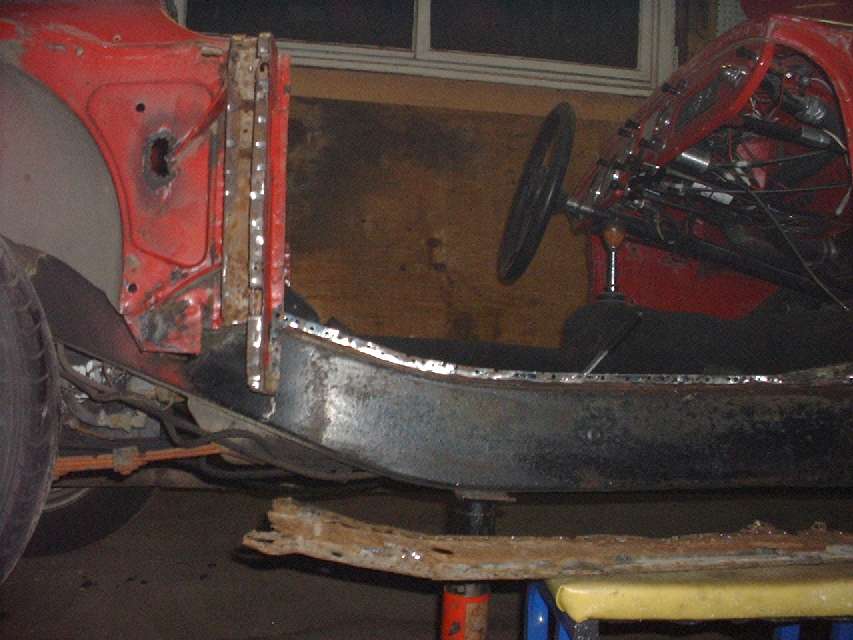
 This job started by breaking a few spot welds at the bottom of the pillars. I then scribed horizontal reference lines on the side of the body slightly above the intended cut and weld zones, 6 inches high in front and 8 inches high in back. The front cut was 5-5/16 inches up from the bottom of the sill, even with the top of the spot weld flange in the door opening. This cut was about 9/16 inch above the flange of the box panel, with solid metal and bright red paint all around.
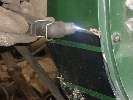
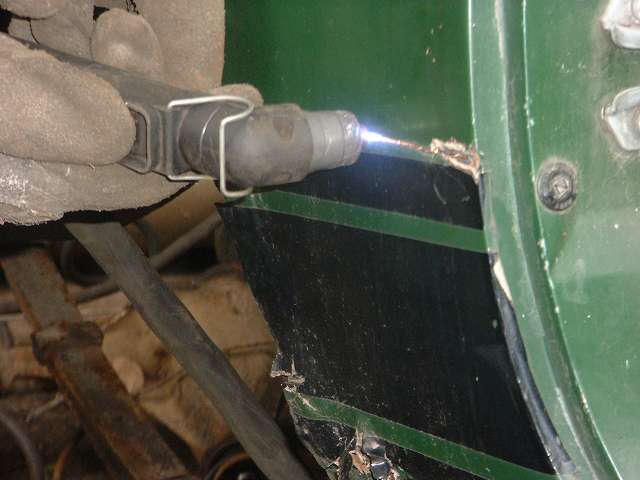
 For the cut ahead of the A-pillar I secured a board with a pair of C-clamps for a straight edge guide, then used a plasma cutter to slice cleanly through the sheet metal at about one inch per second. This is a handy tool for certain situations with clear access. If you don't have a plasma cutter, a small Sawzall or cut-off grinder could serve as well (just a little slower). I wanted a straight cut to minimize panel preparation time prior to welding.
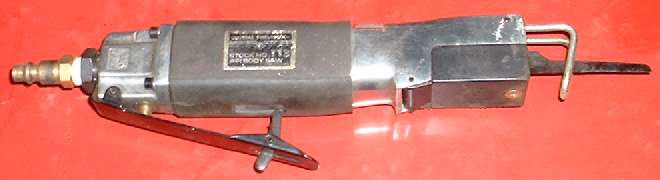
 For the cuts aft of the B-pillar I used an air powered mini Sawzall. You can see I cut away a short rusted bit at bottom of the back panel on the B-pillar along with a "Z" cut in the flat panel. The bottom of the remaining flat panel aft of the B-pillar contains the body to frame attachment bracket. Thankfully this area is still solid, and I am patting myself on the back for doing this job now before the rust got any worse. Power wire brushing of a paint blister disclosed a rust hole in the middle of the vertical panel. This was not noticed with last paint 10 years ago, although the rust must have been started at that time. I suppose there may have been a crack in the prior paint right at the tail end of the gusset. This one has easy access for patching. I may cut a smidge off the tail of the gusset in the process.
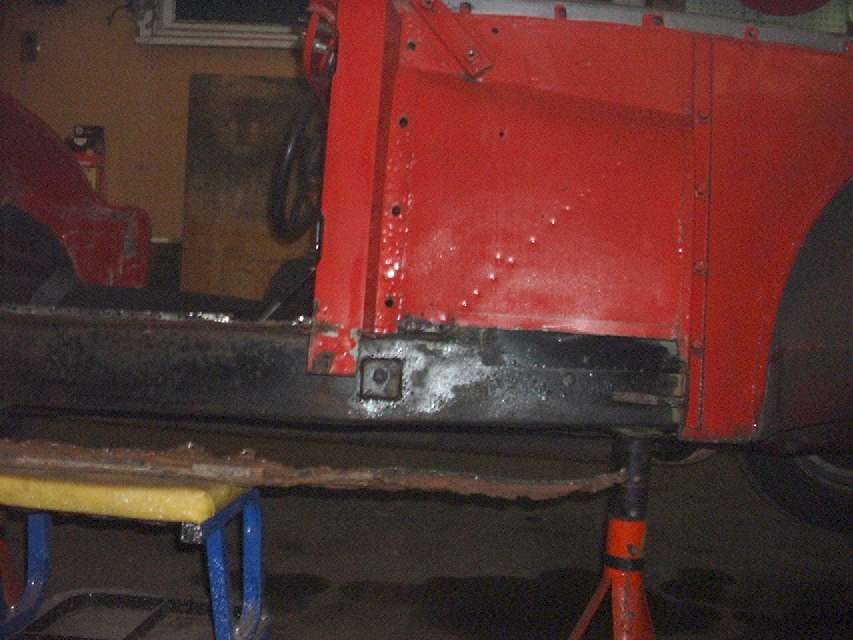
In between the pillars I again used the mini Sawzall to cut through the vertical panel just below the top weld flange. The rusty panel removed is sitting on the stool below the frame in the pictures. The final touch was to use an angle grinder to remove the remaining outer layer of metal from the top spot weld flange (about 10 minutes). The "L" shape body piece that sits on top of the frame is still there and easily visible.
I am now leaning heavily toward using a spot welder to assemble the new box panel, end caps, internal gussets and vertical flat panels prior to offering the entire assembly up to the body (hopefully undistorted). With proper panel trimming and fitting the door opening base flange should also be a spot weld job. That would leave the front and rear panel joints for MIG welding. I want to do a nice butt weld there, hopefully with minimal weld and minimal distortion, and ground smooth after welding. That may be a bit ambitious for my first significant body patching attempt, but I am a courageous soul (maybe just a little nuts). The body will be coming off for underbody painting after the sheet metal repair, at which time I will have access to the back side of these proposed butt weld joints for possible hammer flattening if needed, back side touch up and grinding. We'll see what time and patience will provide. (18 Dec 07)
|