The MGA With An Attitude
Body Sill Replacement - RT-608
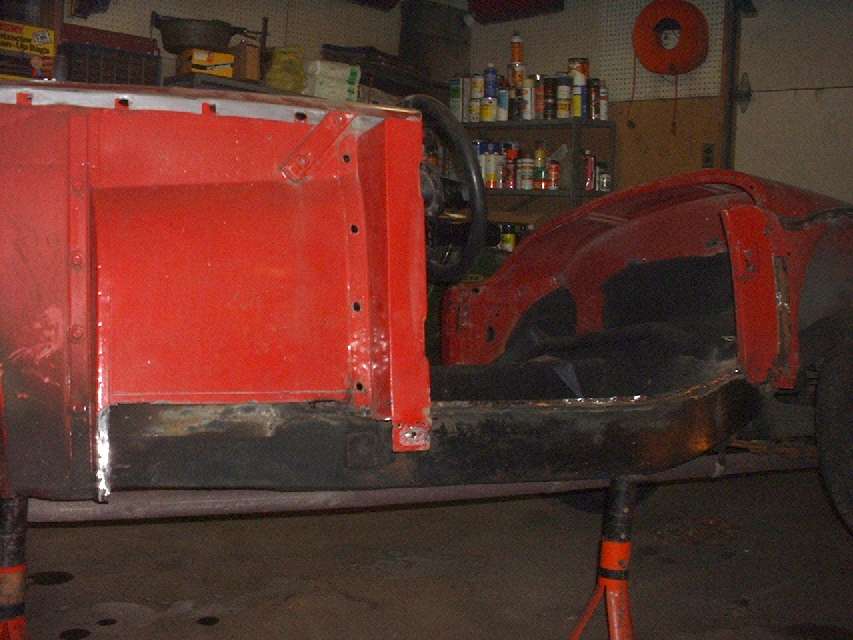
Sill Removal, Left Side
Fast forward a few days, but only one work session later. On the left side I started by peeling the outer cover from the B-pillar again. This side was rusted for a few inches at the bottom, but otherwise looks much better inside. Both front and rear panels of the B-pillar are solid the rest of the way up. I haven't decided yet if I will remove the last part of the outer cover at the top of the B-pillar (depending on access for cleaning and painting inside). I used the mini Sawzall to cut away the bottom of the B-pillar and bottom of the rear vertical panel, and also separated a few spot welds there.
I wanted to try to remove the entire body sill assembly on the left side in one piece, as well as might be practical. I learned a couple of lessons the hard way here. Since I wanted to save the L-flange sitting an top of the frame (same as on the right side), I would have to break the spot welds along the top flange. I started at the back of the door opening. After breaking several spot welds it became painfully obvious this was much more work than it was worth, and I was doing too much damage to the L-flange in the process. So I switched to "plan C".

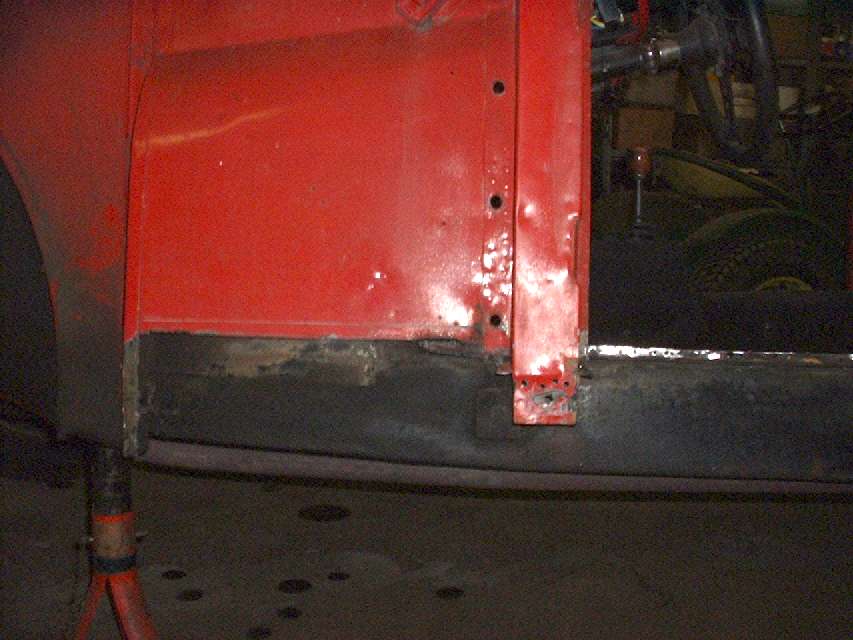
I decided to cut through the vertical panel below the L-flange, similar to the other side, but without removing the box panel. The mini Sawzall (or cut-off grinder) is much slower cutting through two layers of sheet metal (including the outer box flange), so I switched to the plasma cutter. This is much quicker, although it did burn some of the foam rubber packing out of the joint between the L-flange and the frame. No loss there, as this packing will be replaced when the body is off later. I also used the plasma cutter for the long slice in front of the A-pillar and down the front. Next chore was to break the spot welds between the A-pillar and the sill (quick work with the step drill).

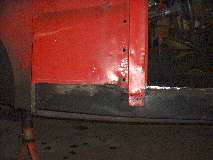
Above: Outer face or left sill. - Below: inboard face of left sill.
Of course inside the box there is no paint and lots of rust.

Then came the next hard lesson. The front vertical panel is all one piece behind the A-pillar, and I had to figure a way to make the horizontal cut above the sill box section. That cut is located slightly up inside of the bottom of the A-pillar, and the sill box section was still in the way of access. I finally used the plasma cutter to cut the sill box panel in front of and behind the A-pillar flanges, then down the outside surface, and horizontally near the bottom of the box. The piece I was removing contained the two internal gussets, and I had not cut through the vertical panel. So I continued to slice up the piece to be removed enough to get inside and cut out the two gussets. I could then reach inside from underneath to cut the vertical panel just below the A-pillar. This finally allowed the entire body sill assembly to fall away.
The plasma cutter had a good workout here. In retrospect, it would have been quicker to cut away the outer box panel first, then the vertical panel, like I did on the other side. Remember the old adage, "reassembly is the reverse of disassembly"? Well it works the other way around too. Disassembly is the reverse of assembly. The farther you get away from the "reverse of assembly", the harder it is to disassemble. I was just a little bull headed in this case because I wanted to preserve the removed sill assembly for future reference and modeling.
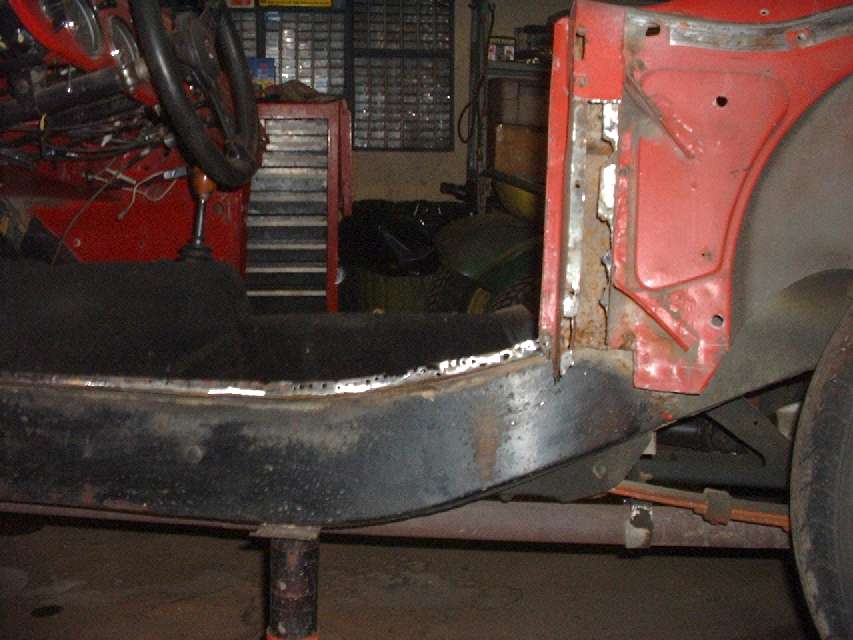
The final touch was using the angle grinder to remove the outer layer of sheet metal from the L-flange below the door opening, quite straight forward, easy and quick. There will be a little more clean up work along the front end of the front panel joint, and removal of the front horizontal gusset that I cut (because I didn't think to break those spot welds first). Then I can do a little sandblasting inside the B-pillar before it's time to start stitching in new sheet metal.
You should notice that all of the body above the cut line is solid and still holding paint, because this was well cleaned and painted both sides of the sheet metal with restoration work 30 years earlier. The only part that was rusty was where the lower box sections rusted from the inside out, because they were never painted inside. I am amazed how clean the A-pillar is inside, and solid all the way to the bottom in spite of no paint for 50 years.
There is a lesson here about periodic maintenance. When the car was only 20 years old and still in fairly good condition it had a body off stripping to bare metal and good repaint inside and out. After a nine year layover during restoration it has done another 21 years on the road, and now it is getting some more timely "periodic maintenance" with new body sills. It is amazing how much better this car looks already without the rusted sills, and it still looks pretty much like a car. Thinking about the condition of a lot of cars that have had no underbody maintenance since they left the factory, this one looks like a restorer's dream with all of the original sheet metal from the cut lines up. The progress is motivating, so I am anxious to start putting back some new sheet metal. If I can manage to do some painting inside of the box sections this time, this car might last another 50 years (with proper maintenance), hopefully still in daily use on the road. (21 Dec 07)
|