The MGA With An Attitude
CONVERTIBLE TOP TECH -- TT-103-18 - (pg 18 of 30)
With the back edge of the fabric centered and secure, you can turn your attention once again to the front header rail. Measure from left to right across the top of the windshield and find the center of the top frame. Make a mark a few inches down the center of the glass from the top for a centerline reference. A black felt tip marker should work well here. Then find the center of the front edge of the fabric and put a centerline mark there on top, just within the first inch of the edge of the material, no farther back. My kit had a few small "V" notches in the front edge of the fabric, one of which was about on center and a good reference point to start with. But don't count on it actually being on the true centerline. There is no guarantee that the left and right side panels are perfect mirror images. Ultimately you need to check the alignment of the left and right corners of the fabric at the sides of the windscreen frame.
One important intermediate step here. Pull the rear metal bow of the top frame up and position it as nearly as possible under the stitched seam in the fabric above the rear window. That bow should remain in this position for the duration of the project.
Now get your staple gun (or other fasteners) close at hand. Start in the center of the fabric and top frame. Pull the fabric forward, center it at the top of the windshield, stretch it up about as tight as you comfortably can with one hand, and staple (or tack) the fabric to the front surface of the header rail. Put in 4 or 5 staples an inch or two apart while you're still holding the tension on the fabric. Staples should be oriented horizontally and be positioned vertically very near the center of that front face of the header rail (you will see an example of this on the next page). You will have a couple extra inches of fabric to hang on to while you are doing this.
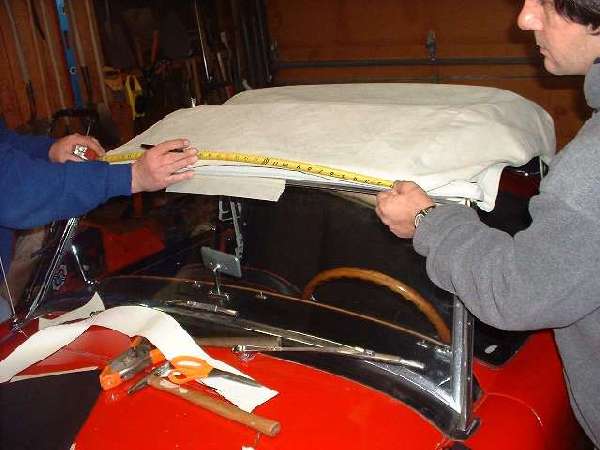
Before you go any farther, check the alignment of the fabric to see if it is indeed on center over the windshield. At each front corner, pull the fabric tight and measure from the fore & aft stitched seam to the side of the windshield. You should have the same distance on both sides. If not, subtract one distance from the other, divide by 2, and move the centerline mark over by that much. Then pull out the staples, relocate and stretch the fabric, and staple it back on to the header rail again. Repeat this process as necessary until you get the fabric centered at the top of the windshield.
Now you can go ahead and fasten the fabric the rest of the way across. Start near the center of the header rail, pull the fabric sideways a bit to remove any puckers in the fabric, stretch it forward and staple it to the header rail. Work your way from the center out to the far front corner, using about equal force at all times for stretching the fabric, and placing the staples about every inch along the way. And be sure to keep placing the staples about half way up that front face of the header rail. Do the same thing for the other side of the car so you and up with the fabric being stretched and stapled all the way across the header rail.
|