The MGA With An Attitude
LOUVERED PANELS For Inner Fenders 2 - TC-117A
BMC part numbers AFH5844 (R/H) and AFH5845 (L/H)
On 12/28/2023, Mark Campbell 1n the UK wrote:
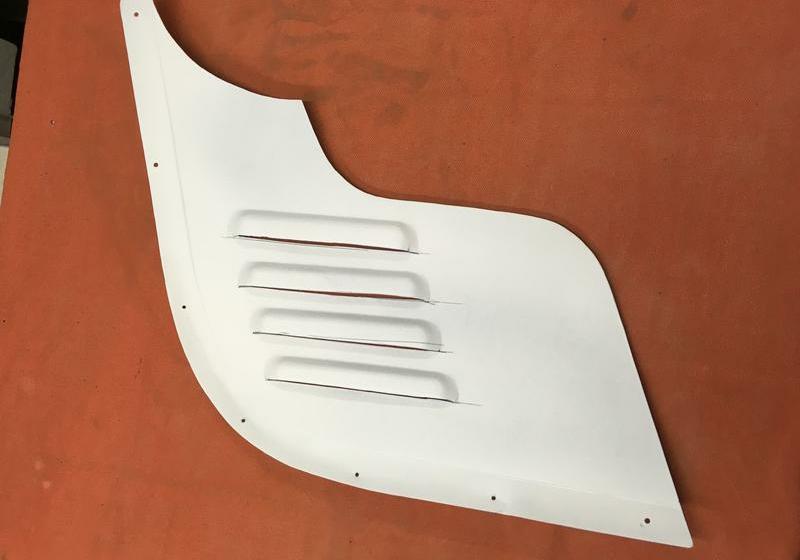
"With reference to the special tool @ TC-117, I decided to make my own louvered panels and used aluminum from a salvaged door skin. -- Mark
On 12/29/2023, Mark Campbell 1n the UK wrote:
"I had started making a jig to press from both sides but it was tearing the material badly. I thought it was probably too tight on shape clearances, but having finished the pair in the photos I think it was also due to the salvaged material being very rigid, almost brittle". -- Mark

On 12/30/2023, Mark Campbell wrote:
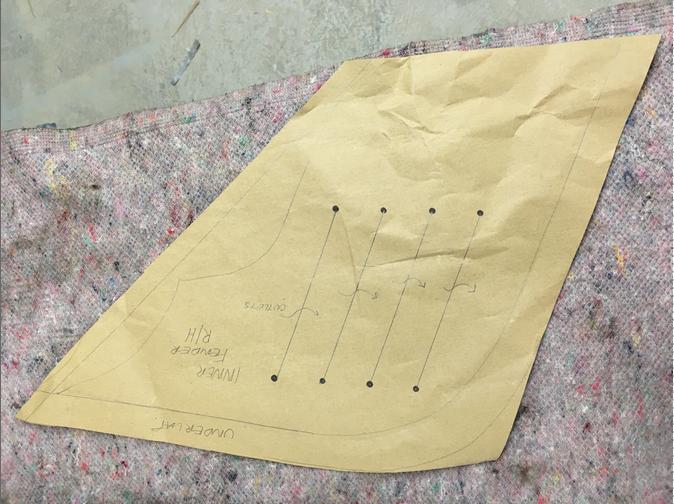
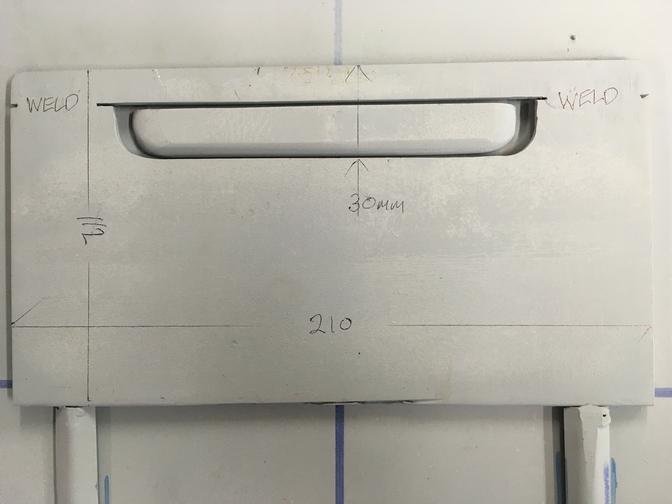
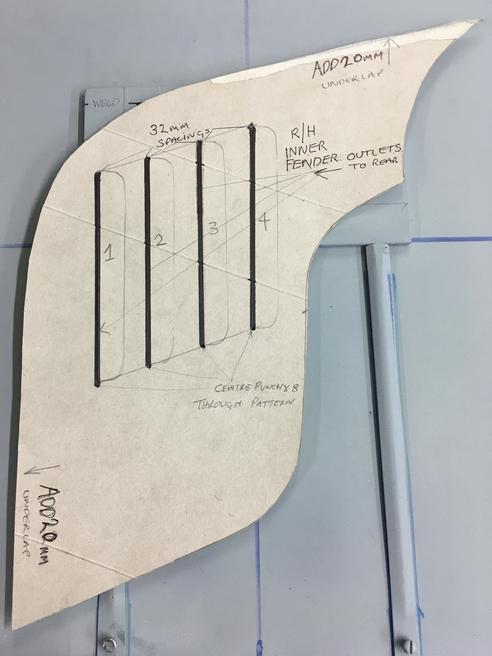
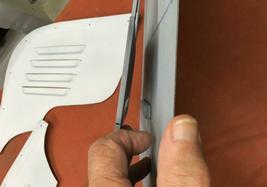
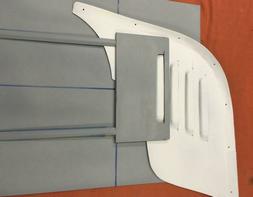
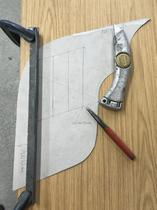
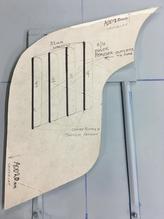
"I first made a cardboard template of the R/H inner fender area based on a guesstimate of size shown in pic1. Then I marked out the spacing of the vents based on the 4 in a row look. I made the jig as shown in pic4 out of 1/4" plate. I cut off the desired width to press in between each vent. Cut out the shape by drilling two holes to create the radii and joined them up with a 1mm slitter blade. I cleaned up the aperture with a file and welded the first off cut back in position. The central shape which forms the underside of the vent was cut from the same 1/4" plate and shaped to fit with a minimum of 1.5mm clearance all round I plug welded it with three holes drilled through the 1mm base plate. I tack welded on two tails long enough to accept the size of the work piece, positioned it, and put two self tappers in to secure it. This acted as a primitive hinge and alignment tool which positioned the press plate over the work-piece each time. At this stage it's best to trial a pressing, I found it enabled me to file out and blend in the angles under the pressing plate where it tore the test piece. The blending-in is more noticeable at either end of the aperture where it was needed. ref pic 4.
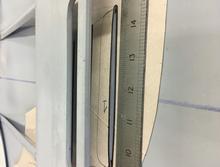

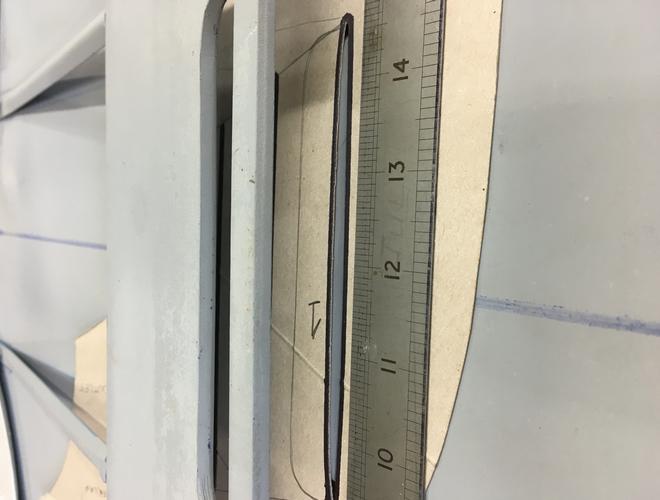
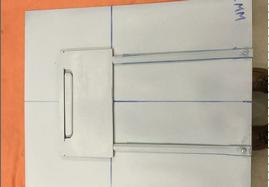
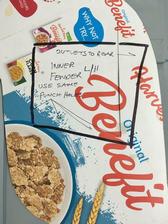
The template was placed over the ally sheet and scribed around adding the desired under-lap. The 8 points were center punched through the cardboard to mark the work piece. The sheet was then placed in position under the angle iron Pic1 clamped down securely and scored heavily with a box cutter using the center punch marks as a start and stop for each of the 4 cuts. The 20mm angle shown in Pic1 is positioned for a right handed downward cut with left handed fingers behind the angle iron for safety!! I found it best to have a spacer under one end of the angle iron so I was able to release one clamp and slide the work piece to the next position. The sheet must remain flat until all four vents are pressed sequentially as numbered in pic 5.
 The scores made in the material need to be deep enough to allow the sheet to split at that point, I had more than one or two that cut through which is ideal. They can be teased to open up enough to allow each one to locate over the underside of the vent as per the cardboard template in pic2. The top can be position by eye according to pencil marks at each side. The scores made in the material need to be deep enough to allow the sheet to split at that point, I had more than one or two that cut through which is ideal. They can be teased to open up enough to allow each one to locate over the underside of the vent as per the cardboard template in pic2. The top can be position by eye according to pencil marks at each side.
So, with a metal plate over and below the jig, number 1 vent can be pressed. I used a hydraulic shop press at 4 tons (less pressure could be feasible but the overkill worked for me). Please remember it is not possible to re-press afterwards sequential only 1 to 4 so care is needed here. I used a swage to create the joggle to the under-lap.
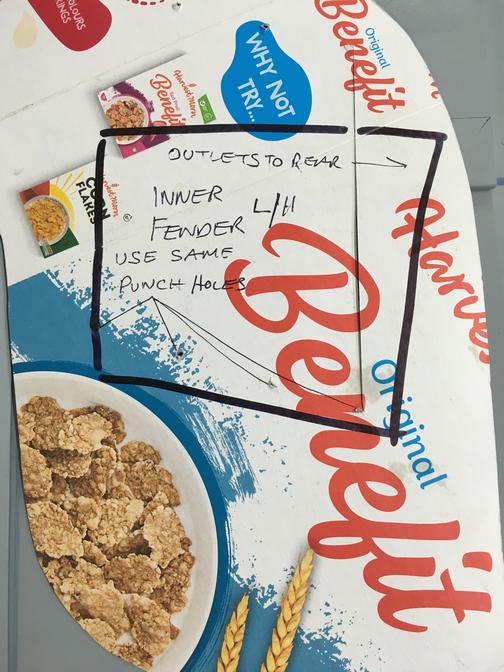
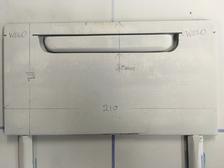
The cardboard template can be reversed to make the L/H inner fender vent see pic6 I used a swage to create the joggle@ 20mm for the under-lap. Each side will need shaping to fit the contours of it's relevant inner fender and may need some hammer and dolly work or a shrinker to the edge of the under-lap area". -- Mark
|