The MGA With An Attitude
REPAIR of the ANALOG TEMPERATURE GAUGE 4 -- DT-102G
Monday March 26, 2018:
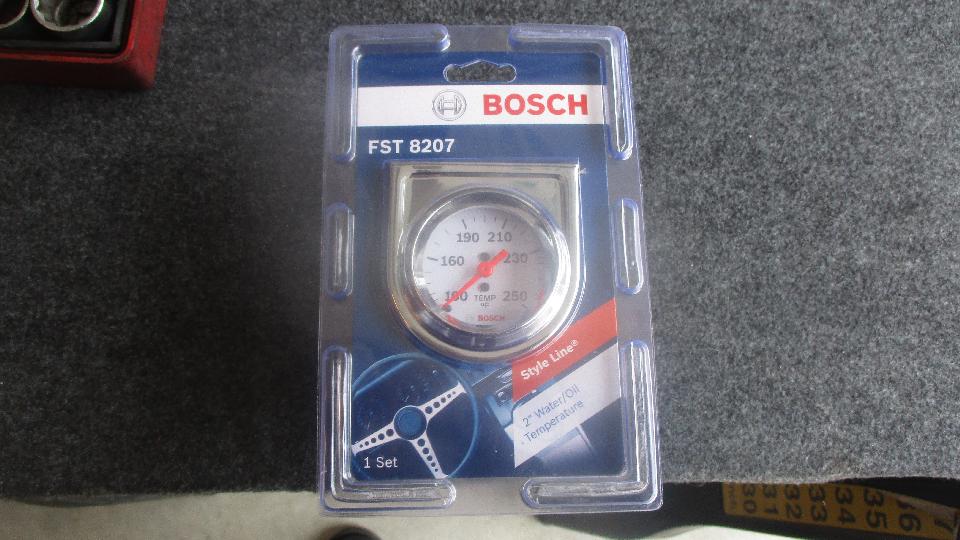
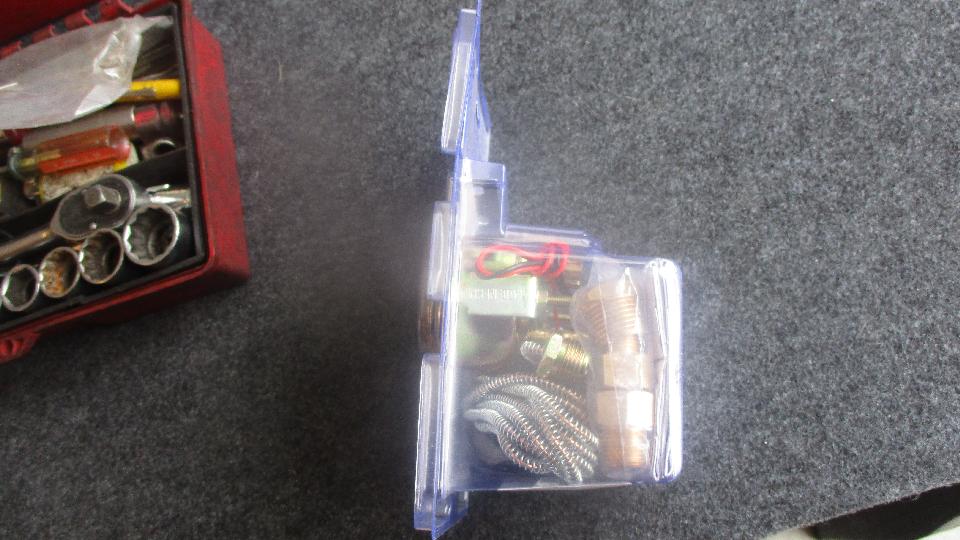
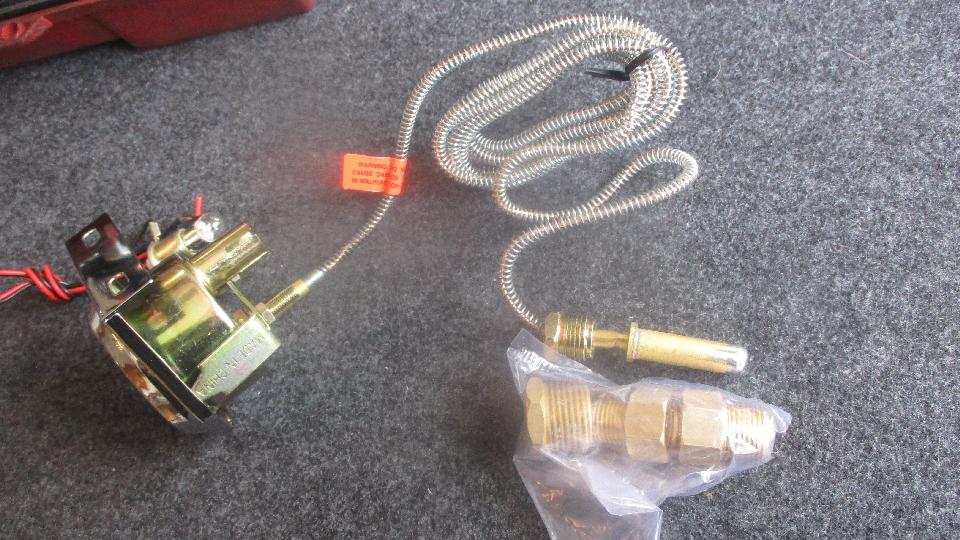
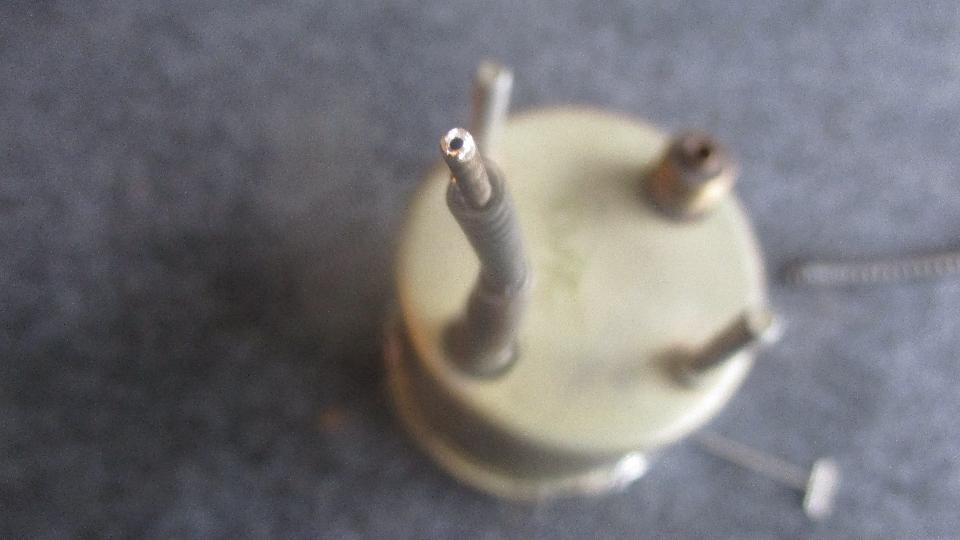
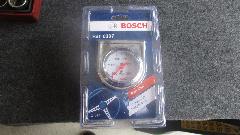
Three days after the last success we are back to do it again, with a lot more confidence. This starts with a $17 Bosch analog temperature gauge procured from the local Advance Auto parts store. I paid a few bucks extra for this one because it has the spiral wrap spring wire around the small pipe very similar to the original unit in the vintage car, good for appearance sake, and maybe a little better protected. It also comes with male pipe thread adapters in three different pipe sizes so it could be used for water or oil temperature sensing in any application where a female a pipe threaded port is installed.
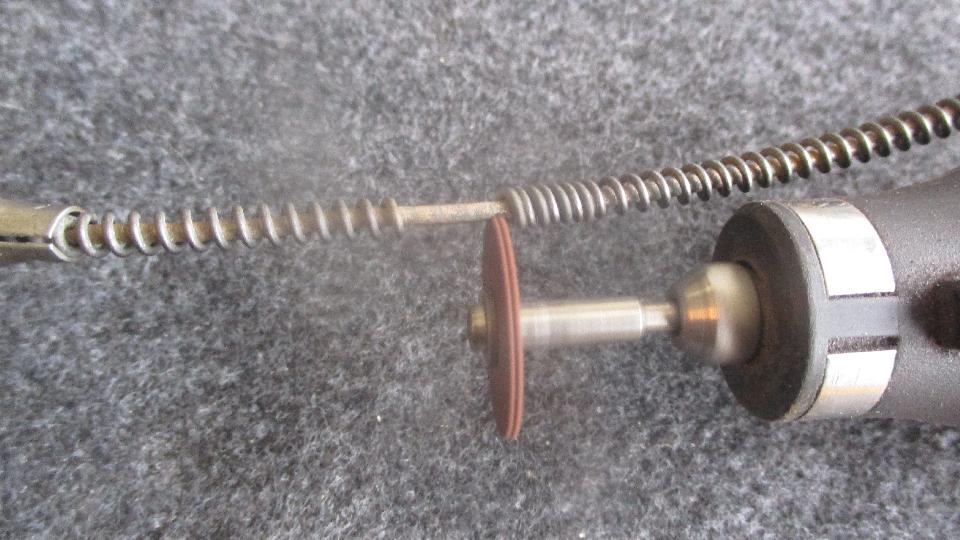
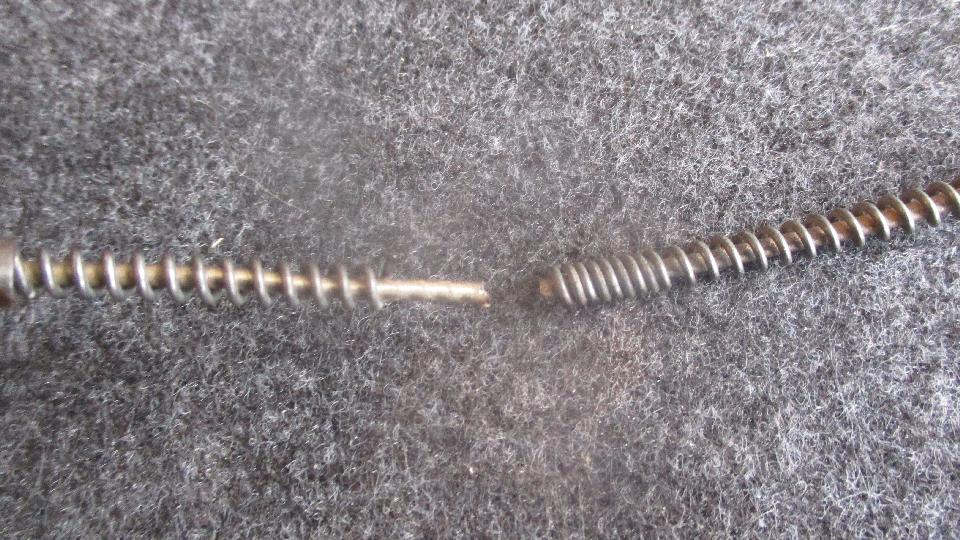
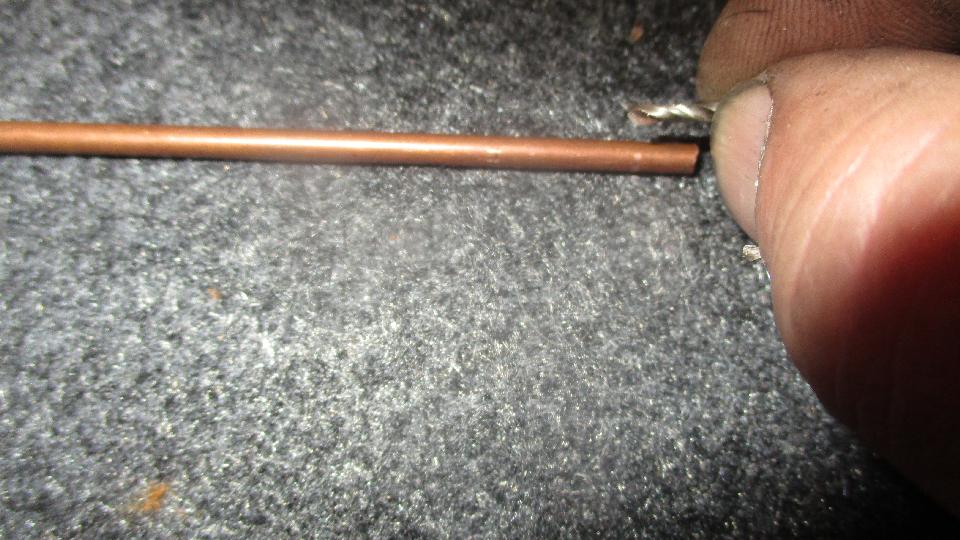
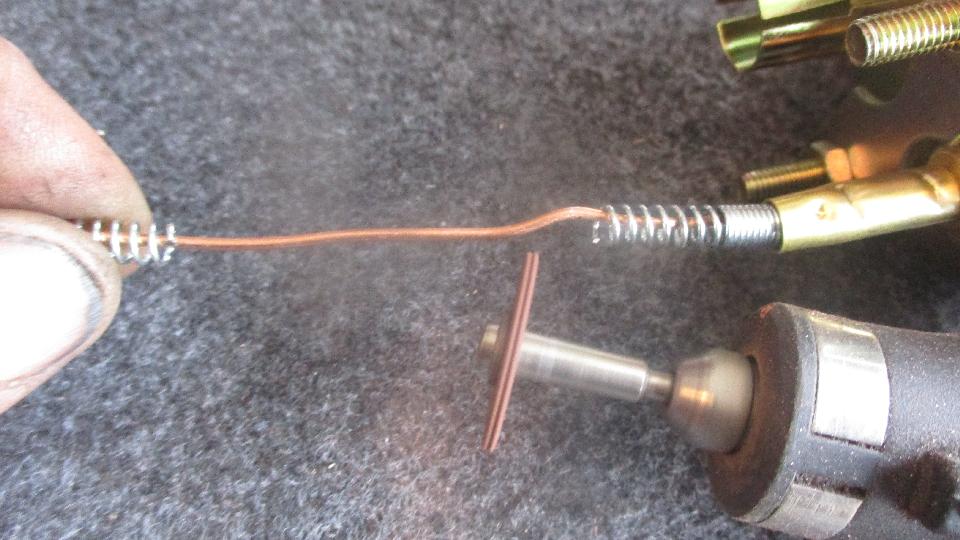
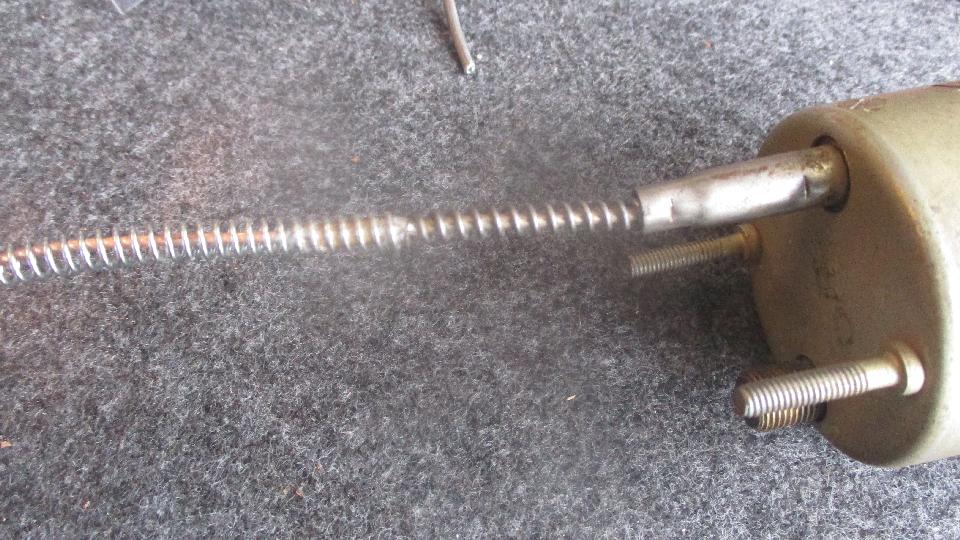
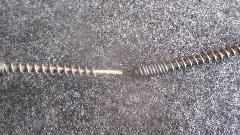
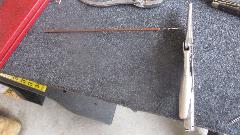
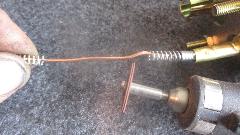
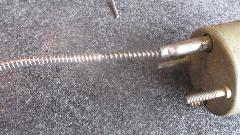
Not knowing where the original leak occurred that disabled the gauge, we will be replacing the full length of signal pipe right up near the back of the gauge, but leaving a short stub to work with. Maybe on some future attempt I may try joining the new pipe inside the gauge, but not this time. I begin by cutting through the protecting spring wire in two places a half inch apart, then screw the loose piece of spring down into the remaining coil for open access to the pipe. Then cut off the pipe leaving about 3/8-inch of bare pipe exposed.

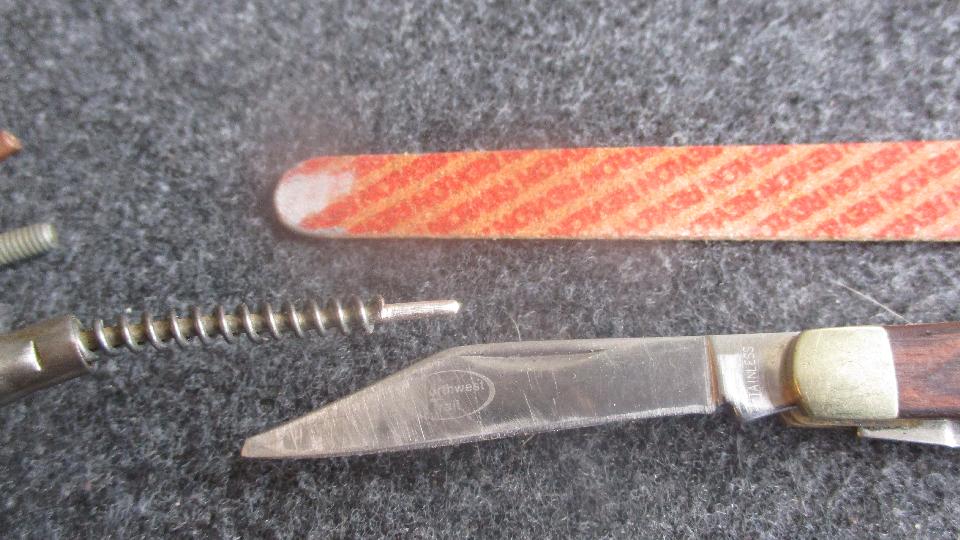
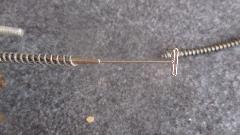
We use a stick pin to clean the bore end of the remaining stub pipe on the gauge to assure there is no flow obstruction. You could suck on the pipe and put your tongue over the end to assure it will hold a bit of vacuum (no leak allowed).


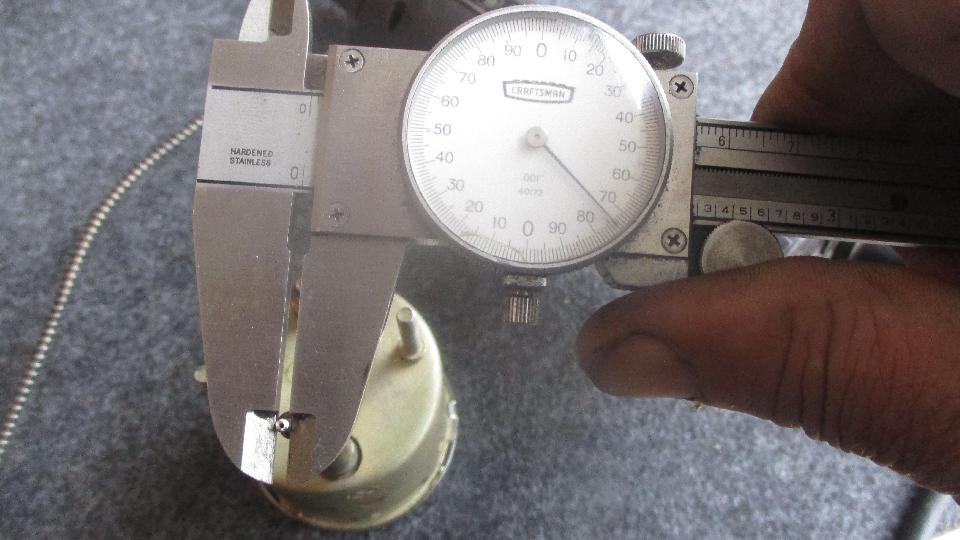
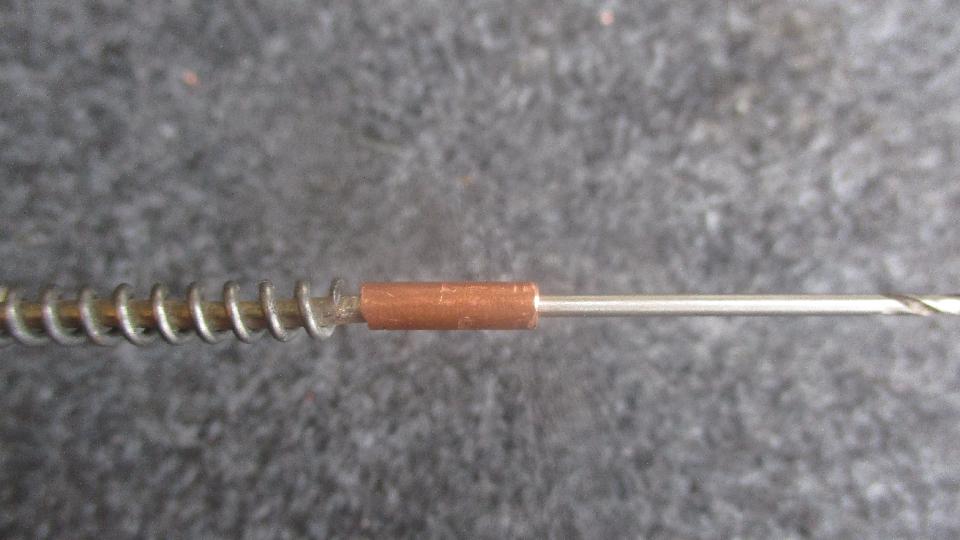
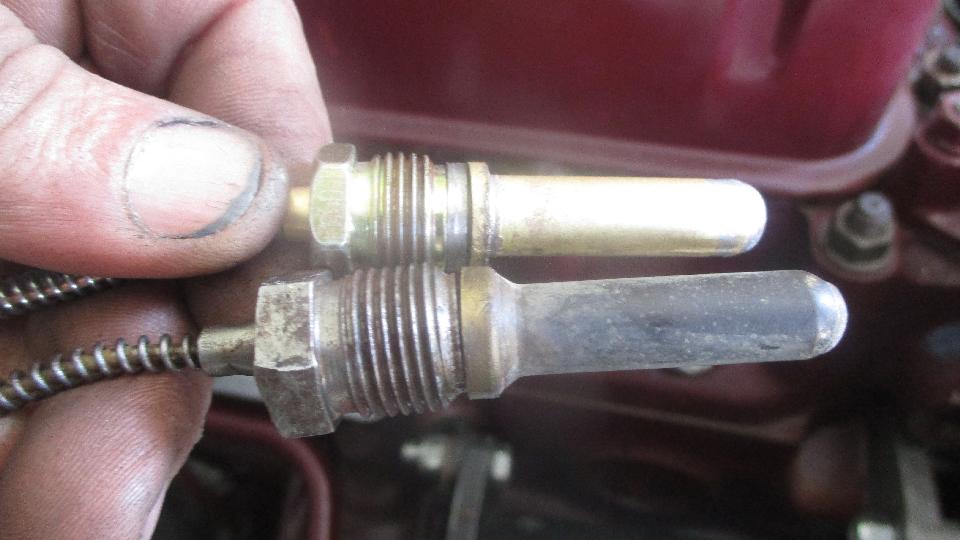
 Measuring the old pipe was actually done before ordering the tubing that will be used for the coupling. The old pipe size is 0.074-inch diameter. Clean any corrosion off of the vintage pipe to make for easy soldering.
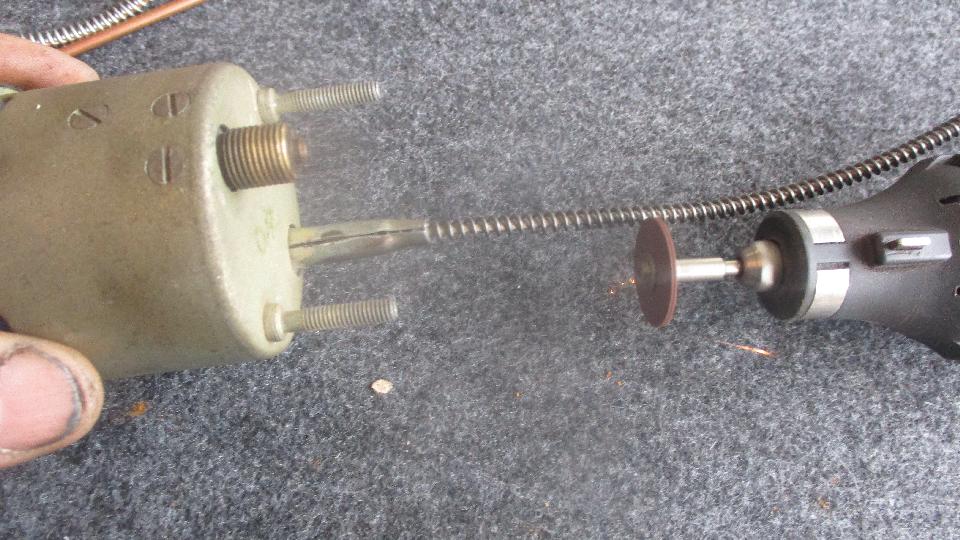
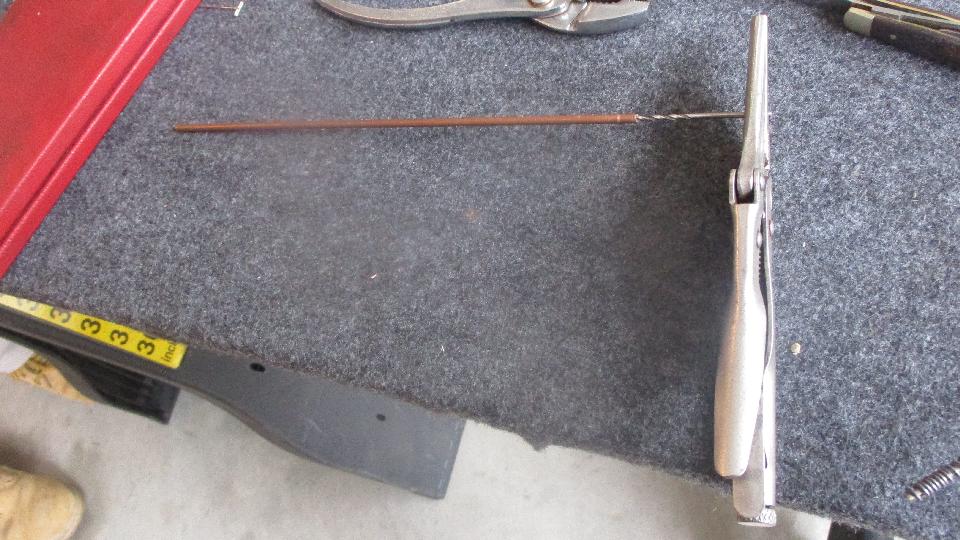
 Copper or brass tubing to be used for the coupling is 1/16" ID, 1/8" OD (procured from McMaster-Carr). We need to open one end up to 5/64" (0.078). This was fun. We didn't have a power drill handy, but only need to open the bore from 0.064" to 0.078", which is only 0.007: to be removed from the radius. I clamped the pipe gently in a vice, held the drill bit with a small Vice-Grip, and proceeded to drill the pipe out by hand. It was surprisingly easy, went so well that I made a couple more spare coupling tubes in a few more minutes. After drilling about 1/4"deep, cut the tube off about 1/2" long, and clean off any burrs or sharp edges. Assure that the gauge pipe fits into the enlarged end of the coupling tube, and a 1/16" drill bit still fits in the small end. Copper or brass tubing to be used for the coupling is 1/16" ID, 1/8" OD (procured from McMaster-Carr). We need to open one end up to 5/64" (0.078). This was fun. We didn't have a power drill handy, but only need to open the bore from 0.064" to 0.078", which is only 0.007: to be removed from the radius. I clamped the pipe gently in a vice, held the drill bit with a small Vice-Grip, and proceeded to drill the pipe out by hand. It was surprisingly easy, went so well that I made a couple more spare coupling tubes in a few more minutes. After drilling about 1/4"deep, cut the tube off about 1/2" long, and clean off any burrs or sharp edges. Assure that the gauge pipe fits into the enlarged end of the coupling tube, and a 1/16" drill bit still fits in the small end.
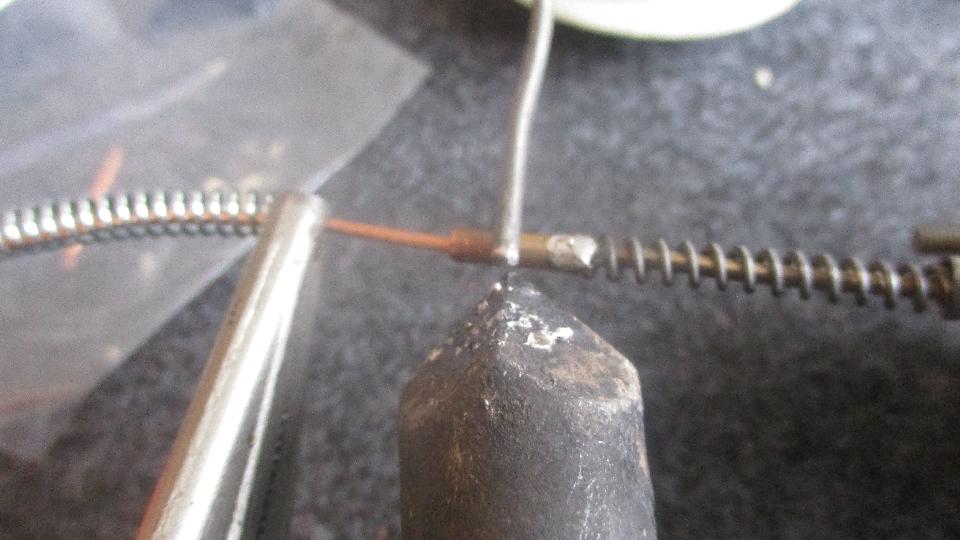
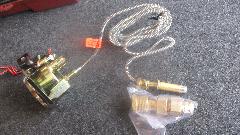
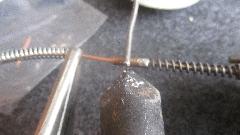
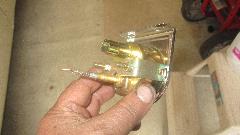
At this point you can use acid core solder (or soldering acid and solid wire solder) to tin the cut end of the original gauge tube, and then solder the coupling tube onto it. Be sure you have a clean and hermetically sealed fitting (not a cold solder joint). This requires a soldering iron with enough thermal mass to do a quick heating of the coupling tube and the steel tube on the gauge.


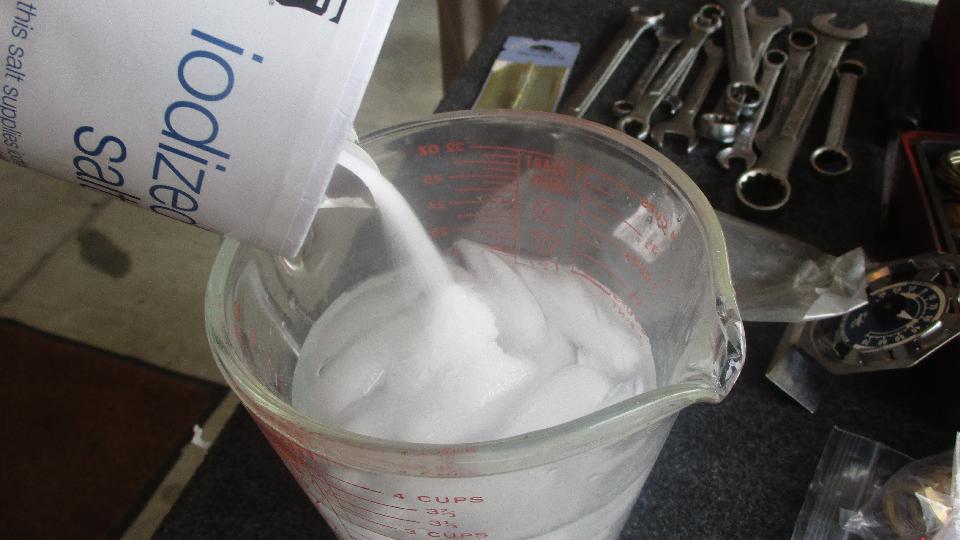
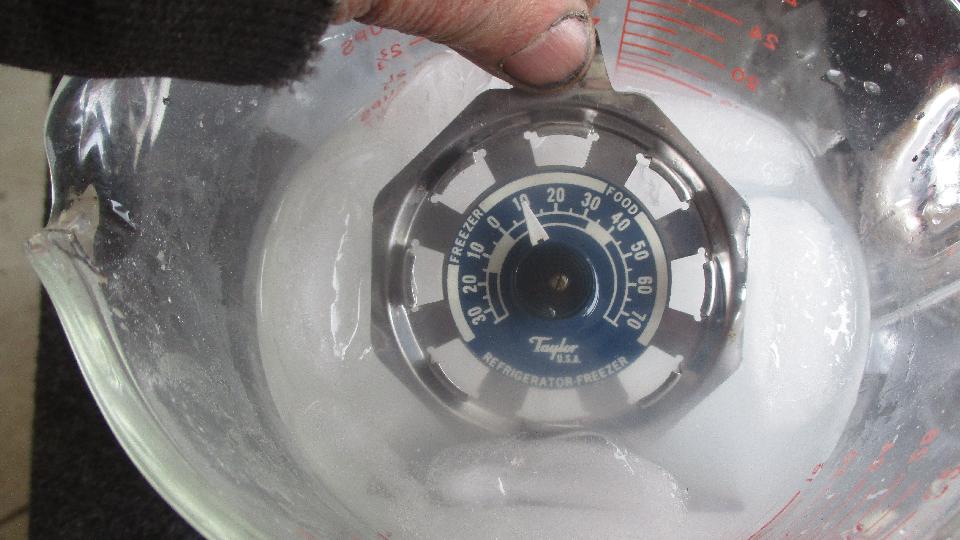
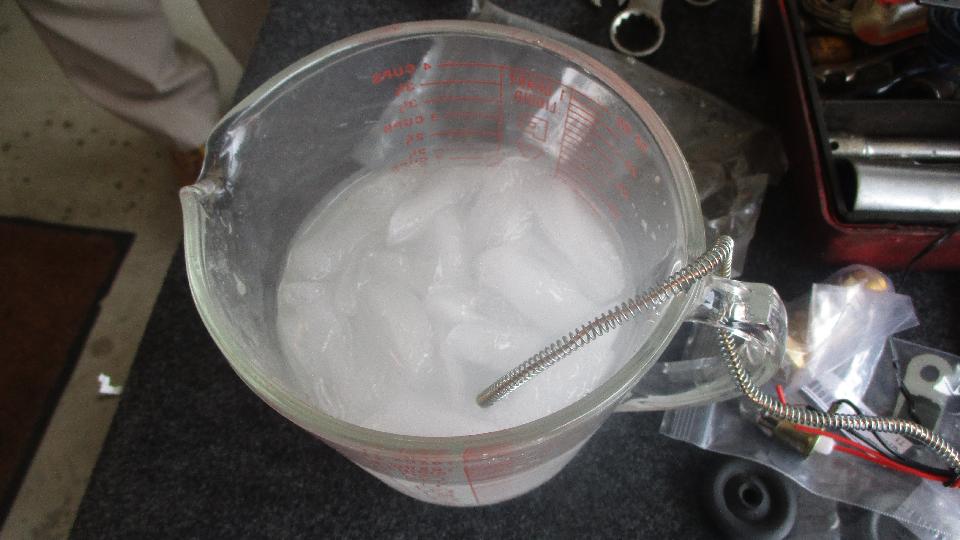
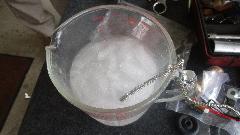
Zeroing in on the real fun, we need some iced brine water. A few days earlier we succeeded with minimal salt in the water, and 24dF cold water. Makes me wonder if this operation might work at 32dF (but not going to try it now). This time we have plenty of salt handy, so just keep adding salt until some of it settles out when no more can be absorbed into the water. The iced brine water is then 10dF, so this is going to be easy. In theory, saturated brine solution should reach -6dF (-21dC), so maybe the cheap refrigerator thermometer is reading up to 16dF too high (which would mean the last one was done at 8dF rather than 24dF). Or more likely we didn't wait long enough for total saturation. Saturation occurs with about 3 ounces of salt in one cup of water (if you stir it long enough). Knowing what the mixture is, if you use enough salt and ice you don't need the thermometer. Stick the new temperature gauge thermal bulb in the iced brine water to soak, and be sure it will stay there for the duration of the next operation.

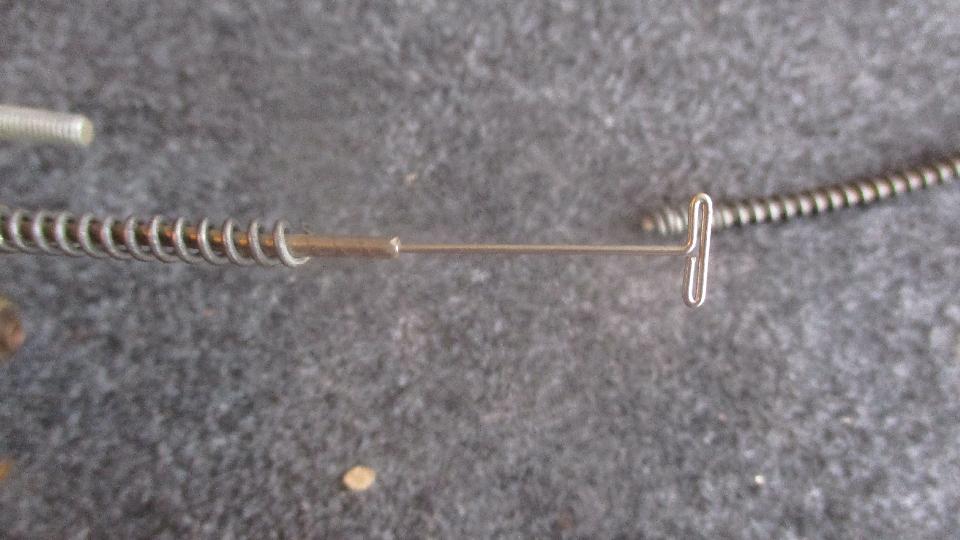
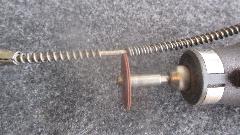
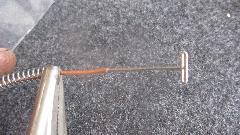
The tube on the new gauge should also be measured. Most of the new ones will be in the range of 0.060" down to 0.045", just be sure it will fit inside the 0.063" bore of the coupling tube. If you are sharp you may have the rubber bulkhead grommet handy to slip over the tube when it is cut and before it is re-joined (because the grommet will not fit over the thermal bulb and flare nut). We cut the spring wire only once near the new gauge, then pulled the spring down the tube a bit and clamped it there with a small locking pliers. Then cut the tube near the gauge. Again, use the stick pin to clear the bore in the cut end of the tube.
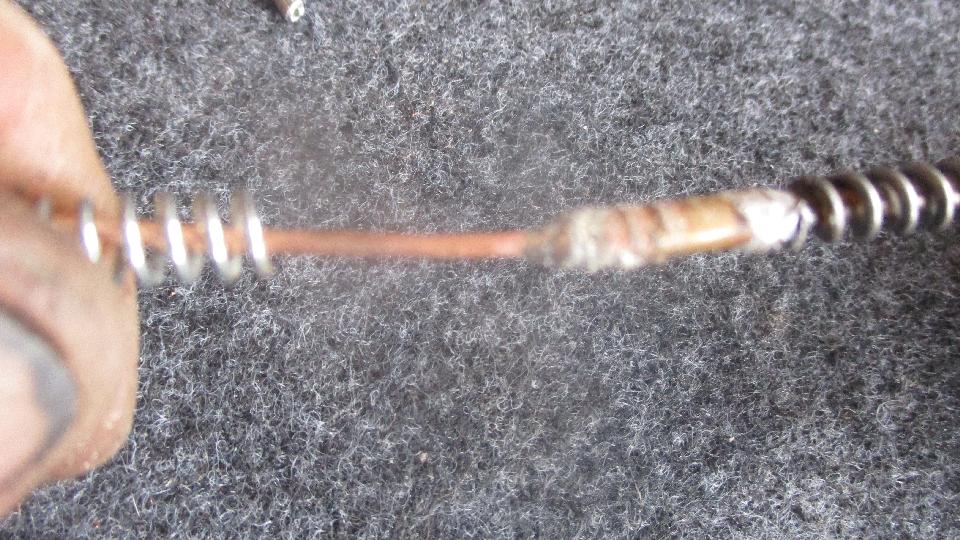
Now we were to be soldering a copper tube into a brass coupling, so we used resin core solder (same as for soldering copper wire). All of the copper and brass bits were new and clean, so this joint was quick and easy. Once the pipe was soldered in place (hermetically sealed of course), we gave the new spring wire a few turns of counter twist, then slipped it over the coupling tube with a little forward twist. This was a nice snug fit so the spring held well on the coupling tube. The larger steel pipe is significantly stronger than the new copper tube, to the new pipe can wank around a lot while the steel pipe hardly wiggles at all (seems almost solid by comparison). If you wanted to assure that the spring would stay put, you might consider adding a bit of heat shrink tubing over the spring before final soldering.
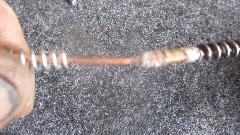
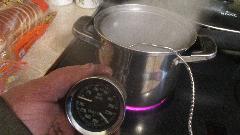
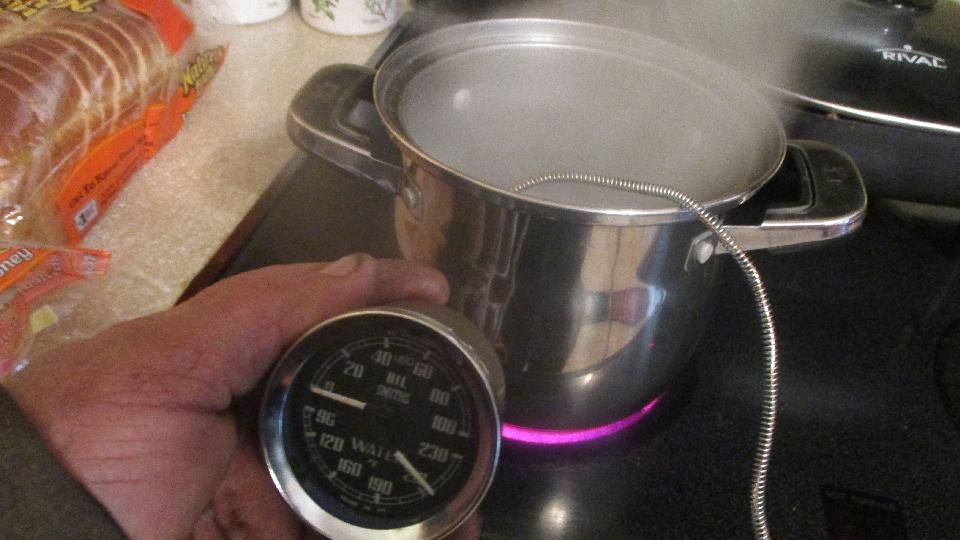
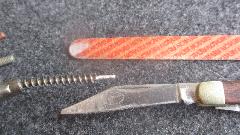
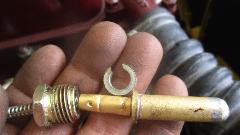
 Then a quick trip to the kitchen to boil some water, and the nice vintage temperature gauge was reading spot on 212dF. The piece on the right is the remains of the new gauge that we get to toss in the dust bin.
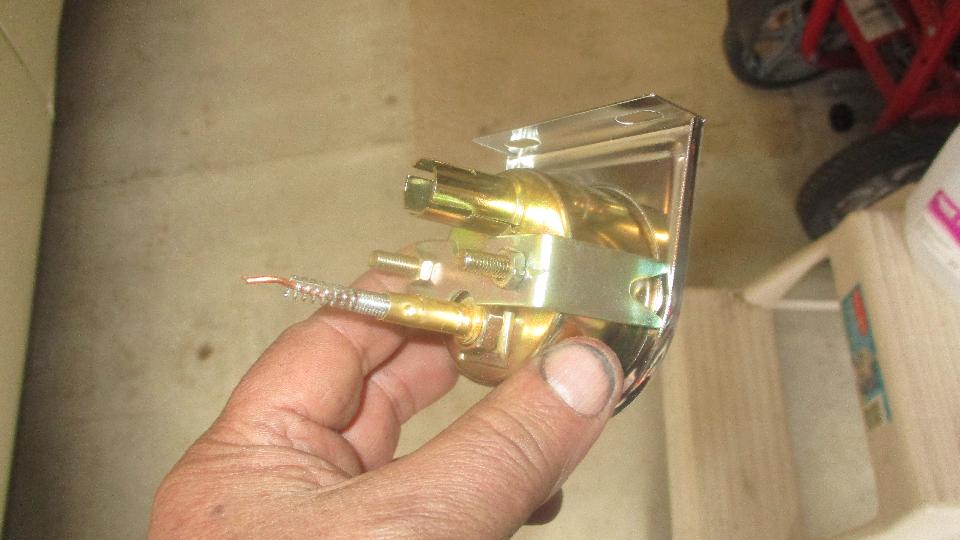
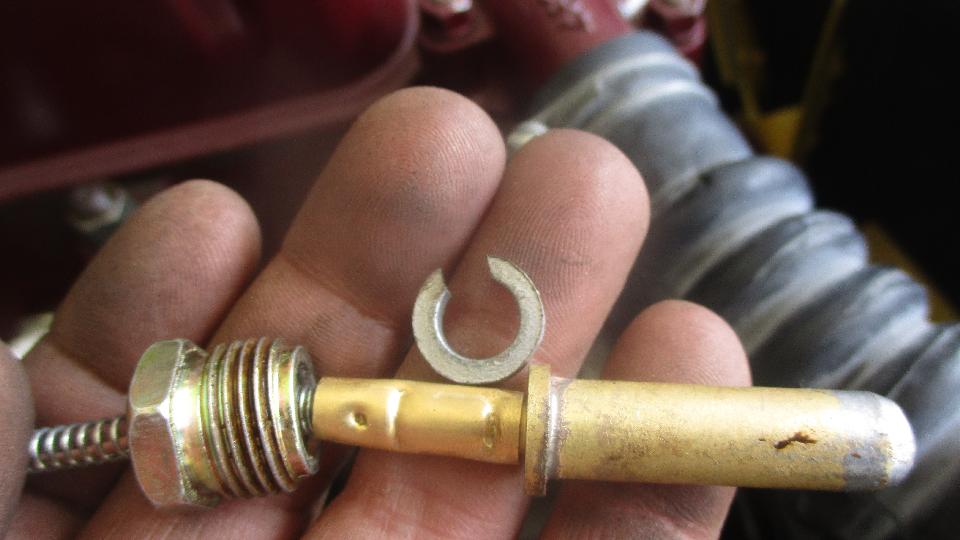
Then back to the garage to reinstall the working gauge in the MGA. This is when it dawned on me that the new flare nut was shorter than the original one, and it would not screw into the head far enough to secure the thermal bulb. But I have seen this before, and it is not hard to fix. You need a 5/16" high crown lockwasher. Or use a standard 5/16" medium spring lockwasher, and grind it down to 1/2" OD. Then cut the split opening out wide enough to fit over the spring wire on the gauge tube. And you can twist the helical washer into a flat plane. Place this spacer collar between the new flare nut and the thermal bulb before installing it in the cylinder head.
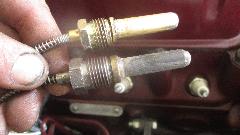

If I had remembered this problem in advance, I could have installed the old flare nut on the gauge pipe in place of the new one before soldering the pipe. I guess I still could, if I wanted to re-do the last solder joint.
|