by Gordon Harrison - the Montreal MG Car Club 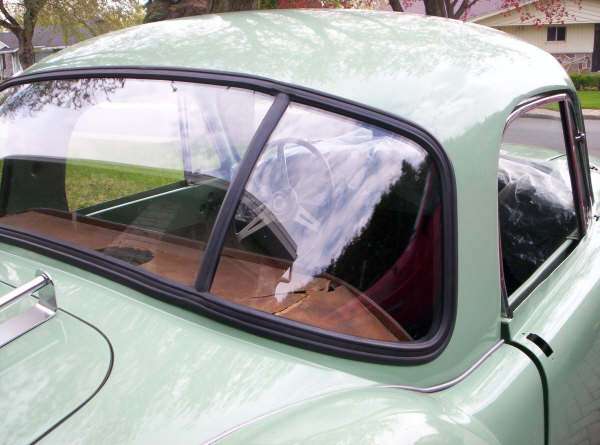
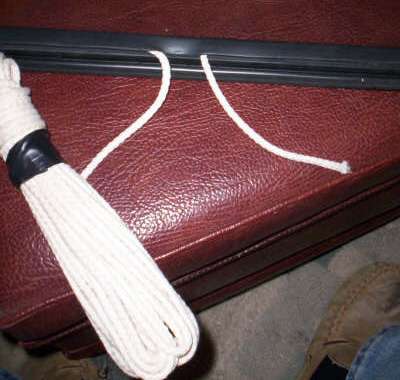
 I wasn't looking forward to the task of installing my windshields into my MGA Coupe. I felt rather than risk breaking the glass, I should take it to a professional and pay them the installation. While trying to figure out what to do, I surfed the Internet, checked all of my reference books and read my owners manual. Finally I took the plunge. I chose a particular type of rope (from Rona hardware) that is the type used for draperies and blinds. It is about 1/4 in wide but most importantly is a woven type of cord not spiral wrapped. The importance of this will be shown later. Also be sure that your rope is of an adequate thickness. If it is too flimsy, it will break when pulled and if it is too narrow, it will tear the rubber seal edge as you pull on it.
 Step #4
 Present the windshields and seal up onto the car body, setting the two outside windshield pieces into place (but not installed). Arrange the seals lower middle section over the metal lip where the seal will be fitted. Fit as much of the inside lower middle seal as you can, over the metal edge and then (from inside the car) using the cord, gently pull the cord from the seal while pushing down on the seal from inside the car. At same time (from outside the car) carefully work the outer seal edge, over the outside mounting lip. Take your time ...don't rush...do a little section at a time and it will work. You will have to get in and out of the car several times for this procedure. Step #5 With the bottom portion of the seal in place, now is the time to insert the center section of glass, starting at the bottom corner. Try to fit the bottom corner and then the vertical edge (on one side) again using your stick. This is perhaps the hardest part of the whole job and will take some juggling to get things in place. Proceed along the bottom and then do the other vertical side. As you reach the top of the seal, you will have to pull (on the seal) to get it around the final corner of the glass. BE CAREFUL AND DON'T OVER DO IT. YOU DO NOT WANT TO TEAR THE SEAL. There, you now have all three pieces of glass installed into the seal. 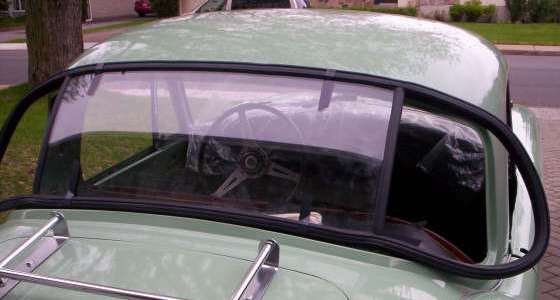 Step #6 Using you hands, from the outside of the car push the windshield and seal into place. At the present moment don't worry about fitting the seal, you are just trying to align and compress the seal to the best possible fit. Using your popsicle stick, slowly place as much of the lower outer seal edge as you can, over the body edge. Now reenter the car and slowly pull the bottom cord along. This will lift the seal over the inside metal edge and begin the final installation. As you work along from the inside , use your fingers to push the seal down over the lip of the metal. Work from both inside and outside of the car. Pull some of the cord...push the seal down...go outside the car and fit the outer seal edge...give a push on the windshield to seat it into the opening. As you proceed along you will see the seal and windshield start to fit the car. By working from the center of the seal outward and doing 6 inches on the right side then 6 inches on the left side and so forth you will see it progressively start to fit. 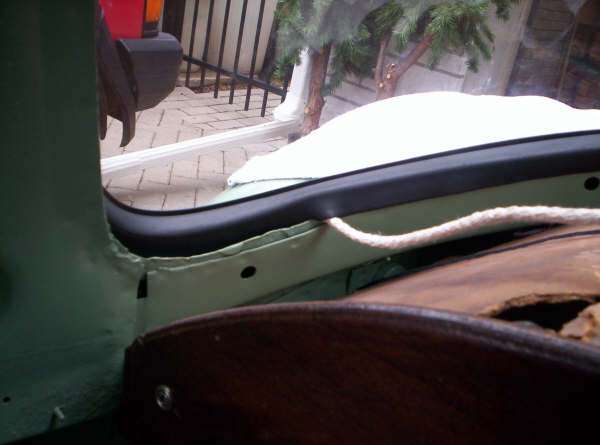 Step #7
 As you progress to the outside window panels remove the tape as you go .When you come to the lower corner, the seal edge will tighten up on you (at the inside area) and it will take more manipulating and pushing and fitting to get around the corner areas. This is the part where you will be glad you have the woven rope as it will not come apart on you and can take a lot of stress. BE CAREFUL NOT TO PULL TO HARD OR YOU WILL TEAR THE SEAL. PATIENCE HERE WILL PAY OFF. Pull a little ....use your stick...push on the window and it will progress. Step #8 By now you should have the lower portion of the seal and windshield installed with both outer side pieces installed and are now moving on to the top portion of the seal. This will be the easy part as most of the glass is fitted. Working from both sides (right & left) pull the cord.. Fit the outer edge of the seal and the inner edge. As you come to the final foot of installation you will notice the seal getting bunched up and harder to pull over the lip. Keep going but very slowly so as not to tear the seal.
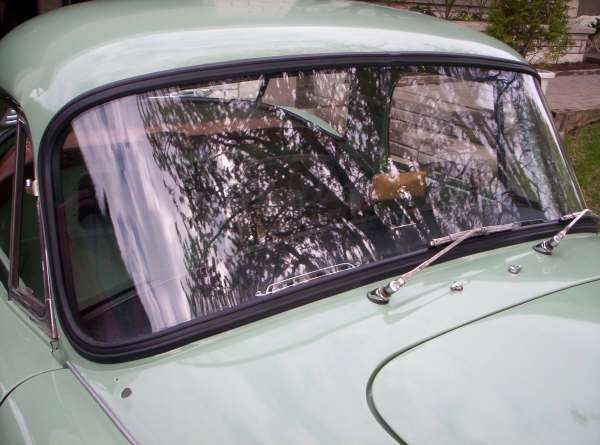
Step #9 Your windshield and seal are now installed. Carefully from the outside, check that all of the outer seal edge is properly seated . Then using your rubber mallet carefully hit the windshield glass all around where the windshield meets the seal. These taps can be reasonably hard but use your brains and judgment so as not to break the windshield. Hitting the windshield will help seat it properly. Now go inside the car and using your fingers manipulate and position the inner seal properly.
Step # 10 Proceed to the front windshield where the same procedures will be applied. There is no need to explain the full procedure as it mimics the rear installation. If you have been able to do the rear fitting, the front windshield will be "a piece of cake". On the Coupe, a word of caution.... DO NOT install the front windshield until you have glued down the vinyl cover on the upper dashboard and installed the defrost vents. If you install the windshield before fitting those pieces it will be "pure hell" to get them fitted after the windshield is in. Get out the window cleaner and tidy up the job, then sit back, open a cool one and admire your handy work. My installation took approximately 1-½ hours for the rear and about 30 minutes for the front. CAUTION: Do not use any type of metal bar, etc., on the glass, as this will ensure you break the windshield. Some people use soap and water on the seal to make the glass slip in easier. This is not necessary and only makes a great deal of mess. Good luck. Gordon Harrison - The Montreal Mg Car Club |
||||||||

