The MGA With An Attitude
WIPER SPINDLE Seal - ET-113C
For a long time I have had a mysterious water leak behind the dash whenever I would drive in a heavy rain storm, but if I flood the area around the wiper spindles with a hose it doesn't leak. The wiper drive spindles are in the area of high pressure at the base of the windscreen. I presume that at road speed the air pressure in front of the glass is enough to push water through the spindle bushing if the seal fails.
The factory Service Parts List has the wheelbox under a singe part number, presumably to be sold as an assembly. It also lists a part 17H5389 called "Tube for spindle (rubber)". It appears the factory thought a field technician could replace this seal, but there are no instructions in the Workshop Manual. Most of the common British parts vendors would prefer to sell you a new wheelbox, but Clarke Spares and Restorations sells a seal suitable for this application.
See prior article ET-113A for information to R&R the wiper wheelbox. The wheelbox must be out of the car for this operation. It will also help if you have an arbor press to press the spindle out of the sprocket and reassemble it later. I won't claim it can't be done with a hammer and punch, but it is one of those situations requiring high force for a press fit part, and you might bend or otherwise damage something trying to hammer on it.
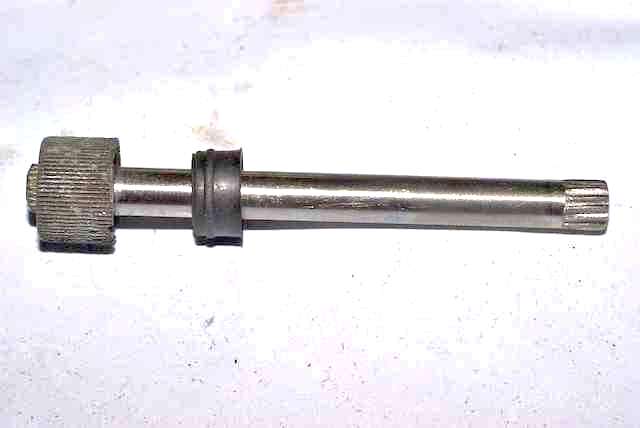
Before you disassemble the spindle you should attain some reference for the assembled length to assure that it will be put back together in the same condition. You might measure the length from face of the knurled knob to face of the sprocket. Or measure length of extension of the spindle beyond face of the sprocket. Or you might find a flat washer with thickness about the same as extension of the spline beyond face of the sprocket, which you will be removing.
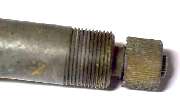
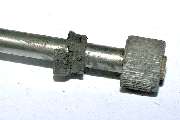
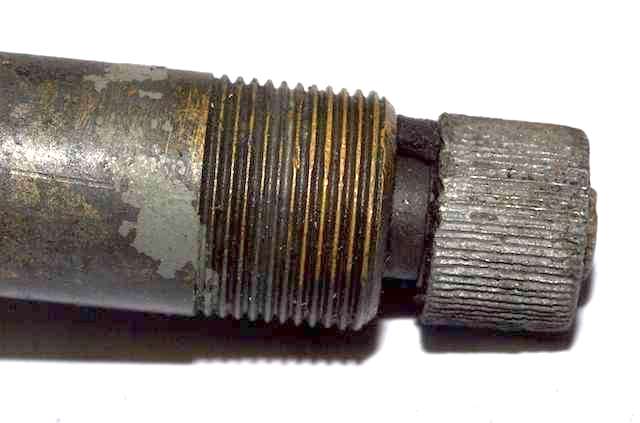
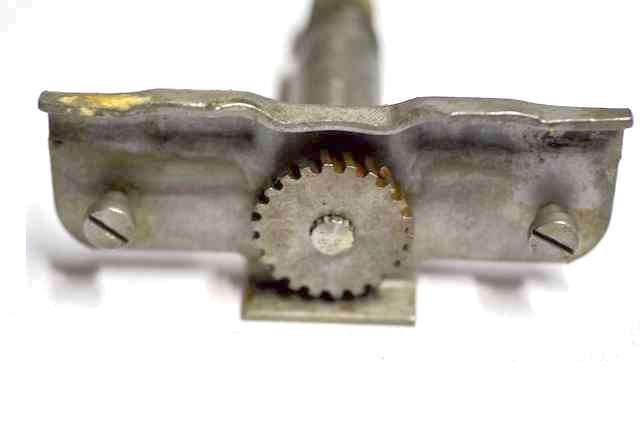
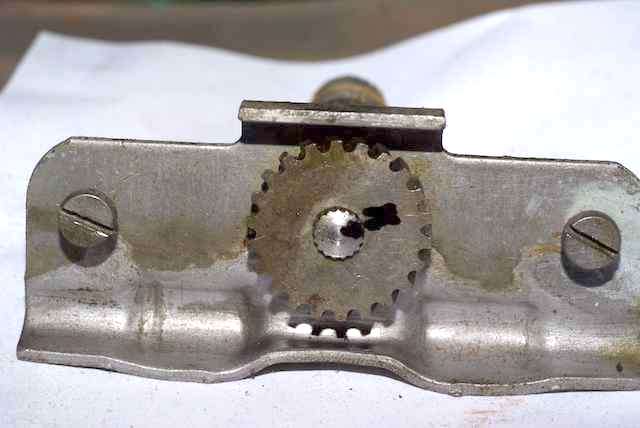
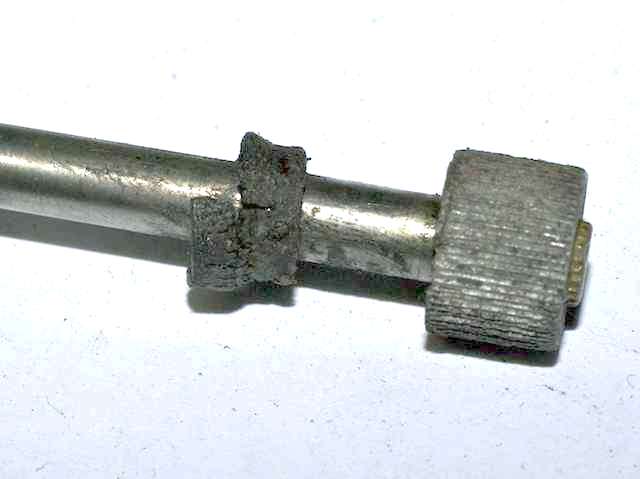
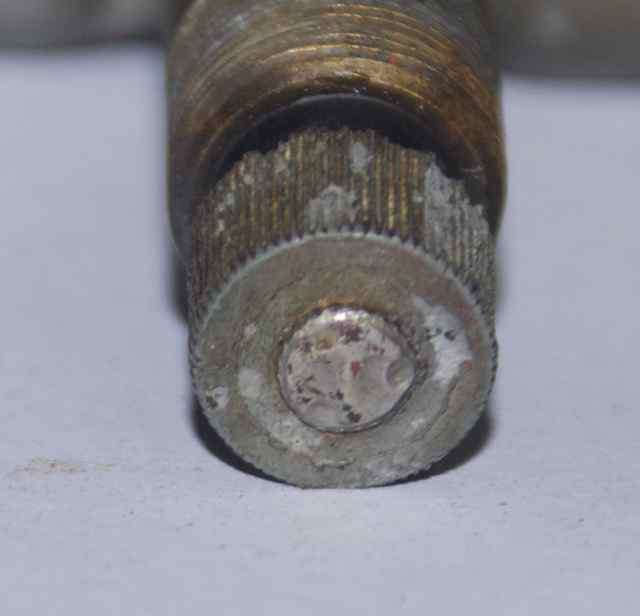
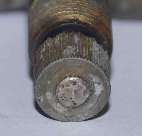
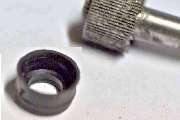
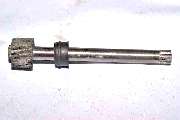
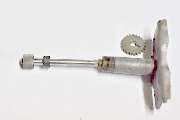
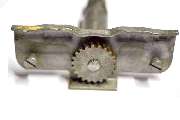
In the first picture you can see an ink mark on the sprocket and end of spindle. This is just a precautionary step. The press fit spline should be symmetrical all around, but it might reassemble easier if it was put back in the original position. The second picture shows the seal area between the output knurl and the end of the housing. This one has no seal or only small fragments of rubber remaining. The third picture above shows what remains of the better seal of the two. Don't expect too much of a 50 year old rubber part.
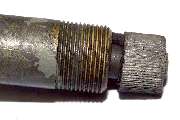
You may expect high force required to push the press fit splined shaft out of the sprocket. The pushing mandrel should have flat end, should be just slightly smaller than the minor diameter of the spline and long enough to reach completely through the length of the housing. Once the sprocket is off, there may still be significant force required to push the splined and completely through the bushing. Apparently the spline on the sprocket end of the shaft is a tiny bit larger than the shaft diameter. The spline drags a bit in the bushing making very shallow but visible scratches in the bushing wall (a full length bronze bushing).
This implies that the spline on the wiper end may be slightly smaller, and that end may have been assembled after the shaft was slipped through the bushing. I would have to think a bit to decide if a puller tool could pull the knurled knob off without damage, remembering that the knurl is thin wall at the bottom edge. The wiper end of the shaft has three punch marks where it has been burred, so the female splines would likely be damaged if you applied any force with a puller. The drive end has no such 'spiking' and is a push fit.
|
|
|
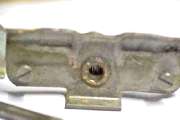
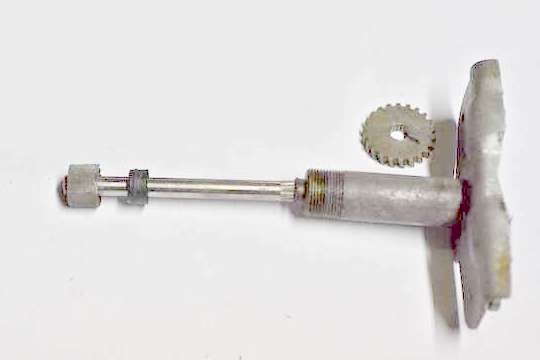
Photos here show the housing after removal of the spindle, the new seal, and seal on the shaft. Clean everything with solvent and put some grease in the bushing and on the shaft. Reassembly should be easier after clean and grease, especially if you can line the spline up with the prior scratches in the bushing. The spindle should rotate with finger force only after assembly. Check this before installing the sprocket.
These pictures show the parts to be assembled, the seal area after assembly, and the finished part. Again, a press is handy to to put the sprocket back on the shaft. This is where you need to install the sprocket back in original position either by measurement or by using the thin flat washer as a pushing tool. The seal fits over the pilot end of the housing and fits loosely inside of the knurled knob (similar to an engine valve seal). You should still be able to turn the spindle with your fingers. During final assembly in the car, grease the drive cable and maybe put a light smear of grease on the sprocket as well.
Photos on this page are compliments of Mark Wellard in Australia.
|