The MGA With An Attitude
RUBBER REAR SEAL for Three Main Bearing Engine - CS-202C
The rear seal installation is in 5 steps spanning 5 web pages.
Click green arrow at bottom to follow pages in sequence.
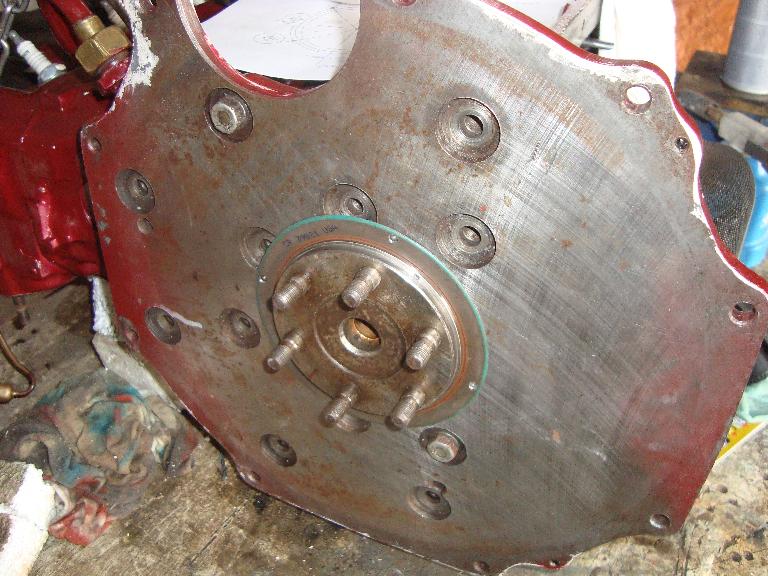
A - Modify rear plate
B - Machine slip ring
C - Modify Viton seal - (this page).
D - Modify bearing cap
E - Assembly
F - Can I buy it?
G - Video Installation
H - Follow-up notes
One problem in operation is that this seal runs dry at highway speeds when no oil gets past the original mechanical helical groove oil seal. This lack of lubrication causes a considerable amount of heat buildup in the seal. As a result, a silicone rubber seal will suffer an early death from heat stress, developing embrittlement and lots of little cracks around the sealing lip. This can happen in as little as a few thousand miles of driving, maybe 50 hours or less at high speed. The answer to this problem is to use a Viton seal rather than silicone. Unfortunately the Viton seal is likely to cost about four times as much as the silicone seal, but if you don't want to be replacing the seal again soon, prepare yourself to buy the more expensive Viton part. Start by purchasing seal number CR#39921. This is a Chicago Rawhide part number, but your local bearing supply house may cross reference it to another manufacture. It may be found cheaper with a web search. For as long as the link may last here is one found on eBay for $19-USD (+$13-USD shipping).
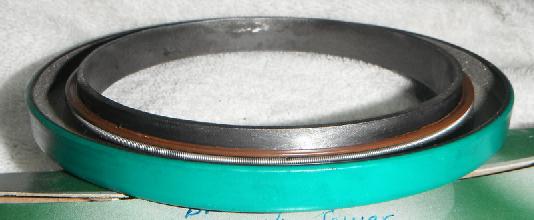
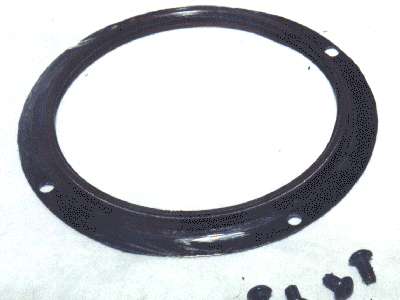
 This is the stock seal, as received. The green sidewall needs to be cut off. This is the stock seal, as received. The green sidewall needs to be cut off.
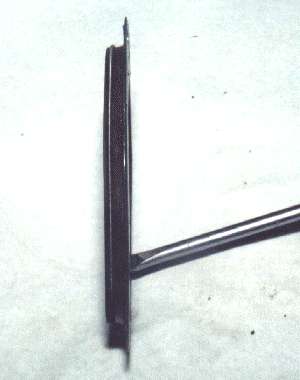
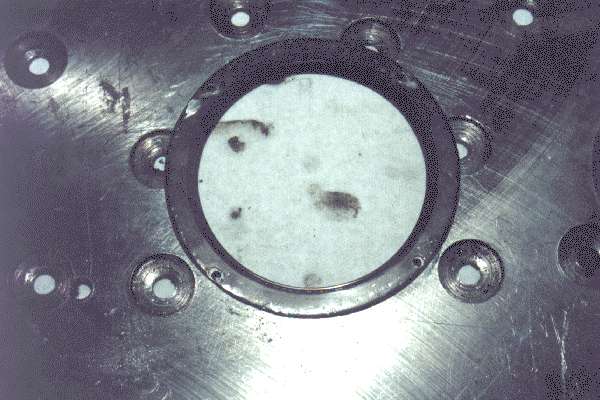
The pictures below show the necessary modification to the purchased seal. It starts out as a standard 4" shaft seal, 5" outside diameter and 7/16" thick. The metal case is cut off such that the only part remaining is the lip seal and a flat metal flange on the face. The inside of that front face must be ground flat to allow it to mate to the rear plate, and four holes are added in the flange to receive the #8 button head screws that hold it in place. A drawing with the cutting dimensions follows the pictures.
|