The MGA With An Attitude
Engine OIL COOLER Installation, Aftermarket Type - OF-105B
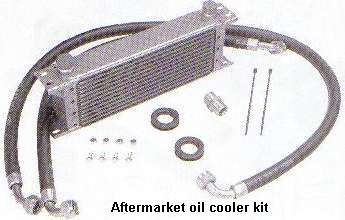 The aftermarket oil cooler is commonly supplied with long hoses and no steel lines. The cooler is usually installed in the factory position on top of the air pan, but with the hoses connected on top. Hoses are generally routed through a pair of holes bored in the body diaphragm along side of the radiator on the right using large rubber grommets to protect the hoses. The standard kit hoses are usually not long enough to route underneath the air pan. Note the aftermarket oil coolers will most likely have mounting ears at top and bottom to allow various mounting configurations above or below the air shelf and with piping at top or bottom.
13 row oil cooler, mounting ears top and bottom.
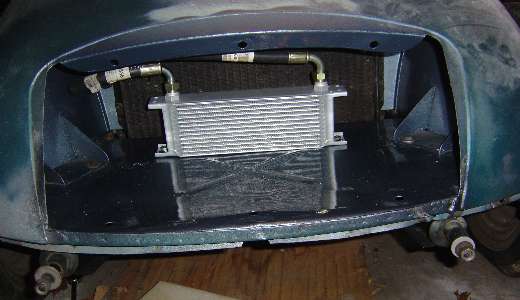
It is common practice to mount the oil cooler fairly close to the radiator. But if you contemplate ever installing an electric cooling fan in front of the radiator, you might consider mounting the oil cooler a little farther forward.
The truly suspicious who think the oil cooler might unduly preheat air flowing to the engine radiator will sometimes mount the cooler below the air pan, but still usually connect the hoses on top. That is most likely because of the limited length of the hoses supplied with the aftermarket kit. If the cooler is mounted underneath, it is common to open an air intake slot in the front valance panel below the bumper, as the cooler may not do much without free air flow. That looks right at home with a Sebring style flush valance panel and no bumper.
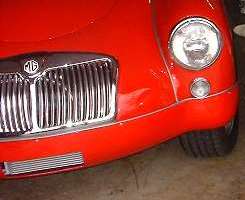
For a stock street car with original bumper, the opening below the bumper looks a little strange, but each to his own. Mounting a front license plate in the normal position below the front bumper would obstruct air flow through the valence. You could go nuts figuring out how to get around that problem. If you are not currently required to use a front license plate, either you or the next owner might be required to use one later.
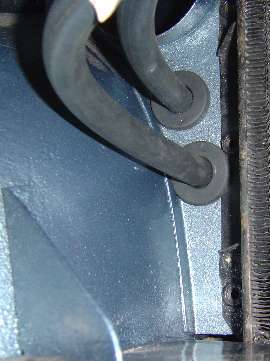
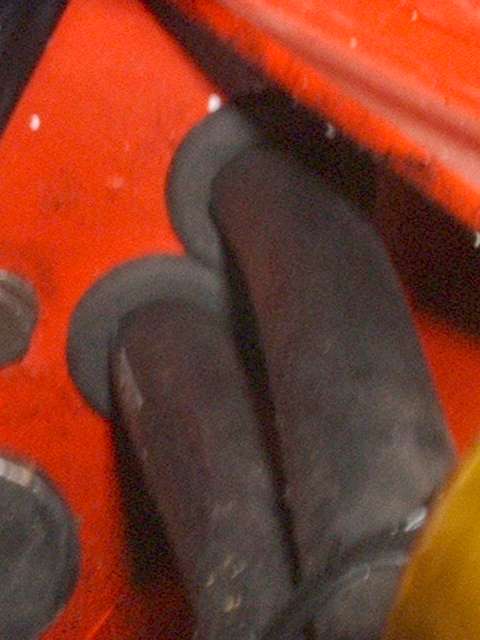
Here you see the passage of the aftermarket oil cooler hoses through the body diaphragm at the side of the radiator. You can cut these holes with a 1-1/4-inch hole saw. 1-3/8-inch holes may be required for thicker grommets, so measure the grommets first. Be careful about positioning. The top grommet needs to go just below the angle gusset (aft of the panel). The bottom grommet can go very close below the first one, and nearly touching is good. In these pictures the bottom grommet is lower than necessary and ended up overlapping the mounting flange of the radiator. These grommets are large with wide flanges. Some may be smaller, but you may not know until you have the parts in hand. (Thanks to Bill Greenwood for pictures of the blue car.)
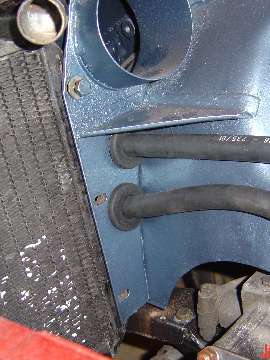
Below we have more pictures of the grommets and hoses. This time the grommets have thinner wall, so they do fit in 1-1/4-inch holes, and also narrower flanges (smaller OD). The top grommet is high, very near to the gusset aft of the radiator. The second grommet is also high, very close to the first grommet. Combined with the smaller OD, this allows both grommets to fit between the inner fender and the radiator bolt flange, so the lower grommet does not overlap the radiator flange. This allows R&R of the radiator without disturbing the rubber grommets.
Installing the grommets is really easy with the right technique. Put the grommet on the hose, then put the hose through the hole and bring the grommet up close to the panel. Using about 2 feet of postal wrapping cord, fold the cord in half and poke the loop end through the hole in the panel from opposite side toward the grommet side. Loop the cord one full turn (or a little more) around the grommet in the groove. Push the grommet up against the panel, and pull on the cord to pull the grommet flange through the hole. It works like a charm.
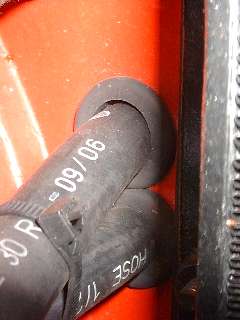
The last time I replaced these rubber grommets I picked up some grommets at the local Ace Hardware store. When I found grommets with the right (thin) cross section they were a little too small in diameter. So I bought three. I used a razor knife to cut once radially through a full grommet. When that is installed in the hole with the hose it only goes about 80% of the way around the hole. Then I cut a pie section from the third grommet to complete the circle and fill the entire hole. It is all pretty snug fit, so the hose holds the grommet sections in place okay. Also notice large tie-wraps binding the hoses together fore and aft of the panel. This helps to immobilize the hoses and preserve the gromemts.
When the car is being driven the shake and vibration of the car and engine will impart some small motion to the hoses. When the hoses are allowed to hang free they can rub and wear on the grommets, and the metal panel could eventually cut through the grommet and possibly also cut into the hose. To prevent this it is a good idea to attach the hoses to the inner fender aft of the diaphram panel. The Moss Motors MGB catalog shows a rubber strap and screw assembly 235-988 which is convenient for this application. Up front you can also attach the longer hose to the shorter one near the first connector on the cooler. A simple tie-wrap works well there.
|
|
|