The MGA With An Attitude
BATTERY TRAY Braces - FR-202D
These templates are compliments of Eric Ohmit in Wilson, NY, USA. This article goes hand in hand with
Battery Frame Weldment - FR-202A, as combination of the side braces and tray make up the sum total of the battery carrier assemblies in the MGA chassis frame. You can click on the image below to bring up full scale PDF templates for the side brackets. Printed at full scale these templates will fit on A-size 8-1/2" x 11"paper. Depending on the printer set-up, you may want to adjust the print scale slightly to finish with exact dimensions.
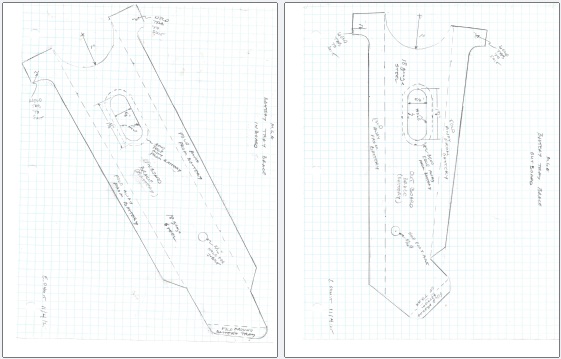
Having recently used these templates to make the parts,I have a few notes to add to the procedure. The 1" radius may not be a close fit to the round cross tube.If remnants of the old brace ears remain welded to the round tube, the radius of the brace may have to be ground back some to clear the extra thickness of material, Or you might take time to grind the old welded ears off to get the tube back to original round diameter.
The long folded edges are labeled "Fold Away From Battery" need to be folded to 90 degrees in the direction AWAY from the battery.The right hand and left hand brackets will be folded in opposite directions, and any reference to "passenger side" may be confusing depending on RH Drive or LH Drive.
The bottom end fold tab is optional. For new cars the tray and brackets were all 18-gauge steel. and the fold under bottom tab may have been a convenience for fixturing in production. When welding these side brackets to a heavier tray for a one-off repair or restoration, it may be more convenient to delete the bottom end tab and weld the bracket to the side of the tray rather than underneath.
There should be one hole in each bracket to secure the J-bolts for the battery hold-down bracket. Original side braces intended for the small square 6-volt batteries have the hold-down holes located as shown.The J-bolts extended upward and rearward at an angle. The hold-down bracket would sit on the top rear corner of the battery case.
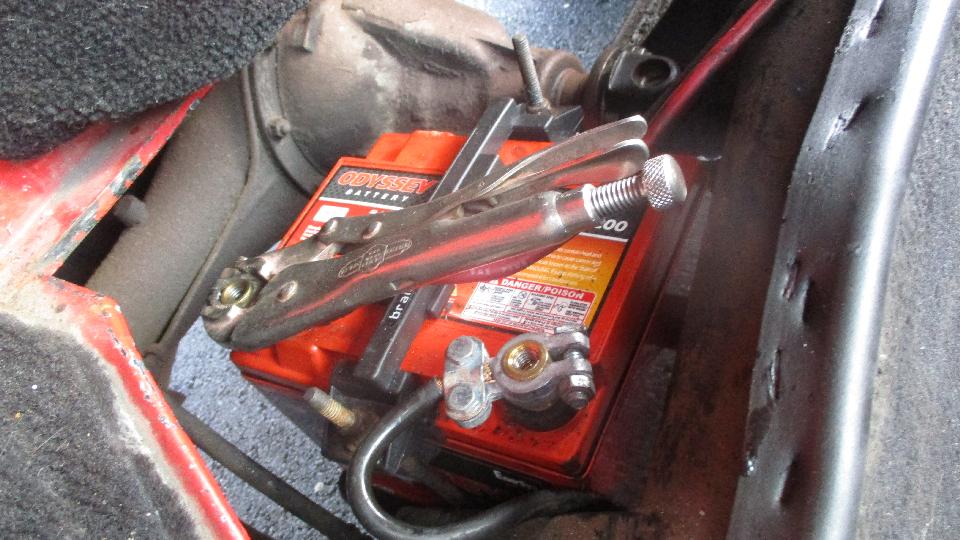
When extending the bottom tray to accept a Group 26 battery, you may like to use a hold-down

 clamp centered across the top of the battery.When I did this the J-bolts went in the same holes in original position extending straight upward, and it worked out well. This Braille 3188 model is my favorite, as long as the J-bolts can go straight down on both sides, and there is space across the center on top of the battery. Sturdy FRP (Fiberglass Reinforced Plastic), adjustable width, strong and durable, about $20 for the whole kit. -- Excuse the Vice-Grip. It was temporarily holding a broken cable terminal clamp. And the top ends of the J-bolts were trimmed down later.
|