The MGA With An Attitude
Body Sill Replacement - RT-616
Inner Sill Panel and Box Assembly
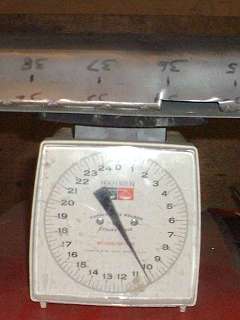
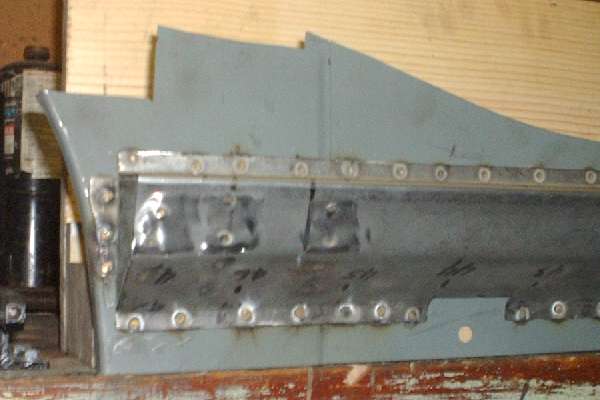
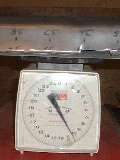
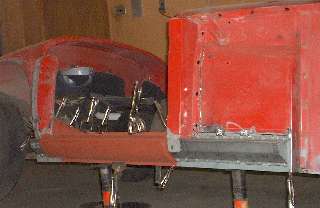
When the zinc primer inside is dry it's time for more welding. I put the inner sill panel back on the car, straight up parallel to the frame, then aligned the box panel tight against the bottom of the door pillars, and clamped it all together. Then I took the clamped assembly off the car, back to the bench, and spot welded it around the flanges. Spot welds are so quick and easy that I don't mind using a lot of them for high strength, so I put them about 1.5 inches apart. Pictures show the result, and my scale says it weighs 10.5 pounds.

 (Overall length of the bottom edge was added by special request in Sept 2021) (Overall length of the bottom edge was added by special request in Sept 2021)
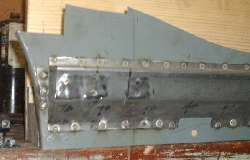
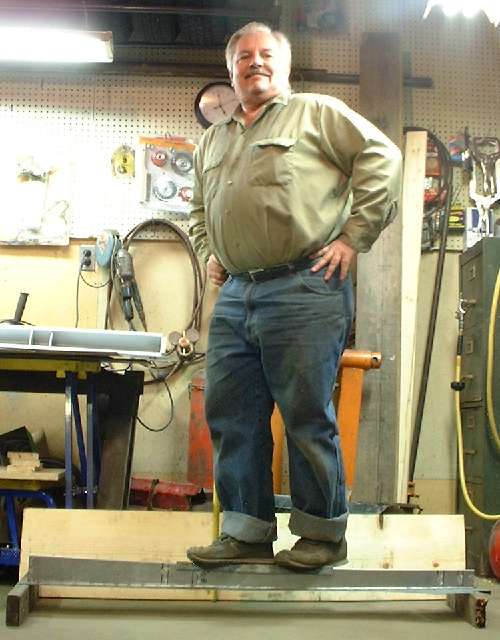
Now here's another treat from the learning curve. Apparently 35 spot welds in a straight line can cause a small amount of linear shrinkage. When the box beam was laid flat it had a small upward bow, about 3/16 inch in the center of the span. When I applied my body weight the beam didn't bend enough to become straight. Being picky about such things, I straightened it.
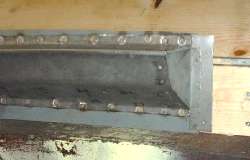
 I put the assembly flat side down near the edge of the bench, top side forward, with a board under each end. Then I placed an 18 inch length of 3/4 inch angle iron (1/8 inch thick) over the top corner to distribute the force over a larger area and proceeded to load it down with a large pony clamp. Squeeze a little and it springs back. Squeeze more and it still springs back. Eventually enough bending motion will cause it to yield and take a set when the force is released. The magic distance turned out to be 3/8 inch bend in mid span to reach the yield point, after which additional motion induces the appropriate amount of permanent bend, and then it springs back 3/8 inch when released. It worked as planned making the inner panel and flange straight again. Mind you, if you apply too much force and motion beyond the yield point the box would buckle and fail catastrophically, which is why I was using the clamp to apply force and slow progressive motion.
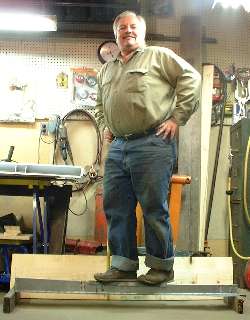
After that exercise I was curious to know just how strong this beam is (without having to do an exotic engineering calculation). I know what I weigh (210 lb), so I stood on it and measured the beam deflection. It moved 0.090 inch. Spring rate is then 210/.090 = 2333 lb/in (like a leaf spring). Force to yield is then 2333x0.375 = 875 pounds, and that's the narrow direction across this beam. It will be stronger in the upright orientation. This stiffness (along with the chassis frame) is what should keep your doors from rattling on a rough road. (16 Feb 08)

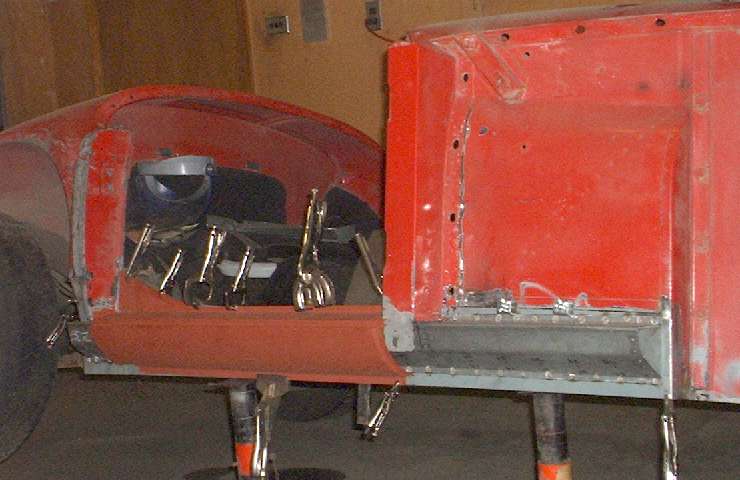
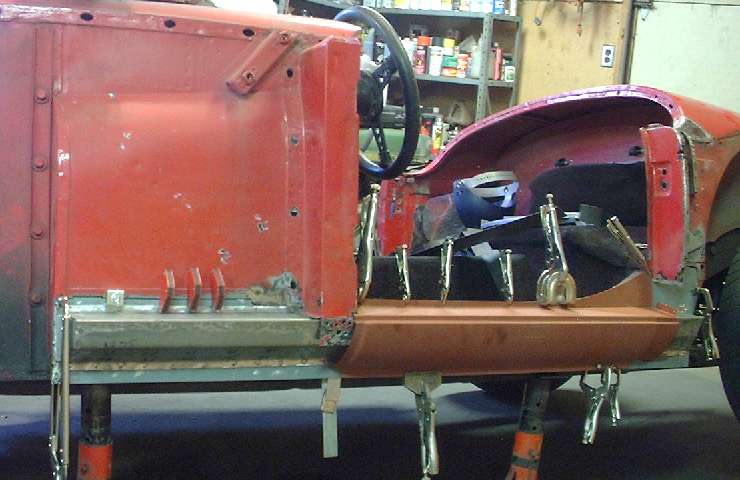
Fast forward a bit to assemble the weldment for the other side, more zinc primer, test fit and align and clamp, remove and spot weld. Then I clamp the parts back on the car, and it's time to test fit the new outer rocker panels. Hey, this is beginning to look like progress. I am suddenly getting anxious to weld the new sill assemblies to the body, but I need to keep things in proper sequence. I still have some repair work to do on the B-pillars, and painting inside the box sills before attachment. I have one more trick up my sleeve. (23 Feb 08)
|