The MGA With An Attitude
REPLACING Leaf Spring SHACKLE BUSHINGS -- RS-101A
On 3/25/2024, Joshua Cohen wrote:
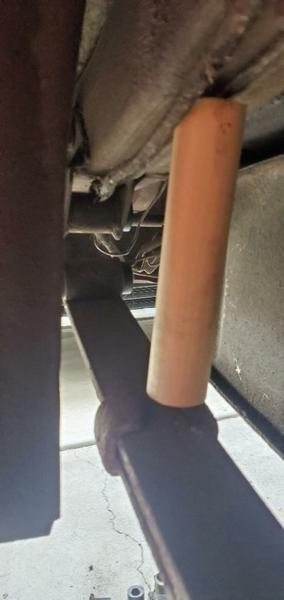
"1959 MGA 1600. I found that a 5-inch piece of wood hammered between the leaf springs and the upper frame around a foot from the shackle assembly, pushes the shackle eyelets apart an almost perfect distance to allow removal and replacement of the shackle bushings very easily and quickly. I was able to replace these bushing in about 30 minutes per side with only a single jack.
The wood inserted holds the eyelets apart. There was no need to load the springs with a second jack, I waited to fully tighten the shackle nuts after putting the wheel back on and the car on the ground.
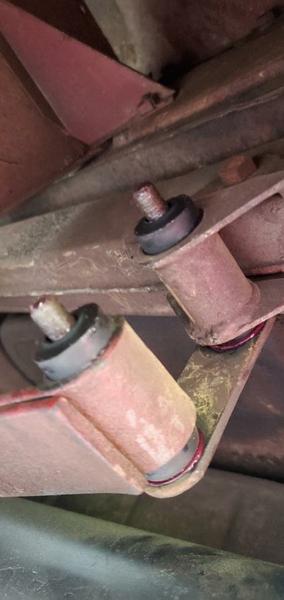
March 24, 2024. Today replaced the eight rear shackle bushings which were likely 65 years old.
This only took 1 hour for both sides.
Tools: Crowbar, Hammer, 9/16th ratcheting wrench, flat head screwdriver. 5 inch long 1" inch diameter wood dowel, jack, wheel lug cross.
1. Loosen rear lugs on one tire.
2. Jack car from frame below door.
3. Remove tire
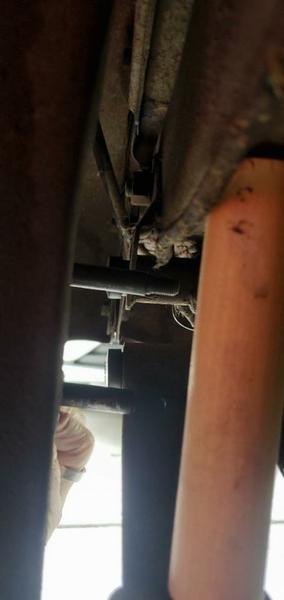
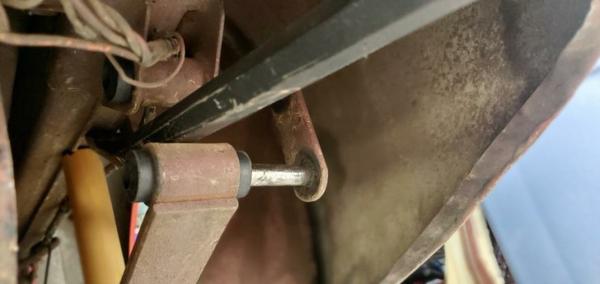
4. Use the five inch long dowel and hammer between the leaf spring and upper frame. You could use a 5 2x2. Just wedge it into place to put opening pressure to hold the leaf away from the frame. THIS WOOD PIECE IS THE TRICK MAKING IT MUCH EASIER. Put the wood in before removing any nuts.
5. From the rear, loosen/remove both nuts on the shackle. Use the 9/16th socketing wrench. Don't lose the nuts and lockwashers.


6. Use the crow bar, screwdriver, and/or hammer to pull the shackle pins out of the eyelets. The wedged piece of wood will make this easier as the tendency would be for the leaf spring to push up and close the gap.
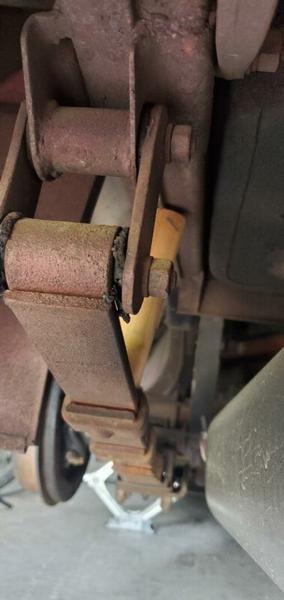
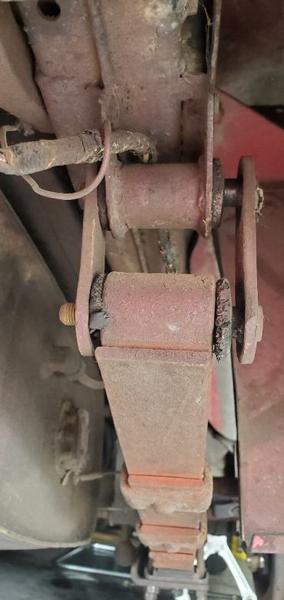
7. Once you have the shackle out, then use the screwdriver to get the old bushings out. You should feel inside the eyelets to make sure that all of the rubber has come out. I used the screwdriver to scrape the inside of the eyelet, because my 65 year old bushings had some residual rubber on the inside. you could use a wire brush.
8. Clean the shackle pins/bolts, makes sure that any large chunks of rubber or residue of old rubber do not make rough spots on the shackle pins. I wire brushed the shackle pins.
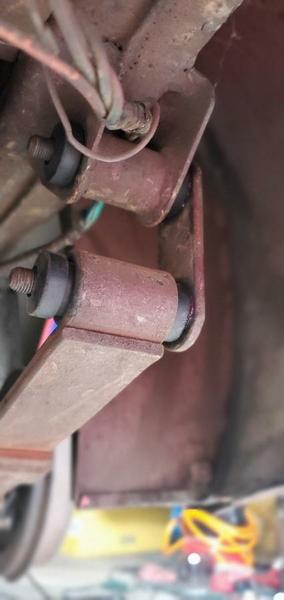
9. I put grease on the outside of the bushings (only where they will be inside of the eyelet, then pushed the bushing in from the outside - all four.
10. I greased the exterior of the shackle pins/bolts, and the inside of the shackle plates which push on the outside of the bushings.
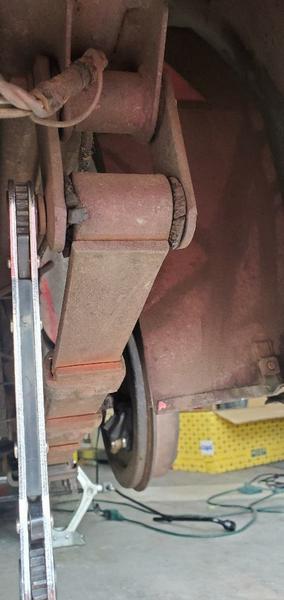
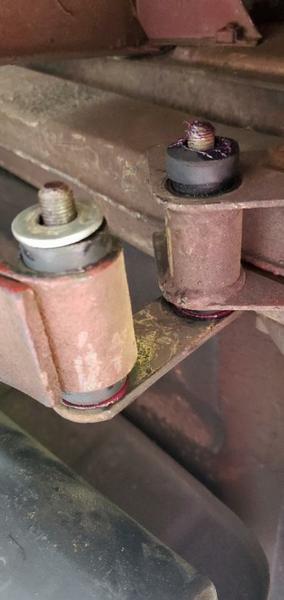
 11. While pushing the shackle pins into the eyelets with the bushings in place, you need to alternately squeeze the bushings and push the shackle pins in. Because the wood holds the leaf away from the upper eyelet - the distance between the two eyelets will only need a slight outward adjustment with the crow bar. Without the wood, its hard to even get the crow bar between the eyelets. Push the long end of the crow bar between the two eyelets, and put the end of the crow bar against the upper frame a few inches beyond the eyelets. Push the eyelets slightly apart to match the size of the shackles. Once started, the shackle will hold the distance, and the crowbar may not be needed.
12. Because the new bushings are not compressed, they dont allow enough threads past the plate and lock washer. I used a fender washer and the shackle nut without the outer plate, to squeeze the bushings into place, and create enough free threads on that shackle bolt to put the cover plate in place. I also greased the inside of the cover plate. I still needed to use the crow bar to adjust the distance to allow the shackle plate over both shackle bolts.


 13. DO NOT TIGHTEN THE SHACKLE NUTS YET. Just get it finger tight. Put the wheel back on and tighten the lugs (not the final tightening on the lug nuts either).
14. Lower the car. Tighten the Lugs with good torque.
15. Tighten the shackle nuts very tightly with the car resting on the ground.
These Look Great. Much better feel on the road than with the OLD worn out bushings.
|