The MGA With An Attitude
The factory introduced a change to the Twin Cam timing chain tensioner in response to failures. This change is mentioned in Confidential Service Memorandum MG 288. The passage there pertaining to the tensioner says:
 While the additional thread length may have helped prolong the life of a new tensioner, this change did not stop thread failures from occurring. Thread failure might occur if there was too much tension applied (beyond travel limit of the internal spring), or if the locking nut was over-tightened.
 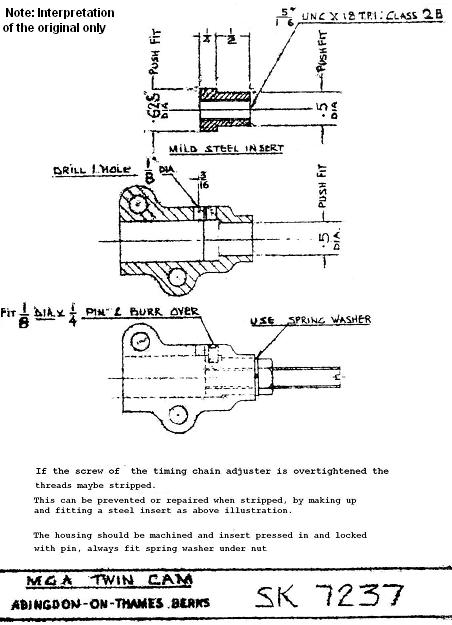 Subsequently the factory proposed another method of fixing the tensioner, see Document SK 7237 above (click for larger image). This document is reproduced below in fresh readable form.
From the Workshop Manual, Section A.20: TIMING CHAIN - ADJUSTING On 1/18/2013, Dirk Van Ussel in Antwerp, BE wrote: "With a large screwdriver and levering against the 3/4" cam bolt, you can move the tensioner up and down. It should move about 1.5- 2.0 mm. I always found the handbook too vague and inexact"! -- Dirk/Antwerp On 8/27/2021, Dirk Van Ussel in Antwerp, BE wrote: "I found a simpler way: The camshafts are provided with a hexagon to put a spanner on. By moving the exhaust cam left and right,the chain is put on tension and released. This enables you to feel the clearance of the tensioner's piston by putting your finger on. When You follow the instructions of the manual it is next to impossible to give the right tension as the screw can easily be overturned 1 full turn. -- Dirk |