The MGA With An Attitude
MGA Guru Is GOING MOBILE - (April 1 - April 15, 2026)
Wednesday, April 1, 2026:

Lots of clean-up work on more than 20 new Part Numbers tech pages from the past few days. Catch a few errors, add a few more pictures, upload all the updates and verify that all the links work. -- In the evening, time to watch the big rocket launch to send the 4-passenger Artemis II mission around the moon.
Thursday, April 2, 2026:
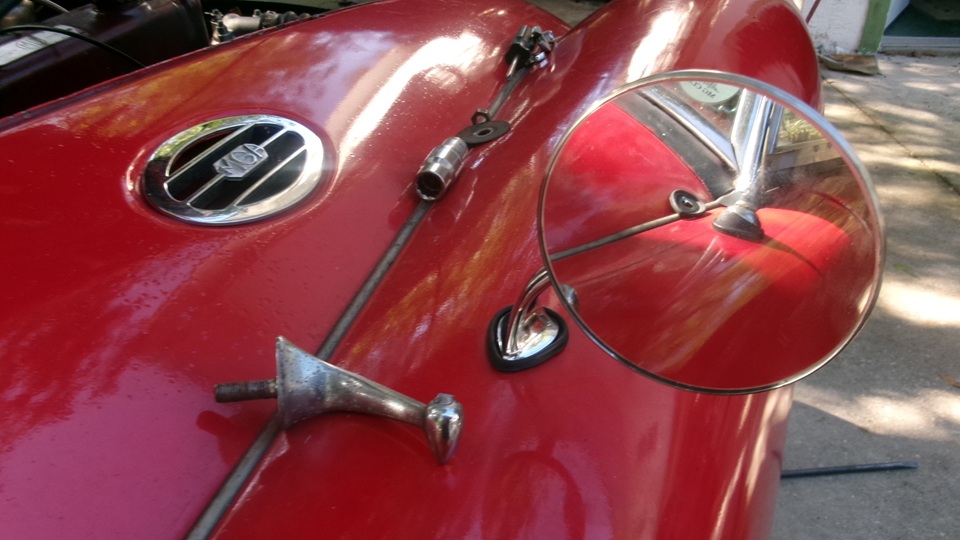
 Added pictures and dimensions for the AEH427 Oil Thrower used in the MGA Twin Cam engine. And, there is now a source for this part. -- Had plans to do a little work on the car, but it rained, and it got late, so not today. The wing mirror has arrived, still waiting for the trailer license renewal sticker, no urgency. Also waiting for a return shipping label for the faulty radiator to be returned, hate waiting in the dark.
By popular demand, I just uploaded a new Part Numbers tech page for the AFH1899 Door Casing Stiffener for MGA roadsters. Yes we can buy this part for a pittance, but people still keep asking for a drawing so they can make it themself. I guess if you are handy and have the sheet metal, you could make one quicker than waiting for delivery. I have pictures, but I would have to take my car apart for measurements to make the drawing. Maybe someone else will do it before I get around to it.
Friday, April 3, 2026:
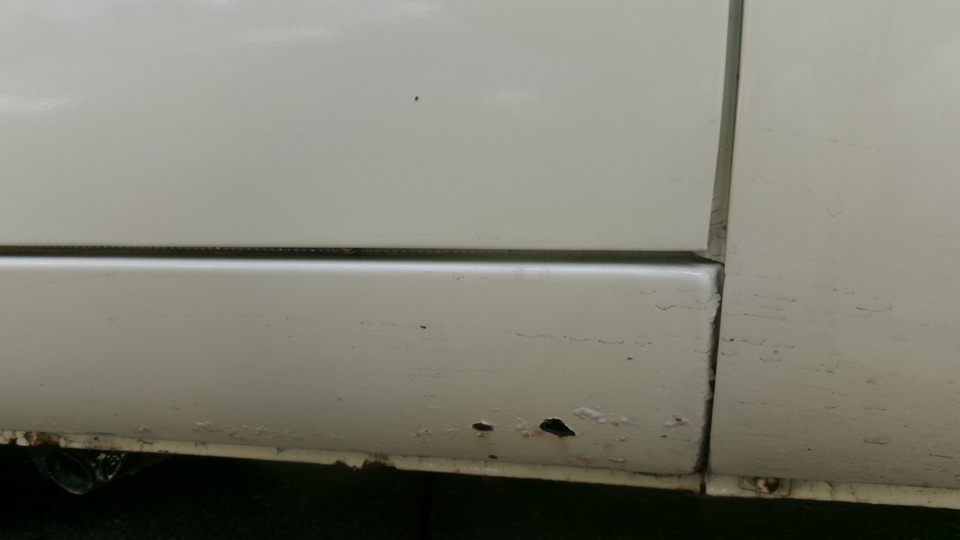
Good morning, work day at Tech Central. It is notable that our friend with the MGB currently undergoing the clutch replacement was feeling generous, and procured four new 18-volt battery packs for the large assortment of power tools. We had been down to three, one junk and only two that held charge. Now there is a full compliment of good batteries on the 6-pack charger. the yellow MGB needing to be moved out of the way was displaying a small rust hole in the right side body sill.


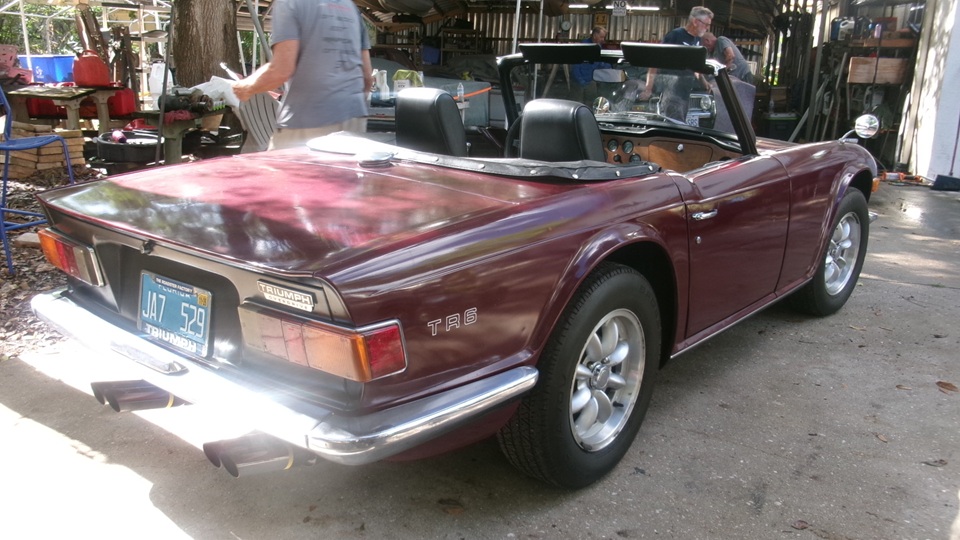
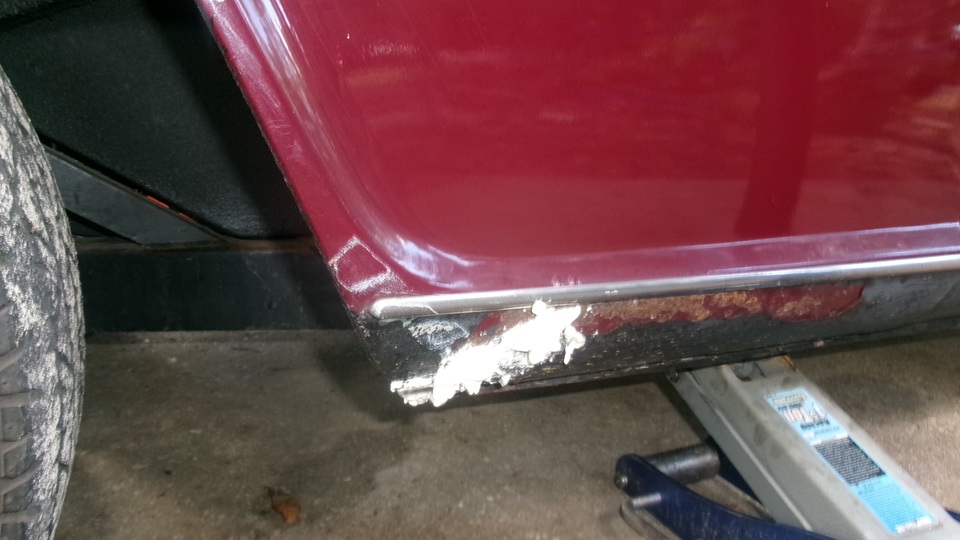
That incident would trigger a discussion and a quick tech session on a similar rust hole in the left side body still of the TR6. Jack it up for easier access, and grind away any abnormally thin rusted metal, keeping full thickness metal. Then grab an aerosol can of expand in place packing foam. Spray the expanding foam through the open hole to fill the cavity inside, until the foam is bulging out proud of the surrounding surface. When the foam has set up, dress it off with a spaghetti file, sand it flush, and it will be ready to smooth out with body diller, sand and paint. Crude maybe, but quick and effective for a not too expensive road car.

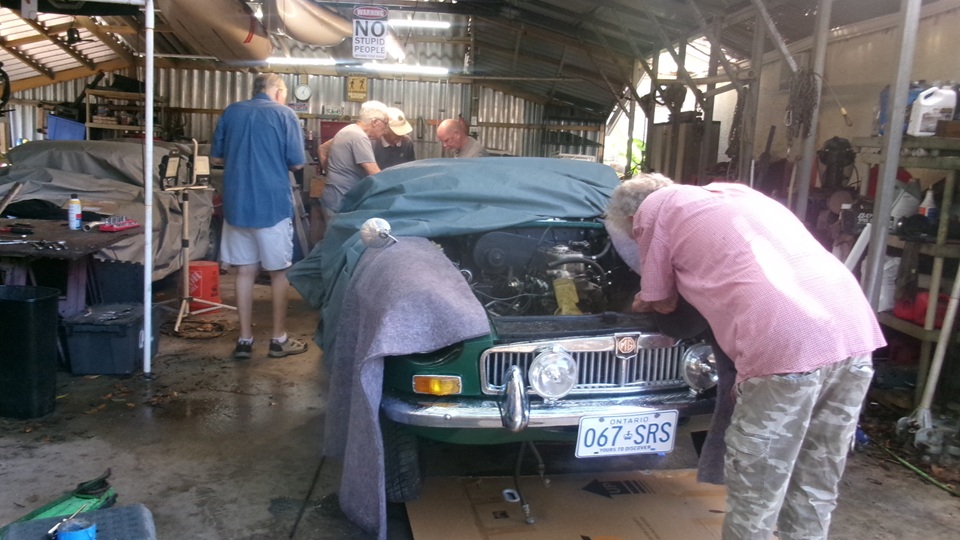
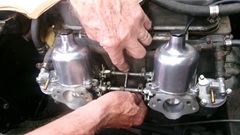
 Back to the MGB with fresh clutch, with engine and gearbox already back in place (last week). The swarm was heavy into this with multi-processing., installing the radiator with mounting diaphragm, generator, oil filter, starter motor. Also connecting the exhaust pipe flanges to the exhaust manifold, and installing carburetors. When the clutch slave cylinder was installed, there was time spent with a stubborn bleeding process. There was a fair amount of fettling with carb linkages, as frayed pull cables needed special attention, and not everyone was intimately familiar with the full configuration of the linkage attachments.
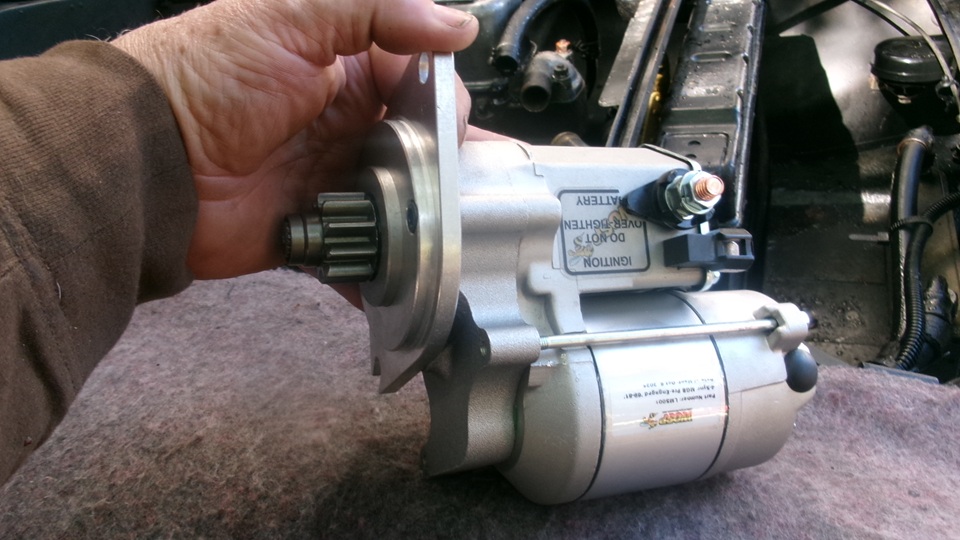
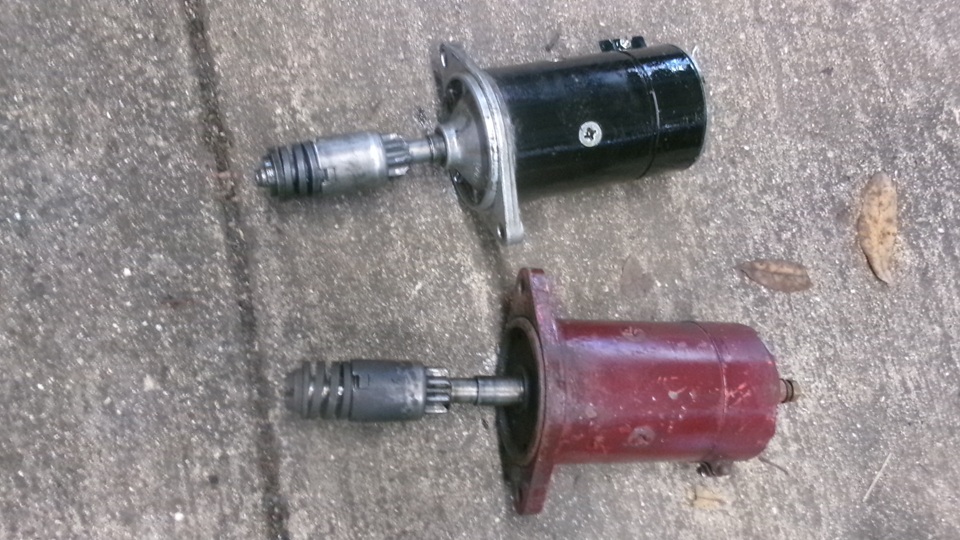
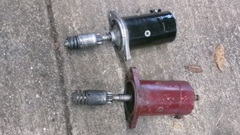
One sad boo for the day, the new pre-engage gear-reduction starter motor didn't fit in the car. the motor housing extended on one side is clocked wrong, so it hits the steel clutch hydraulic pipe, just above where the clutch slave hose bracket is welded on the unibody. Gawd, I feel bad for this guy, after my recent fiasco with the new MGA radiator that didn't fit in the car (and still hasn't been returned). The old (black) inertia starter recently removed has a very badly worn pinion gear (and worn ring gear as well) that is on its last legs and will jam frequently. We groused around in the attic to find another (red) similar inertia starter with a much better pinion gear. We are all wondering if this is the one removed from my MGA when I installed a gear reduction starter several years ago (maybe). Connecting them to a battery jumper box had both jumping to life equally well, so the red one was installed in the car with a prayer and a song, as they are not pulling the power unit again to change the ring gear. With several starts, this one only jammed once, so that should get him by until he can exchange the new incorrect gear reduction starter for the correct model. All said, put the jumper battery box back in the shop and plug it in to recharge.

Everyone was leaving by mid afternoon, and it was pretty hot out, and we will be back tomorrow, so knock off now. My new wing mirror is in hand, to be installed later, and the license renewal sticker has been pasted on the trailer plate, good for another year.
In the evening I called Scarborough Fair to inquire about the return shipping label for the bogus new MGA radiator that didn't fit, and needs to be returned directly to Moss Motors. Not good news, and not surprising. Moss is getting progressively worse for customer service, now requiring pre-approval and a Return Authorization number for any merchandise returns , which may take 7 to 10 days to process. For certain returns, there might also be a 20% restocking charge. That means Moss wants to make their profit margin even when the customer is dissatisfied, and after you pay shipping costs both ways.
Saturday, April 4, 2026:
Two projects for us today, beginning with the MGB with new clutch. The owner couldn't come to grips with the fact that it took three Fridays and a bit more, and some express delivery parts, and it still wasn't finished. First requirement was to make the clutch
 hydraulics work so he could drive it away. All normal attempts having failed on Friday, pump and pump and a few attempts at vacuum bleeding. For some unknown reason they didn't get around to pressure bleeding, even though the pressure cap fitting was available. I finally got someone to listen long enough to convince them it needed reverse bleeding, which can be done with a trigger pump oil can. If not one of those handy, all you need is a small hose to fit on the bleed nipples. Run this from the right front brake caliper to the clutch slave cylinder, open both bleed nipples, and pump the brake pedal to force fluid from the brake circuit into the clutch slave circuit. (Remove fluid from the clutch master reservoir first). They were jumping up and hollering when it worked.
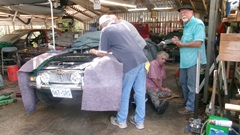
 Then needing to make the bonnet fit, two people holding it to align while I was assembling bolts in the slotted brackets. Snug up just tight enough for some friction so it could be realigned with a push, pack some cardboard around the edges to give a little clearance and protect paint, push and nudge until it fits well, then open gently and tighten the bolts. That also worked, Then needing to make the bonnet fit, two people holding it to align while I was assembling bolts in the slotted brackets. Snug up just tight enough for some friction so it could be realigned with a push, pack some cardboard around the edges to give a little clearance and protect paint, push and nudge until it fits well, then open gently and tighten the bolts. That also worked,
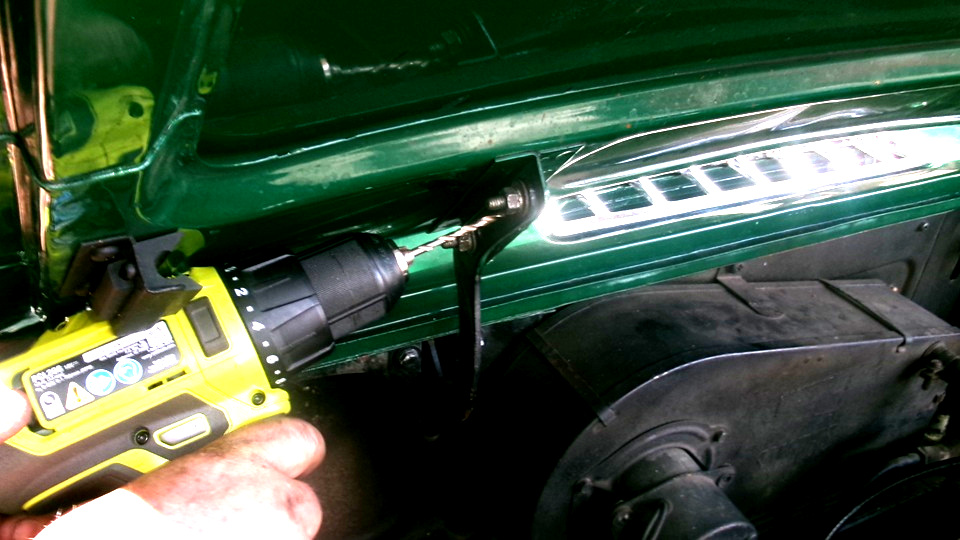
 after which they were anxious to get the car out. But I was insisting to drill the alignment holes through the hinge brackets so they won't have to fight this again next time the bonnet needs to be removed. As was, there were holes through the hinges, but no holes in the bonnet brackets. That means this bonnet was a replacement part since the last time it was drilled. The existing holes were 5/32" where I was expecting 1/8". No problem, just grab a 5/32" drill bit from the Magic Trailer, and a power drill with one of the new batteries, and in just a minute there were four new holes all in alignment, ready to pin the bonnet in place next time it needed to be reinstalled.


One last request, identify a worrying rattling noise in the engine at fast idle speed. That took 30 seconds, turning out to be the
 center exhaust hanger with one bolt missing and the second very loose about to fall out. The loose one remaining was coarse threaded with no lock washer, that figures. Not long to grab two new 1/4-28-UNF x 3/4 bolts with nuts and lock washers from the Magic Trailer, zip those into place, and it was good to go.
Then they left in flash. I'm sure the MGB was parked in the guy's local winter home garage while he and his wife were hustled off to the airport for their return to Canada. With luck, we may see them again in November.
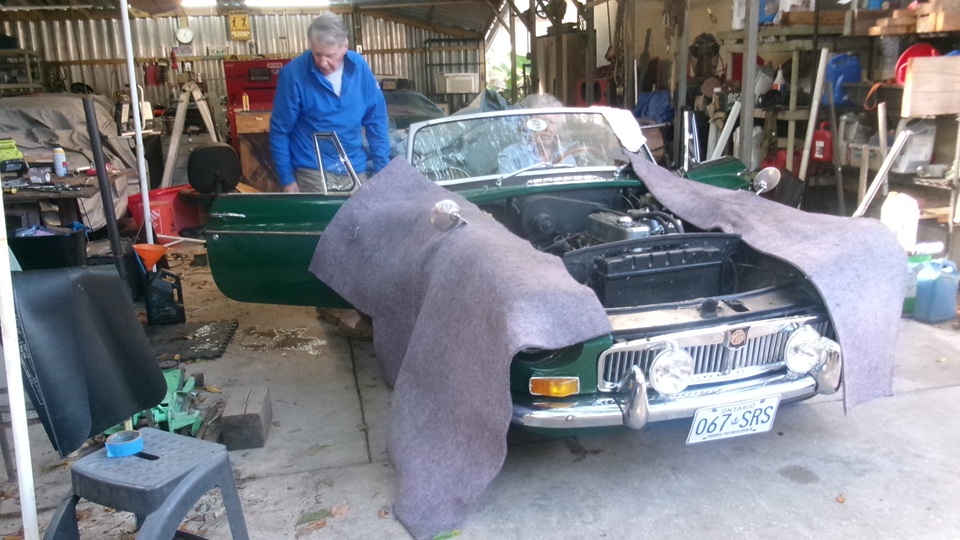
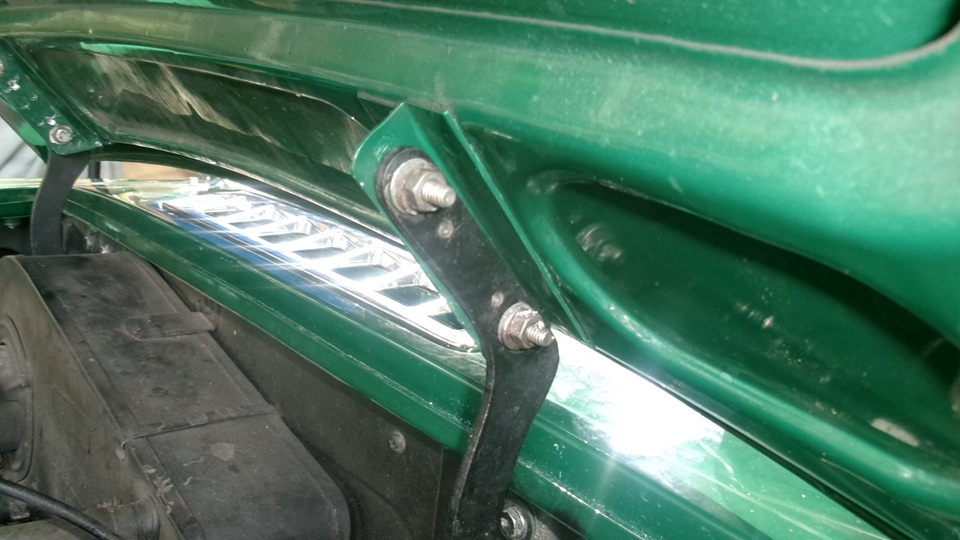
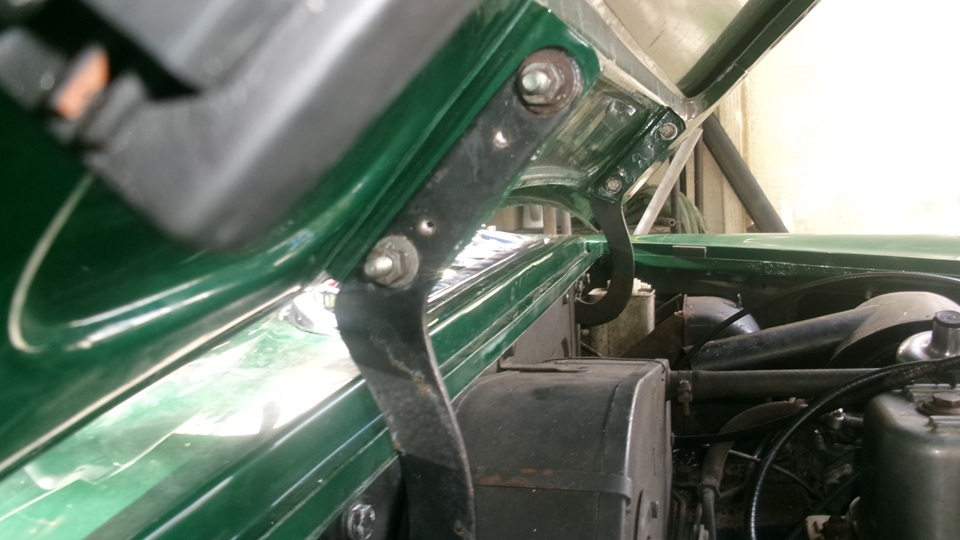
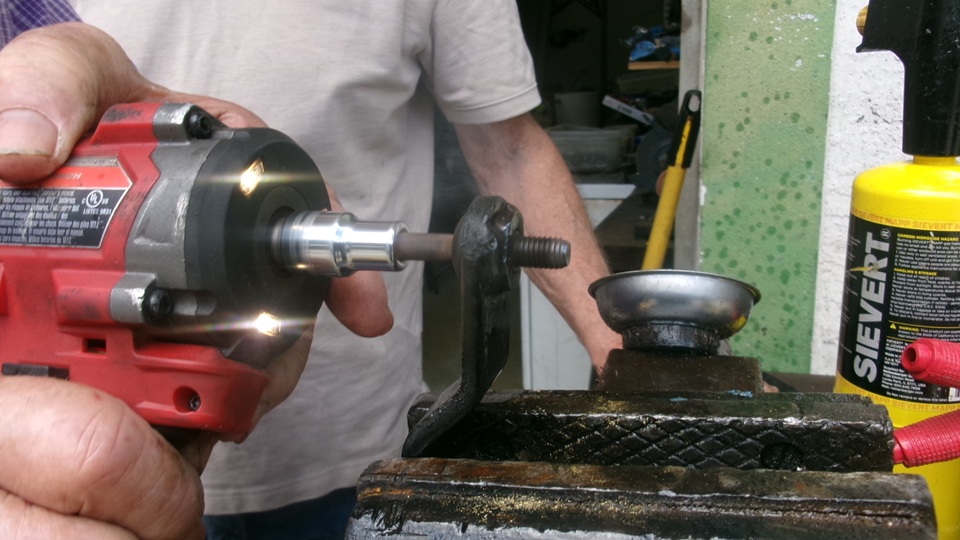
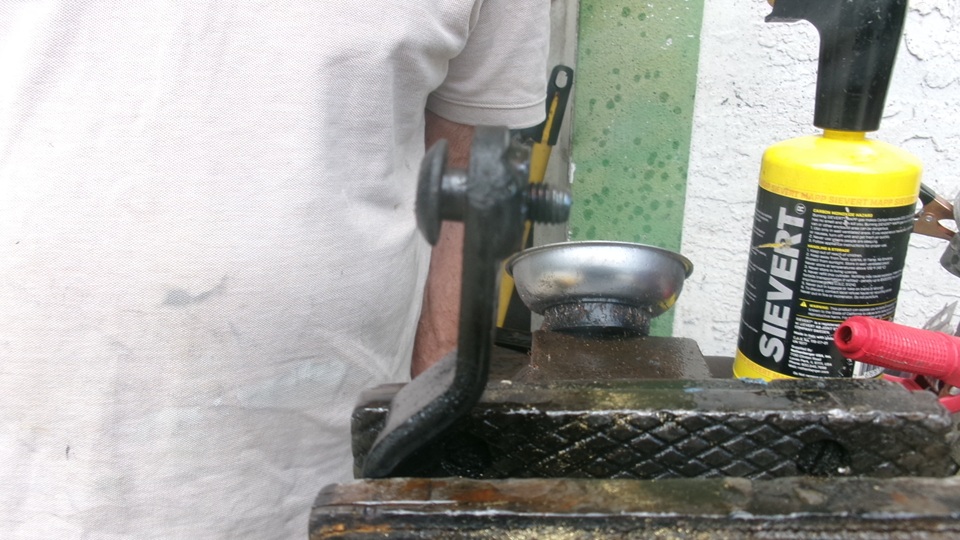
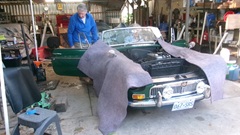
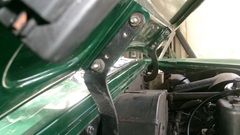
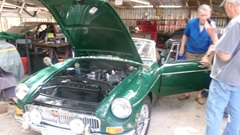
Okay, back to the second project, things we were supposed to do for our MGA on Thursday (except it was raining then). Jack the font to remove a wheel and splash panel for access to install a new right side wing mirror. The old broken pedestal to the left of the new mirror. Quick and easy, and reinstall the splash panel.


While I was under there, I noticed this oil dripping, which seemed like a bit much for only being parked for a couple of hours. That turned out to be
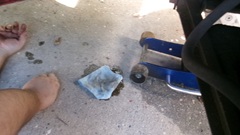 a loose oil drain plug, which we overlooked when installing the 1800 engine with new crankshaft, 128-miles, 2-1/2 weeks go. OOPS! Easy fix, tighten the drain plug, and add 1/2 quart of oil to top up. -- While it was up with the front wheels off, we were looking to identify a notable "clunk" in the front suspension,which has been bugging us since about same time as the broken crankshaft back in November. That turned out to be loose swivel link trunnion bolts and loose upper a-arm pinch bolt in the RF suspension. those must have been left loose last time we were replacing lower a-arm bushings (15-mo, 16,700-mi). That was a bit of a shock, kick me now. Spend ten minutes checking and tightening all of the front suspension bolts.
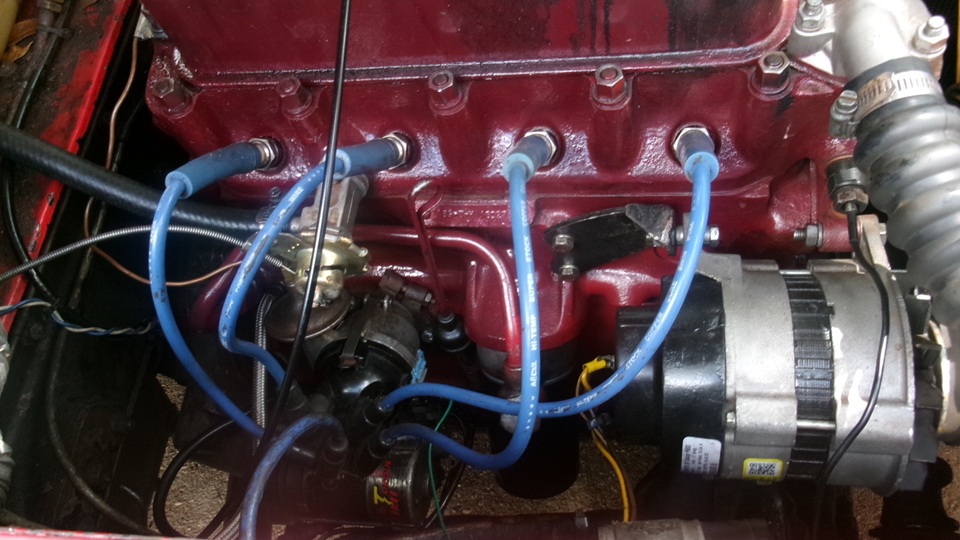
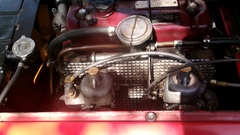
Then we got to reinstall the PCV valve.first installed on the 1800 engine in early November before the crankshaft break, but removed when we installed the loaner Magnette engine. Long ordeal since then, but now catching up lots of delayed maintenance. With the PCV valve on the 1800 engine, change carb metering needles to #5.
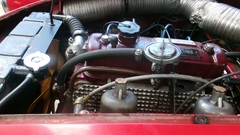
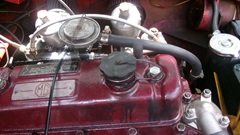

 Lastly, drain the plain water and fill the cooling system with 50/50 mix ethylene-glycol coolant, now that we are confident with the integrity of the engine and the new cell core radiator. Readjust fuel mixture and advance ignition timing a little to stifle a rough idle, and reset idle speed. Toddle off to late lunch and good WiFi spot.
84dF in mid afternoon (warmer in the sun). Twenty minute drive to go 5 miles in traffic with a few miles brisk and some idle time waiting for left turns. Running very well, and nicely cool, 185dF coolant while sitting still idling (with 180dF thermostat). Now looking forward to 100dF ambient in southern Texas in a few weeks, and pulling the trailer up hills at speed in the mountains. Thinking we may stay put in southern Florida one more week, as there are plans for a birthday party for our Tech Central host Jerry Wilcox next Friday.
Sunday, April 5, 2026:
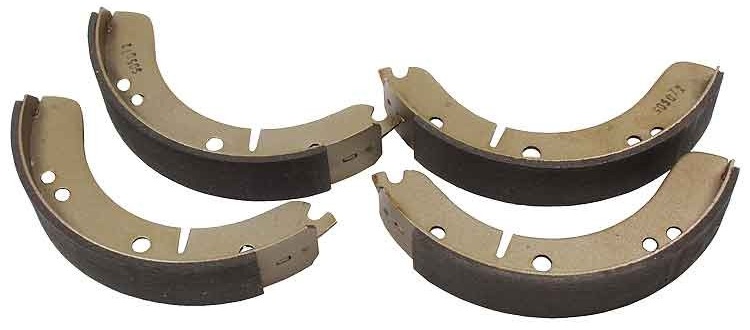
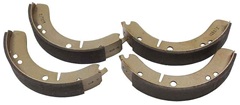 Following up on a reoccuring problem, for more than 20 years by now, MGA brake shoes are often too small and cannot be used as received. So I just posted a few more new Part Numbers tech pages for the the related often faulty parts.
8G8025 -Shoe assembly
8G8306 -Shoe assembly
8G8307 -Liner with rivets
AJH5172 -Liner with rivets
Monday-Tuesday, April 6-7, 2026:
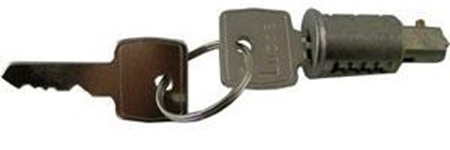 Two days of rain, working on new Part Numbers tech pages for ignition switches, locks and keys. This is nuts (common for BMC part numbers). For the lock and key set, it looks like someone made an error with a part number and had to correct the number. Four different SPL books, and no two the same. And I didn't get all the aftermarket partnumbers yet.

AHH5369 Ignition Switch, MGA early with screw terminals.
3H2825 Ignition Switch, MGA late with Lucar terminals.
7H9380 Lock and Key -(part number error changed later)
7H9830 Lock and Key -( 1500 and Twin Cam)
2H4185 Lock and Key -(1600&1600-MK-II)
24G1345 Lock and Key -(1600&1600-MK-II)
ANK4646 Key blank -(all MGA)
Late in the day a friend in Arizona sent some information and pictures for installing a back up switch in the MGA (or early MGB) with 3-synchronizer gearbox. Not the first creative idea to do this, but this one seems to reveal (and rely upon) the fact that the remote control shift rod moves more forward in reverse than it does in 2nd or 4th gears. While this looks like an easy installation on an exposed gearbox, I do wonder how difficult it may be to install or field service with a fully assembled car.
Wednesday, April 8, 2026:
Ordered a new boot lid seal for the MGA. The first one from Moss Motors in 1986 was too thick and too hard, so it would not close all the way and definitely not seal. We had a good one from MacGregor British Car Parts in Dundas, Ontario, Canada in

 2010, which was the impetus for creating the BD-116A"Boot Lid Seal Magic" tech page. That one was perfect for 15 years, but finally took a set and settled too low, so the boot lid would no longer pop up when released. Eight months ago August 2025) we bought one from Scarborough Faire, but that one was solid foam rubber, much too thick and held the lid up at least 1/4-inch at sides and rear. Determined not to put up with this one for too many years, I finally had time to do some searching, and just bought one from Sports Car Parts, Ltd on Ebay, which is reported to be the correct shape and hollow (soft). Now wait for delivery to be sure.
Thursday, April 9, 2026:
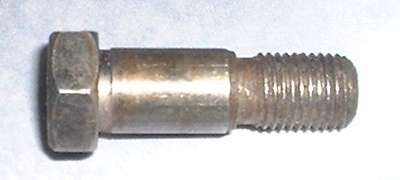
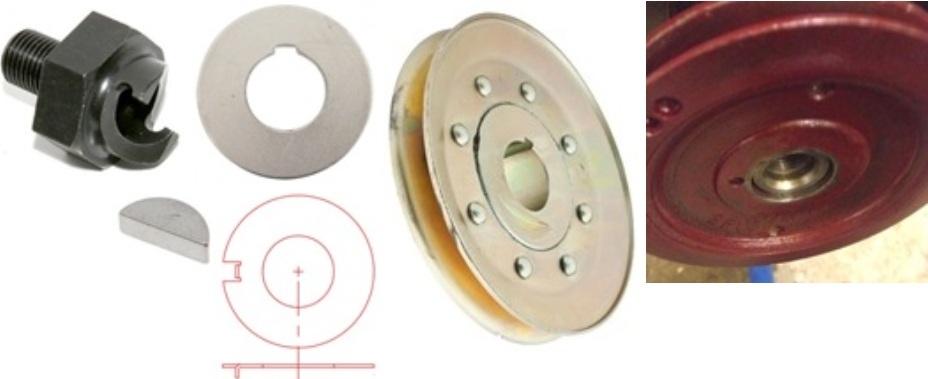
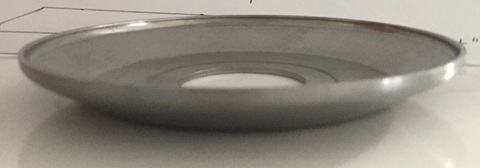
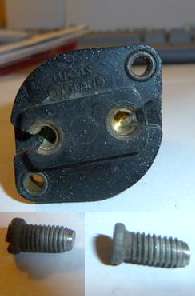
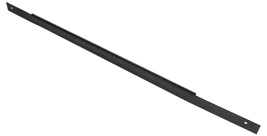
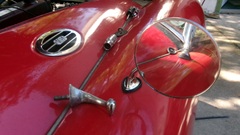
Quick move before lunch, posting an new Part Numbers tech page for theAFH1753 Boot Lid Seal (pics above). -- Later in the day, another Part Numbers stech page for the 51H1022 flywheel bolt for MG B-series 3-main bearing engines.
Friday, April 10, 2026:
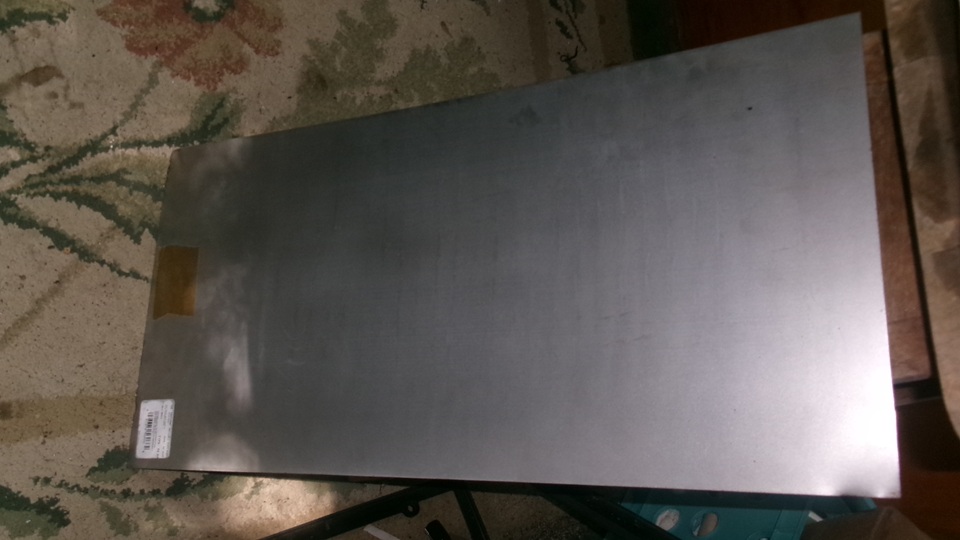
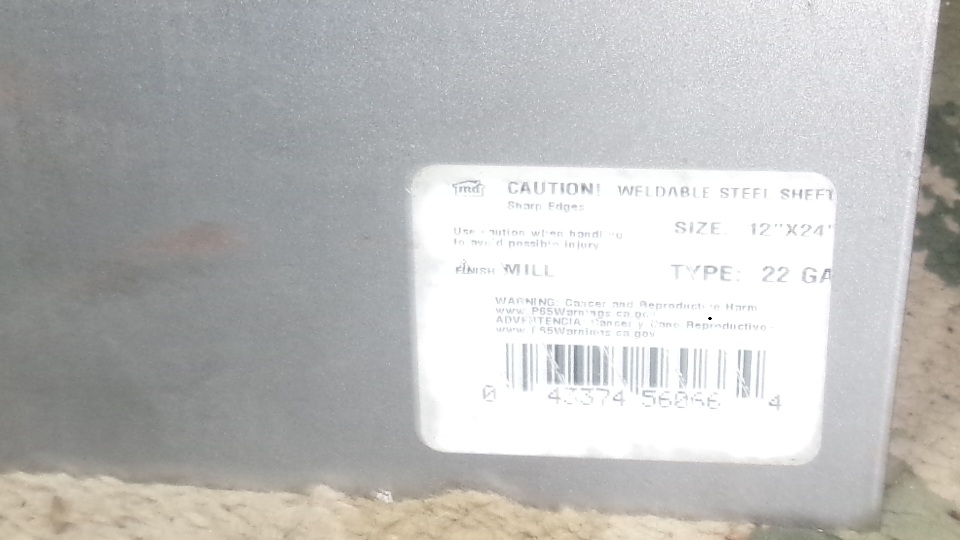
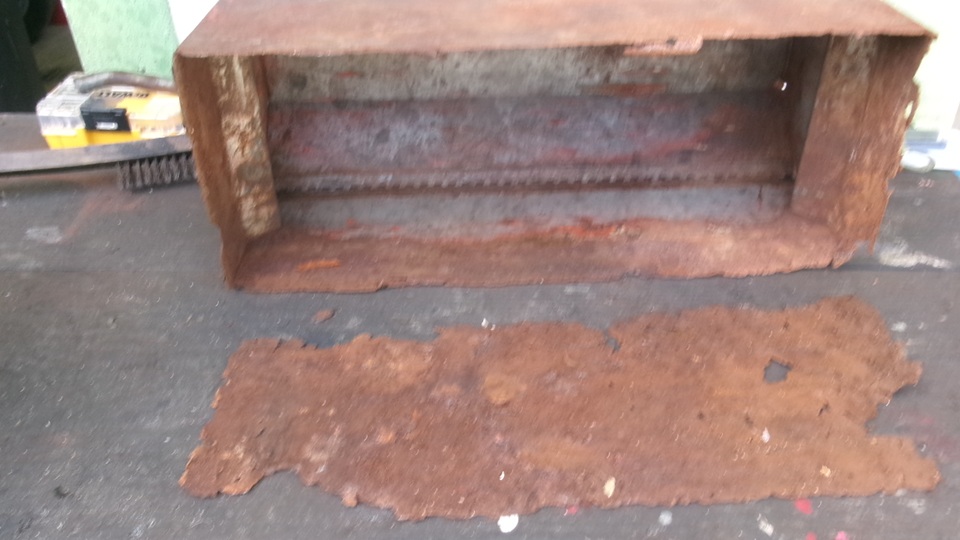
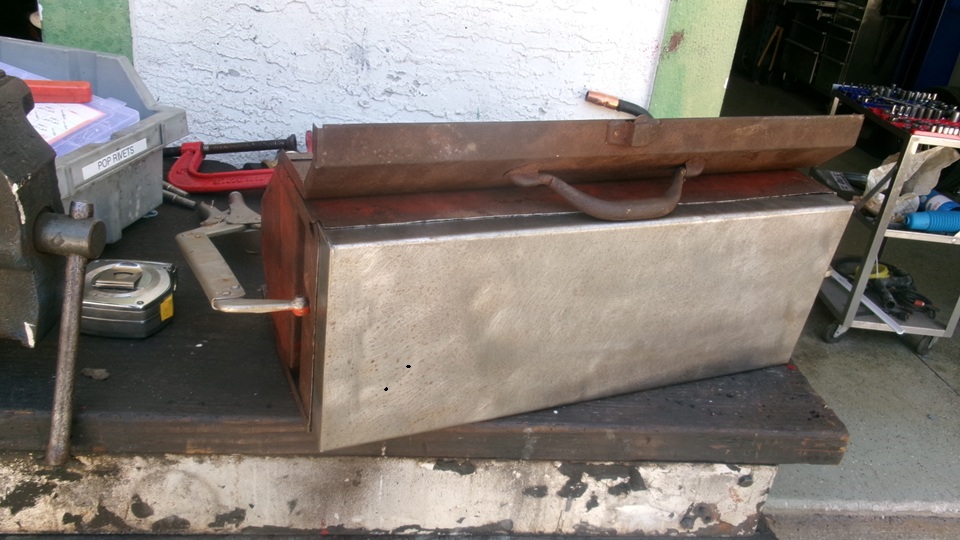
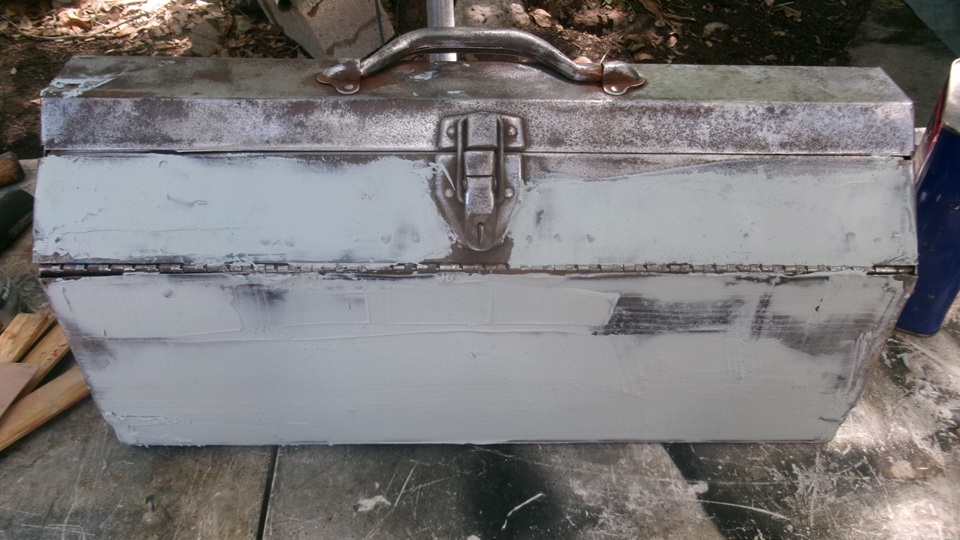
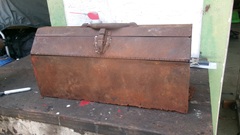
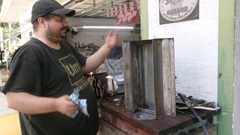
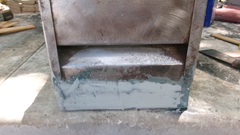
Someone at Tech Central was walking around with a piece of sheet metal in hand, to which I took an immediate interest. "Wazzat for"? "Oh, nothing, John said he didn't need it now". "I may have a use for it, how thick is it"? "I dunno, kinda thin, you need it, take it". So I snatched it. 12-inches by 24-inches by 22-gauge. I'm used to 18-gauge, 0.048" thick, common for MGA body panels, so this is somewhat thinner. But we've been wanting to repair an old steel hip roof tool box that we have been carrying in theMagic Trailer since 2014. The trailer is sometimes wet inside, so thesteel tool box rusted out the bottom, so you can't pick it up with anything in it. It may be okay if we can replace only the bottom panel. the new sheet measures 0.030" thick. The old tool box measures 0.040" thick. This might be close enough, certainly better than 0.000-thickness in the bottom panel. Set it aside for now, may be a good project for tomorrow.


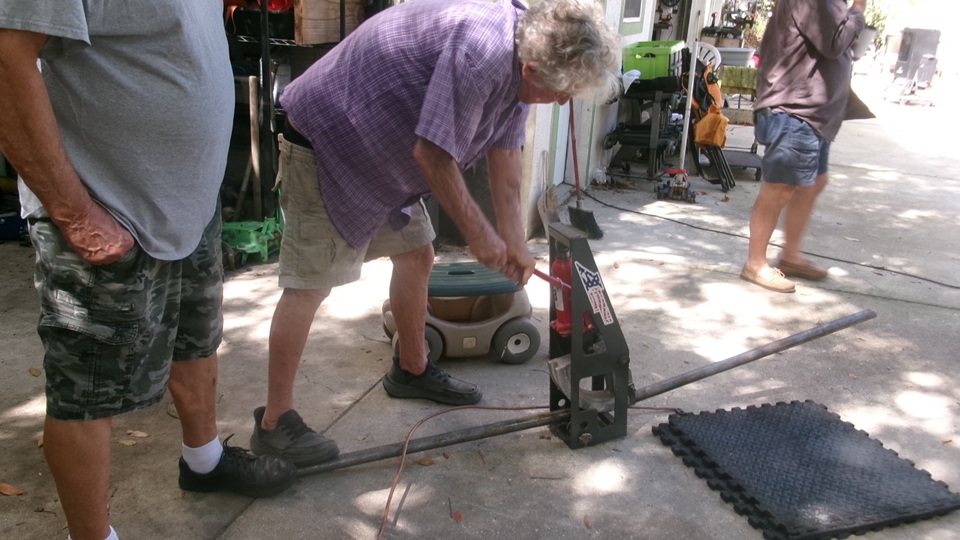
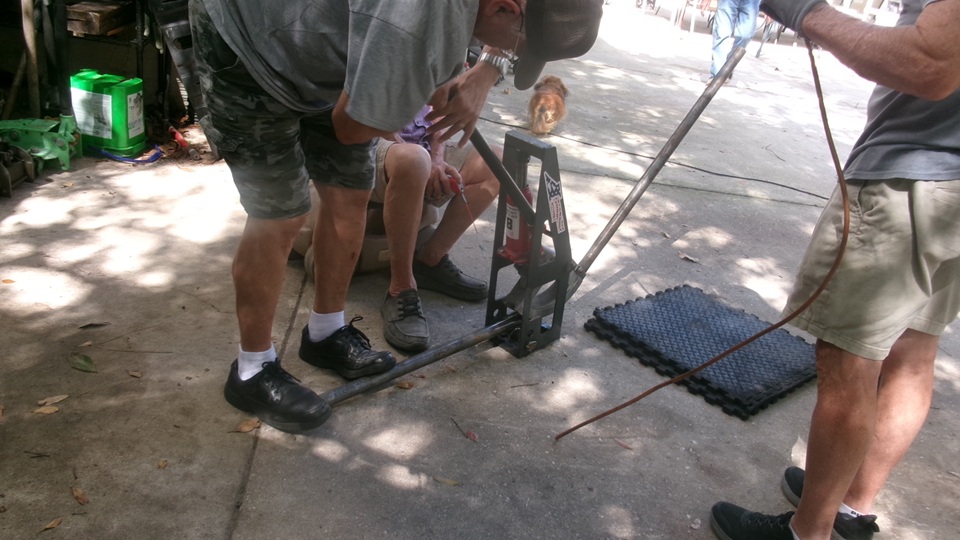
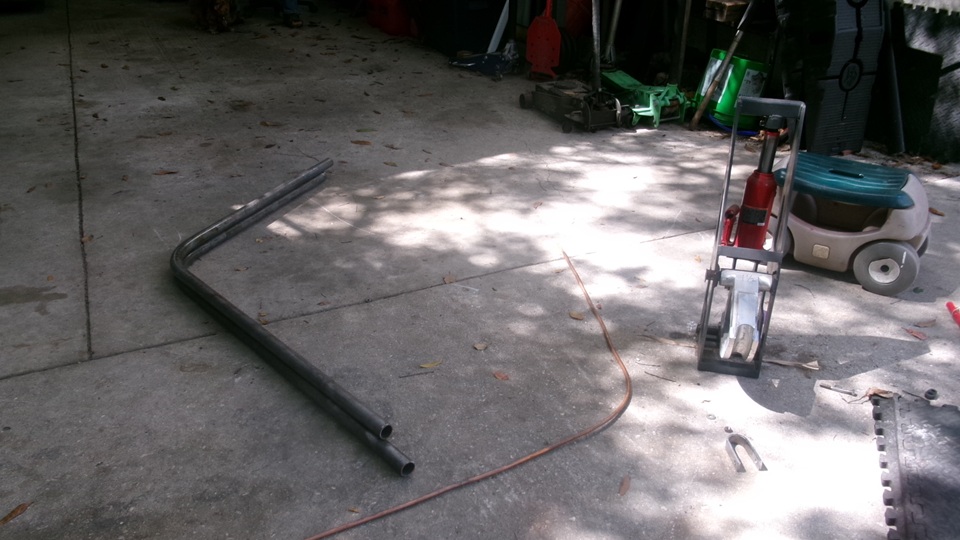
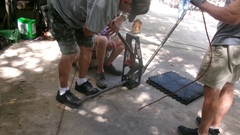
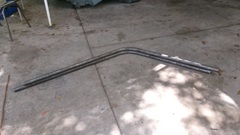
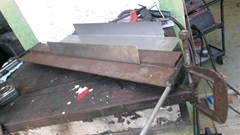
Firing up Tina, the wannabe race car. I think they just like to hear it run once a week. Today they get srtarted on fabricating a roll cage, beginning with two sides of the main hoop. They bought this hydraulic pipe bender, at least two years ago, knowing they would eventully be making a roll cage. I saw them using it once when it was new, but I think theywere only bending exhaust pipe tubing then. Now they are all anxious to see how it does on thick wall tubing, assentially 1-1/2" steel pipe.
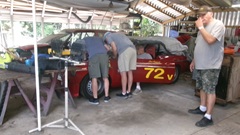

Kind of slow pumping, but seems to work pretty good, as long as there are extra hands to hang onto it, since it is not bolted down. There was a piece of copper tubing they formed byhand for the shape template. Once one came out good, it didn't take long to form thesecond one mto match. A little extra length on both ends, it will be cut to fit in the car before welding. Enough work for the old guys for one day. They will likely get back to it next week.

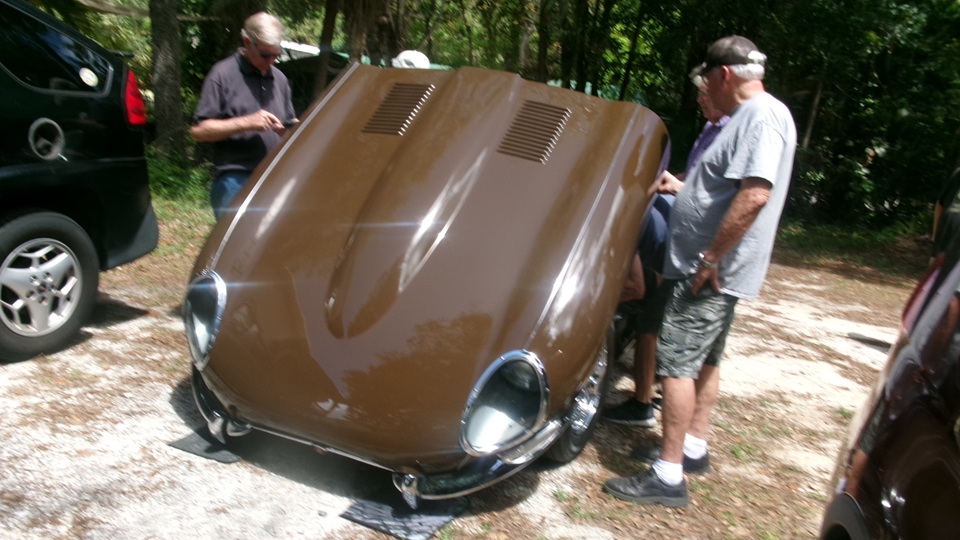
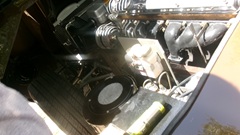
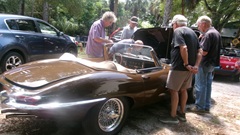
Break to check out the E-Type. The complaint here was the electric cooling fan kept running after the engine was shut down, and the fan ran long enough to erun the battery down, never shut off. They were looking at the thermostatic switch, and a DIN type relay. After a while it was all plugged in, and it was not running. So fire up the engine and let ir run to warm up enough to make the fan come on again, and a few minutes later shut it down and wait while the fan kept running. In about ten minutes it shut off. Really? It might be fixed, maybe or maybe not. If there is any more problem with it, I was suggesting that there may be a time delay relay available in the DIN format. Ten minute delay after switch off might be worth a try.

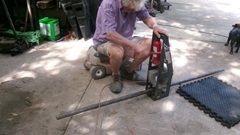
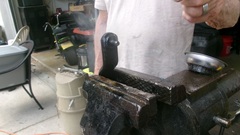
 One more litle chore for the dy. These are clutch and brake pedals, maybe from Tina. The small shoulder bolts for pivot points were seized in the bushings (assuming there were bushings in there). Penetrating oil and a #40 Torx driver and small impact wrench was not moving it. Apply some heat until it smokes, followed by more penetrating oil, and then another shot with the small impact wrench got it moving. Drive until it spins, tap the bolt out, more P-oil, more spin until it turns free. give it a dab of grease, and repeat all with the second one.


Time for a little chat with friends, until they were all wandering off. We will return tomorrow. Then off for a WiFi spot to process the day's photos and notes.
In the evening, there was time for work on Part Numbers tech pages, beginning with updating
AEH375 Stud page to include the relatedAEH376 Plate for camshft sprocket support. And while we're at it, another page for AEH411 Sprocket, AEH412 Spindle for sprocket, and AEH413 Bolt for sprocket. All of this is related to moving a cam drive sprocket to a forward parking position while adjusting cam timing for the Twin Cam engine. -- Congratulations to Artemis II crew for successfu re-entry and splashing down this evening.
Saturday, April 11, 2026:
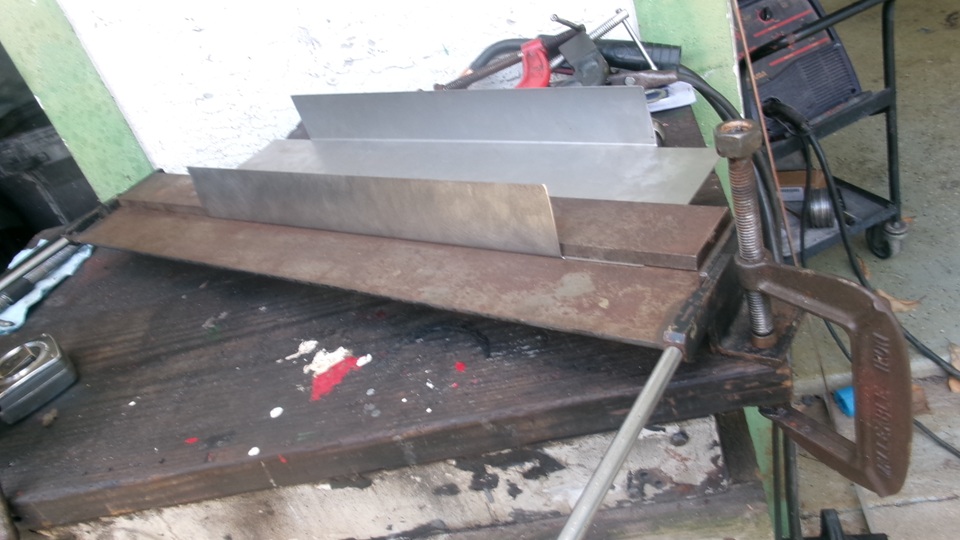
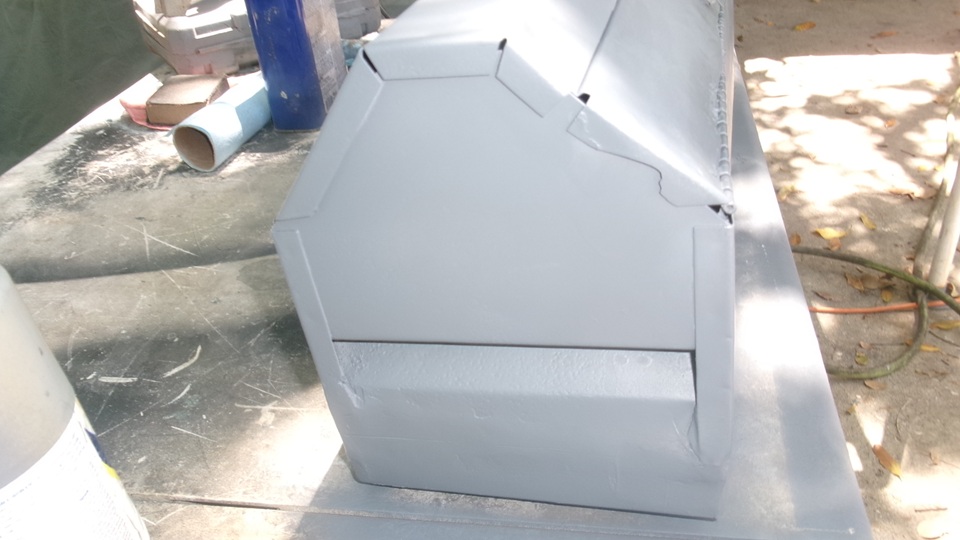
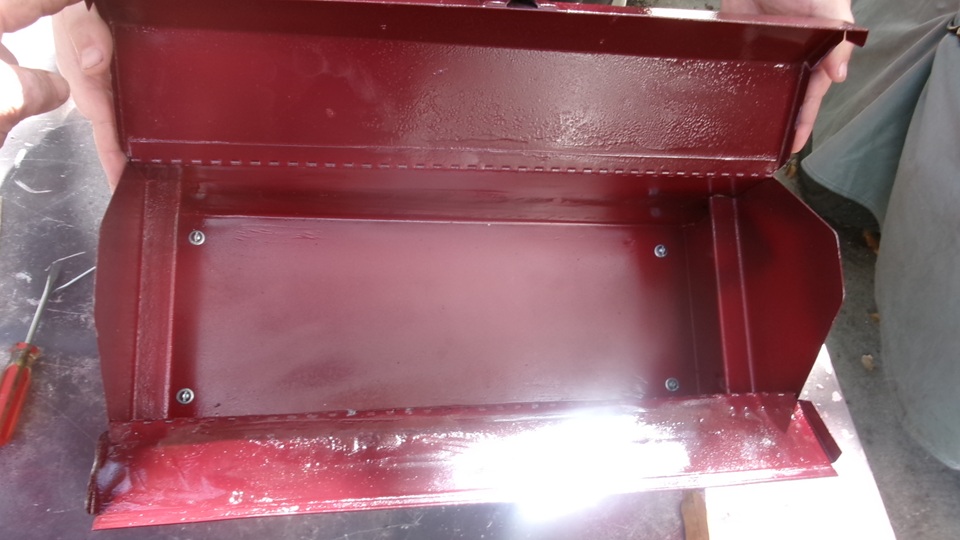
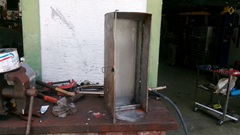
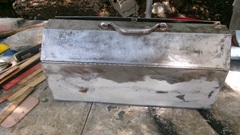
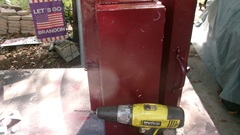
Off to Tech Central again with a bit of a mission (or hobby). We will try to repair (rebuild) a 50 year old steel hip roof tool box. We are rather fond of this box, because of its thin walls and space efficiency (and limited space in the Magic Trailer). You can't buy a replacement like this any more. The problem is, the trailer is often wet inside,so the toolbox has been rusting badly. We have not been able to pick it up for three years, as there is no bottom left in it. After inspection, the first move was to cut one inch from the bottom of the side walls all the way around. And lots of penetrating oil on the lid piano hinges.
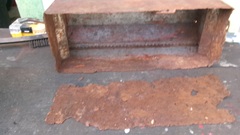
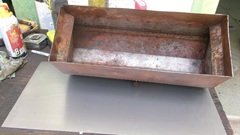
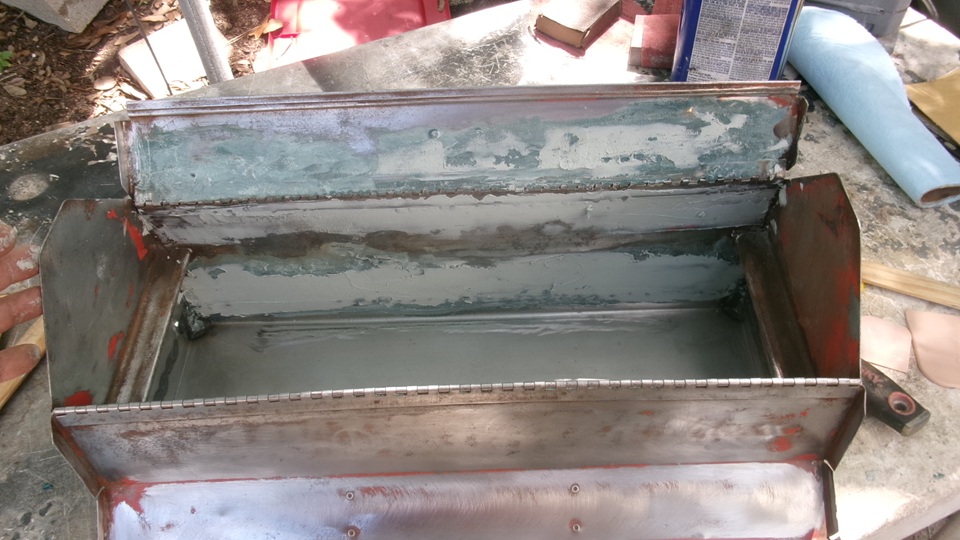
Then grab that 12" x 24" piece of sheet metal we found yesterday, and drag out the metal bender. In round numbers, the box is 7" wide and 19" long, so the new sheet is 5" more in each direction. We decide to form the sheet first, and if the new bottom tray is too tall, we can cut it down later. Measure carefully, and cut a 2-1/2" square out of each corner of the sheet, so when formed up the new tray is 7" x 19" x 2-1/2" tall. When assembled with 1-1/2" overlap on the sides, the tray extends 1" below he cut side walls, making the box the same height as it was before. There was an opportunity to make it up to 1" taller, but Navigator reminded us that we stow stuff on top off the toolbox, and we don't want to give up that extra 133 cubic inches of space on top.
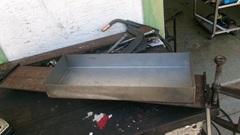
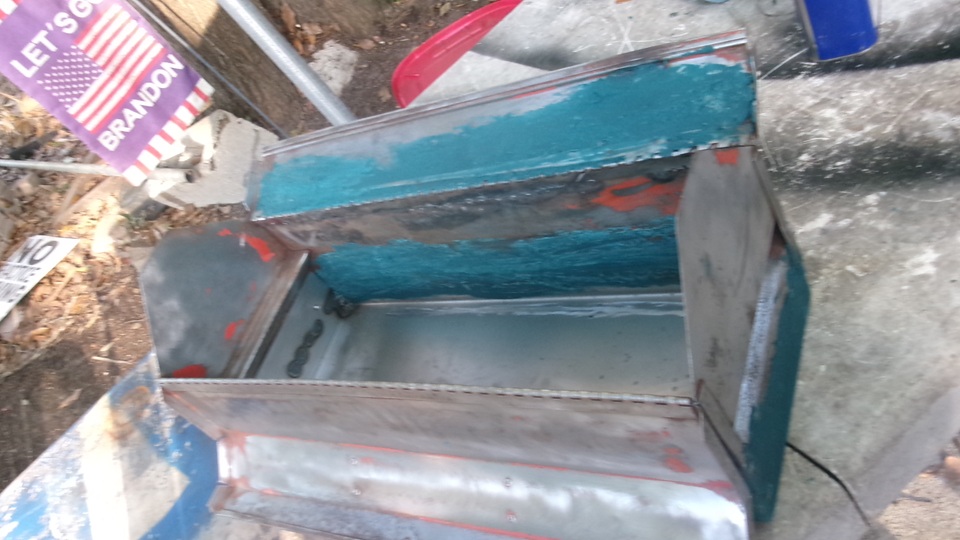
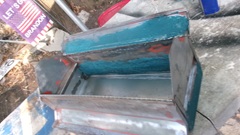
No need to cut the tray down, leave the 1-1/2" overlap, and put two pop rivets in each end to hold it in place. No spot welder handy, so spend some time with the MIG welder stitching in tack welds every 1/2" at the edge of the new metal inside, both sides (not at the ends where they hide inside under the end shelf gussets). Then more tack welds all around the outside to secure the bottom edge of the old metal. Then half an hour with a flap wheel sander in an angle grinder removing sharp burrs from all the tack welds. Some of the original spot welds for one of the hinges had broken loose along with some slightly bent edges at top of the side wall, so more time with clamps and tack welds to re-attach the hinge. Then what must have been two hours with a Scotch-Brite wheel in power drill and the flap wheel sander, buffing off all of the old paint and rust inside and out (should have been a sand blasting job). After digging ourselves out from under a ton of grinding and sanding dust, blow away remaining dust and wash the box down with lacquer thinner, like clean enough to paint (but not yet). It was looking pretty good, so time for pictures.

For the first time in my life, I was going to try "angel hair Bondo" (short strand fiberglass reinforced filler) to smooth over tack welds and corner gaps, and fill in a few welding blow holes. The two pound can of filler we found in the paint booth was half used and somewhat dried out, hard to get out of the can, hard to mix and hard to spread. Given what we had in hand, we made do as best we could, and an hour later it was time to give it up for loss of daylight. Clean up our mess ,and ourselves, pack up and head off for late lunch and WiFi.


Sunday, April 12, 2026:
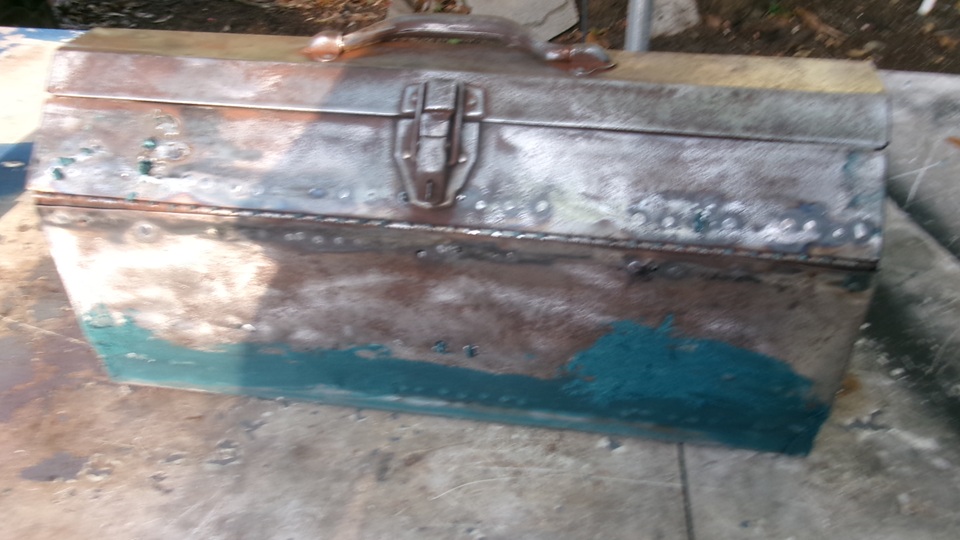
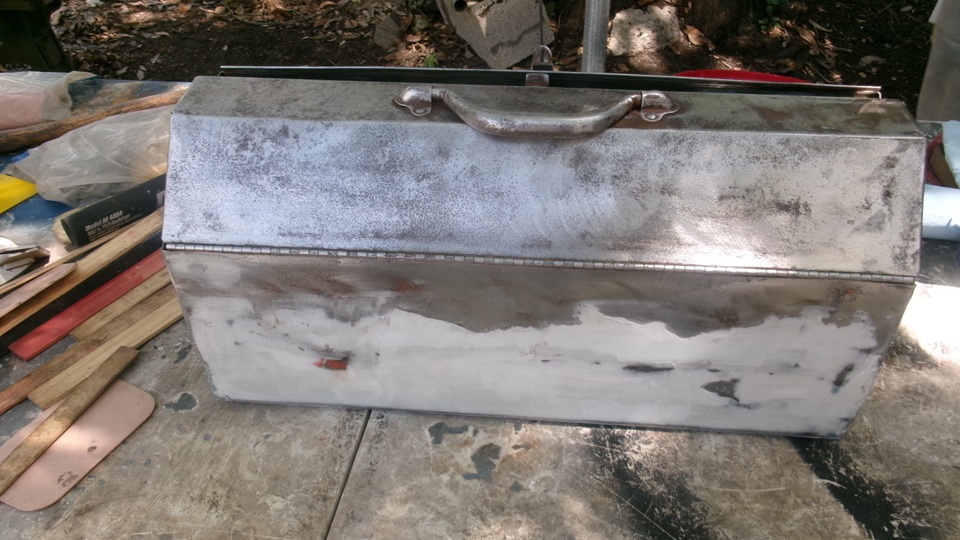
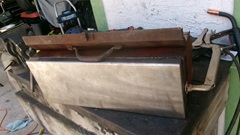
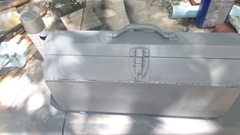
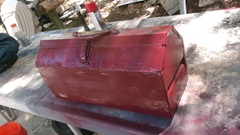
Back at the tool box repair, not expecting to work nearly as hard today. Start by power sanding away excess Bondo from yesterday, the stuff that was hard to apply and somewhat irregular. Then we spent some time fettling with the hinged roof pieces to get better fit, as they had been bent some in prior times when the hinges were rusted near solid. No intention to make the whole thing straight as new, but we do want to seal up the flat surfaces, hide any holes, and grind down any high spots from welding that might catch a finger. So after power sanding the box inside and out, we grabbed a fresh can of Bondo to give it another thin coat or two, and sand it smoother, mostly to hide irregular welding and seal any holes.


Another hour and a half of casual resurfacing, with due time for Bondo to cure before final sanding. It was down to "just a bit wavy but smooth to the touch all over in and out", and we think sealed up except for the normal cover joints. So blow the dust off,wipe it all gently with lacquer thinner, and clean up the table in preparation for primer paint.

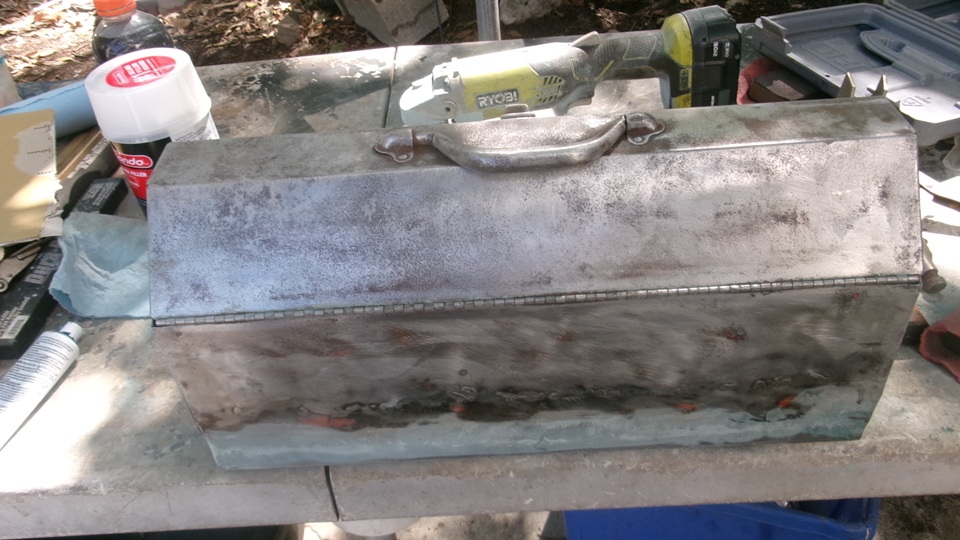
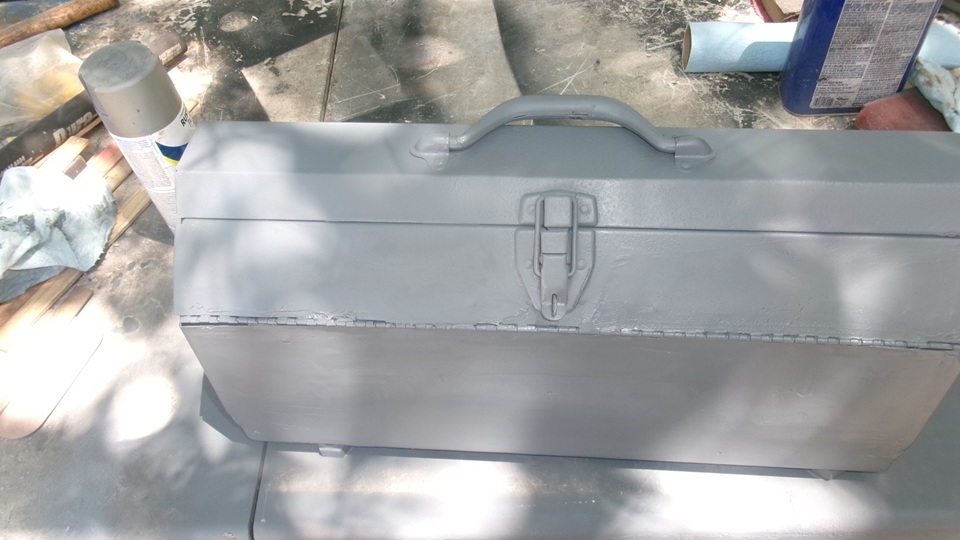
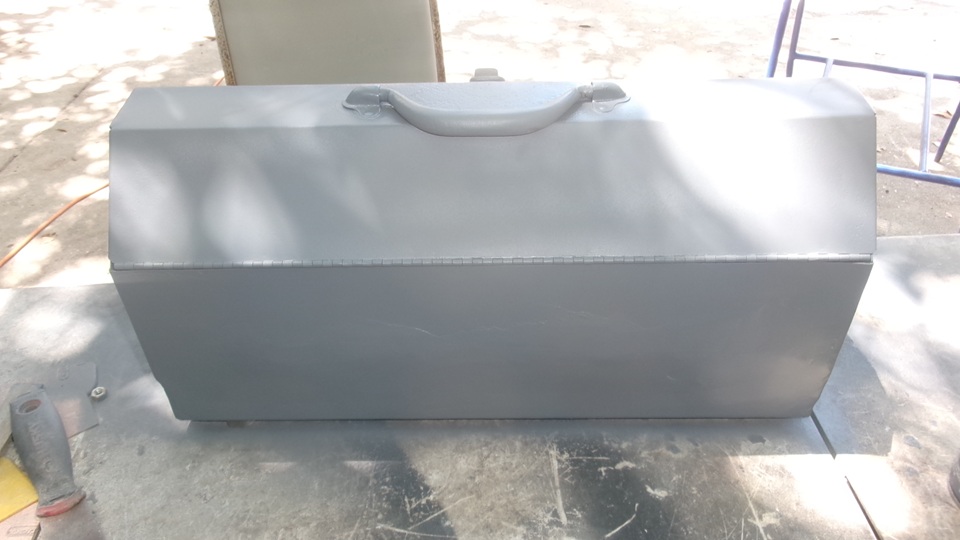
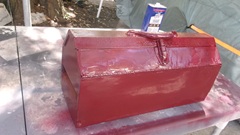
That was the easy part, just spray the primer from an aerosol can. Spray inside first,working through all of the inside corners with blow-back. Spray inside the covers, and over the ends where the cover will overlap, then close it up so we could hold it by the handle. Sitting just over the edge of the table, spray around all for sides. Tilt it 45 degrees on the edge of the table, spray half of the bottom, rotate 180 degrees to repeat on the other half of the bottom. Holding it high by the handle, spray one last pass around all of the bottom corners,and set it down on four big hex nuts. Flip the handle over a couple of times while spraying that last. Wow! That's a lot different from what it looked like yesterday morning.

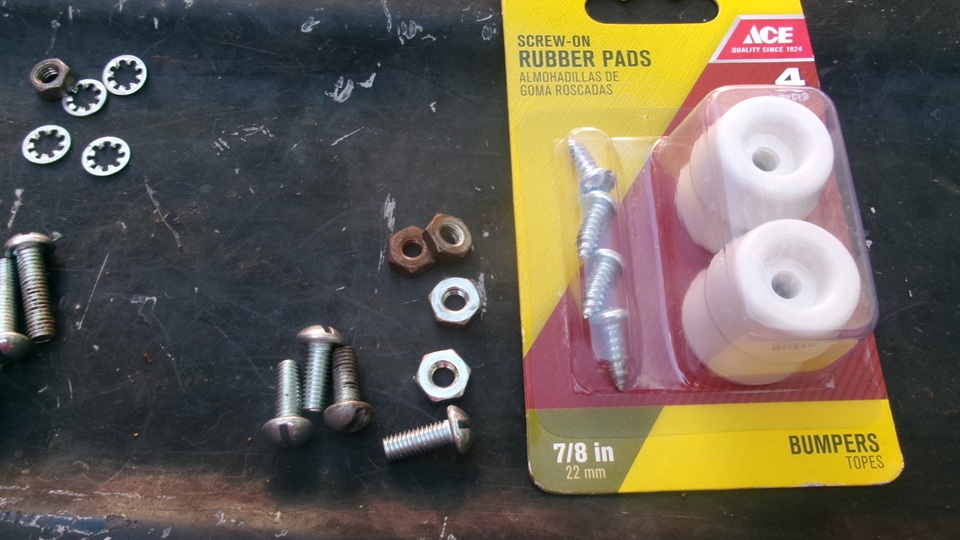
Primer instructions say 24 hours to full dry, so no finish paint today. While cleaning up, and refilling our 1-quart travel can of lacquer thinner, we noticed the shop was desperately low on the stuff. The traditional 5-gallon can was empty, and a newer 1-galllon can was down to a pint when we were finished. So tomorrow (after the business week end break) we will fetch another 5-gallon can for the shop. The stuff is less expensive in larger lots, if we shop around and buy it from the right supply house. For now, clean up, pack up, close up, and head to Ace Hardware to buy some rubber bumper feet for the new tool box, and a hand full of fasteners and other supplies for re-stocking the Magic Trailer. Then to mid afternoon lunch and WiFi time.
Monday, April 13, 2026:
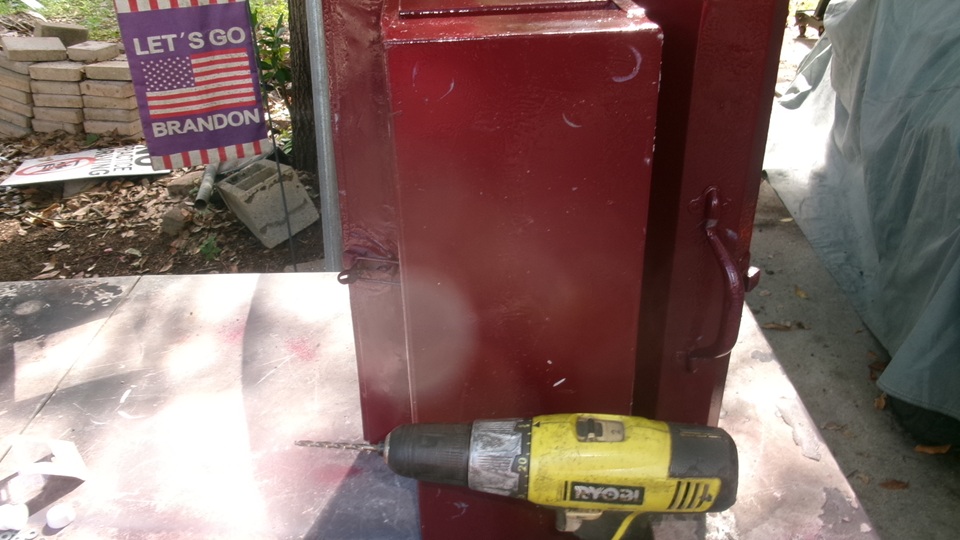
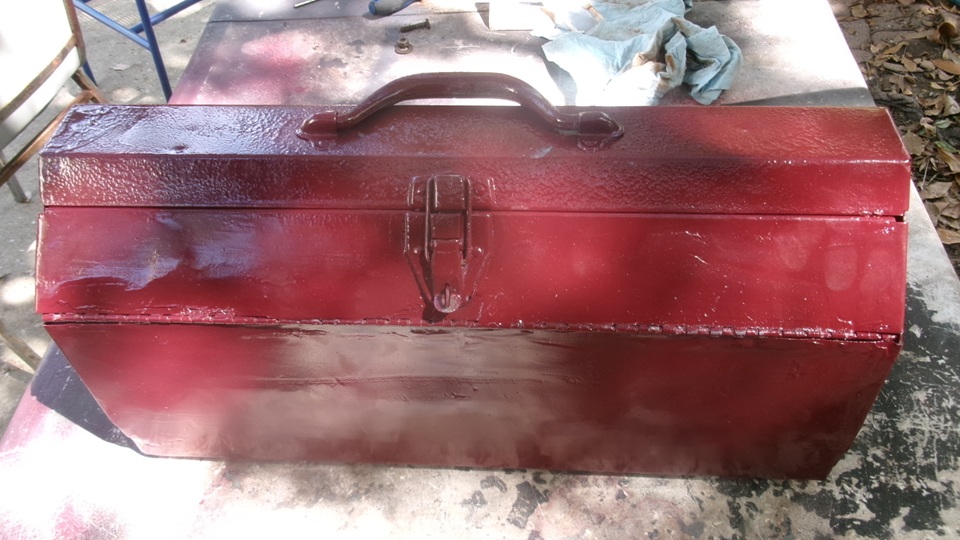
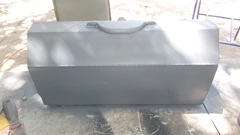
Nothing as boring as watching paint dry, so this will be a short work day. Grab a couple of paint cans, and spray something red on the tool box, inside and out, and on the bottom, top, handle and latch parts of course. Sitting on four large hex nuts so it doesn't stick to the table. Set that aside under the canopy, and we will get back to it again another day.
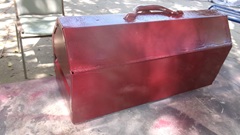
On the way in we took a little side trip to an industrial paint supply place to pick up five gallons of lacquer thinner to resupply general shop use at Tech Central. -- After the quickie paint work we were swapping fuel metering needles in the carburetors again. Not entirely happy with the way it has been starting and running with the PCV valve installed. We will try it with MB needles for a while before we delete the valve again for more tinkering. At least we have it set up to be easy the change between18G and 18GA configuration (without and with the PCV valve). After a few minutes of fine tuning fuel mixture and carb synchronization, it was idling okay, stable idle, nothing to immediately bother us. During the next five mile run in moderate city traffic with some standing idle time at traffic lights, it was behaving itself, and switch off when parked was pleasantly uneventful. Now to leave it parked for 10-hours, and see how well it starts late night. Then another short run and switch off for another 8-hours to see how well it starts in the morning. For now, that's about all we can do with it, until we change our daily routine again.

Back to WiFi work. -- Tracking says our new boot lid seal arrived at Tech Central shortly after we checked the mail box and left. Another small job for tomorrow. -- Also a good day to knock off early, sitting in on a John Twist Zoom tech session in the evening, chatting about late model MGB cars.
Tuesday, April 14, 2026:
Take a full day off to let the paint dry. Spent time working on new Part Numbers tech pages for the MGA rubber door buffers with tapping plates and screws. For something that should be simple, there are lots of strange part numbers , as usual.
Wednesday, April 15, 2026:
Finishing the tool box today, drilling holes to install rubber feet with short #10 screws. Thin lock washers and hex nuts underneath inside the rubber bumpers, with one flat washer inside the box under the screw head to shorten the screw length a bit so it does not extend below bottom of the foot.

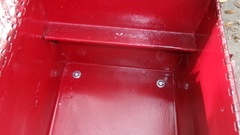
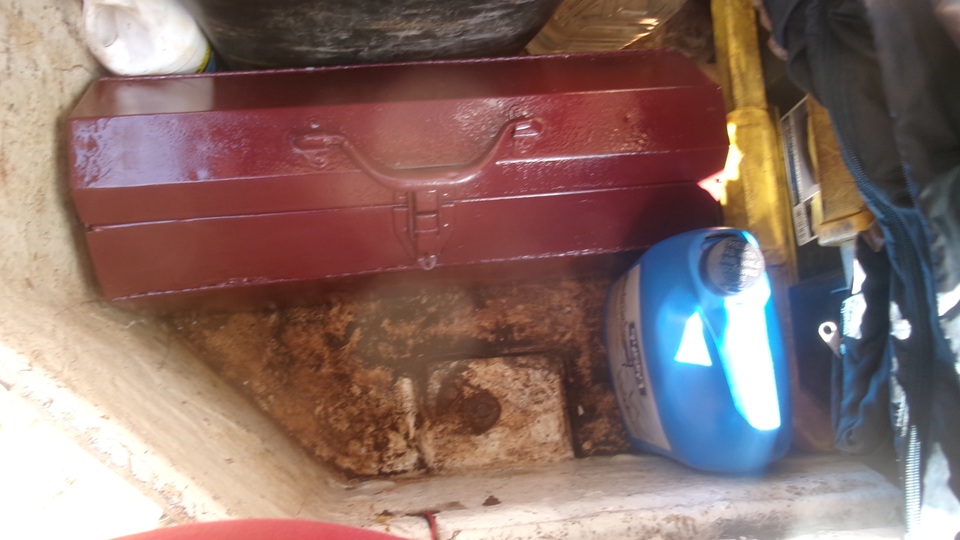
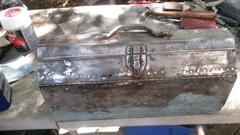
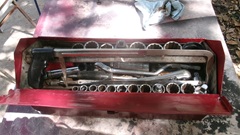
Finally it has plastic feet, so it does not have to sit on the damp floor in the Magic Trailer. The center picture below illustrates the space efficiency advantage of the thin wall sheet metal box, with interior space nearly equal to the overall space it occupies for traveling. Then we begin to load it up, beginning couple of drill index, a manual impact driver, and the 1/2" drive socket set I have had since 1968, and a few more oversize sockets. The 19" long box easily holds 18" long big-boy tools. The lift-out tray gives quick access to the stuff underneath.


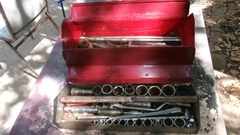
Fully loaded, including a hack saw dropped in the top before closing. I haven't weighed it, but figure about 40-pounds packed to go,and still lift and carry with one hand. And there it is dropped back into its normal home the trailer with minimal space required.

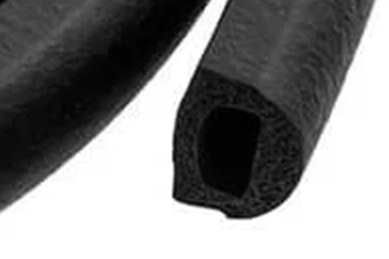
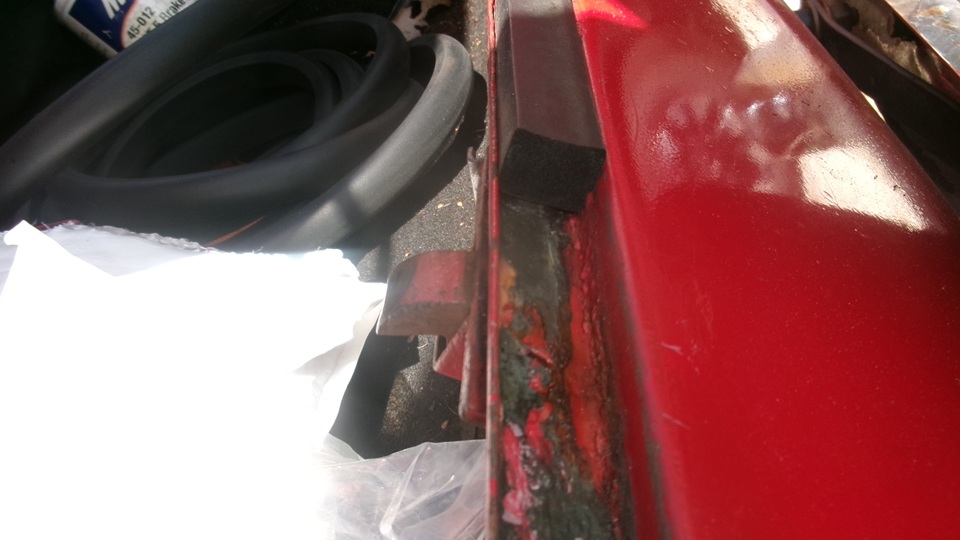
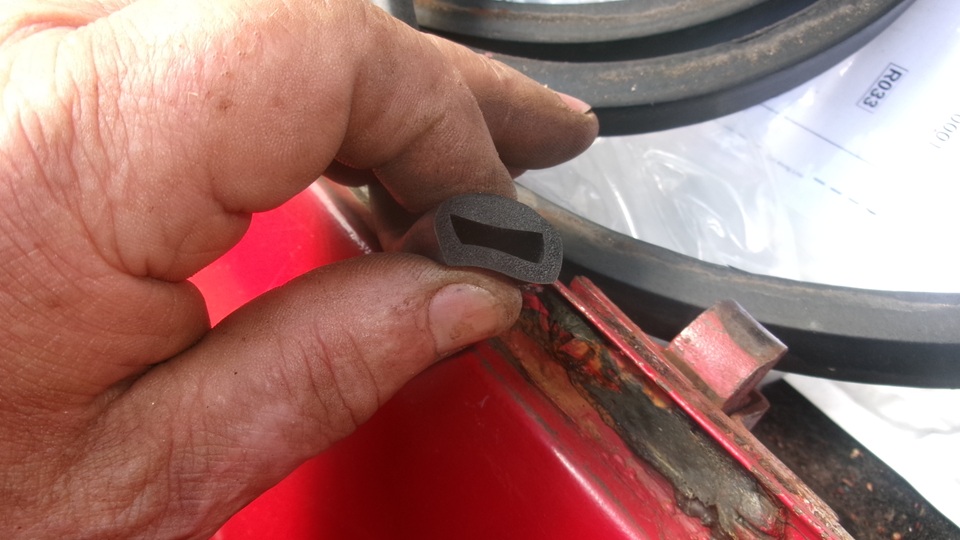
Now we spend a few more minutes replacing the weather seal for the MGA boot lid (again). Pull out the fat rectangular foam rubber strip that would not allow the lid to close. Install this hollow rubber strip that will compress easier to allow the lid to close with a moderate push. The 3M weather strip adhesive was very sticky stuff, too easy to get stuck on fingers (and paint), too hard to remove, but it does wonders for holding the rubber strip in place.


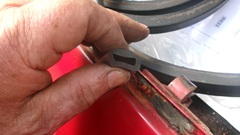
After readjusting the latch striker to reduce the gap, the boot lid closes better. Not quite flush yet, but give it a few days in the Florida sun, and we'll see how it goes. Pack up, and do feed the mama racoon on the way out.


|